TYPO3 is an open-source and easy-to-use content management system (CMS). It is primarily used to build and manage small and large websites. TYPO3 provides many useful extensions that make it easy to customize and enhance its functionality.
Moreover, TYPO3 CMS’s graphical interface allows you to use its tools easily.
If you are looking for an easy guide to installing TYPO3 on Ubuntu 24.04, this illustrated guide is for you.
How to Install TYPO3 on Ubuntu 24.04?
You will be guided through the following topics:
How to Prepare Ubuntu 24.04 for TYPO3?
How to Install TYPO3 via Wget on Ubuntu 24.04?
How to Set up TYPO3 on Ubuntu 24.04?
How to Prepare Ubuntu 24.04 for TYPO3?
Before installing TYPO3, you are required to prepare your Ubuntu machine by following the below steps.
Step 1: Refresh System Cache Files
At the beginning of installing new packages, refresh your system cache file to check for the new updates:
sudo apt update

If the command displays “All packages are up to date”, your system is refreshed and there is no need to install any missing files.
Install PHP Package
Step 1: Install PHP
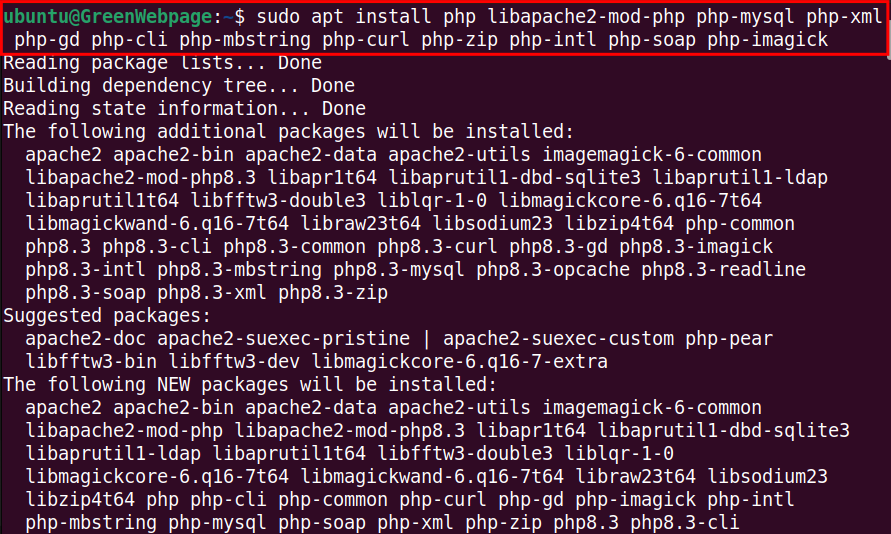
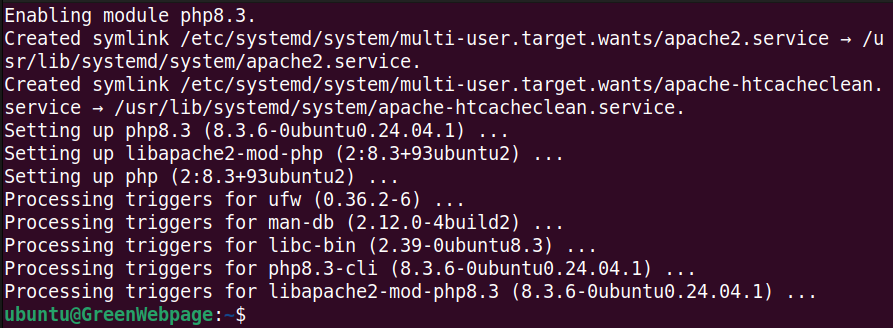
Run the following code from your Ubuntu terminal to install PHP and the required extension files for TYPO3:
sudo apt install php libapache2-mod-php php-mysql php-xml php-gd php-cli php-mbstring php-curl php-zip php-intl php-soap php-imagick
Step 2: Check PHP Version
After installing PHP, check its version:
php -v

Make sure the installed PHP version is 8.0 or newer, as this is the minimum requirement for running TYPO3 on Ubuntu 24.04.
Install MariaDB
Step 1: Install MariaDB
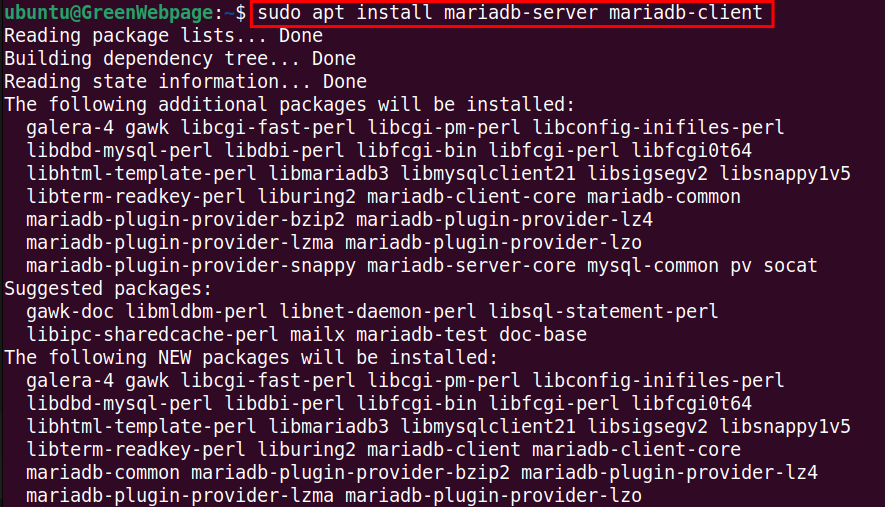
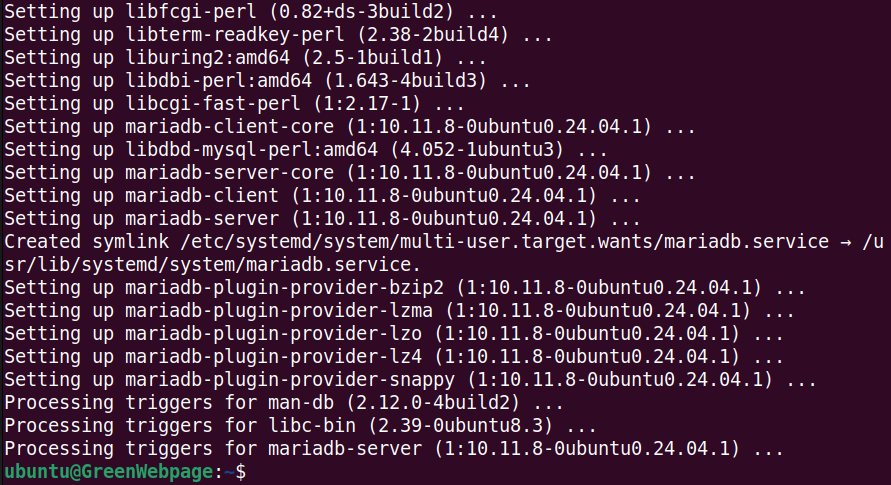
Ubuntu 24.04 requires a database engine for typo3. Therefore, you have to run the following code to install the MariaDB package on your system:
sudo apt install mariadb-server mariadb-client
Step 2: Check MariaDB Status
The following command verifies the status of the MariaDB service on your machine:
sudo systemctl status mariadb
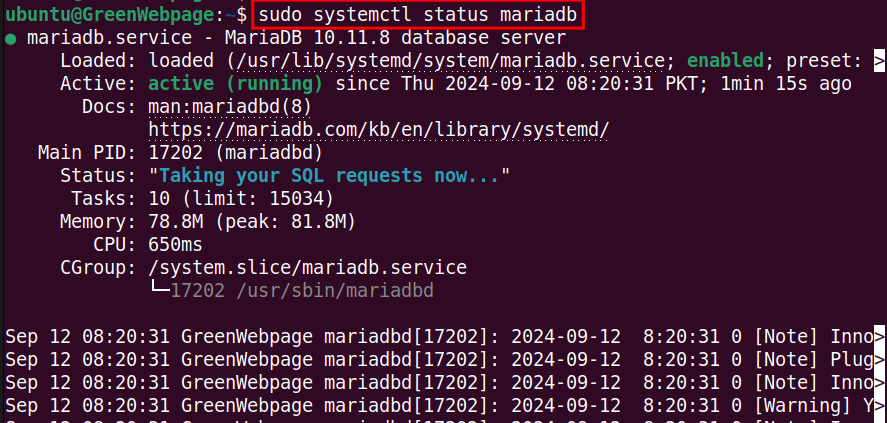

This command will display a summary report, such as MariaDB status, memory usage, CPU usage, etc.
In case, the MariaDB is not enabled and active, you can utilize the following two commands to start and enable it from the terminal:
Start MariaDB
sudo systemctl start mariadb

Enable MariaDB
sudo systemctl enable mariadb

Secure MariaDB Installation
Step 1: Secure MariaDB
The below command is essential to enhance the security of MariaDB installation on your Ubuntu 24.04 system:
sudo mariadb-secure-installation
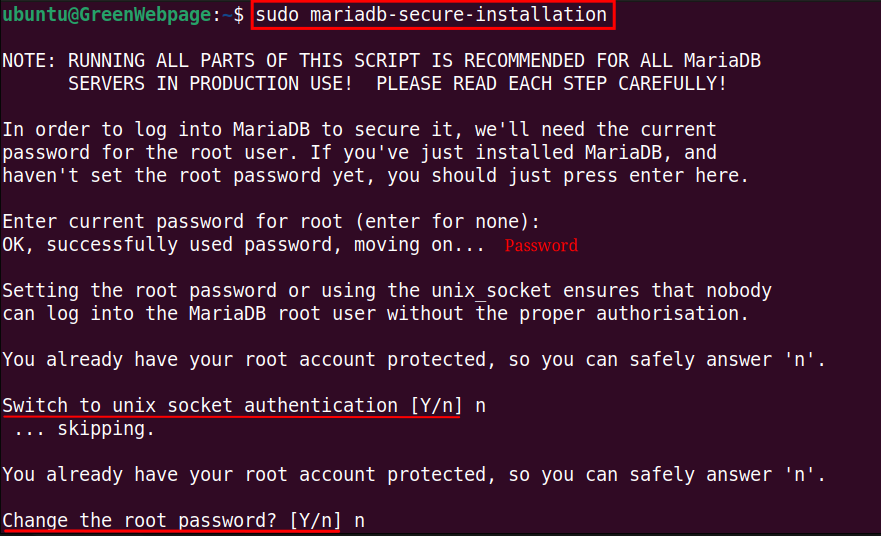
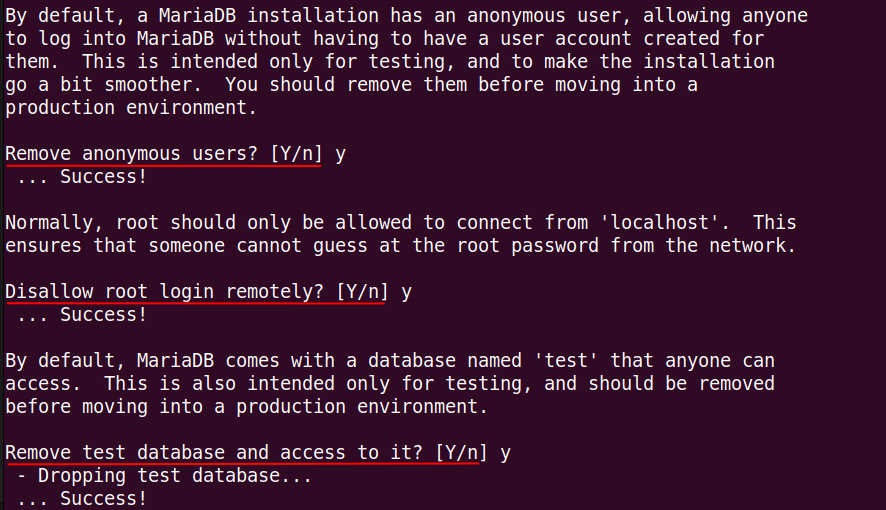
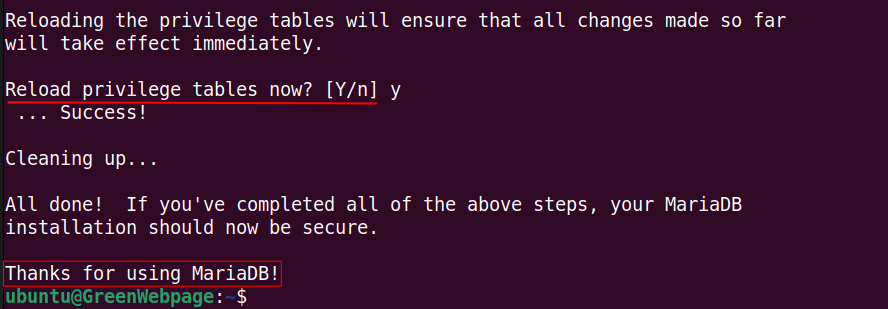
Carefully read the prompted questions during the setup process and answer them accordingly.
Step 2: Access MariaDB Root Account
To manage MariaDB databases from the terminal, run the command to log in as root user:
sudo mariadb -u root -p

In the MariaDB shell, enter the following script to create a database for your TYPO3:
CREATE DATABASE typo3_db;
CREATE USER 'typo3_gwp'@'localhost' IDENTIFIED BY 'passcode/123';
GRANT ALL PRIVILEGES ON typo3_db.* TO 'typo3_gwp'@'localhost';
FLUSH PRIVILEGES;
EXIT;
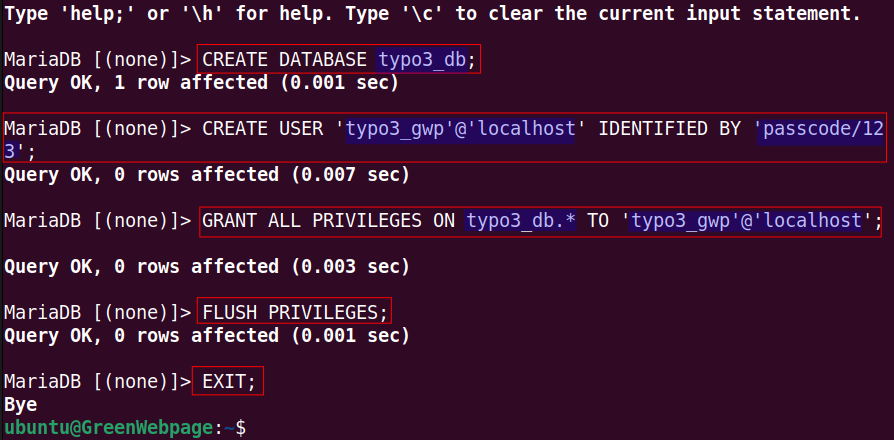
The above script is used as an example, use your own instead.
You can verify the created database with the code within the Shell:
SHOW DATABASES;
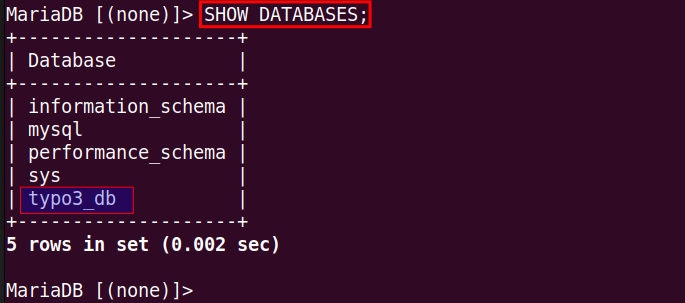
This command will list all existing databases, including the newly created one (i.e. typo3_db), on your terminal screen.
Install Apache2
Step 1: Install Apache2
For setting up TYPO3 on Ubuntu 24.04, installing Apache2 is also required for managing content on the web server:
sudo apt install apache2

If the Apache2 package is already installed on your Ubuntu 24.04, you will get the above output.
Step 2: Check Apache2 Status
Run the command to ensure that Apache2 is properly running on your Ubuntu 24.04:
sudo systemctl status apache2
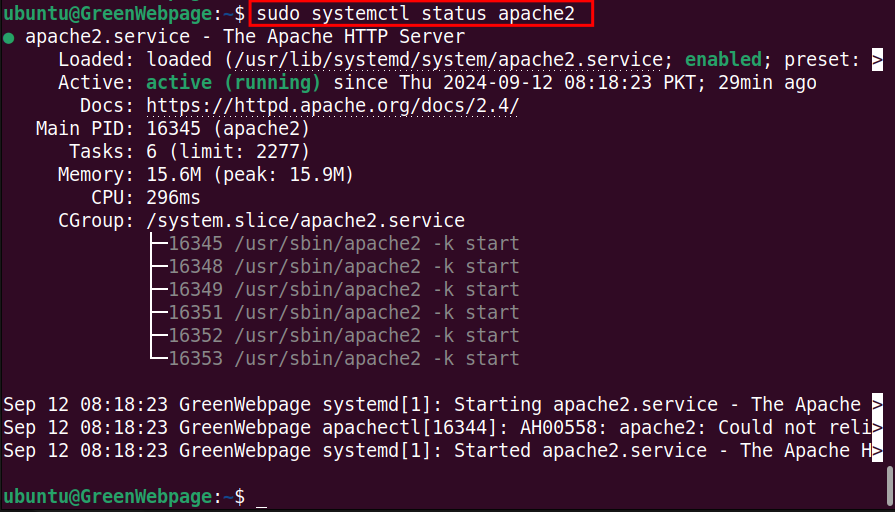
If the status is disabled or inactive, use this command in one line:
sudo systemctl start apache2 && sudo systemctl enable apache2
How to Install TYPO3 via Wget on Ubuntu 24.04?
Following the below steps will install the TYPO3 on your Ubuntu machine.
Step 1: Download the TYPO3
The newest and updated release of TYPO3 can be downloaded from the following official TYPO3 link:
https://get.typo3.org/version/12
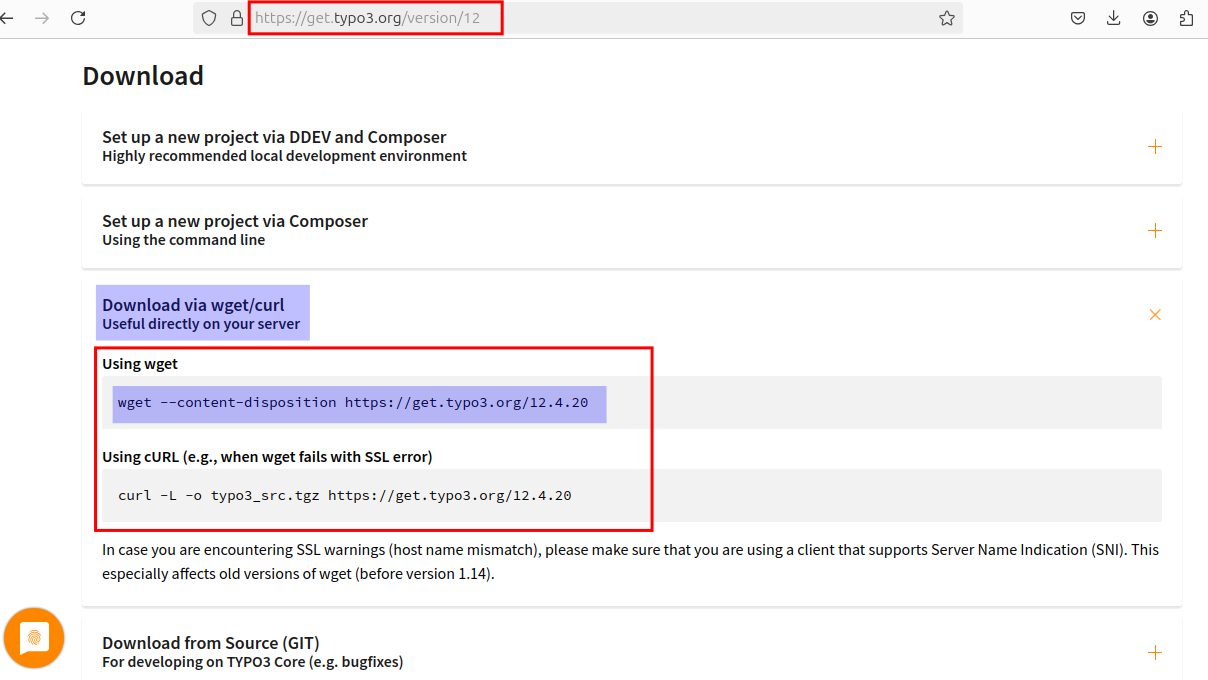
After copying the link, open the terminal and use this script to download the TYPO3 on your system:
wget --content-disposition https://get.typo3.org/12.4.20
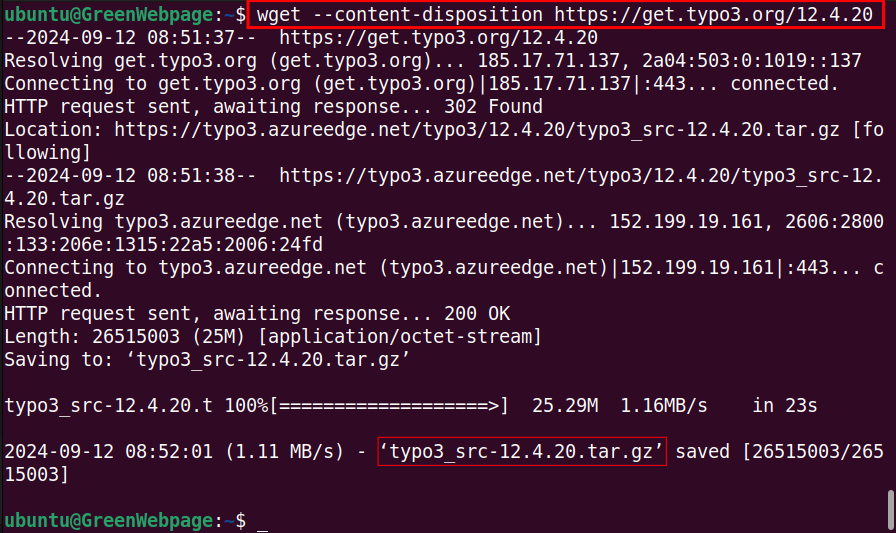
This command will download the TYPO3 tarball file, which you can use for further configuration on your system.
Step 2: Extract TYPO3 Tarball File
To configure the TYPO3, you need to extract the TYPO3 tarball file using the command:
sudo tar -xzf typo3_src-12.4.20.tar.gz -C /var/www/html

The “-C” option is used to directly extract to the root path “/var/www/html”.
Step 3: Move the Setup file to TYPO3
This command will rename the directory name to a simple name like “typo3”:
sudo mv typo3_src-12.4.20 typo3

Renaming the directory to a standard name, such as “typo3” makes it easier to update the files without renaming them again and again.
Step 4: Set Permissions for TYPO3
Next, you have to change the ownership and set permissions of the TYPO3 files to the Apache:
For change the ownership of the TYPO3 directory:
sudo chown -R www-data:www-data typo3

Set Permissions for TYPO3 directory:
sudo chmod -R 755 typo3

Step 5: Create TYPO3 Configuration
The command will create an empty configuration file for the TYPO3 site.
sudo nano /etc/apache2/sites-available/typo3.conf

Write the script for the configuration file, for example:
<VirtualHost *:80>
ServerAdmin admin@localhost
DocumentRoot /var/www/html/typo3
ServerName localhost
<Directory /var/www/html/typo3>
AllowOverride All
Require all granted
</Directory>
ErrorLog ${APACHE_LOG_DIR}/error.log
CustomLog ${APACHE_LOG_DIR}/access.log combined
</VirtualHost>
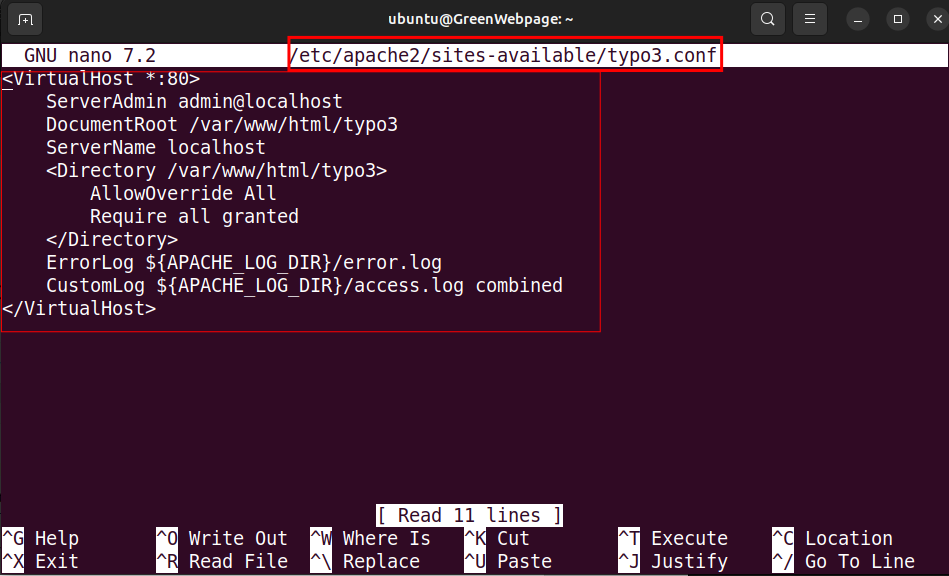
Make sure, you have entered the actual path of the root document and directory like “/var/www/html/typo3”. If it is not correct, your TYPO3 can be accessed through Apache server.
Step 6: Enable the Module “rewrite”
Once you have created TYPO3 configuration file, enable the “rewrite” module from the terminal:
sudo a2enmod rewrite

The confirmation message will be displayed in your output, as shown above.
Step 7: Enable TYPO3 Configuration
Next, you need to enable the TYPO3 configuration to ensure TYPO3 runs smoothly on the Apache server:
sudo a2ensite typo3.conf

Step 8: Restart Apache2
To refresh your system configuration and apply the changes immediately, restart the Apache server:
sudo systemctl restart apache2

So far, you have successfully completed the steps above. Let’s proceed to finish the setup process in the next section.
How to Set up TYPO3 on Ubuntu 24.04?
The step-wise guide will present you with a complete setup of TYPO3 CMS.
Step 1: Open TYPO3 CMS
To complete the setup process, open the TYPO3 CMS using the virtual host, such as:
http://localhost:80
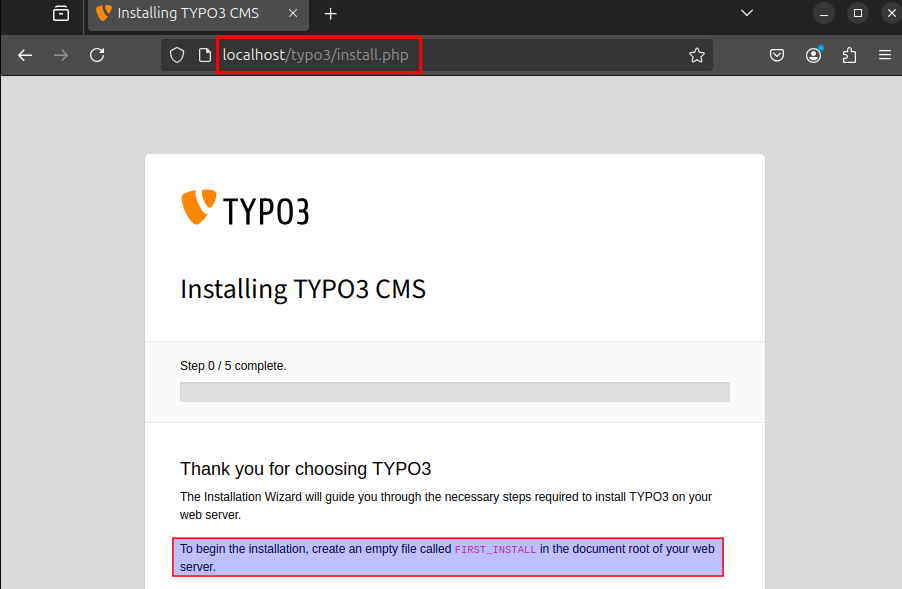
Step 2: Create “FIRST_INSTALL” file
The TYPO3 CMS installation requires an empty file “FIRST_INSTALL” at the root path “/var/www/html/typo3/”. The following command will do it for you:
sudo touch /var/www/html/typo3/FIRST_INSTALL

Step 3: Access Your TYPO3 Database
Fill the required fields, such as username and password, and continue:
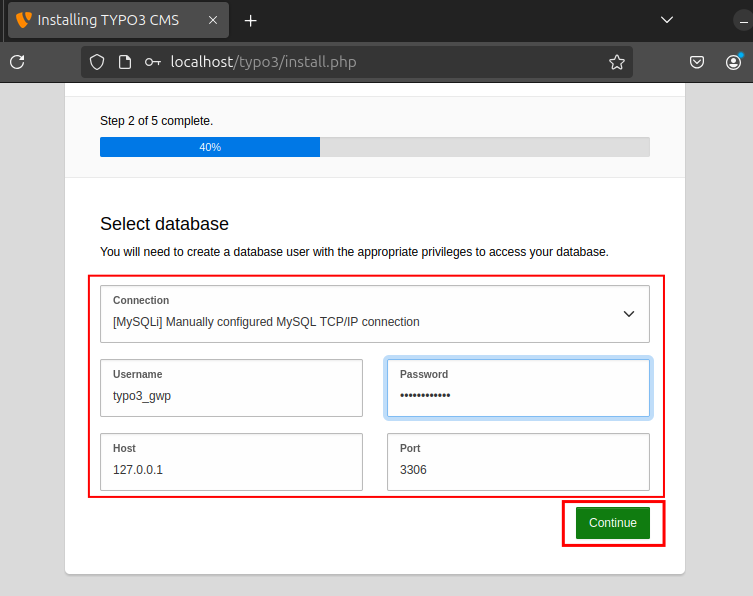
Note: Enter the Username and Password, you entered for the MariaDB database.
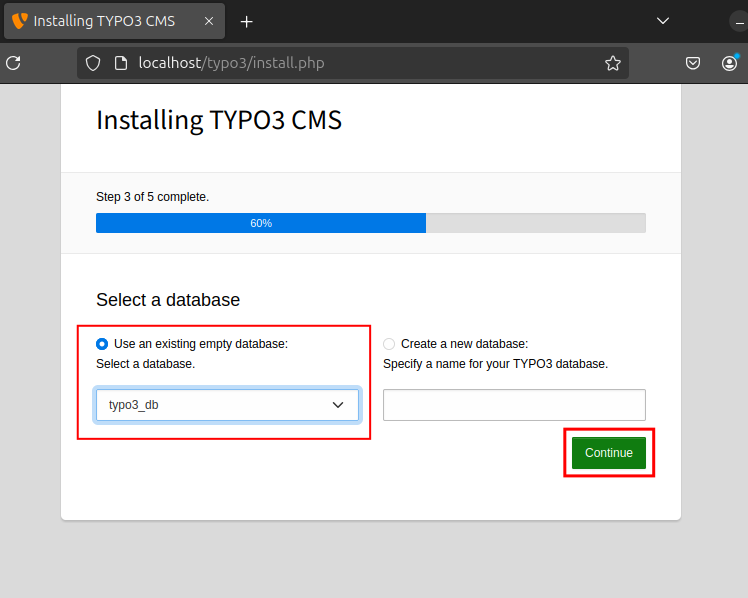
Step 4: Select Database
You can either select the existing database from the dropdown list or create a new one:
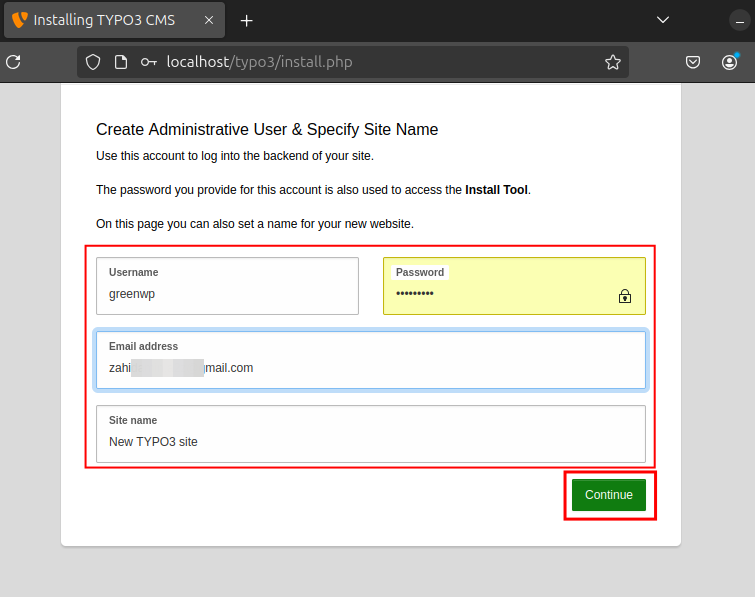
Step 5: Create Administrative User
Specify the required details in the fields, which will be used to log in to your TYPO3 CMS site:
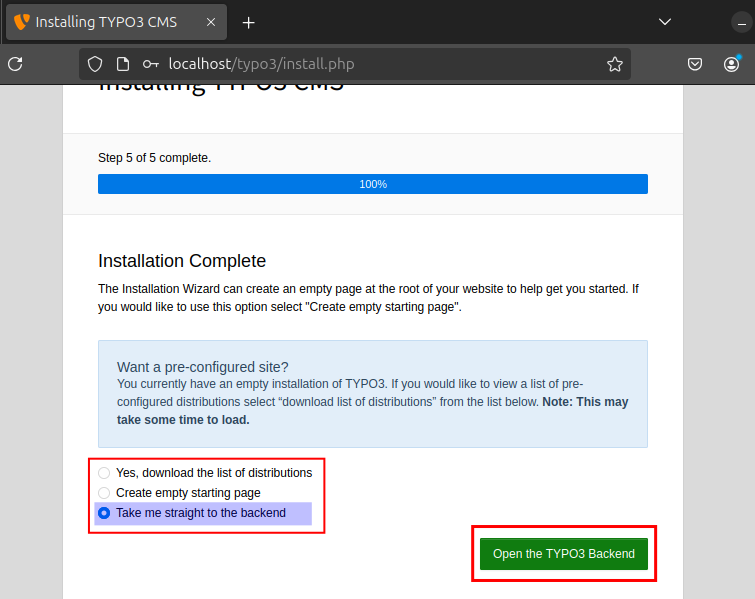
After the installation of TYPO3 CMS has been completed, choose your preferred option from the given list and open the TYPO3 Backend.
Step 6: Log In TYPO3 Backend
Enter your credential to open the TYPO3 backend:
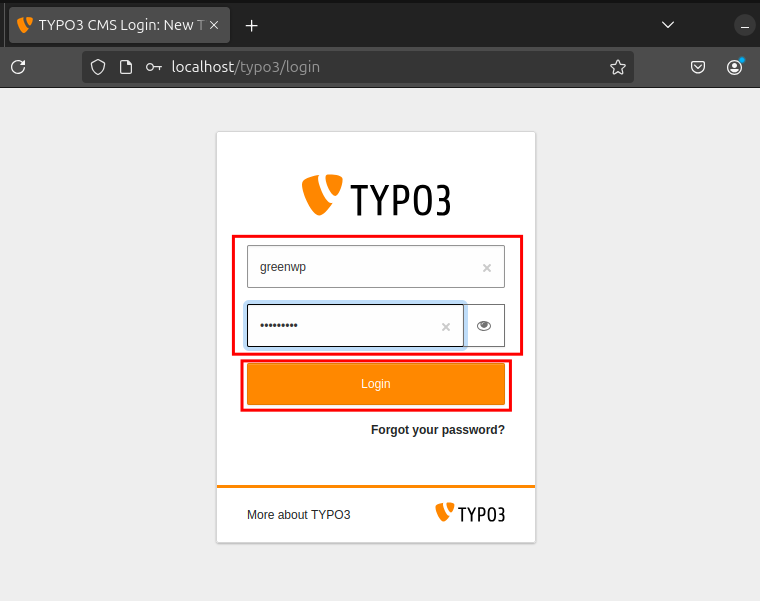
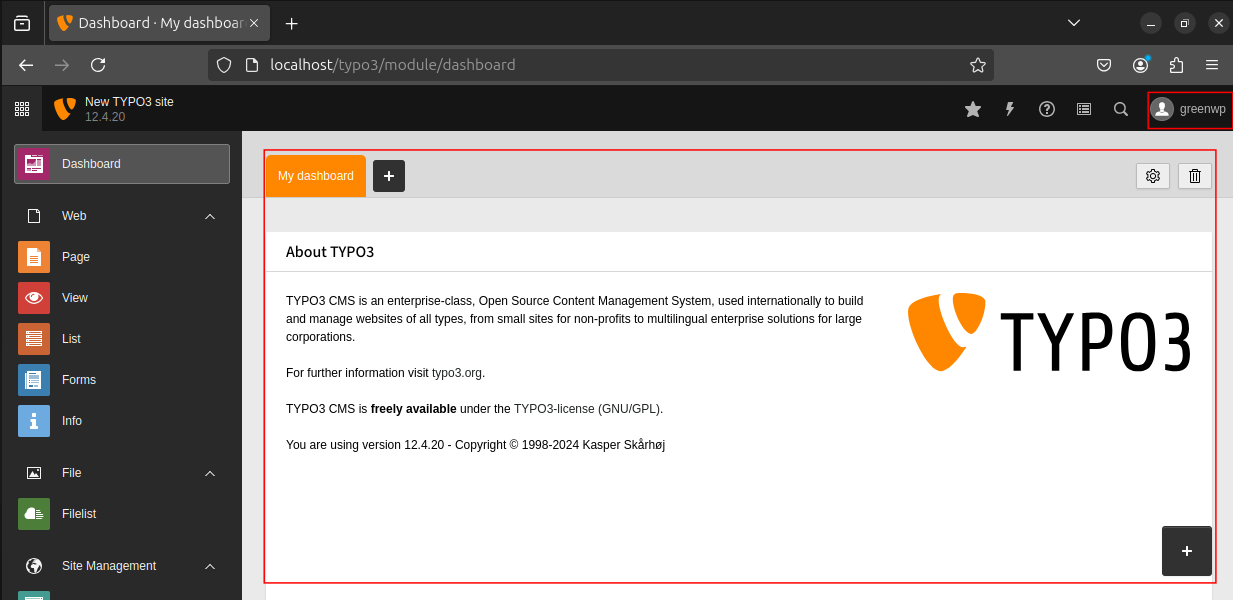
Finally, you have successfully finished the set up process of TYPO3 CMS. The following screenshot is attached for your reference:
Conclusion
You can set up TYPO3 on Ubuntu 24.04. Before installing, you have to install Apache, MariaDB, PHP on your machine. The next step is to download the latest TYPO3 from the trusted source and configure the TYPO3 system with executing simple steps.


Leave feedback about this