Django, a high-level Python web framework, is a popular choice for developers building complex web applications. Its clean architecture and extensive feature set accelerate development while ensuring application reliability.
This guide will walk you through installing and configuring Django on Ubuntu 24.04, providing a solid foundation for creating dynamic web projects. We’ll explore how to leverage Django’s built-in tools to streamline common development tasks.
How to Install Django on Ubuntu 24.04?
How to Setup/Start Django Project on Ubuntu 24.04?
How to Install Django on Ubuntu 24.04?
Ubuntu 24.04 paired with Django offers a rapid development environment for building robust web applications. Django’s influences on code simplicity reuse as well as streamlines the development process.
Let’s get started with installation:
Method 1: Using Ubuntu Official Repository
Method 2: Using a Git Repository
Method 3: Using a Virtual Environment
Method 1: Using the Ubuntu Official Repositories
To install Django on the Ubuntu 24.04 system, utilize the standard package repositories. Here’s what you need to do:
Step 1: Update Packages List
To ensure your system is up-to-date, start by updating its software packages:
sudo apt update
Step 2: Check Installed Python
Django is a web framework built using Python. Ubuntu typically comes pre-installed with Python. To confirm the exact Python version on your Ubuntu system, simply run the “version” command in your terminal:
python3 --version

Django cannot be installed without Python. Users must install Python first:
sudo apt install python3-pip
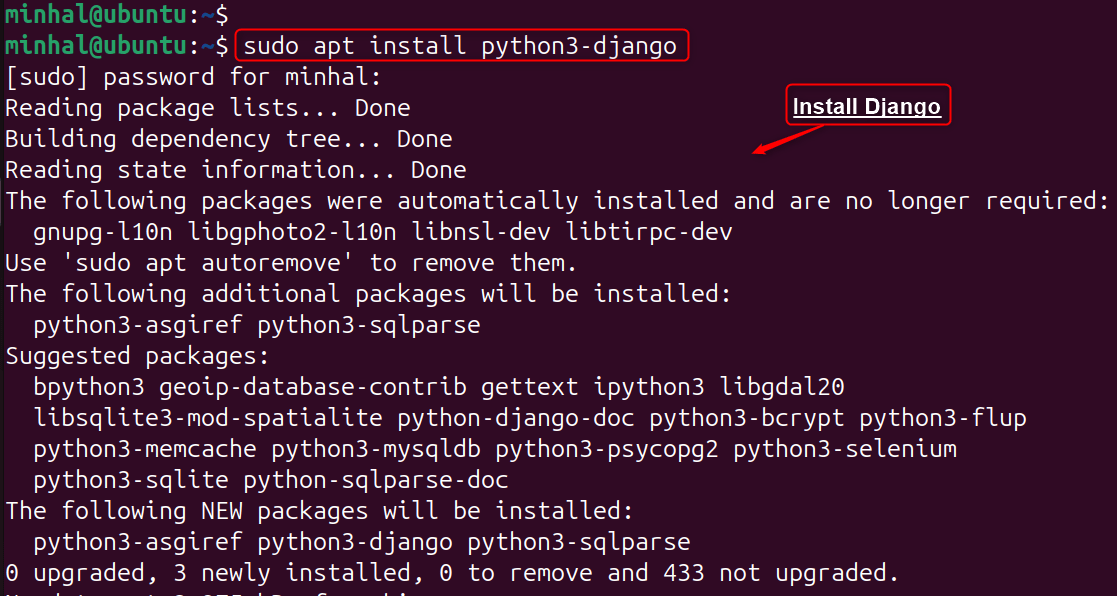
Step 3: Install Django
Install Django by running the command python3-django in the terminal:
sudo apt install python3-django
Step 4: Check Django Version
Upon successful installation, authenticate Django by checking its version with the ‘–version‘ flag:
python3 -m django --version

Method 2: Using a Git Repository
To obtain the latest Django version from the Git repository for Ubuntu 24.04, users must configure Python, pip, and establish isolated development spaces:
Step 1: Update Packages List
To start, verify that all your software components are up-to-date. Execute the command below:
sudo apt update
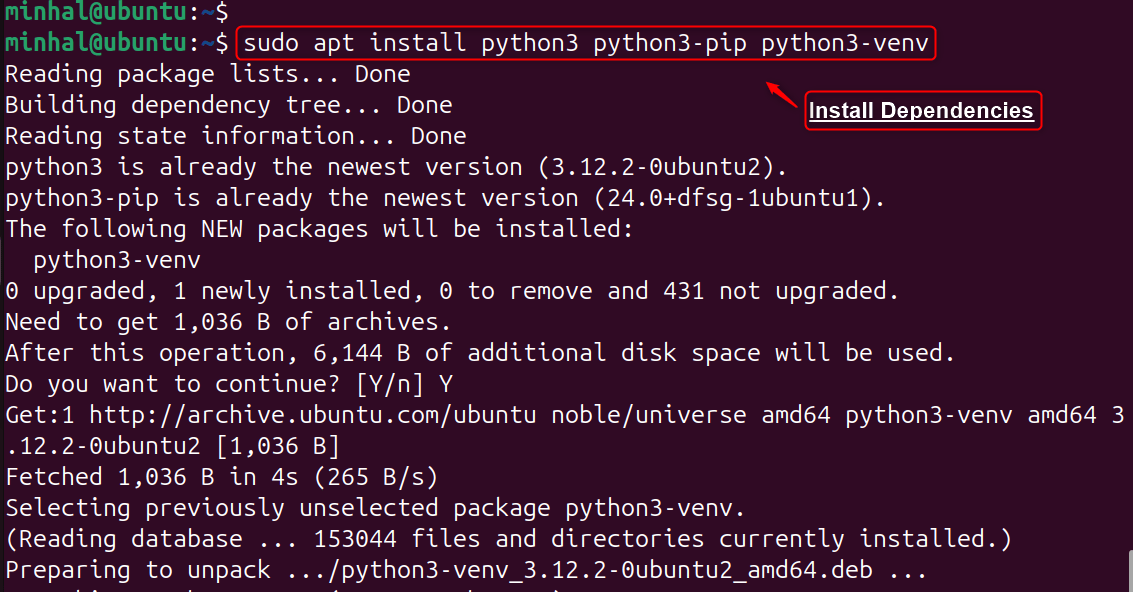
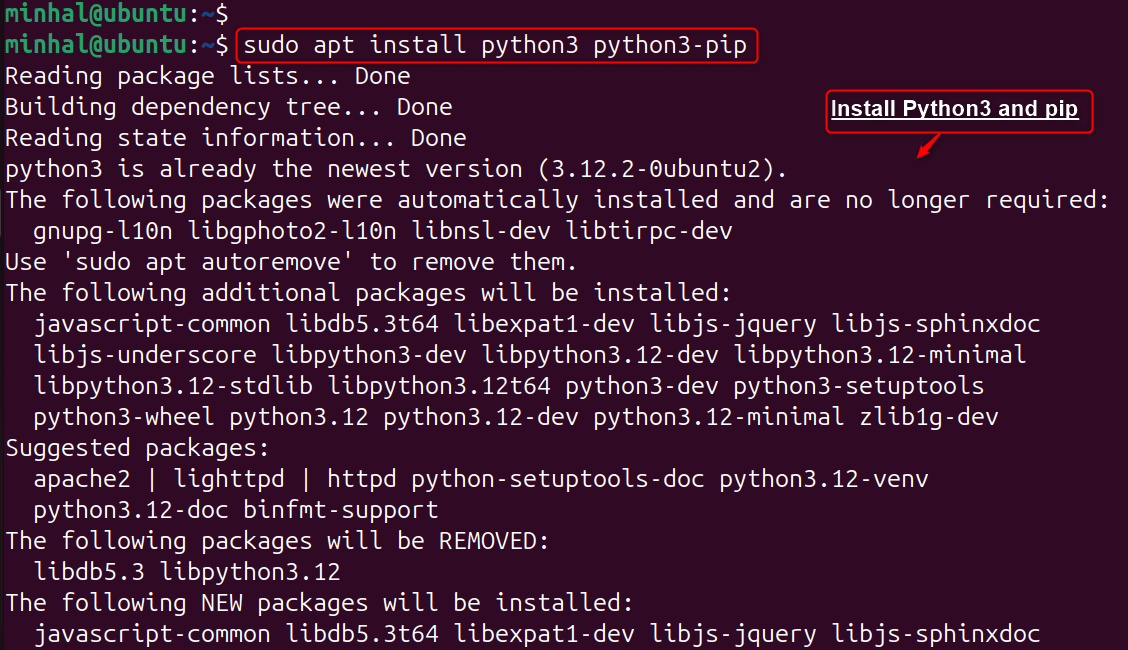
Step 2: Install Python, pip, and Python Environment
Set up the necessary Python environment by installing Python, pip, and additional packages with the apt command:
sudo apt install python3 python3-pip python3-venv
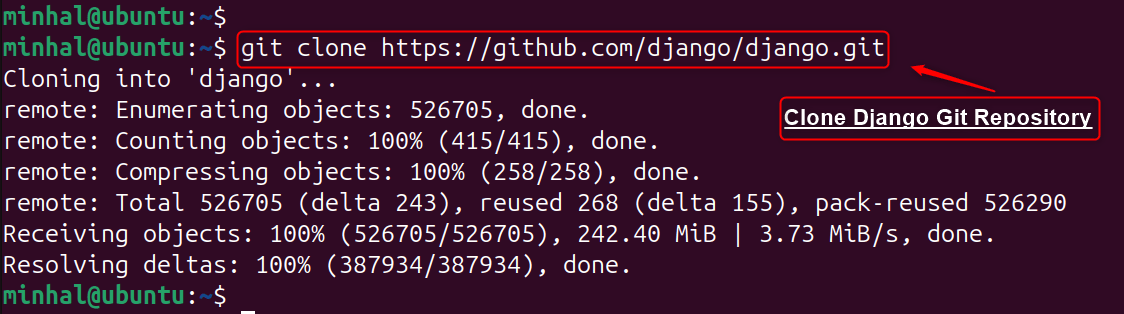
Step 3: Clone the Django Repository from GitHub
After setting up the required dependencies, you can obtain the Django project code by cloning the Git repository. For example, you can clone the repository into your home directory using the following URL:
git clone https://github.com/django/django.git
Step 4: Create a Virtual Environment
After cloning, navigate to the Django repository and create a virtual environment named ‘myenv’ using ‘venv’:
cd djangopython3 -m venv myenv

Step 5: Activate Virtual Environment
To start using the virtual environment, execute the command ‘source myenv/bin/activate’:
source myenv/bin/activate

Step 6: Install Django
To set up Django for development, use the ‘pip install -e‘ command to install it directly from the repository:
pip install -e ~/django

Step 7: Check the Django Version
After installing, verify Django is working by checking the version:
django-admin --version

Method 3: Using a Virtual Environment
To create a dedicated workspace for your Django projects, setting up a virtual environment is recommended. For Ubuntu 24.04 users, here’s how to install Django within a virtual environment:
Prerequisites: Check the Python Version
Django requires Python 3. Check your Python version by running ‘python3 -V‘ or ‘python3 –version‘:
python3 -V

Step 1: Install Python and pip
To begin, ensure Python 3 and pip are installed to create a virtual environment:
sudo apt updatesudo apt install python3 python3-pip
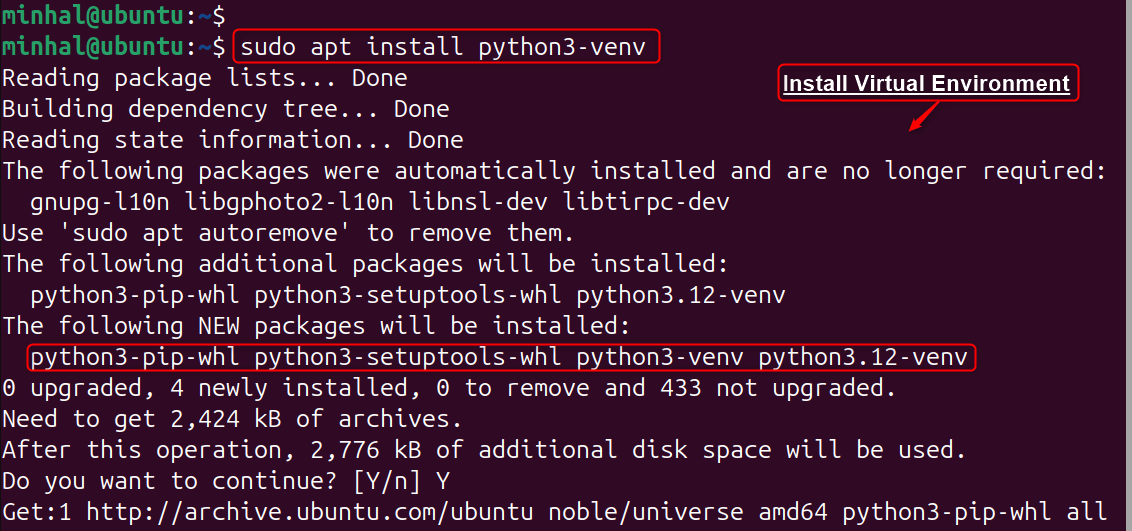
Step 2: Set Up a Virtual Environment
To avoid conflicts with other Python projects, set up a virtual environment for your Django project. You’ll need the ‘venv’ module to do this:
sudo apt install python3-venv
Create the project directory in the desired Django projects folder (e.g., ‘myproject’):
mkdir myproject
cd myproject

Within the project directory, create a separate Python environment called ‘myenv’:
python3 -m venv myenv

Once the virtual environment is created, use the ‘source’ command to activate it by specifying the environment name:
source myenv/bin/activate

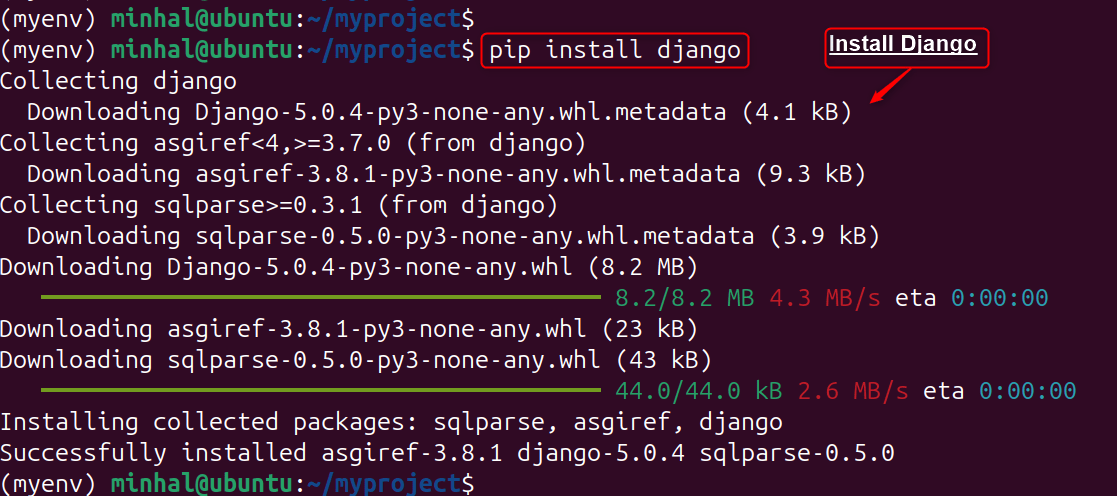
Step 3: Install Django
Once the virtual environment is activated, use pip to install Django on Ubuntu 24.04:
pip install django
Step 4: Verify Django Installation
To verify that Django has been successfully installed, determine its version:
django-admin --version

To access your Django application, verify that your firewall allows connections on port 8000. If it’s blocked, open it by executing the command sudo ufw allow 8000 in your terminal:
How to Setup/Start Django Project on Ubuntu 24.04?
After installing Django on Ubuntu 24.04, follow these steps to create your Django project:
Step 1: Start a New Project
To begin, users create a new Django project using the ‘django-admin’ command. For example, they might name it ‘mysite’: (continuity of Method 3):
django-admin startproject mysite

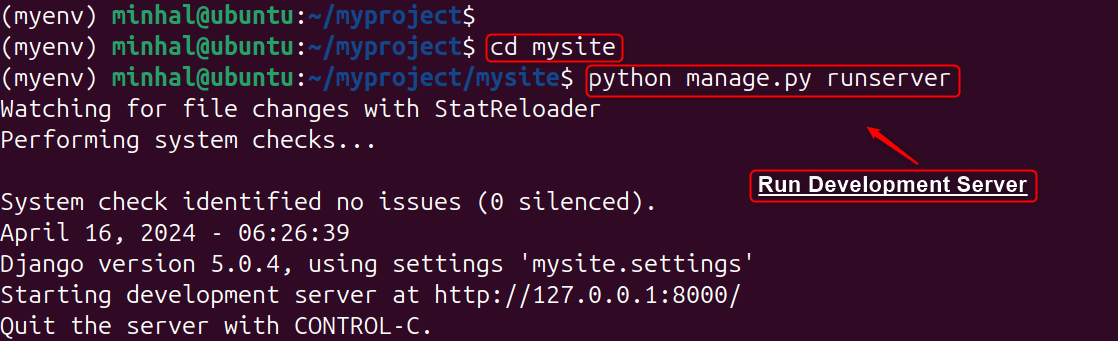
Step 2: Run the Development Server
Open the ‘mysite’ folder and initiate the development server to verify everything is functioning correctly:
cd mysite
python manage.py runserver
Step 3: Access Django Web Page
Access the Django welcome page by navigating to http://127.0.0.1:8000 in your web browser:

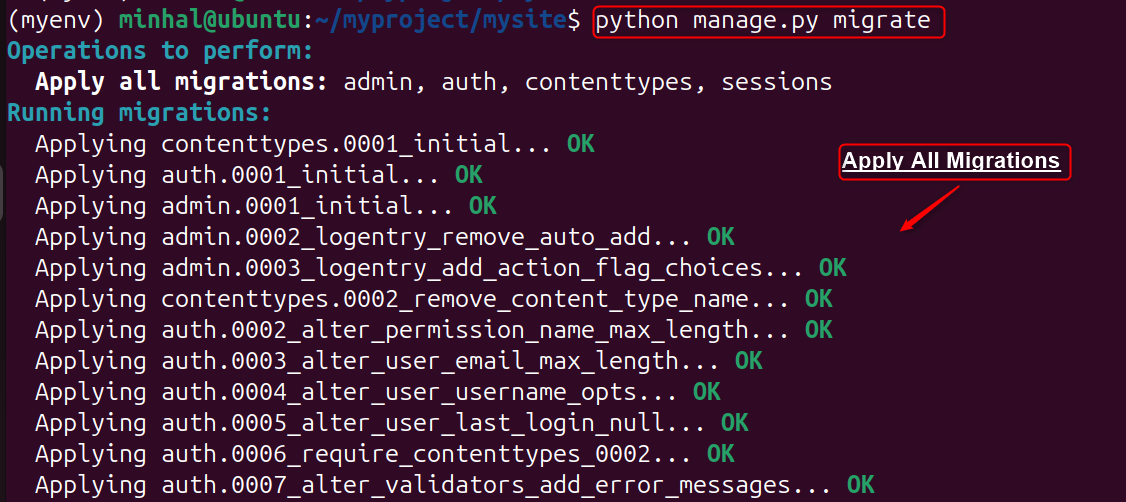
Fix: Unapplied Migration(s) Error
Encountering issues or an error message about unapplied migrations? To fix this, simply run the manage.py migrate command:
python manage.py migrate
Step 4: Create Django Admin Credentials
For the admin interface, create a superuser account. Let’s create one named ‘admin’:
python manage.py createsuperuser

Step 5: Access the Django Admin Interface
Access the admin interface by adding ‘/admin/’ to the end of your URL: http://127.0.0.1:8000/admin/. Use the previously created credentials to log in:

After clicking the ‘LOG IN‘ button, proceed to the Admin Interface by following the instructions below:

You’ve now successfully set up Django on your Ubuntu 24.04 system. From here, you can begin developing your web applications,
For more detailed instructions or additional configurations, such as setting up a database or deploying your Django application, refer to the official guide.
Uninstall/Remove Django on Ubuntu 24.04
To eliminate Django from your Ubuntu 24.04 system using the standard package repositories, execute the command to remove the ‘python3-django‘ package:
sudo apt remove python3-django
sudo apt autoclean && sudo apt autoremove # Remove Unused Dependencies
pip uninstall django # Remove Django via pip (After Navigating Installed Folder)

It removes unnecessary packages related to Django.
Conclusion
To install Django on Ubuntu 24.04, you have three primary options. The first involves creating a virtual environment for isolation. Begin by updating system packages, installing pip and venv, then creating a project directory. Within this directory, establish a virtual environment and activate it before using pip to install Django. Alternatively, you can directly install Django from the Ubuntu repositories for a simpler approach. For development purposes or granular control, installing Django using Git provides flexibility. While the virtual environment method offers project-specific isolation, the repository-based methods are generally quicker.
Frequently Asked Questions
pip. First, ensure you have Python and pip installed, then run pip install Django in your terminal. python3 -m venv myenv and activate it before installing Django. django-admin --version or python -m django --version to verify the installation. django-admin startproject myproject, and then navigate to the project directory. 


Leave feedback about this