
Desktop Environments closely relate to a site’s appearance. Ubuntu uses the user-friendly GNOME, which is also very interactive by default. However, users can install other Desktop Environments if needed. This post will discuss how to install XFCE on Ubuntu 24.04. XFCE is the default desktop environment of Xubuntu (a well-known distribution of Ubuntu). As with all capable operating systems, XFCE has a customizable appearance, a window manager, a taskbar/dock panel, and accessibility features.
- How to Install XFCE on Ubuntu 24.04?
- How to Change the Display Manager on Ubuntu 24.04?
- How to Uninstall XFCE From Ubuntu 24.04?
- Final Thoughts
How to Install XFCE on Ubuntu 24.04?
To install XFCE on Ubuntu 24.04, Ubuntu provides two methods, which are using apt and the tasksel. The tasksel has a set of XFCE tasks which this tool can install via TUI (Text User Interface) and CLI. A streamlined version of the installation tool is apt, which provides less flexible CLI-only support. Let’s examine each in more detail:
Method 1: Using apt
The default repositories/core libraries of the system contain the XFCE package and this is what apt fetches. Also, there is XFCE support coming via the “xubuntu-desktop” package. The simple XFCE4 package is attached to your Ubuntu, whilst some core features, like the terminal, do not change.
Once you install the “xubuntu-desktop”, you will get the overall functionality of both XFCE and Xubuntu.
Let’s explore the step-by-step instructions:
First, update the core libraries of your Ubuntu using the command:
sudo apt update

Now, install the XFCE using any of the following commands:
For a Basic XFCE (For Basic Features):
sudo apt install xfce4

For a Feature Enriched XFCE (For Some Additional Features):
sudo apt install xfce4 xfce4-goodies

Now, you can log out/reboot your system. When logging in, you have two choices based on your Display Manager:
For gdm3 (GNOME Display Manager):
Go to the “Gear” icon and change your desktop to the “XFCE” from:

For lightdm: The gear icon is located at the upper side of the screen. Click on it and a list of Desktop Environments that are installed/available will be shown to you:
And there you have it with XFCE support!

Method 2: Using the tasksel
Tasksel is a TUI and CLI scheduler that lets users install XFCE as well as other desktop environments available for Ubuntu and other Debian-based distros. Tasksel considers each of these tools or environments as a complete task or a set of packages.
Let’s install XFCE using tasksel:
Prerequisites: Install tasksel on Ubuntu
Tasksel is not available in Ubuntu by default. First, update the repositories list and then install the command tasksel:
sudo apt update

Now, install the tasksel manager:
sudo apt install tasksel

Now, you have two options; either you go for a command line installation or a TUI. Both have their advantages. Let’s go through both and you can choose as per your preference:
For CLI:
Now, enlist the available tasks of the tasksel through the below command:
tasksel --list-tasks

The “u” letter before the tool means it is uninstalled and similarly the letter “i” means it is installed on the system.
The XFCE package name is “xfce-desktop”. Install the package using the command below:
sudo tasksel install xfce-desktop
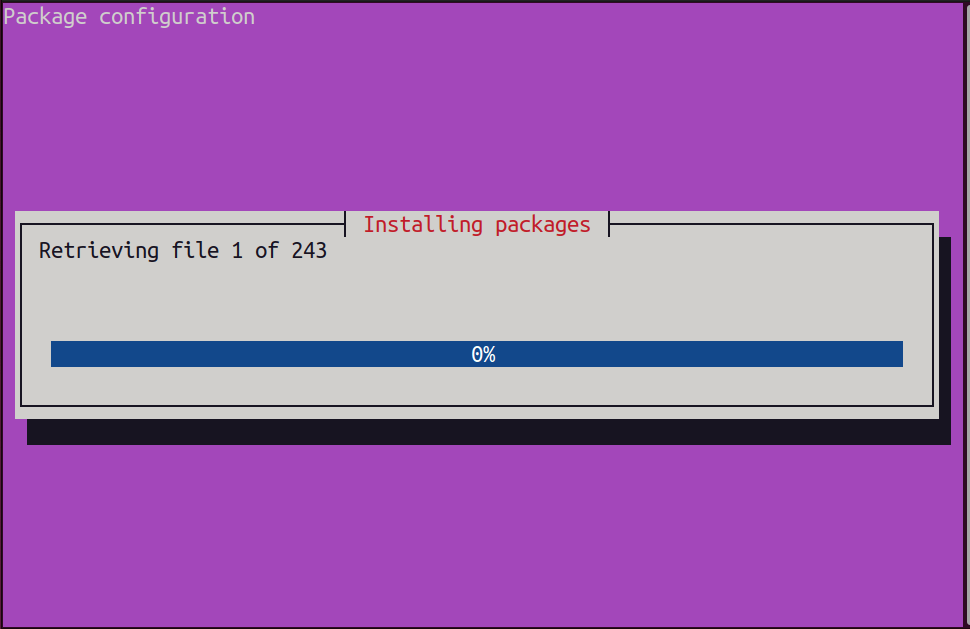
Soon after execution of the command, the installation will be initiated, as shown below:
Now, verify the XFCE installation through the same above command:
tasksel --list-tasks
The “i” in front of the XFCE confirms that it is installed on the system now.
To switch to XFCE, you first have to log out or reboot your computer, and then you can select the DE by clicking the “Gear” icon located at the bottom of the login screen:

Note: Install a Tasksel’s Task Through the apt
XFCE can also be installed with an apt command: the task name for xfce is xfce-desktop.
sudo apt install task-xfce-desktop
You can do this without needing to install tasksel.
For TUI:
To open tasksel through TUI, use the command:
sudo tasksel
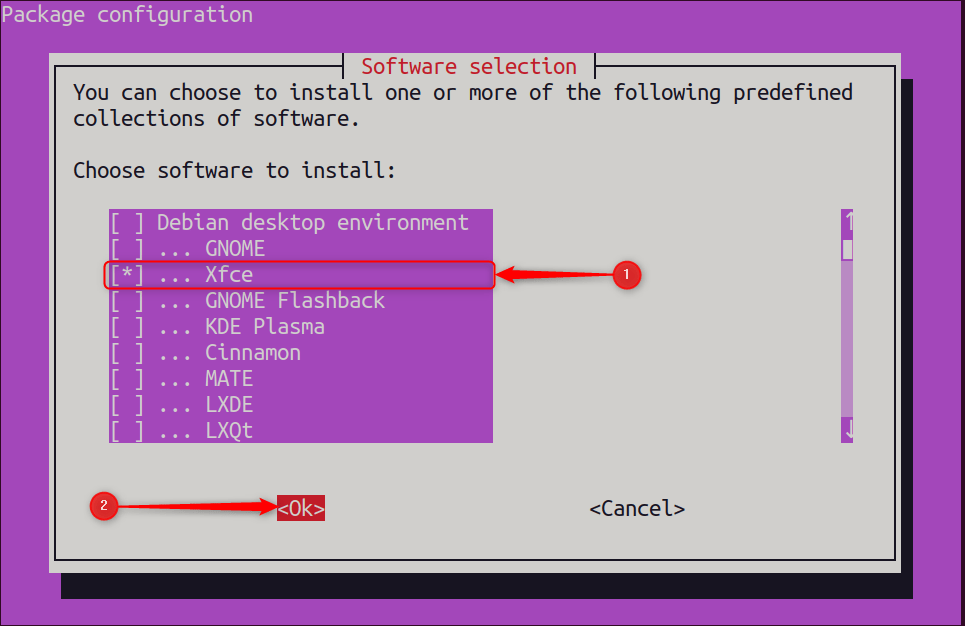
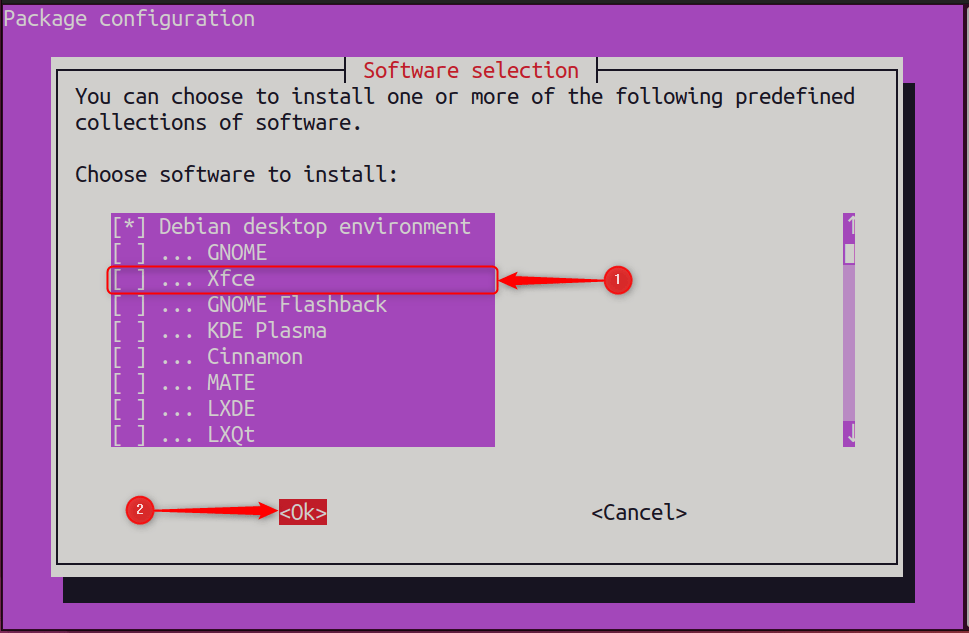
You should be able to see a list of available tasks. Locate the XFCE option and click OK:
You will soon be able to log in through the XFCE desktop when the installation is complete.
Note: If you want to also change the display manager when changing to XFCE, refer to the section.
Method 3: Using Synaptic Package Manager
In this way, it is easier to manage and configure the Xfce Synaptic Package Manager for the Xfce Desktop environment. Focusing your attention on the matter at hand Synaptic Package Manager is a graphical application while the other one is for command line-based interaction. Moreover, it has been noted that you can install each of the packages (xfce4, xfce4-goodies, or xfce-desktop) using the synaptic package manager. So let’s do this.
Install Synaptic Support
Depending on the terminal you are using and the package manager pre-configured for your system, you can install additional apps by entering simple command line options. It should be noted, though, that when you do install, you should verify default Synaptic support is checked. In Ubuntu 24.04, the Synaptic relationship manager is supposed to come pre-installed:
sudo apt install synaptic

To open the packages, execute the terminal command:
sudo synaptic
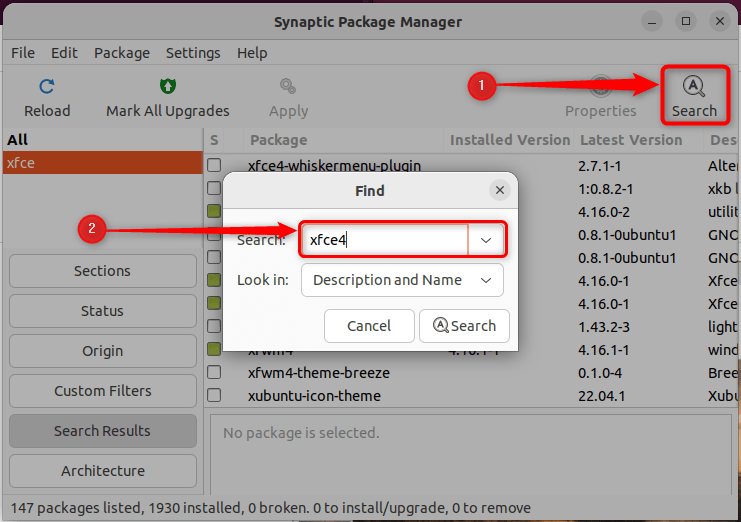
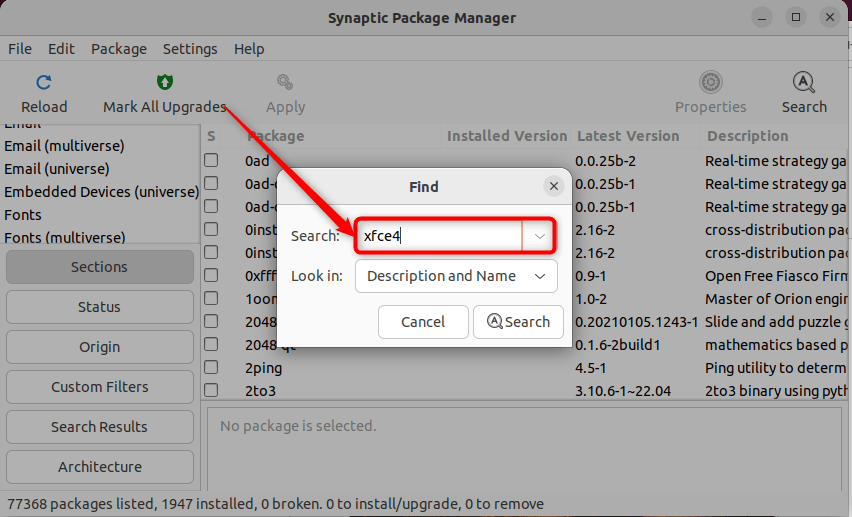
Be sure to input the exact package name in terms of form. I.e. xfce4, xfce4-goodies, task-xfce-desktop:
Now, hit to mark it for installation:
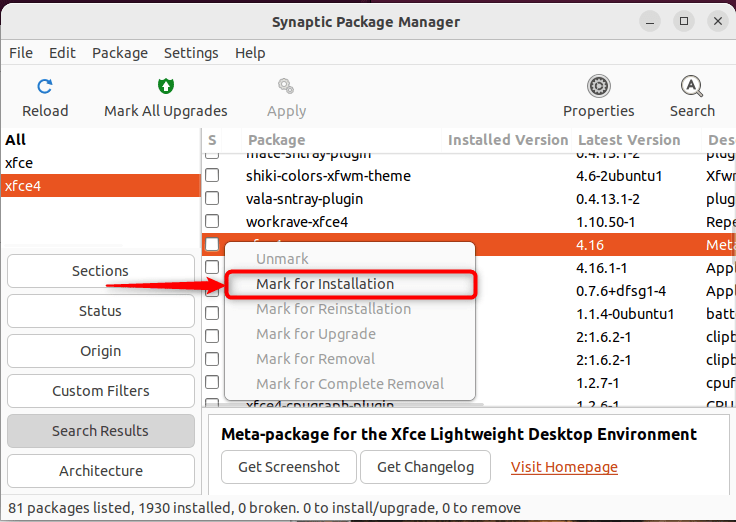
The next interface holds the bundle of packages that can be installed with the same package:
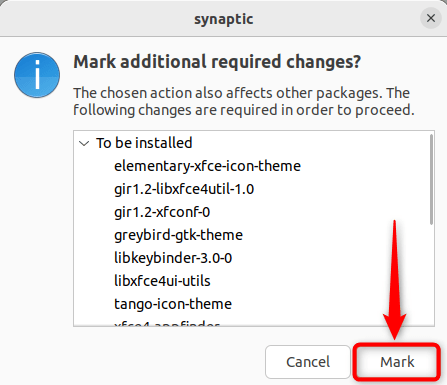
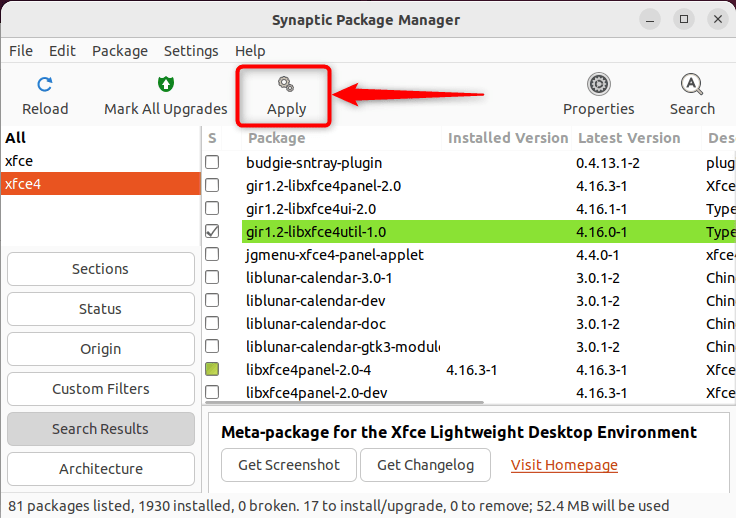
Once marked, click on the “Apply” button:
The above display tells you to decide whether or install the recommended software all in one convenient package.
Once installed follow the screen instructions and now you will be able to switch to the XFCE Desktop Environment while logged out, Or rebooting your system.
How to Change the Display Manager on Ubuntu 24.04?
A Display Manager manages the graphical user interface that is presented during authentication. Two display managers are most commonly used: Lightdm, and Gdm3. Gdm3 is more heavyweight than Lightdm, which is why it is preferable to use Lightdm.
To switch the display manager, simply prompt your system to reconfigure the display manager with any of the commands provided below:
sudo dpkg-reconfigure gdm3
sudo dpkg-reconfigure lightdm
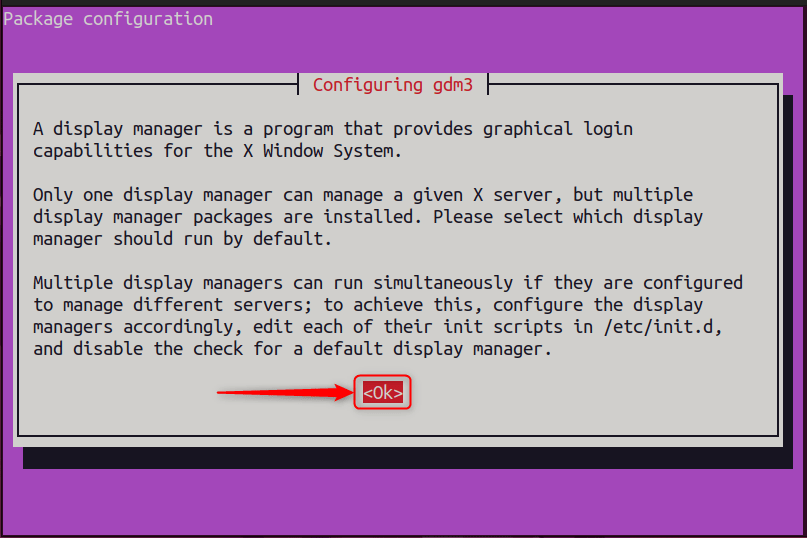
The following prompt, shown below, Select the OK option (during software installation) that they need to select to continue:
Choose the one that you want to and press the “OK” button to continue (in our case it is lightdm)

Upon logging in or restarting your computer, you will be able to select the Xfce Session like this:

You can always switch back to “gdm3” or “lightdm” whenever you desire.
How to Uninstall XFCE From Ubuntu 24.04?
The XFCE needs to be removed from the location where it was installed. I remember there were two ways to do it, namely tasksel and apt. Both methods have different ways to execute commands to uninstall XFCE. Let us check it out:
Uninstall XFCE | Installed Through APT
As for now just use the “autoremove” command to get rid of Xfce along with the dependencies files:
sudo apt autoremove xfce4 xfce4-goodies

The command will get rid of both the basic Xfce version and the advanced version of Xfce installed
Uninstall XFCE | Installed through tasksel
You may remove tasks with the help of tasksel using the following command:
sudo tasksel remove xfce-desktop

This command will remove the XFCE task alone that was installed via tasksel (as a task).
Important: If you wish to uninstall the XFCE from the TUI interface of tasksel, execute “sudo tasksel” and simply remove the check mark from “XFCE” and then hit “OK”.
Uninstall XFCE | Installed Through Synaptic Package Manager
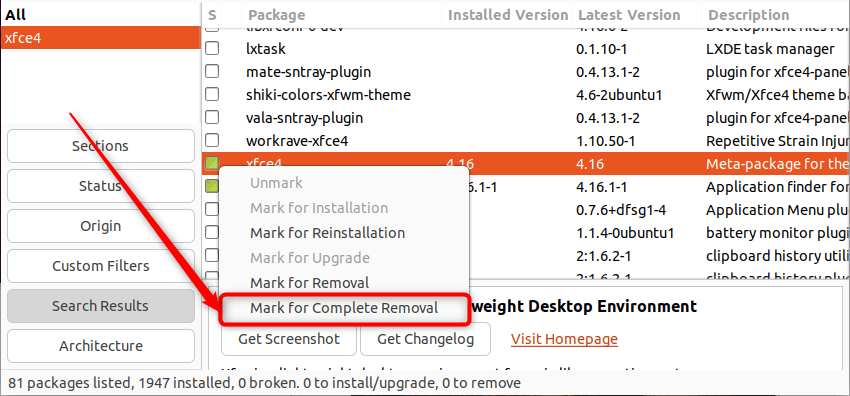
If you wish to get rid of XFCE installed using the synaptic package manager. Go to the applications menu and open the synaptic manager or run (“sudo synaptic”) from the command line. Search the package you wish to uninstall, for example, xfce4:
Select the package and mark it for complete uninstallation:
Apply the changes:
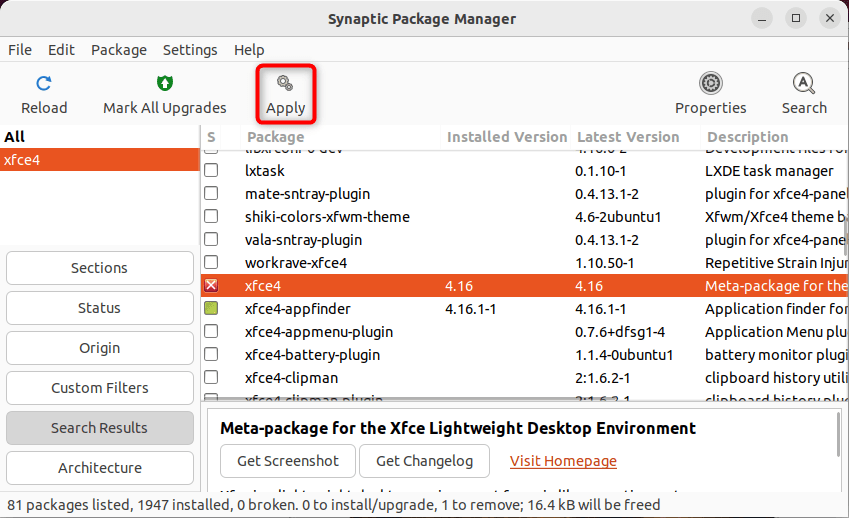
In some moments the package will be uninstalled from the system. That’s how it is done with XFCE on Ubuntu 24.04.
Final Thoughts
Just as GNOME is used for Ubuntu, Xfce is for Xubuntu. XFCE, like any other desktop environment, can be easily installed on any other operating system. If you want to get it on Ubuntu, use the apt or the tasksel. When compared to Ubuntu’s GNOME, XFCE has some features in common and some that are unique to it. Further, with the click of a mouse, you can transform your Ubuntu into Xubuntu and continue to enjoy the benefits of XFCE. This post has listed all the methods of installing XFCE.
Frequently Asked Questions
sudo apt update && sudo apt install xfce4 xfce4-goodies
sudo apt purge ubuntu-desktop gnome-shell, but it’s not necessary for using XFCE. 


Leave feedback about this