Webmin is a powerful, web-based control panel and automation software for Linux systems (e.g., Debian 12) worldwide. These users can set DNS options, manage user accounts, and configure settings for common packages. It is good for the system administration of your Debian 12 servers. It is possible to control a large number of parameters, including users, services, drivers, and firewall settings, among others.
In this article, you will learn how to install Webmin on Debian 12 and how to configure access to the Webmin interface.
Table of Contents
Let’s start with the installation.
How to Install Webmin on Debian 12?
Webmin controls many features of your Debian 12 system. Below are different ways to install Webmin on Debian 12. Let me begin with the most simple:
Method 1: Using the Official Webmin Repository
Webmin is a web-based interface for system administration for Unix. To get Webmin installed on Debian 12, let’s do it from the official repository.
Step 1: Add Webmin Repository
Update your sources list in /etc/apt/sources by adding the Webmin repository file:
|
echo “deb https://download.webmin.com/download/repository sarge contrib” | sudo tee -a /etc/apt/sources.list |
|---|

Step 2: Download GPG Key
Users now have to download and install the Webmin GPG key by entering the following command:
|
wget -qO – https://download.webmin.com/jcameron-key.asc | sudo apt-key add – |
|---|

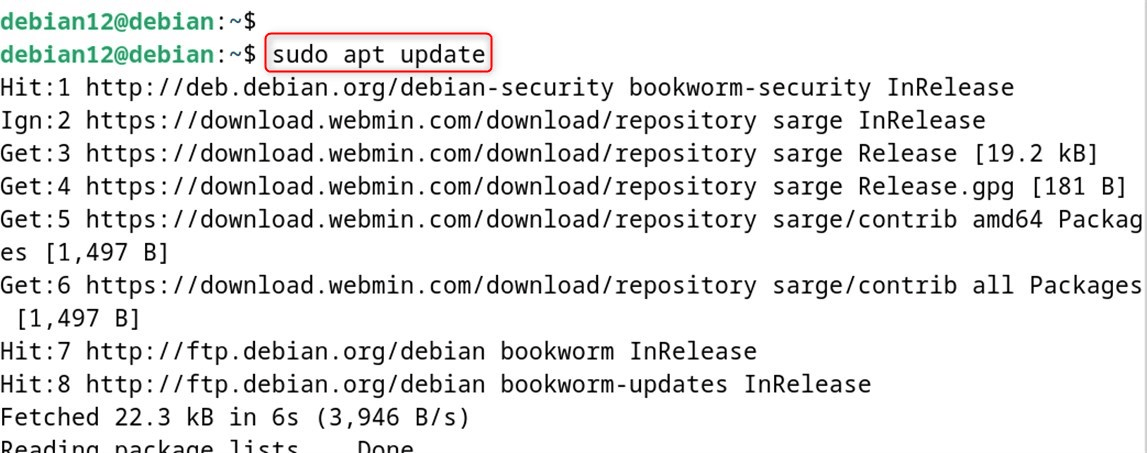
Step 3: Update Package Lists
Now, the user must make sure that the repositories are up-to-date with the following command:
|
sudo apt update |
|---|
Step 4: Install Webmin
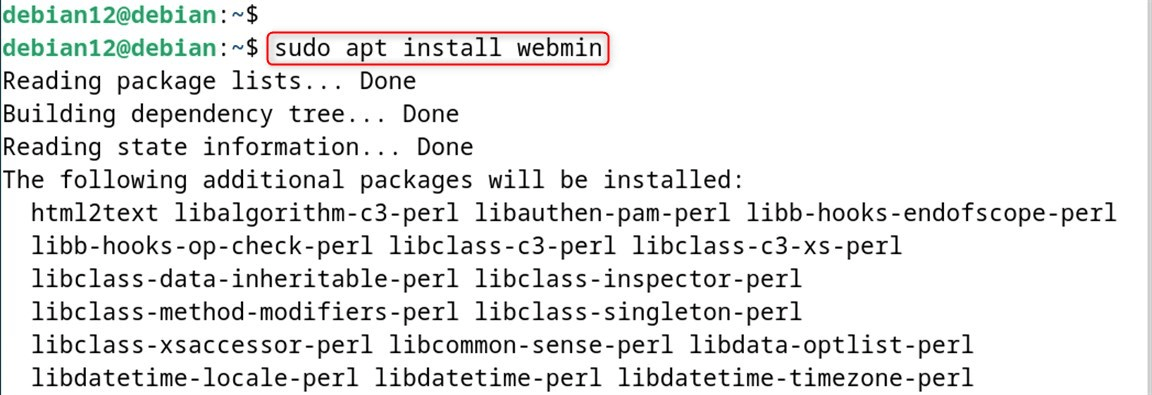
Now you can install Webmin using the “apt” command as root:
|
sudo apt install webmin |
|---|
Step 5: Access Webmin Web Interface
After the installation, you can check out the web interface by browsing to https://your-server-ip:10000 in your favorite web browser. It does, however, you have to log in as the root or the sudo user:
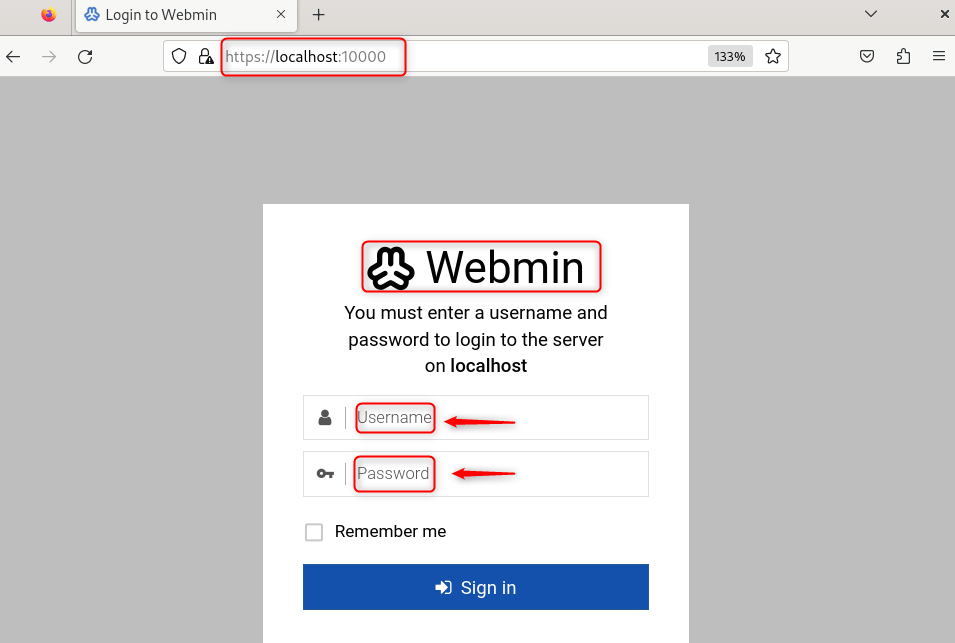
Here, it logs into the Webmin interface by clicking on the “Sign in” button as shown here:
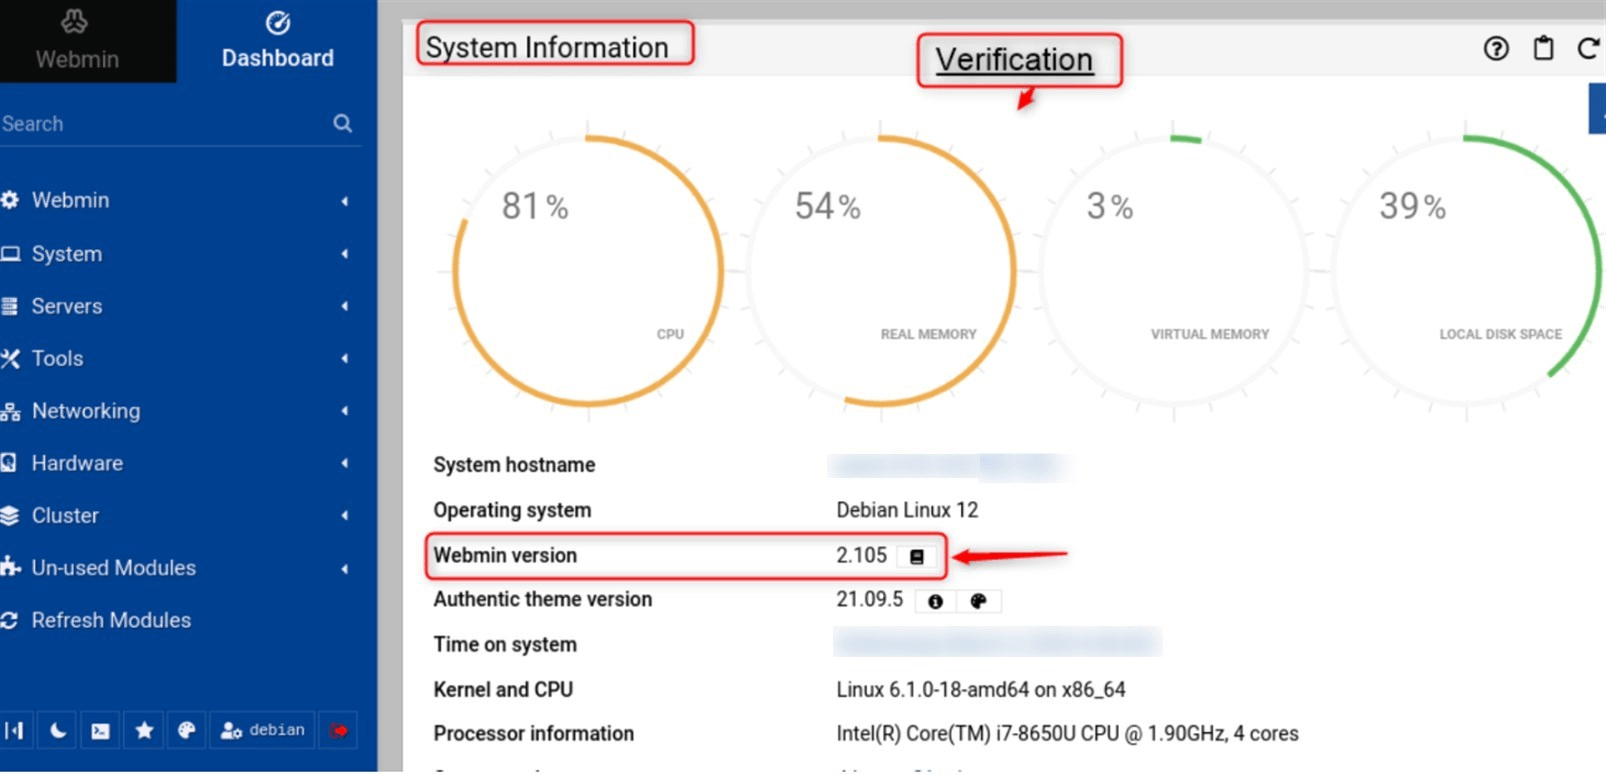
Thus, users may manage their Debian 12 server using Webmin.
Remove/Uninstall Webmin
To remove Webmin from Debian 12, execute the autoremove command as below:
|
sudo apt autoremove webmin |
|---|

That is a wrap from this section.
Method 2: Using setup-repos.sh Script
To add the Webmin repository to Debian 12, run the “setup-repos. sh script which is provided by Webmin developers. The following script adds the Webmin repository to the system and installs the most recent version of Webmin. For installing Webmin on Debian 12 using setup-repos.sh script, try the following:
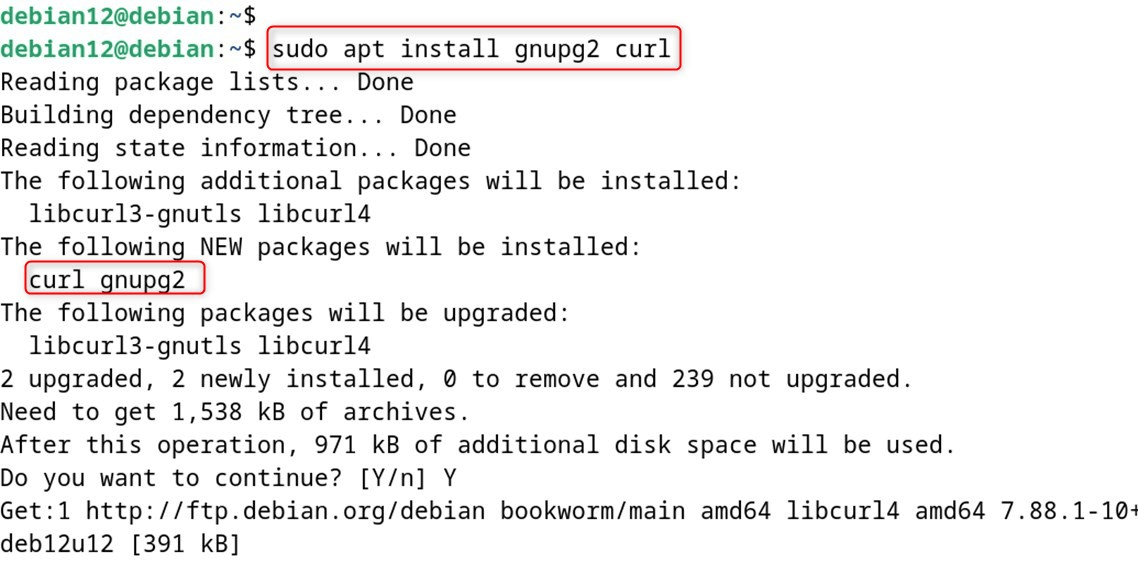
Step 1: Install Dependencies
First of all, we are going to install Some Dependent packages that are needed for webmin installation on Debian 12:
|
sudo apt install gnupg2 curl |
|---|
Step 2: Download the Script
Then download the setup-repos. sh script from the webmin GitHub repository to install Webmin for you:
|
curl -o setup-repos.sh https://raw.githubusercontent.com/webmin/webmin/master/setup-repos.sh |
|---|

Step 3: Make the script executable
Now, enable the script as an executable script by using the “chmod” command followed by the permission “+x”:
|
chmod +x setup-repos.sh |
|---|

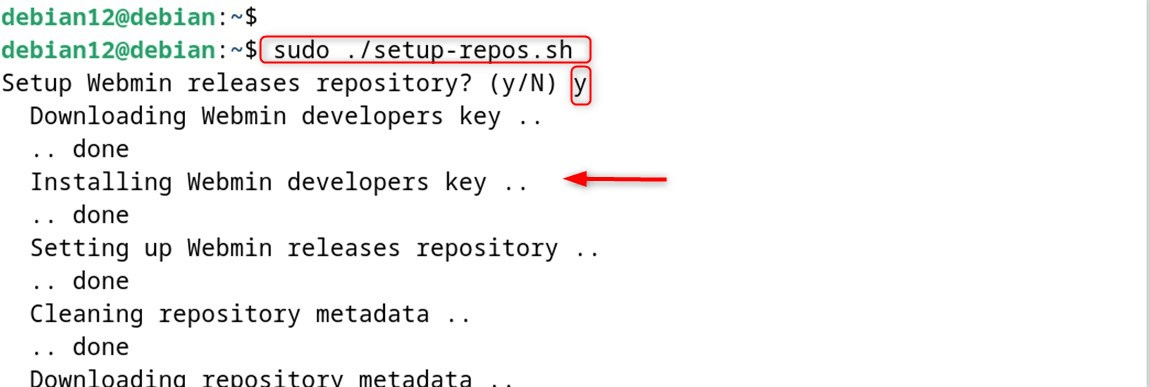
Step 4: Run .sh Script
Execute the downloaded script file as root as below in this step:
|
sudo ./setup-repos.sh |
|---|
Step 5: Install Webmin
If you want to install Webmin, use the “install” command followed by the package name “webmin”:
|
sudo apt install –install-recommends webmin |
|---|
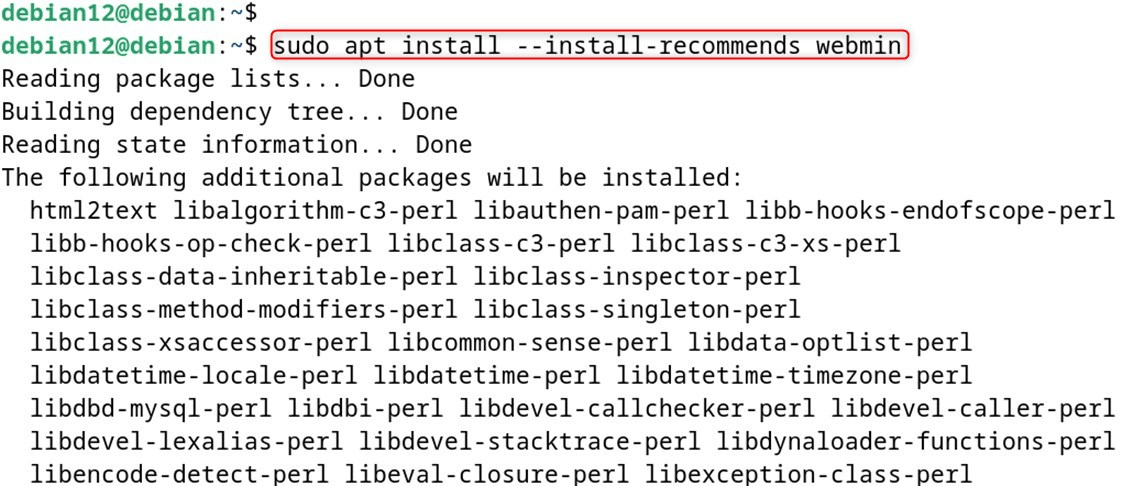
Now, consider the mail-server module, which brings in the core modules that are suggested for installation to complete the installation.
Step 6: Access Webmin Web Interface
Wait until the script completes, and then access https://localhost:10000 to verify that Webmin is installed. Log in to Webmin using your root username and credentials, and begin controlling your system:

Remove/Uninstall Webmin
To uninstall Webmin on Debian 12, run the following command to remove the webmin package with the apt autoremove tool:
|
sudo apt autoremove webmin |
|---|
That’s it for this section.
Method 3: Using the .deb Package
Now, users can also install Webmin on Debian with the assistance of the .deb package. Let’s consider the stated steps:
Step 1: Download the Webmin Debian Package
First, the latest Webmin zip package is to be downloaded by users. Deb package on the official site. For example, with wget, it would be this:
|
wget https://sourceforge.net/projects/webadmin/files/webmin/2.105/webmin_2.105_all.deb |
|---|

Step 2: Install the Webmin Package
Install the Webmin package using the apt command: You will need sudo or be root to do this:
|
sudo dpkg -i webmin_2.105_all.deb |
|---|

Note: If the user detects a dependency issue, do the following:
|
sudo apt –fix-broken install |
|---|
This will set up and install Webmin and its prerequisites on your server.
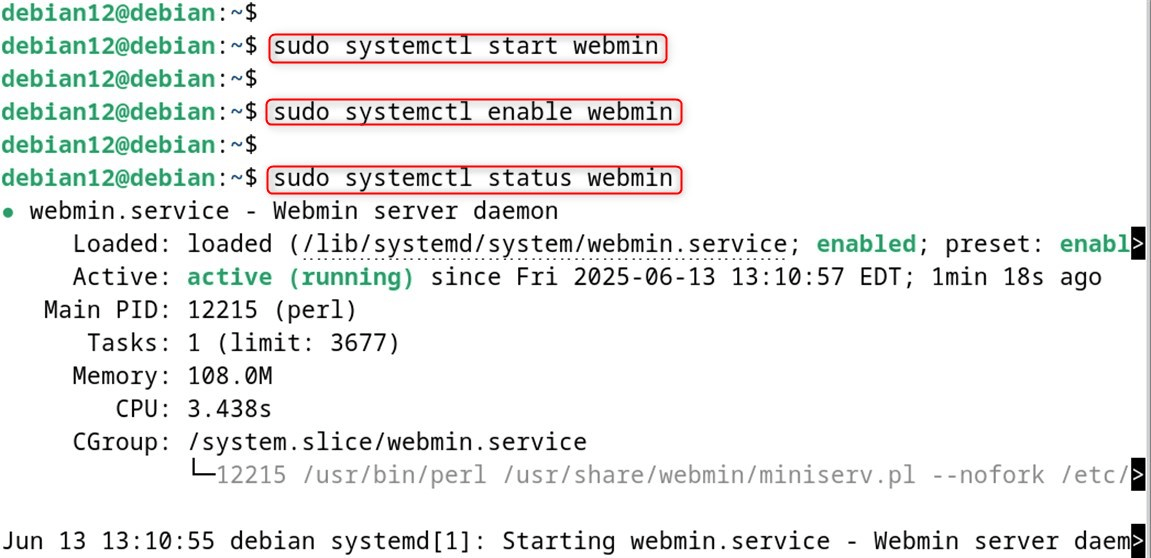
Step 3: Start and Enable Webmin Service
And last, users will need to start the Webmin service and set it to run at boot:
|
sudo systemctl start webmin sudo systemctl status webmin |
|---|
Step 4: Access Webmin Web Interface
Now you can open your Web browser and type https:// https://your_server_ip:10000 and you will get to your Webmin:
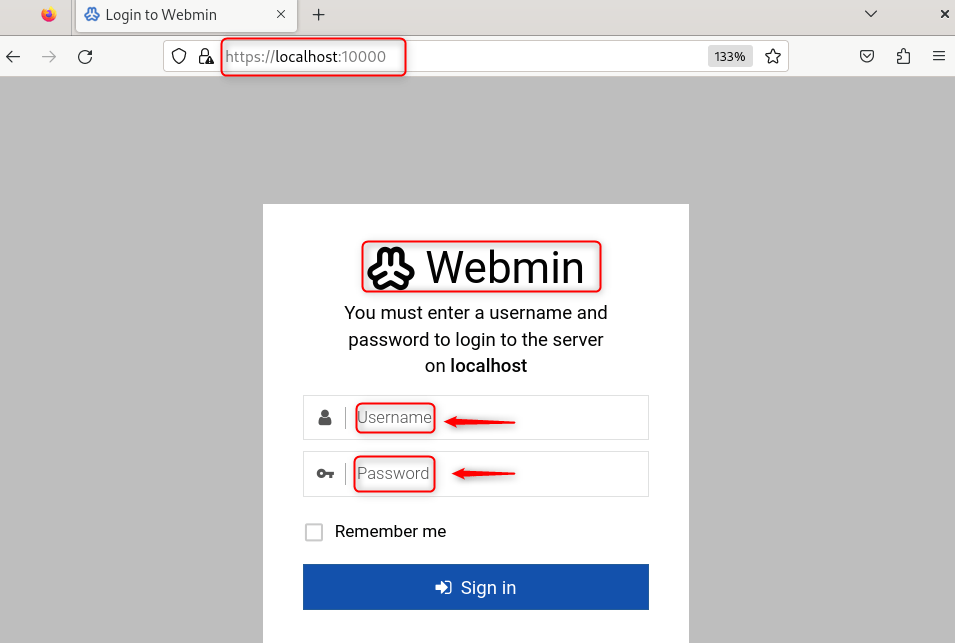
You will need to log in using either your root username and password or a user that has sudo privileges:
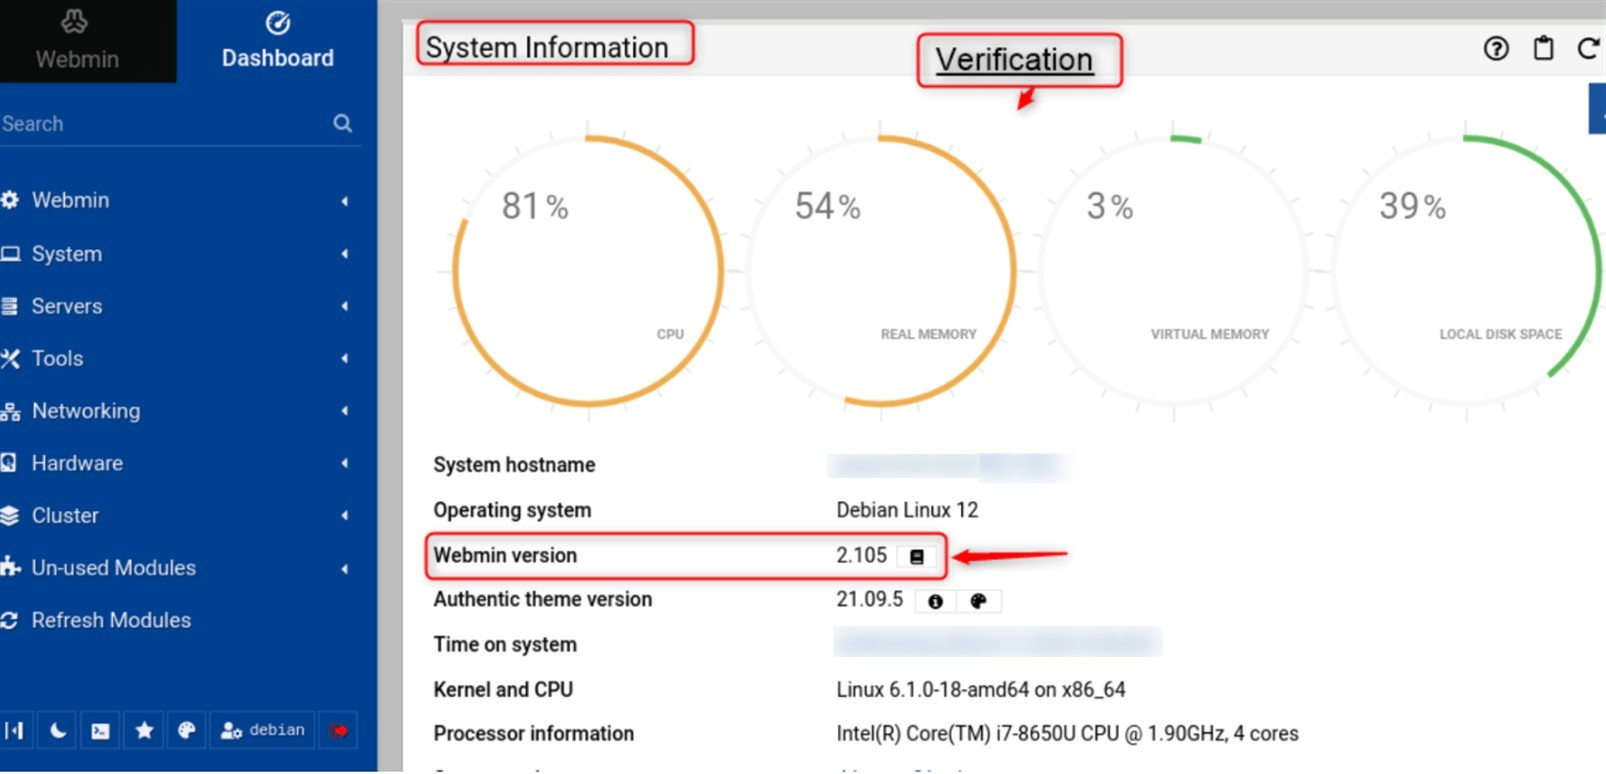
That’s it! Webmin has been installed on Debian 12 from a downloaded package. Deb package. Now you can use it to remotely manage your system.
How to Configure/Manage Webmin on Debian 12?
Webmin is an interface for managing Linux servers. You must also make port 10000 available in your firewall to ÿconnect to Webmin’s web interface. Here’s how to configure it:
To get started, you need a Debian 12 server with a root password set up. Manage the Webmin service as follows:
Start Webmin:
|
sudo service webmin start |
|---|

Restart Webmin:
|
sudo service webmin restart |
|---|

Check Webmin’s Status:
|
sudo service webmin status |
|---|
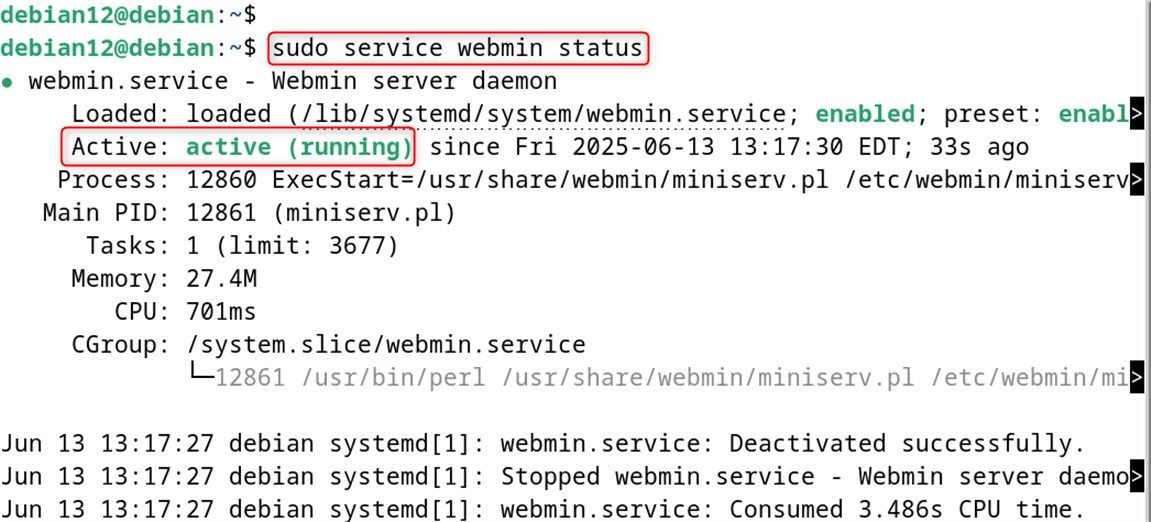
Stop Webmin:
|
sudo service webmin stop |
|---|

Configuring Webmin:
For customization of Webmin, head over to the “miniserv.conf” configuration file:
|
sudo nano /etc/webmin/miniserv.conf |
|---|
Change the listen address, if you wish: (e.g., set it to your IP address)
|
listen=YOUR_IP_ADDRESS |
|---|

Save and close the file.
Restart the Webmin Service:
And then reboot the Webmin Service using the “systemctl” command:
|
sudo systemctl restart webmin |
|---|

Optional: Firewall Rules
For security, you should set up a firewall (UFW) to allow SSH (port 22) and Webmin (port 10000):
|
sudo apt install ufw -y |
|---|
Accessing Webmin:
Open a browser and then put the URL:https://YOUR_IP_ADDRESS:10000. Log in using your server login details. Discover Webmin capabilities such as user account management, Apache setup, DNS configuration, and so on:
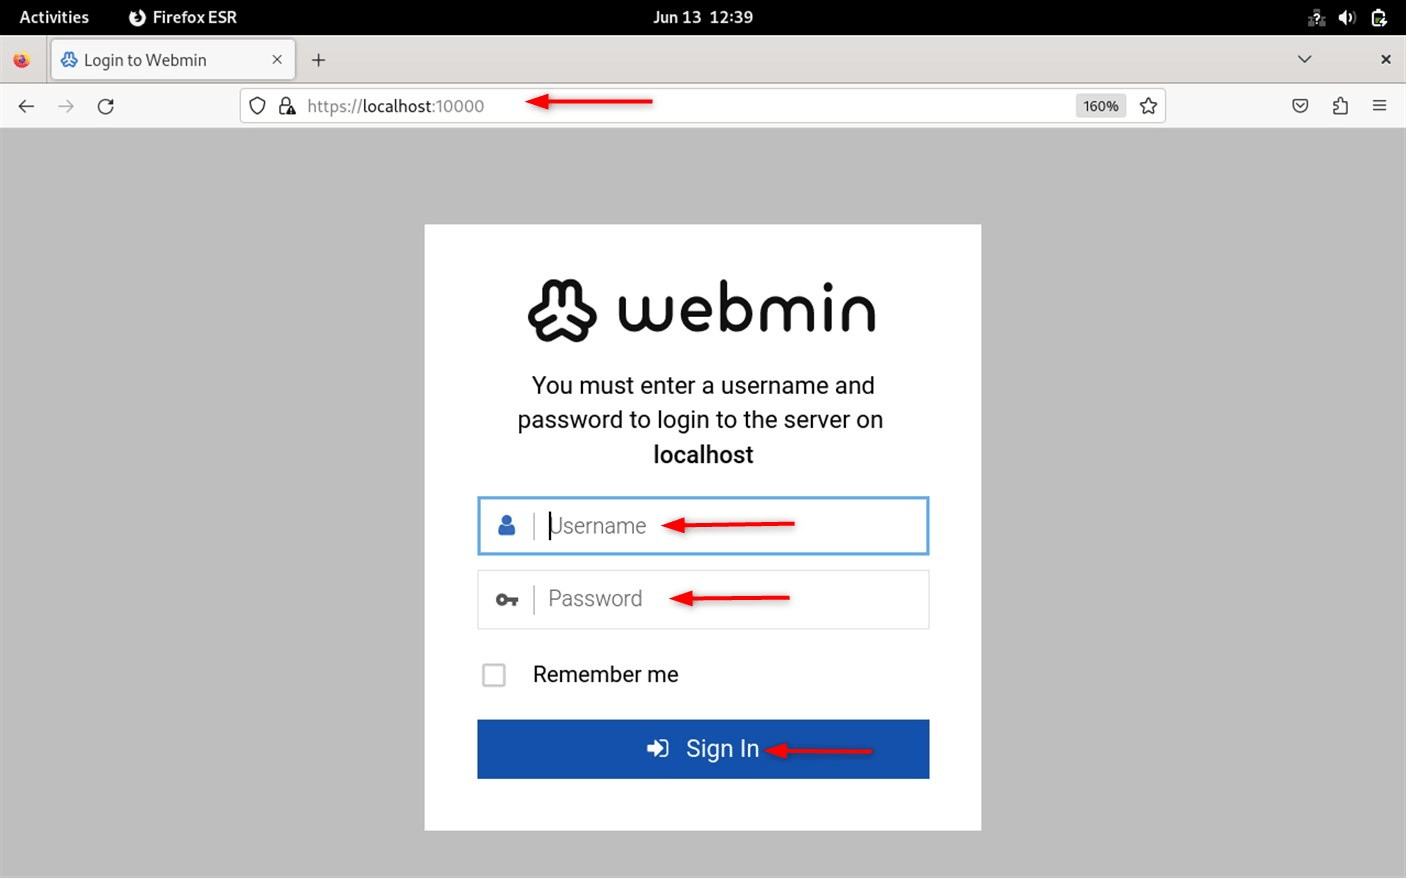
Webmin is easy to use for server management, and it is also available for new users.
Conclusion
You can use Webmin on Debian 12 to carry out general system administration tasks like adding new users, configuring services, as well as installing and updating packages. On Debian 12, install Webmin by adding its repo to your sources list, updating your package lists, and installing Webmin with apt.
To use it, log in to Webmin, open your Web browser to either the IP address or Domain Name at port, and log in as user: Login with your system username and password. Then click on the individual modules or options throughout Webmin and make the changes that you need to make. If you want to control the Webmin service, launch its service using the “sudo systemctl start webmin” command. You can halt the service above by running the command ‘sudo systemctl stop webmin. You can check the status of the Webmin service by running the command “sudo systemctl status webmin”.




Leave feedback about this