
Installing Java in CentOS 10 will be crucial for system administrators and developers who wish to run Java applications, frameworks, or servers such as Apache Tomcat, Jenkins, or Hadoop. Java is one of the most popular programming languages and runtimes in the world. Installing and configuring the correct Java version on CentOS 10 is essential for stability, performance, and compatibility, whether you are setting up a software development environment or deploying an enterprise-grade application.
This guide will cover the steps to installing Java on CentOS 10, including OpenJDK and Oracle Java. We’ll also discuss how to set up JAVA_HOME.
Table of Contents
How to Install Java on CentOS 10
It’s easy to install Java on CentOS 10, whether you select OpenJDK, for flexibility and open-source support, or Oracle Java, for enterprise-grade support. This guide covers all installation methods, from setting up environment variables to using yum repositories. These steps will allow you to quickly configure Java on CentOS 10 for software deployment, application development, or server management.
Prerequisites
Install Java only after you have:
- CentOS 10 is installed and operational.
- You are currently logged in as the sudo user.
- The latest packages are installed on your system.
Method 1: Install OpenJDK (Recommended)
OpenJDK, the open-source Java implementation, is available in CentOS’s repositories. It is ideal for the majority of use cases, such as production environments. To install Java on CentOS 10, follow below steps:
Step 1: Check Available Java Versions
To list all OpenJDK versions available, run the following command:
|
sudo yum search openjdk |
|---|
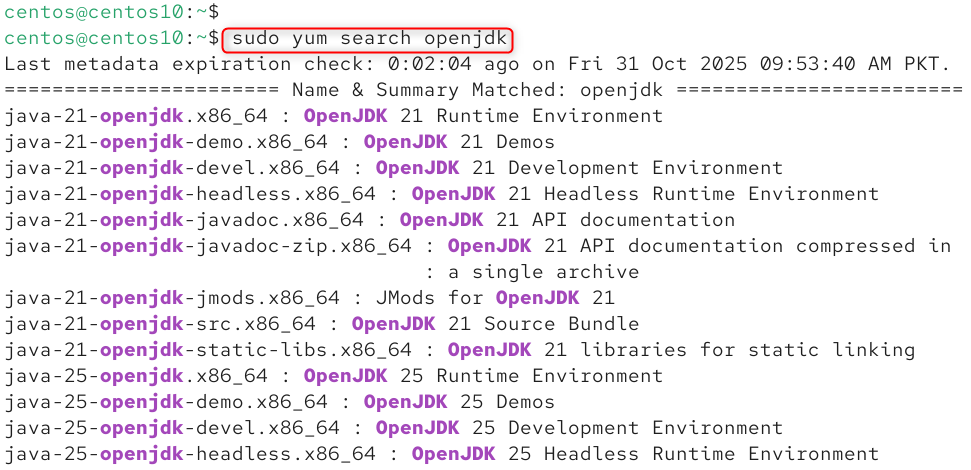
This command will list the versions of OpenJDK available in your CentOS 10 repository. You can then choose the one you want.
Step 2: Install Java (OpenJDK 21 Example)
Install OpenJDK 21, which is the most popular and stable version:
|
sudo yum install java-21-openjdk-devel |
|---|

The -devel packages include the Java Runtime Environment and the Java Development Kit, which are required to compile and run Java applications.
Step 3: Verify Installation
Check your Java version after installation:
|
java -version |
|---|

Java has been successfully installed on CentOS 10!
Method 2: Install Oracle Java (Optional)
Oracle Java is the Oracle proprietary distribution. Oracle Java is often needed for enterprise software that depends specifically on Oracle’s version.
Step 1: Enable Oracle Yum Repository
Install the Oracle Java Repository package.
|
wget https://download.oracle.com/java/21/latest/jdk-21_linux-x64_bin.rpm |
|---|
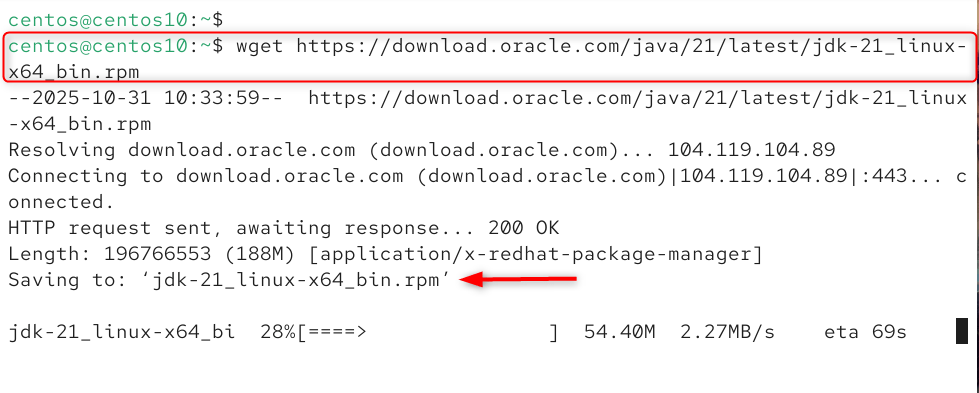
This will add Oracle’s official Java repositories to your CentOS 10 systems, allowing you to install Oracle JDK Versions easily.
Step 2: Install Oracle Java
Install the latest Java version, for example, Java 21:
|
sudo rpm -Uvh jdk-21_linux-x64_bin.rpm |
|---|
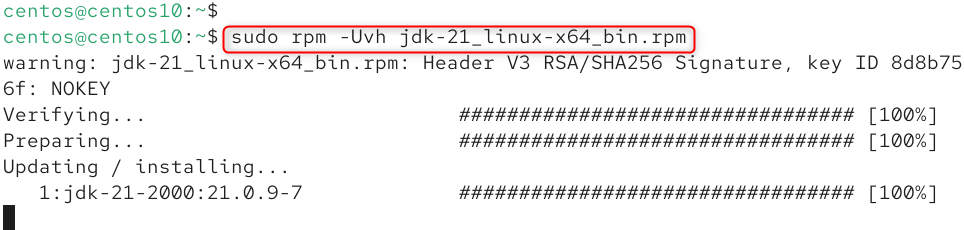
Install the Oracle JDK, which includes the runtime as well as the development tools.
Step 3: Verify Installation
Check the version installed:
|
java -version |
|---|

Now that you have installed the latest Oracle Java on your CentOS 10 System, you can start using it.
Method 3: Install Specific Java Version (Manual Selection)
You can switch manually between Java versions if you have more than one installed.
Step 1: List Installed Java Versions
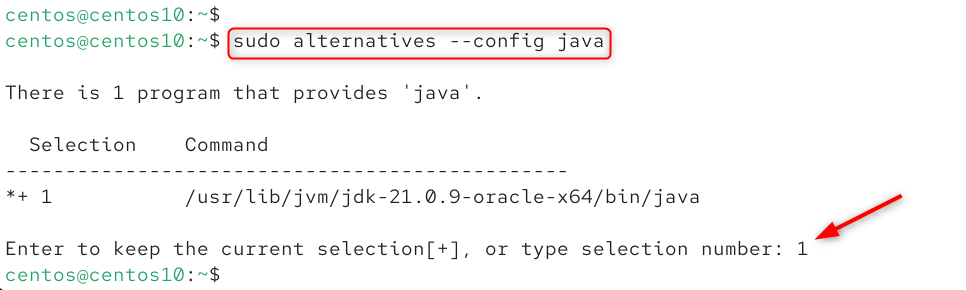
List all Java versions installed.
|
sudo alternatives –config java |
|---|

The list below shows all Java versions installed. The * represents the current default Java version.
Step 2: Switch Default Java Version
Enter the version number you want.
|
sudo alternatives –config java |
|---|
Changes the default Java version for all applications.
Setting JAVA_HOME Environment Variable
Many Java applications use the JAVA_HOME variable to find your Java installation path.
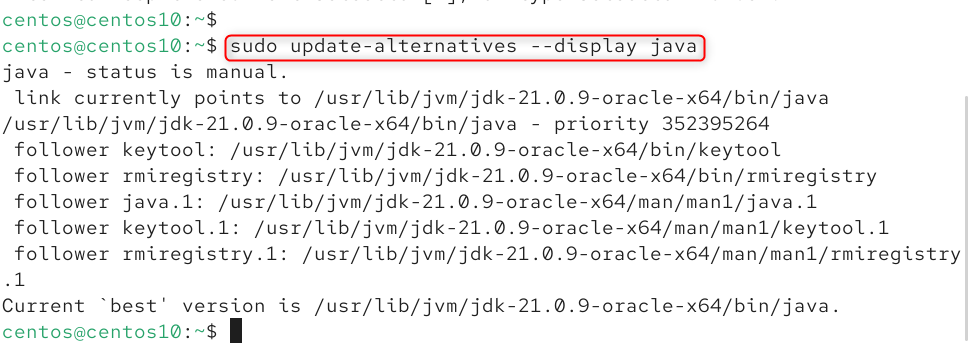
Step 1: Find Java Installation Path
First, find the installation path:
|
sudo update-alternatives –display java |
|---|
Step 2: Set JAVA_HOME Variable
Open the environment configuration file:
|
sudo nano /etc/profile.d/java.sh |
|---|
Add the following line (replace path with your own version):
|
export JAVA_HOME=/usr/lib/jvm/java-21.0.9-oracle-x64/bin/java export PATH=$PATH:$JAVA_HOME/bin |
|---|

Apply changes after saving and exiting:
|
source /etc/profile.d/java.sh |
|---|

Step 3: Verify JAVA_HOME
Check the variable:
|
echo $JAVA_HOME |
|---|

By setting JAVA_HOME, all Java applications and tools (such as Maven or Gradle) can automatically locate your Java installation.
Conclusion
To install Java on CentOS 10, first update your system using sudo dnf update -y to ensure all packages are up to date. Then check available Java versions with sudo dnf search openjdk and install your preferred version, for example, sudo dnf install java-21-openjdk-devel -y to install OpenJDK 21. Once the installation completes, verify it using java -version to confirm that Java is installed correctly.
You can set the default using sudo alternatives -config java if multiple Java versions are present. Finally, configure the JAVA_HOME environment variable by editing /etc/profile.d/java.sh and adding export JAVA_HOME=/usr/lib/jvm/java-21-openjdk followed by export PATH=$PATH:$JAVA_HOME/bin, then reload it using source /etc/profile.d/java.sh. Your Java installation on CentOS 10 is now complete and ready to use.


Leave feedback about this