
CentOS 10 requires that you configure proxy settings if your system is behind a firewall or corporate network that restricts direct internet access. Properly configured proxy settings ensure that your server can securely connect to external repositories, update packages, and access web resources. This tutorial can help you set up a secure and reliable proxy connection, whether you manage a single server in an enterprise network or a single machine.
This guide will show you how to configure CentOS 10 proxy settings step-by-step. It includes setting up global variables, configuring YUM/DNF for package management, and applying proxy rules for curl and wget.
Table of Contents
Why Configure a Proxy?
CentOS 10’s proxy settings ensure that your system, tools, and applications can securely access the Internet. This is especially important in restricted or enterprise environments. Setting environment variables, updating the DNF/YUM settings, and applying settings for applications and services will make your system proxy-ready.
A proxy is a mediator between your computer and the Internet. A proxy server is useful for:
- Control and monitor internet traffic.
- Filtering traffic can improve security.
- You can bypass network restrictions and internal firewalls.
- Download updates from servers in private networks.
Step-by-Step: Configure Proxy Settings on CentOS 10
You’ll need to configure your proxy settings if you want to use a proxy to monitor and secure traffic on CentOS 10 servers. Misconfigured proxy settings can cause updates to be blocked, package downloads to fail, and errors with tools such as curl or wget.
Step 1: Set Proxy as Environment Variables (System-Wide)
Environment variables are used by most Linux applications to read proxy information. By setting them globally, all users and applications can access the Internet through the proxy.
|
sudo nano /etc/profile.d/proxy.sh |
|---|
Add the following lines:
|
export http_proxy=”http://proxy.example.com:8080″ export https_proxy=”http://proxy.example.com:8080″ export ftp_proxy=”http://proxy.example.com:8080″ export no_proxy=”localhost,127.0.0.1,.example.local” export HTTP_PROXY=”$http_proxy” export HTTPS_PROXY=”$https_proxy” export FTP_PROXY=”$ftp_proxy” export NO_PROXY=”$no_proxy” |
|---|
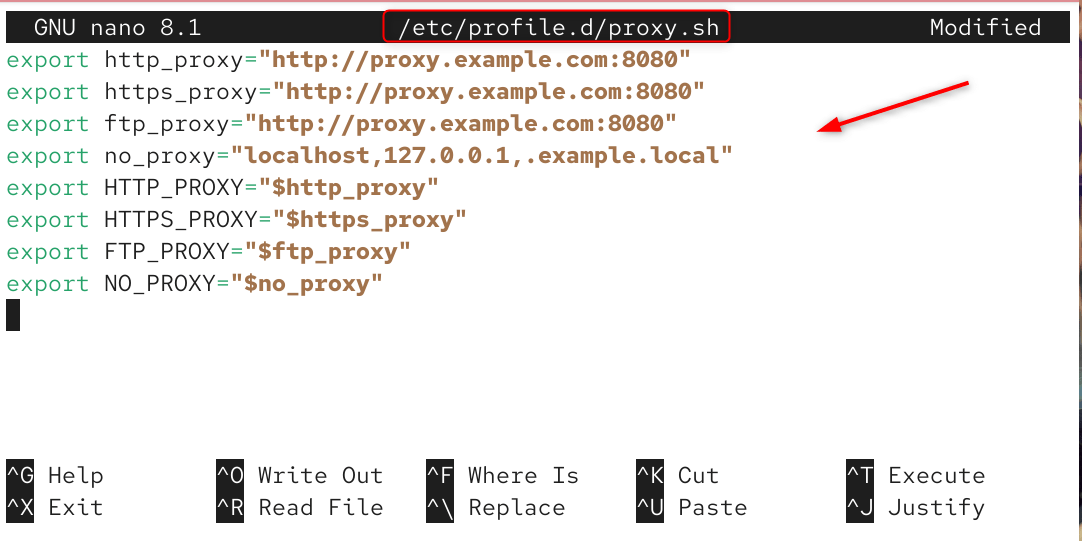
Explanation:
- The http_proxy or https_proxy specifies your proxy address.
- No_proxy specifies local domains and IPs that should bypass the proxy.
- Save this file in /etc/profile.d/ to apply the settings system-wide.
Apply the configuration immediately:
|
source /etc/profile.d/proxy.sh |
|---|

Step 2: Configure Proxy for DNF/YUM Package Manager
CentOS 10’s default package manager is DNF. The package downloads require explicit proxy configuration.
|
sudo nano /etc/dnf/dnf.conf |
|---|
Add the following to the [main] section:
|
proxy=http://proxy.example.com:8080 # proxy_username=yourusername # proxy_password=yourpassword |
|---|
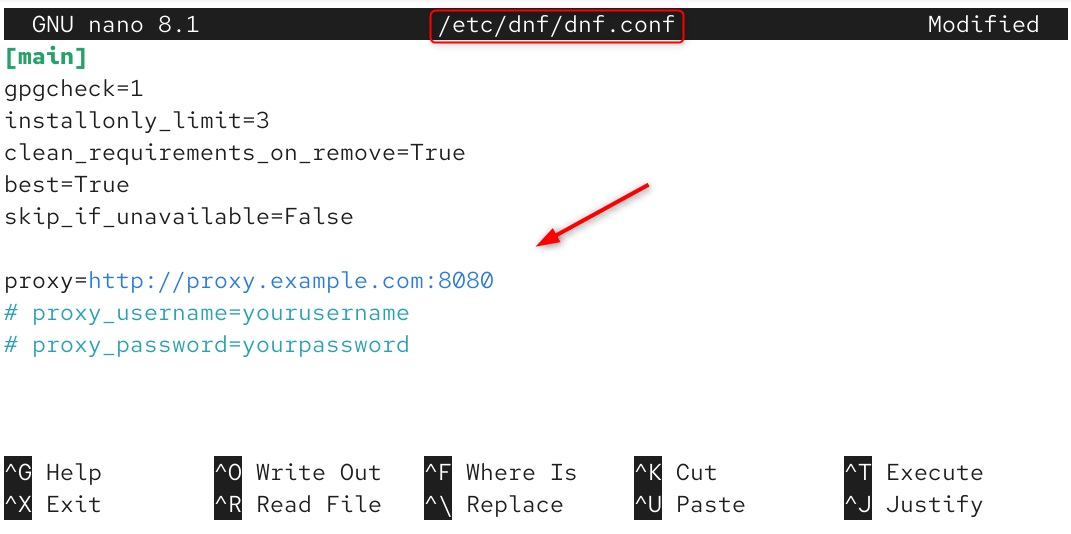
Explanation:
- All DNF operations, such as dnf installation or dnf updates, will use the proxy server.
- If you require authentication for your proxy, remove the comment and enter proxy_username/proxy_password.
Test it:
|
sudo dnf update |
|---|
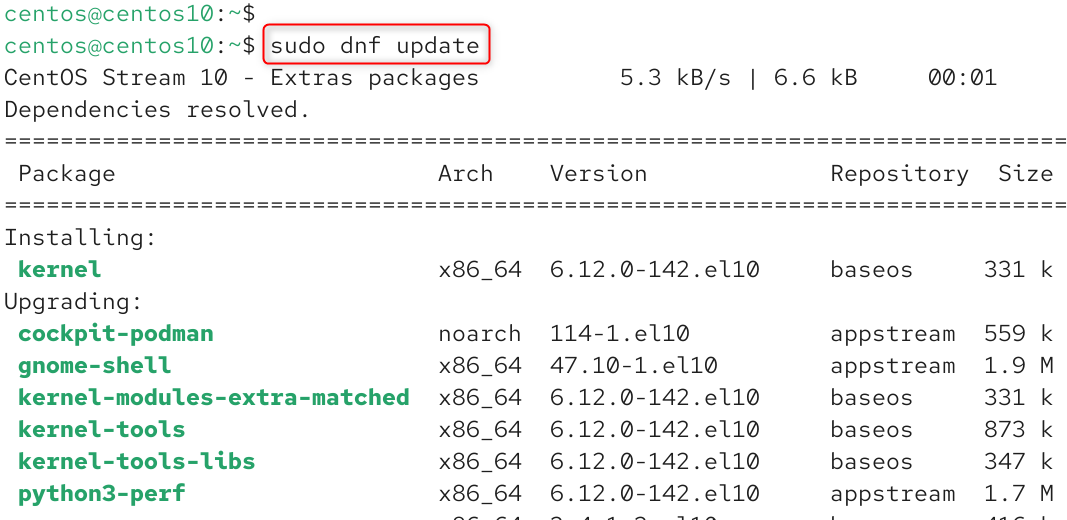
Your DNF proxy configuration is correct if the update succeeds.
Step 3: Configure Proxy for Wget and Curl
Some command-line utilities, such as wget or curl, use their configuration files.
For wget:
|
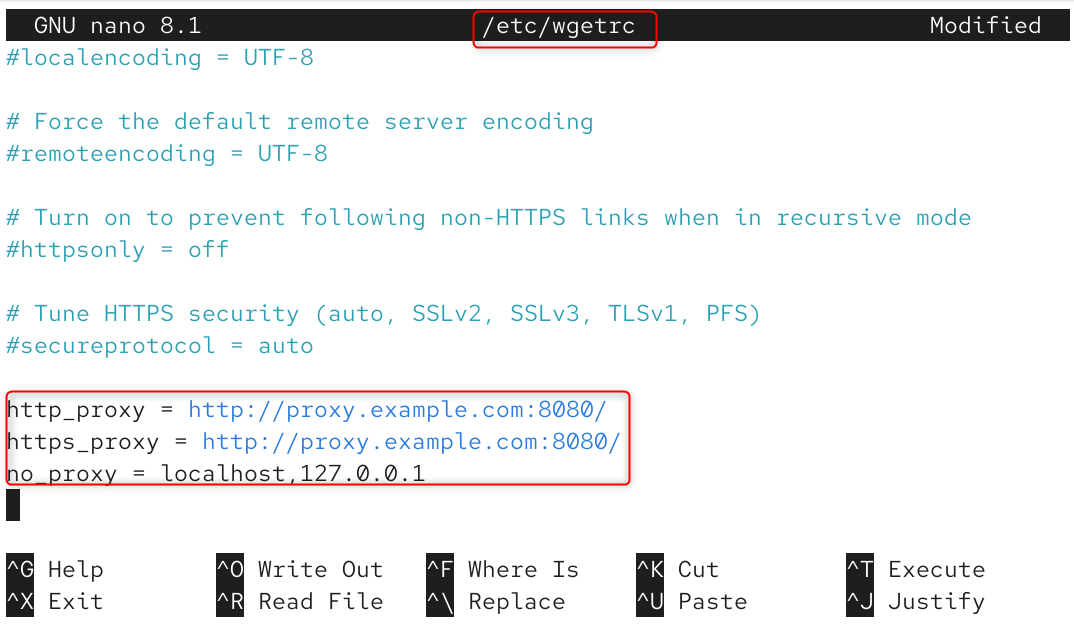
sudo nano /etc/wgetrc |
|---|
Add:
|
http_proxy = http://proxy.example.com:8080/ https_proxy = http://proxy.example.com:8080/ no_proxy = localhost,127.0.0.1 |
|---|
For curl:
You can specify the variables directly or use environment variables.
|
curl -x http://proxy.example.com:8080 https://example.com |
|---|
Explanation:
The proxy settings will ensure that your commands connect to URLs through the proxy instead of directly.
Step 4: Configure Proxy for Systemd Services (Optional)
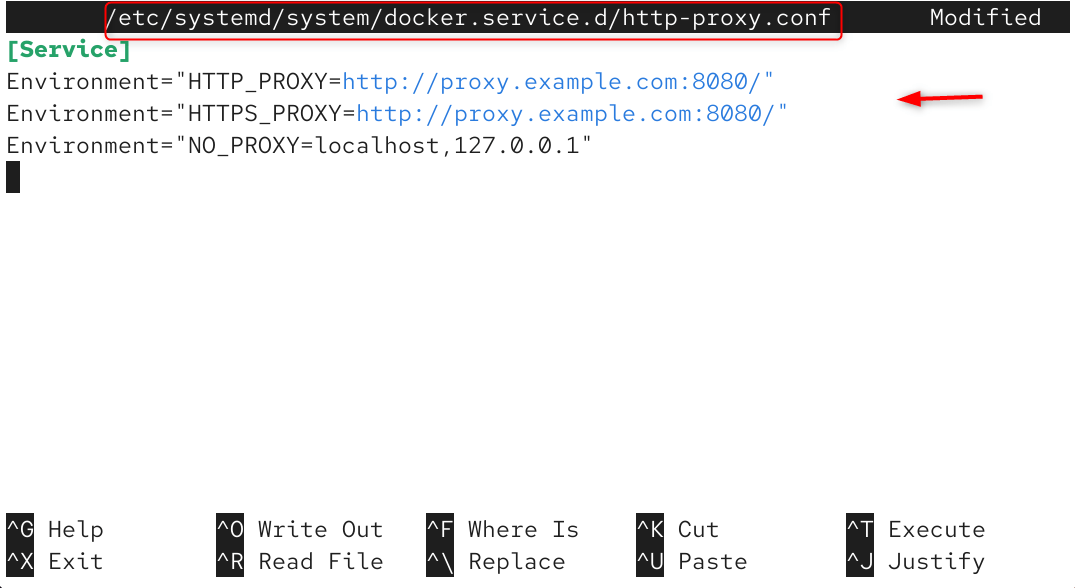
Create a configuration file to allow services managed by Systemd (such as Docker, Nginx, or others) to use the proxy.
Example for Docker:
|
sudo mkdir -p /etc/systemd/system/docker.service.d sudo nano /etc/systemd/system/docker.service.d/http-proxy.conf |
|---|

Add:
|
[Service] Environment=”HTTP_PROXY=http://proxy.example.com:8080/” Environment=”HTTPS_PROXY=http://proxy.example.com:8080/” Environment=”NO_PROXY=localhost,127.0.0.1″ |
|---|
Apply the changes:
|
sudo systemctl daemon-reexec sudo systemctl daemon-reload sudo systemctl restart docker |
|---|
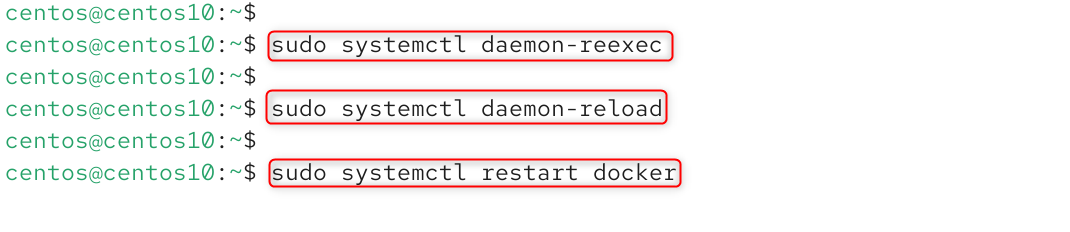
Explanation:
Systemd overrides make sure background services inherit proxy values at startup.
Step 5: Bypass Proxy for Local Networks
Local traffic (like localhost and internal domains) may not be routed through the proxy.
Add exceptions to no_proxy:
|
export no_proxy=”localhost,127.0.0.1,.internaldomain.com” |
|---|

Explanation:
It improves speed and reliability by preventing unnecessary proxy routing of local or intranet addresses.
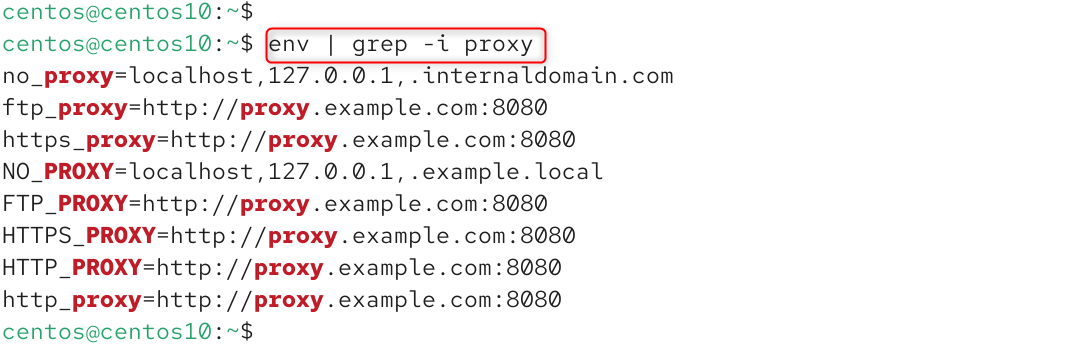
Step 6: Verify Proxy Configuration
The following will allow you to verify the proxy configuration.
Check environment variables:
|
env | grep -i proxy |
|---|
Test internet access:
|
curl -I https://www.google.com |
|---|
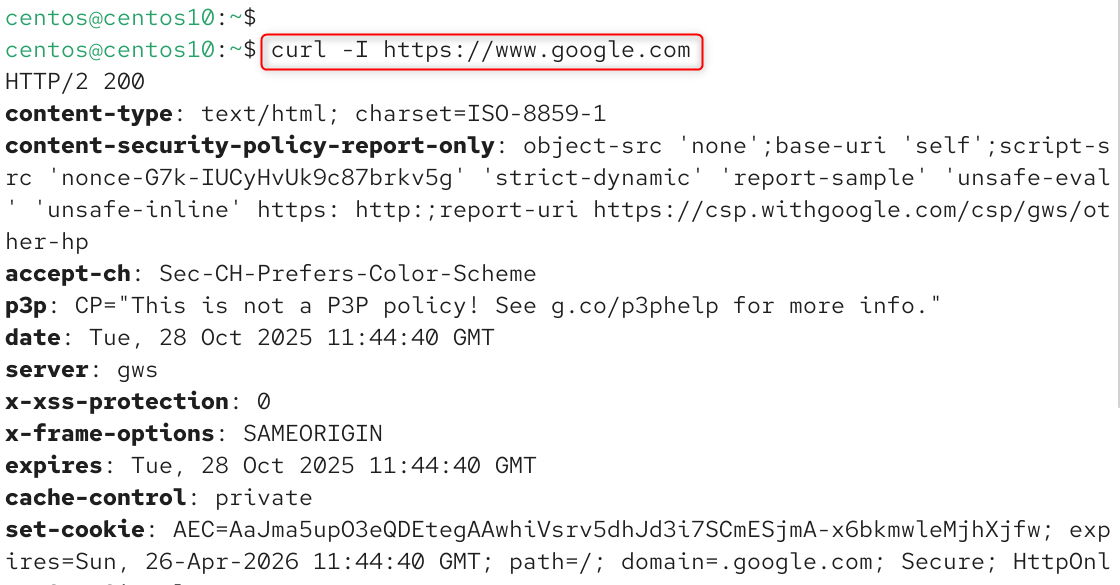
Explanation:
If you get a valid HTTP reply (like 200 OK), then your proxy has been configured correctly.
Troubleshooting Tips
- If you receive Error 40 (Proxy authentication required), please check your username and password in the proxy URL.
- Timeouts and No Connection: Check that your proxy IP address and port number are correct and that the firewall is not blocking the connection.
- Check for typos in /etc/dnf/dnf.conf if DNF does not work.
- If the changes do not apply, re-source your environment or restart the service by using systemctl start.
Conclusion
To configure proxy settings on CentOS 10, open the terminal and create a new file using sudo nano /etc/profile.d/proxy.sh, then add your proxy details such as export http_proxy=”http://proxy.example.com:8080″ and export https_proxy=”http://proxy.example.com:8080″, including no_proxy for local addresses. Save the file and apply the changes with source /etc/profile.d/proxy.sh.
Next, edit the DNF configuration file using sudo vi /etc/dnf/dnf.conf and add proxy=http://proxy.example.com:8080 under the [main] section to enable package manager access through the proxy. Finally, test the configuration by running curl -I https://www.google.com or sudo dnf update to verify that your CentOS 10 system is successfully connected through the configured proxy.


Leave feedback about this