
Managing user accounts is an important part of Linux administration. Knowing how to list users in CentOS 10 will help you monitor activity and troubleshoot effectively. CentOS provides multiple commands for retrieving this information, whether you are looking to view human accounts, system users, or network users (such as those in LDAP).
This guide will explore the different ways to list users in CentOS 10. We’ll cover cat, getent, awk, compgen, and many more.
How to List All Users on CentOS 10?
Listing users in CentOS is a fundamental admin task that you can use for audits and scripts. You can also list users to help with troubleshooting, migrations, or other administrative tasks. CentOS 10 has local users in /etc/passwd and remote users via LDAP/NSS/SSSD. Use getent to ensure reliable results for local and network accounts. awk/cut can be used for quick filters. Choose the method that best suits your environment and provides the required information.
Each method is explained step by step so that you can quickly identify which approach works best for your environment.
1) Read /etc/passwd
/etc/passwd contains one line per local account with fields separated by. This displays all local users, including system accounts (daemons, postfix, etc.). Use this when you only care about local users and the machine doesn’t use network authentication.
|
cat /etc/passwd |
|---|

To get only usernames, use the cut command as below:
|
cut -d: -f1 /etc/passwd |
|---|

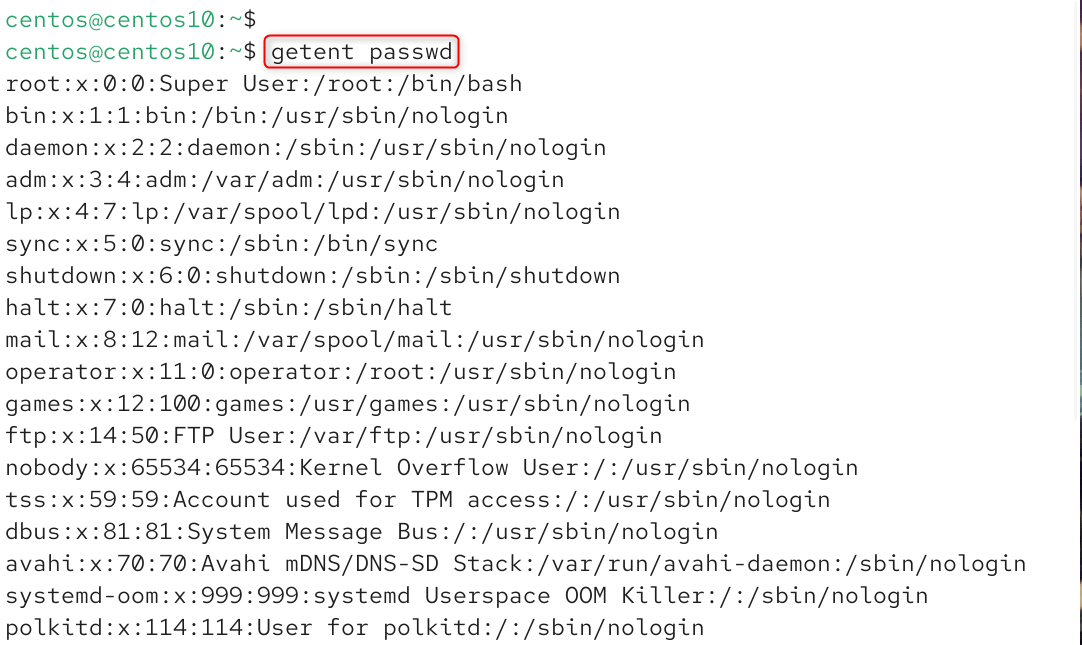
2) Use getent passwd
getent queries the Name Service Switch and returns entries configured in /etc/nsswitch.conf. These sources include local files, LDAP, or NIS. This is a universally recommended way to list local and remote users because it does so consistently.
|
getent passwd |
|---|
To get usernames only, use the cut command:
|
getent passwd | cut -d: -f1 |
|---|

3) Use awk to list just “regular” (human) accounts (UID ≥ 1000)
On CentOS, system accounts have UIDs below 1000 while human accounts begin at 1000 (this can be controlled in /etc/login.defs by UID_MIN). This will print all usernames with a UID of 1000 or more, which are usually real users.
|
awk -F: ‘$3 >= 1000 {print $1}’ /etc/passwd |
|---|

If you want to include network accounts as well:
|
getent passwd | awk -F: ‘$3 >= 1000 {print $1}’ |
|---|

4) List interactive (login-capable) users
This filters out accounts with shells of /usr/sbin/nologin or /bin/false. These shells are often used to block interactive logins. Combining with UID checks will show only human accounts.
|
awk -F: ‘($7 !~ /(nologin|false|\/sbin\/nologin|\/usr\/sbin\/nologin)/) && ($3 >= 1000) {print $1}’ /etc/passwd |
|---|

5) Use the Bash builtin compgen -u
compgen -u displays all usernames that are known to the shell. (It queries NSS). This is a quick way to check usernames, but the output (only usernames) is not adorned. It works with interactive shells and scripts.
|
compgen -u |
|---|

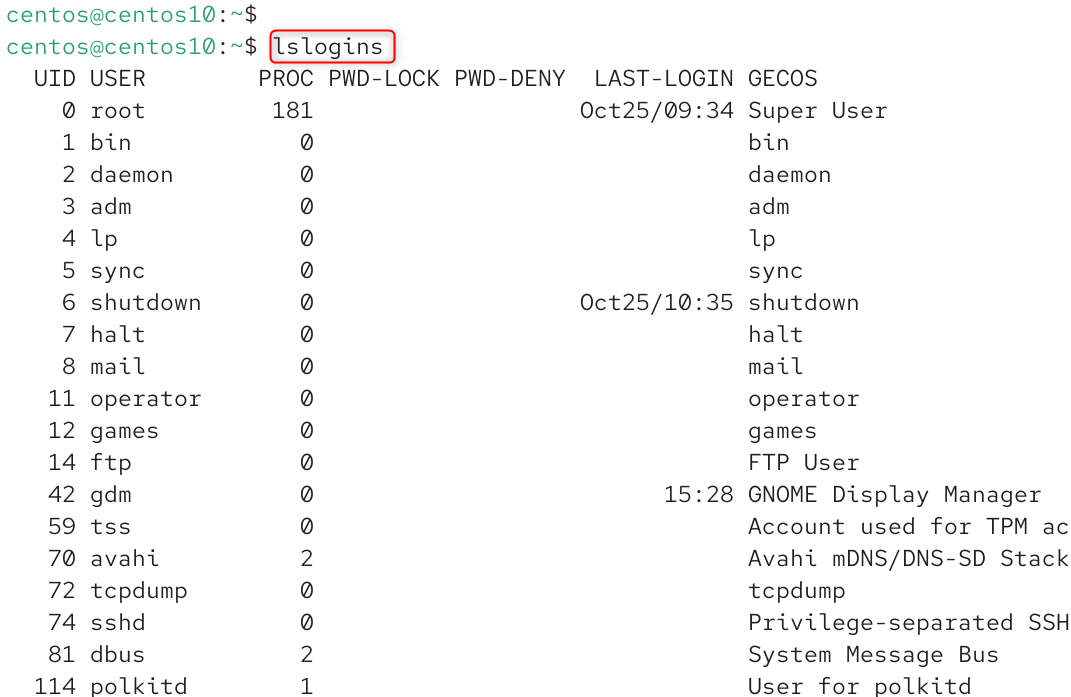
6) Use lslogins to get richer account info
lslogins prints a table that includes username, UID, and last login. It also shows the home directory, shell, and other information. This is a great way to get a comprehensive overview. Only for compact usernames:
|
lslogins |
|---|
If you want to get information about the root and local username, use the below:
|
lslogins -u |
|---|

7) Count users
The total number of users (local and network) is shown. To count regular users:
|
getent passwd | wc -l |
|---|

8) List currently logged-in users
They only show the current session, not all of your accounts.
|
who |
|---|

Or
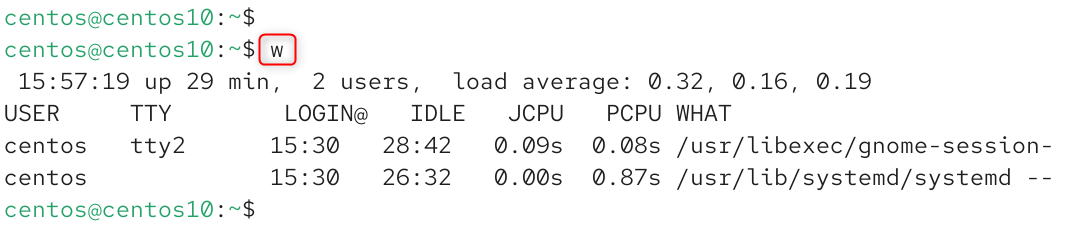
You can use them to check who is currently logged in (especially useful during maintenance).
|
w |
|---|
9) Show locked accounts
Search for accounts that have !, *, or !. This indicates that the account is locked or there is no password. Root must be able to read /etc/shadow.
|
sudo awk -F: ‘($2 ~ /^!|^\*|^!!/) {print $1}’ /etc/shadow |
|---|

10) Show accounts allowed to use sudo
It will show you the members of your sudo group or wheel group, depending on which distro you use. This is useful to see users with admin rights.
|
getent group sudo wheel | cut -d: -f4 |
|---|

11) GUI / Control Panel methods
You can find local accounts on the Users page of a control panel. These are great for point-and-click admin.

Best practices
- Getent is better than reading /etc/passwd, if you’re using LDAP/SSSD/NIS. It returns the actual resolutions of your system.
- Check UID_MIN at /etc/login.defs for the threshold of system users vs. regular users (CentOS uses 1000).
- The shell field (/sbin/nologin or /bin/false) shows how many services disable log-ins. Filter by shell if you want only human accounts.
- Root privileges are required to read /etc/shadow and make accurate checks on locked accounts.
- Tip for scripting: Use getent passwd when you want to be able to port your scripts across different auth backends.
Conclusion
To list all users on CentOS 10, you can use several methods depending on your needs. The simplest way is to view the local user database with cat /etc/passwd, which lists all system and user accounts, or use cut -d: -f1 /etc/passwd to display only usernames. For a more comprehensive list, including network or LDAP users, use getent passwd.
To display only regular human users (those with UID ≥ 1000), run awk -F: ‘$3 >= 1000 {print $1}’ /etc/passwd. You can also use compgen -u for a quick list of all usernames or lslogins to see detailed account information. Each of these commands helps you view different user categories, from system accounts to active login users, depending on what you want to check.


Leave feedback about this