Running your own mail server gives you full control over delivery, storage, and privacy instead of handing every message to a third-party inbox provider. This guide walks through building a working mail server on Rocky Linux 10 using Postfix to handle sending and receiving mail, and Dovecot to handle IMAP so people can actually read it from a mail client. It also covers the DNS records, TLS setup, and firewall rules that separate a mail server that actually delivers mail from one that quietly lands in everyone’s spam folder.
Postfix ships directly in Rocky Linux 10’s base repository, so unlike Docker or Redis, there is no third-party repo to add here. That part is genuinely simple. Getting mail to actually arrive reliably is the part that takes real care.
Table of Content
- Why You Need to Install and Configure a Mail Server on Rocky Linux 10
- Install and Configure a Mail Server on Rocky Linux 10
- Troubleshooting Common Mail Server Issues
- Conclusion
- Frequently Asked Questions
Why You Need to Install and Configure a Mail Server on Rocky Linux 10
Two services work together to form the core of this setup. Postfix is the mail transfer agent, meaning it is the piece that accepts mail from the internet, checks where it should go, and hands outgoing mail off to the next server in line. Dovecot handles IMAP, which is what lets a mail client like Thunderbird or Outlook actually connect and read what landed in someone’s inbox. Postfix also leans on Dovecot for authentication, so a user only has to log in once and both services trust that result.
This guide uses standard Linux system accounts for mailboxes to keep things approachable if you are setting this up for the first time. If you later need to support many domains or hundreds of mailboxes, a MariaDB-backed virtual user setup is the natural next step, and the configuration files here translate over cleanly once you get there.
Prerequisites and DNS Setup
Skipping DNS setup is the number one reason a freshly built mail server ends up in spam or fails to deliver at all. Handle this first.
You need a domain name with DNS access, and a static public IP address that ideally does not already carry a bad sending reputation from a previous tenant if you are on a rented server. Point an A record at your server for a subdomain such as mail.example.com, and then set an MX record for your domain pointing to that same hostname.
Set the system hostname to match before you install anything:
sudo hostnamectl set-hostname mail.example.com |
|---|


Check that reverse DNS, also called a PTR record, is set up correctly for your IP address through your hosting provider’s control panel. Many providers require a support ticket to set this, and a missing PTR record is one of the fastest ways to get flagged by receiving mail servers, regardless of how well configured Postfix itself is.
Install and Configure a Mail Server on Rocky Linux 10
Installing Postfix and Dovecot on Rocky Linux 10 is the easy part, since both come straight from the base repository with no extra configuration to add a third-party source.
What actually determines whether your mail server works in the real world is everything around it: correct DNS records, a clean PTR record, working TLS certificates, and SPF plus DKIM set up before you ever send a real message. Get those right from the start, and a self-hosted mail server on Rocky Linux 10 is a genuinely reliable way to run your own email infrastructure rather than something you will be fighting with every week.
Step 1: Install Postfix
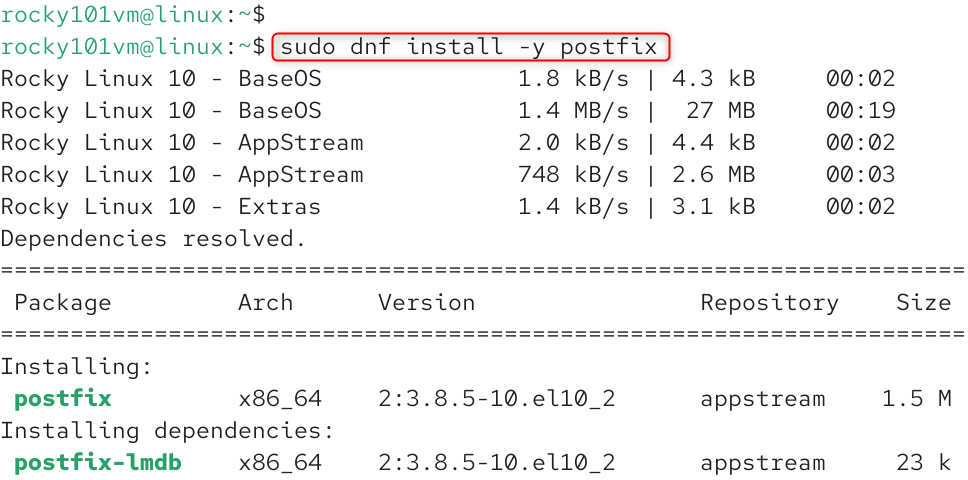
Rocky Linux 10 includes Postfix in its base repository, so this is a single command:
sudo dnf install -y postfix |
|---|

Start and enable it:
sudo systemctl enable –now postfix |
|---|


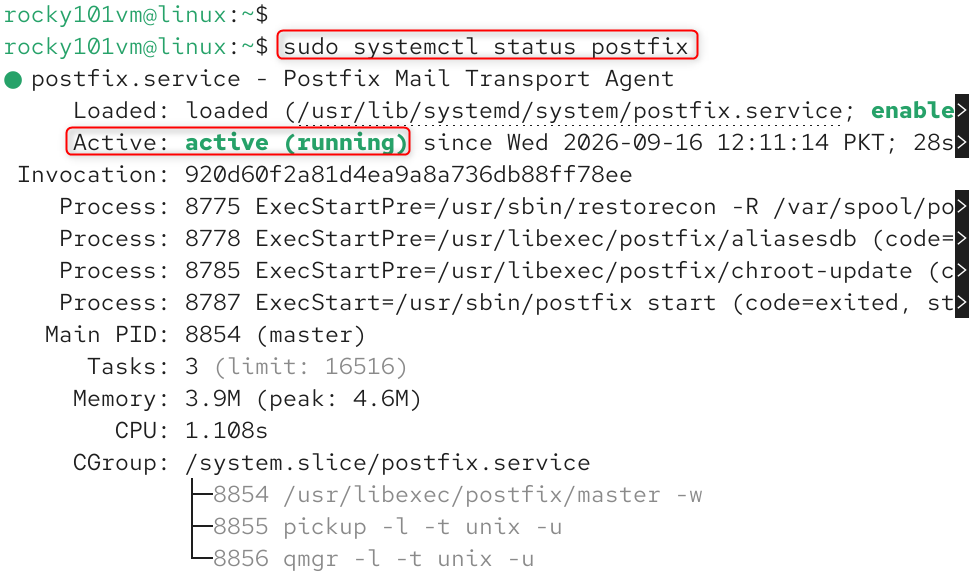
Confirm it is running:
sudo systemctl status postfix |
|---|

Step 2: Configure Basic Postfix Settings
Back up the stock configuration before editing anything:
sudo cp /etc/postfix/main.cf /etc/postfix/main.cf.bak |
|---|


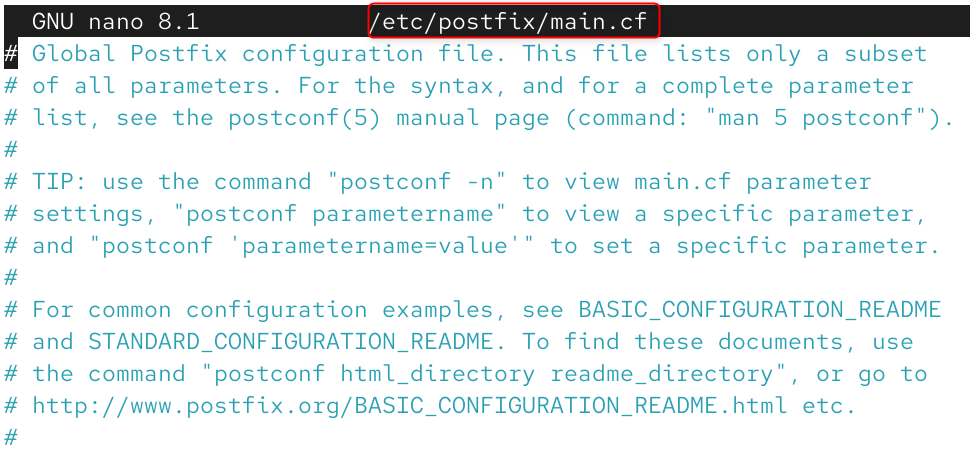
Open the file:
sudo nano /etc/postfix/main.cf |
|---|

Set these core values, adjusting the domain to your own:
myhostname = mail.example.com mydomain = example.com myorigin = $mydomain inet_interfaces = all mydestination = $myhostname, localhost.$mydomain, localhost, $mydomain mynetworks = 127.0.0.0/8 |
|---|

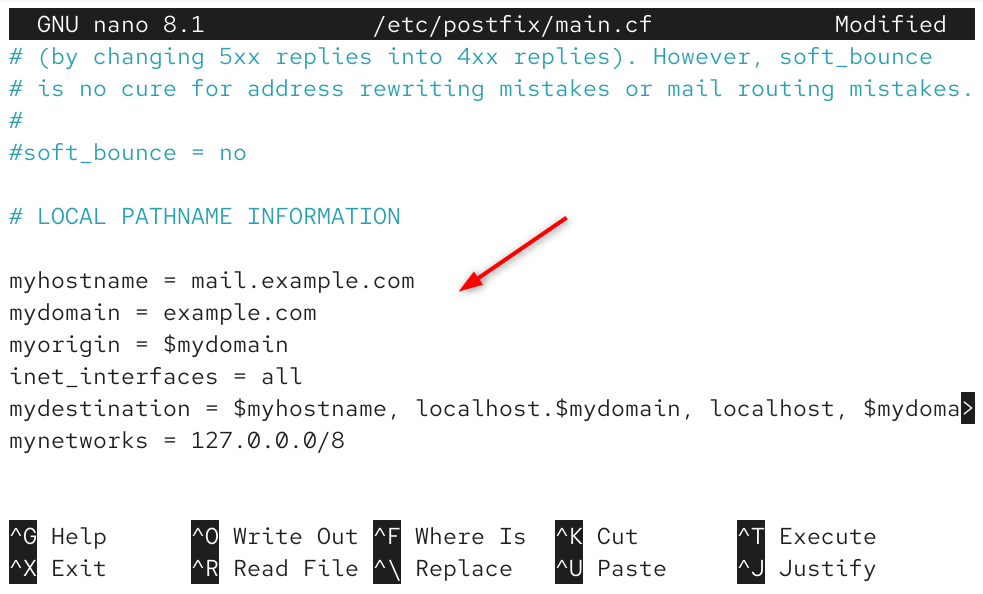
mynetworks controls which hosts can relay mail through your server without authenticating.
Keep this scoped tightly to localhost unless you have a specific reason to widen it, since an open relay is exactly what spammers look for.
Restart Postfix to apply the changes:
sudo systemctl restart postfix |
|---|


Step 3: Install Dovecot
Now, install Dovecot from the dnp package.
sudo dnf install -y dovecot |
|---|

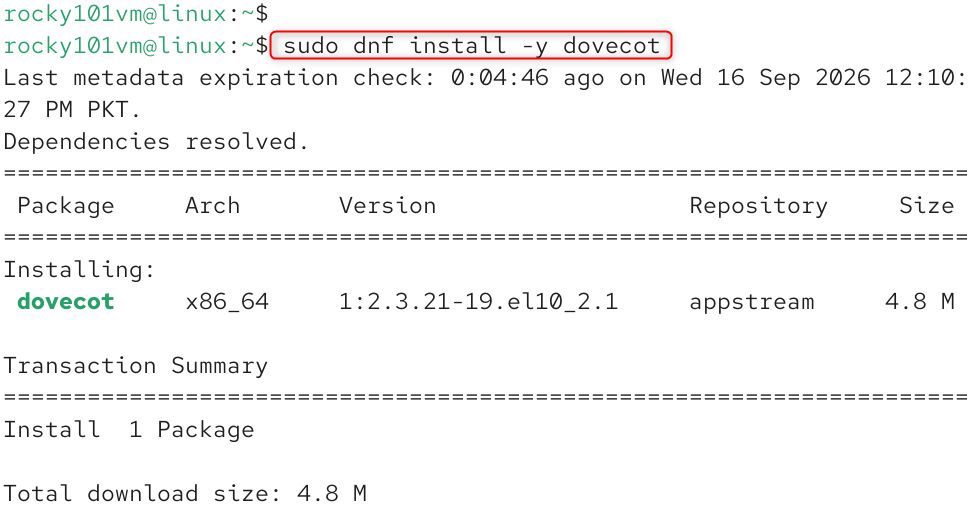
Start and enable it:
sudo systemctl enable –now dovecot |
|---|


Step 4: Configure Dovecot for IMAP
Open the mail location configuration:
sudo nano /etc/dovecot/conf.d/10-mail.conf |
|---|

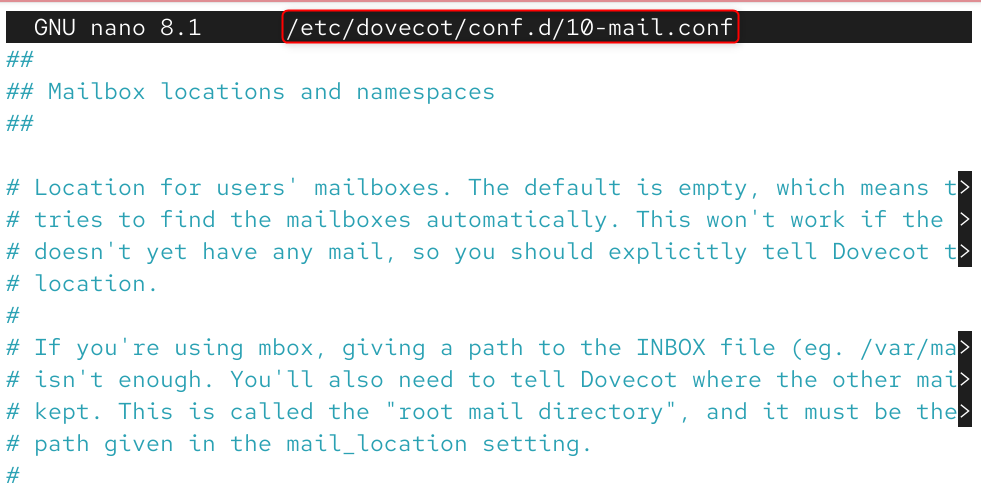
Set the mailbox format and location:
mail_location = maildir:~/Maildir |
|---|

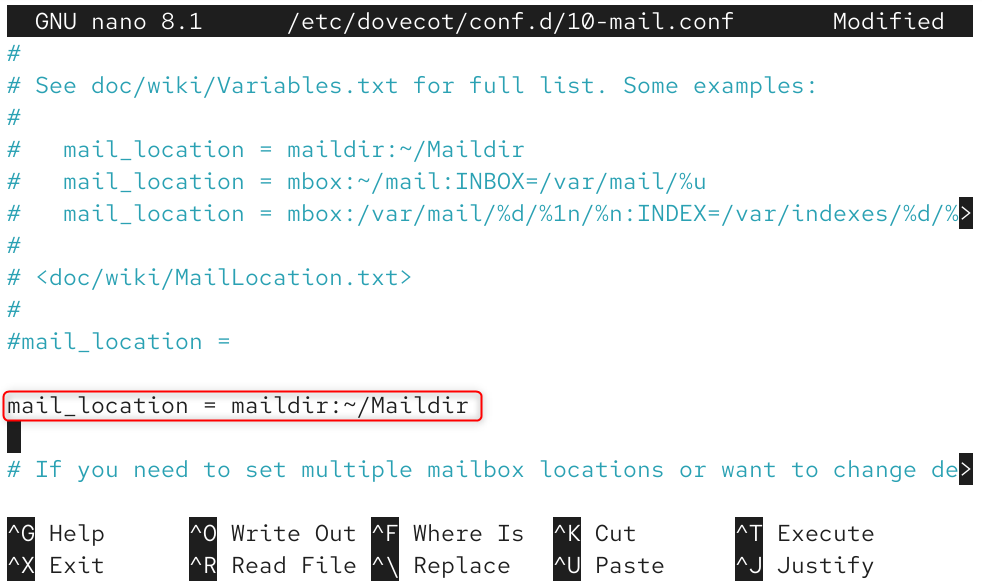
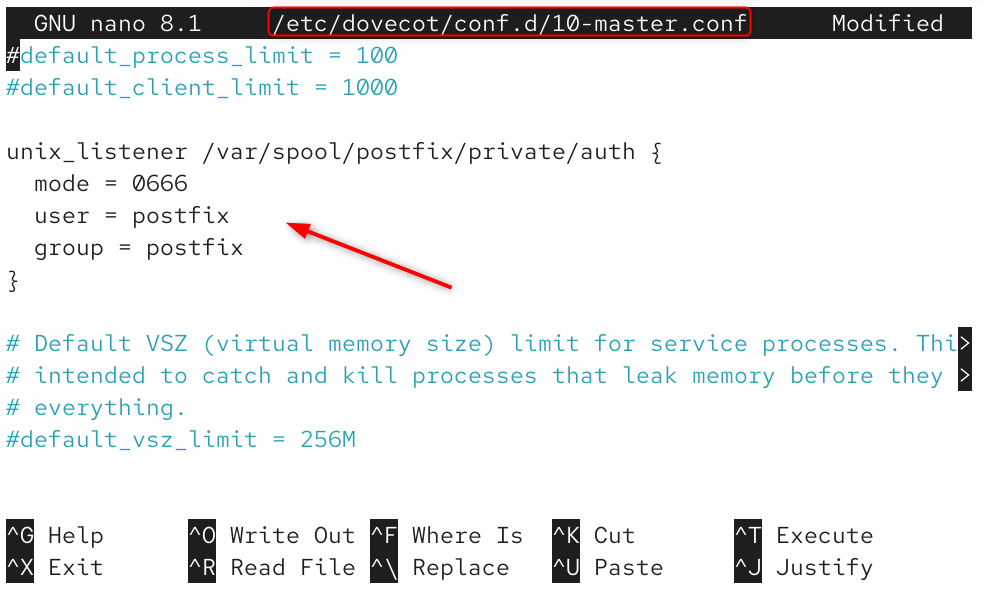
Open the master configuration to enable authentication for Postfix:
sudo nano /etc/dovecot/conf.d/10-master.conf |
|---|
Inside the service auth block, add a Unix socket Postfix can use:
unix_listener /var/spool/postfix/private/auth { mode = 0666 user = postfix group = postfix } |
|---|

Restart Dovecot:
sudo systemctl restart dovecot |
|---|


Step 5: Set Up TLS Encryption
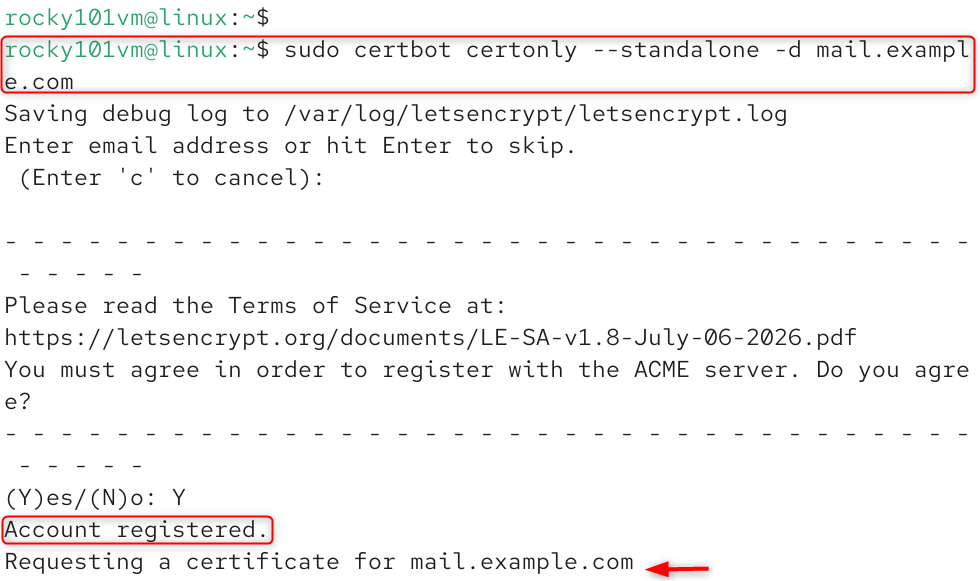
Sending mail over plain, unencrypted connections is not acceptable on a modern mail server, both for privacy and because many receiving servers now penalize or reject unencrypted delivery attempts. Use Let’s Encrypt for a free, trusted certificate:
sudo dnf install -y epel-release sudo dnf install -y certbot sudo certbot certonly –standalone -d mail.example.com |
|---|

Point Postfix at the new certificate:
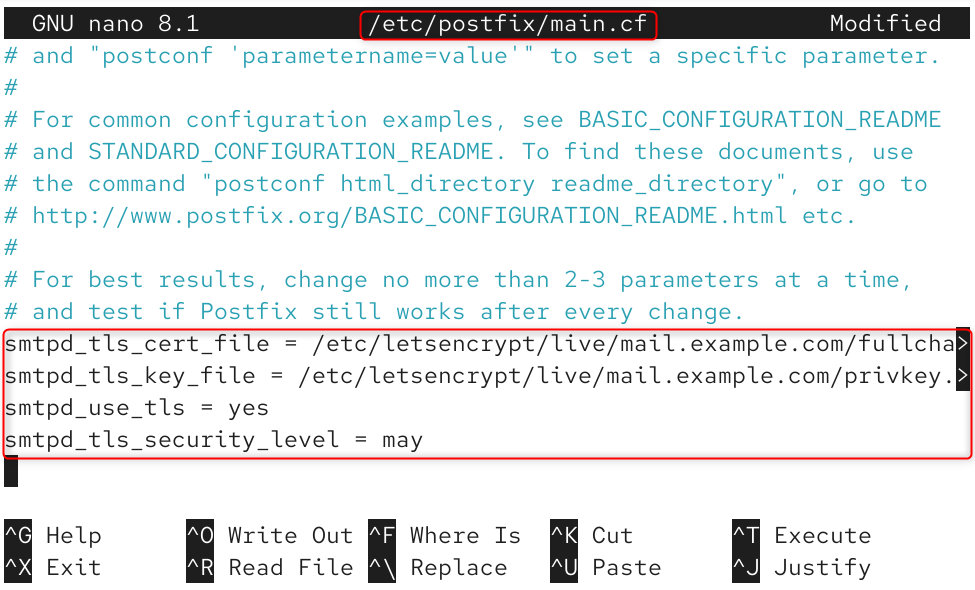
sudo nano /etc/postfix/main.cf |
|---|
Add or update these lines:
smtpd_tls_cert_file = /etc/letsencrypt/live/mail.example.com/fullchain.pem smtpd_tls_key_file = /etc/letsencrypt/live/mail.example.com/privkey.pem smtpd_use_tls = yes smtpd_tls_security_level = may |
|---|

Do the same for Dovecot in /etc/dovecot/conf.d/10-ssl.conf:
ssl = required ssl_cert = </etc/letsencrypt/live/mail.example.com/fullchain.pem ssl_key = </etc/letsencrypt/live/mail.example.com/privkey.pem |
|---|
Restart both services:
sudo systemctl restart postfix dovecot |
|---|


Certbot certificates expire every ninety days. Set up a renewal check through cron or systemd timers so this does not quietly break on you later.
Step 6: Configure the Firewall
Rocky Linux 10 runs firewalld by default. A mail server needs a specific set of ports open, and no more than that.
sudo firewall-cmd –permanent –add-service=smtp sudo firewall-cmd –permanent –add-port=587/tcp sudo firewall-cmd –permanent –add-port=993/tcp sudo firewall-cmd –reload |
|---|

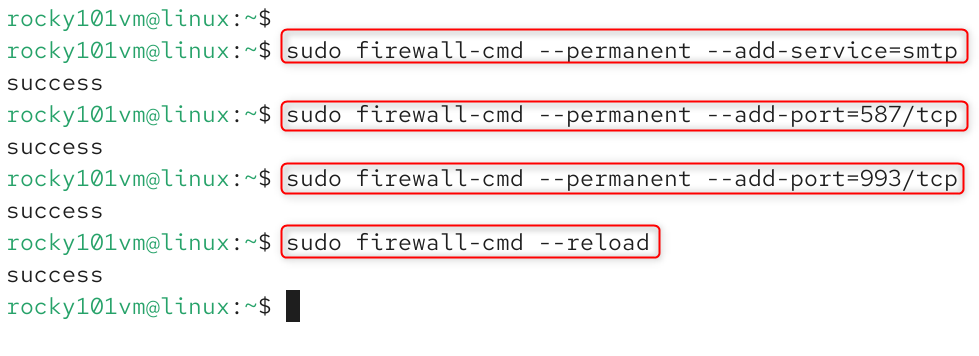
Port 25 handles standard SMTP delivery between servers, 587 is the submission port mail clients use to send outgoing mail, and 993 is IMAPS for secure mailbox access.
Step 7: Check SELinux Booleans
Rocky Linux 10 runs SELinux in enforcing mode by default, and mail services are one of the areas where this genuinely matters. If Postfix cannot write to the mail spool, check and set this boolean rather than disabling SELinux:
sudo setsebool -P allow_postfix_local_write_mail_spool on |
|---|


If you run into a permission-related failure that is not obvious, check what SELinux actually blocked before assuming it is a standard file permission issue:
sudo ausearch -m avc -ts recent |
|---|
Step 8: Add a Mail User and Test Sending
Create a system user to test with:
sudo useradd -m testuser sudo passwd testuser |
|---|

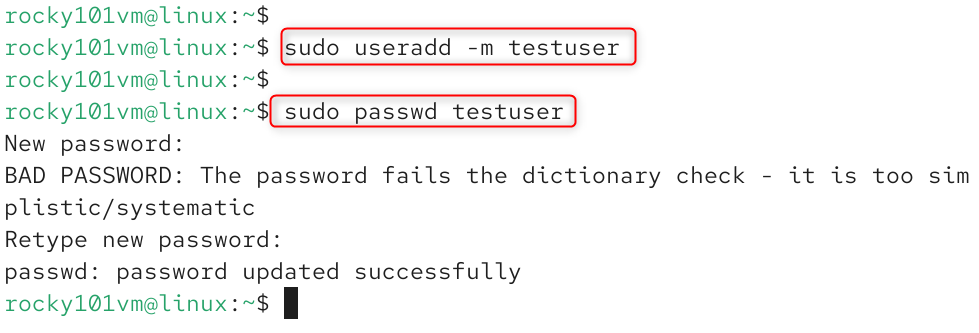
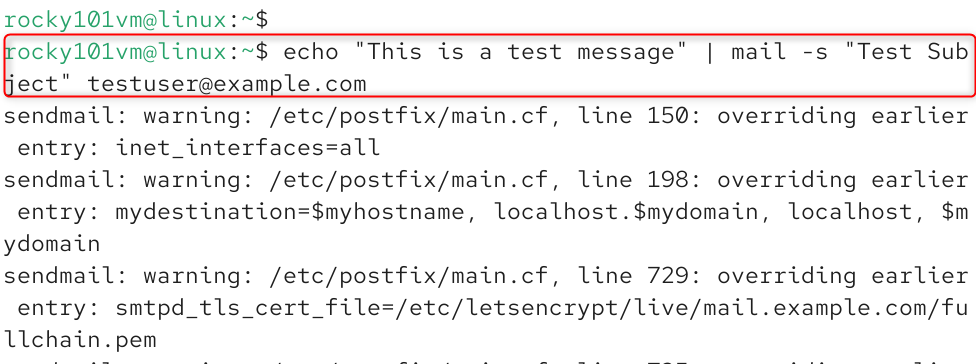
Send a test message from the command line:
echo “This is a test message” | mail -s “Test Subject” testuser@example.com |
|---|

Step 9: Add SPF and DKIM Records
Without these two DNS records, a large share of receiving mail servers will silently drop or spam-file your outgoing mail, regardless of how well Postfix itself is configured. SPF tells other servers which IPs are allowed to send mail for your domain. Add a TXT record at your DNS provider.
Troubleshooting Common Mail Server Issues
Mail is rejected with a relay access denied error. Check that mynetworks in main.cf actually includes the sending client’s IP, or set up proper SASL authentication for remote senders.
Outgoing mail lands in spam every time. This is almost always missing or incorrect SPF, DKIM, or PTR records rather than a Postfix configuration problem. Verify all three before touching anything else.
Mail gets stuck in the queue with a connection timeout. Check that the recipient domain’s MX records actually resolve, and confirm your hosting provider is not blocking outbound port 25, which some providers do by default to reduce spam from their network.
Dovecot authentication fails even though the password is correct. Double-check the Unix socket permissions set up in Step 5, since a misconfigured socket is the most common reason Postfix cannot hand authentication off to Dovecot correctly.
Conclusion
To install and configure a basic mail server on Rocky Linux 10, first set your server’s fully qualified domain name using hostnamectl set-hostname mail.example.com, install the Postfix Mail Transfer Agent via sudo dnf -y install postfix, and start the service with sudo systemctl enable –now postfix. Next, edit the primary configuration file at /etc/postfix/main.cf to define your myhostname, mydomain, mydestination, and set home_mailbox = Maildir/ for user mailboxes.
Finally, open the necessary firewall ports for SMTP communication by running sudo firewall-cmd –permanent –add-service=smtp followed by sudo firewall-cmd –reload, and optionally pair Postfix with Dovecot for IMAP retrieval and SASL authentication.
Frequently Asked Questions
1. Is Postfix included by default on Rocky Linux 10?
No, but it is available directly in the base repository, so a single dnf install postfix command is all it takes to get it. No third-party repository is needed the way it is for something like Docker on Rocky Linux.
2. Why does my outgoing mail keep landing in spam after setting up Postfix?
This is rarely a Postfix configuration issue and almost always missing DNS records. Check that SPF, DKIM, and a correct PTR record are all in place, since receiving mail servers rely heavily on these to judge whether a message is legitimate.
3. Do I need Dovecot if I only want to send mail, not receive it?
Not strictly. Postfix alone can send and relay mail. Dovecot becomes necessary once you want people to actually log into mailboxes and read mail through a client like Thunderbird or a webmail interface, and Postfix also relies on it for SASL authentication if you are allowing authenticated remote sending.
4. Why is port 25 blocked even though my firewall allows it?
Many hosting providers and cloud platforms block outbound port 25 by default at the network level to reduce spam originating from their infrastructure, separate from any firewall rule you configure on the server itself. You typically need to contact your provider directly to request it be opened.
5. Should I use system user accounts or a MariaDB virtual mailbox setup for a mail server?
System accounts, the approach used in this guide, are simpler and a reasonable starting point for a small number of mailboxes on a single domain. A MariaDB-backed virtual mailbox setup is worth the added complexity once you need to support multiple domains or a larger number of users than individual Linux accounts can reasonably manage.