Linux system iptables is an advanced utility firewall that helps a system admin to set up and control the rules of traffic over the network. Even though newer Linux distributions have replaced iptables with nftables, iptables are still popular because of their extensive documentation, administrator familiarity, and overall maturity.
This tutorial aims to show the steps of installing and configuring iptables on Debian 12 (Bookworm), starting from the installation all the way to executing the first set of rules.
Understanding iptables vs. nftables
Debian 12 provides a default firewall, nftables, that has already been configured and started. But don’t worry; having iptables installed alongside or instead of nftables is totally good, so it remains an option.
Key differences:
– nftables: Newer, more efficient framework with unified syntax
– iptables: A legacy framework with separate utilities for IPv4 (iptables), IPv6 (ip6tables), etc.
The features below attract many users to prefer iptables:
- Known as one of the most ancient forms of firewall management within Linux Kernel systems.
- Its very easy to find pre-written scripts that automate the processes done in iptables.
- It works with older firewall programs that do not support newer models.
How to Install iptable on Debian 12?
To get started, confirm the following:
- You have a Debian 12 machine.
- Either Root access or Sudo userboth will be able to give you administrative access.
- Should have the fundamental knowledge of the commands within the Operating System interface.
Step 1: Update Your System
Update of package sets and even upgrading some of the previously existing package components:
sudo apt update

This ensures you’re working with the latest versions of all software.
Step 2: Install iptables
While Debian 12 comes with nftables by default, iptables can be installed easily:
sudo apt install iptables -y
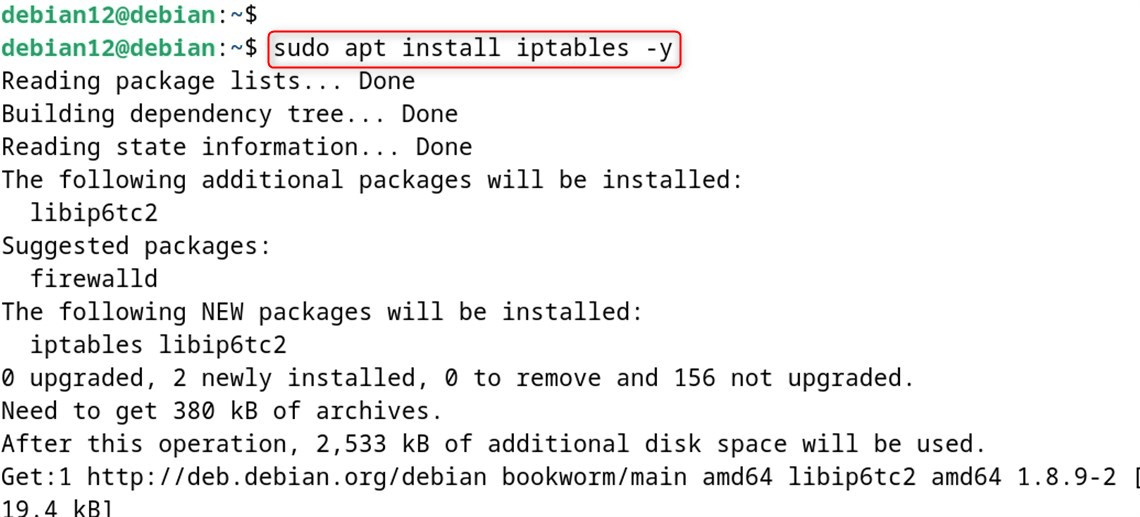
These specific commands, among others, stated above, will integrate the core manipulations that can only deal with IPv4. For users that also require support for IPv6, the commands remain the same.
sudo apt install ip6tables -y
Step 3: Verify the Installation
After installation, confirm whether iptables is installed or not:
sudo iptables --version

Step 4: Check Current Rules
Before making changes, it’s good practice to check your current firewall rules:
sudo iptables -L -v
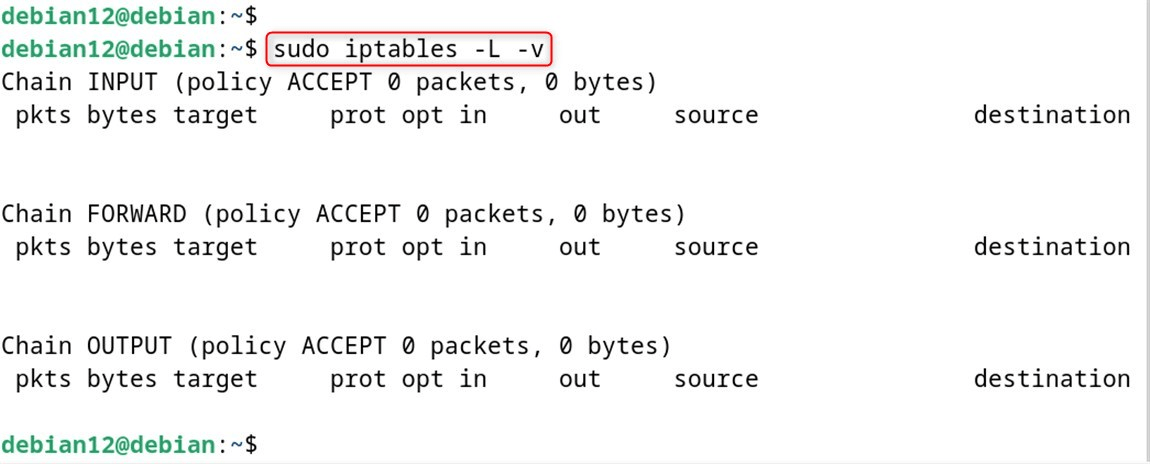
The command provides an adding layer listing layer rule to check all existing manipulations associated chains set value ACCEPT overcharge entered without pre or specify.
Step 5: Install Persistent iptables Rules Package
Automatically, stored iptables rules are lost when rebooting the system. In order to enable saving and restoring rules without manual effort:
sudo apt install iptables-persistent -y

Current rules in IPv4 and IPv6 will be asked for during saving on installation. You have the option of either saving them or skipping this step if rules are not configured yet:
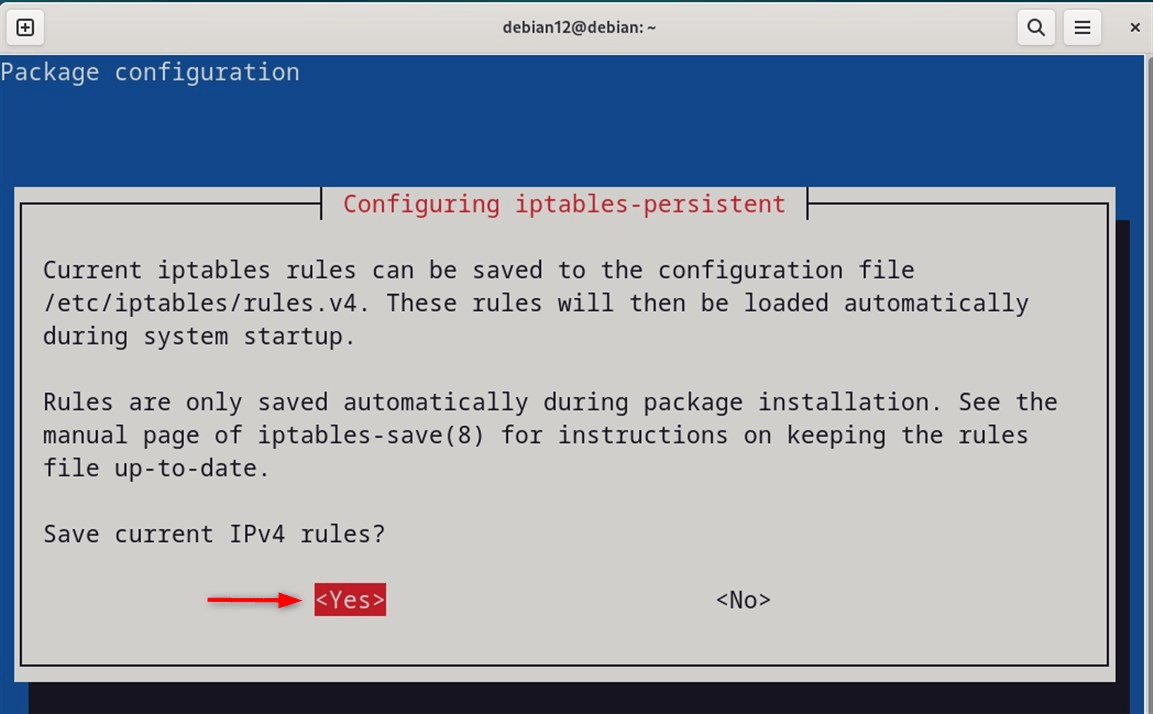
You can choose to save them or skip this step if you haven’t configured any rules yet:
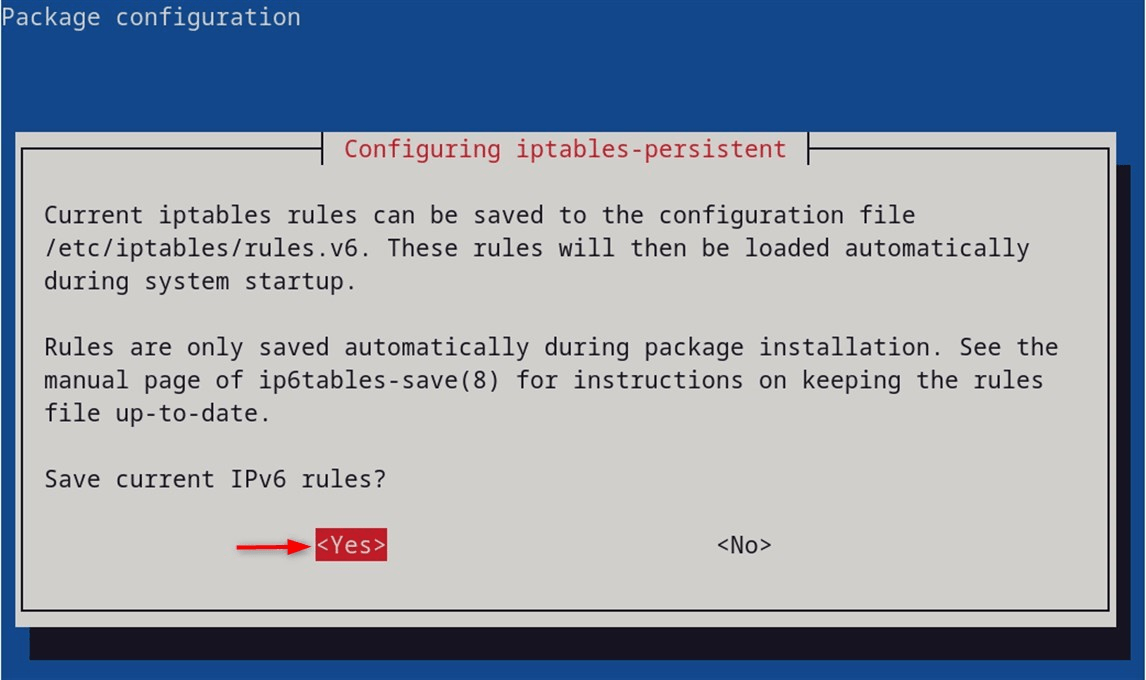
Step 6: Basic iptables Configuration
Set Basic Firewall Rules for iptables. Enable flushing all existing rules first:
sudo iptables -F

Let’s create a basic set of rules that adds the following:
- Adds allowance for established and preceded connections
- Adds permission for SSH, port 22
- Allows inter-communication on the Same System (loopback)
- Restricts all incoming connections and traffic.
Set default policies
sudo iptables -P INPUT DROP
sudo iptables -P FORWARD DROP
sudo iptables -P OUTPUT ACCEPT

Policies on circumvented rules are permissive (associated and allowed).
sudo iptables -A INPUT -m conntrack --ctstate ESTABLISHED,RELATED -j ACCEPT

The permissive state allows for Loopback:
sudo iptables -A INPUT -i lo -j ACCEPT

Let’s allow SSH:
sudo iptables -A INPUT -p tcp --dport 22 -j ACCEPT

Let’s allow HTTP and HTTPS:
sudo iptables -A INPUT -p tcp --dport 80 -j ACCEPT
sudo iptables -A INPUT -p tcp --dport 443 -j ACCEPT

For ICMP (ping) Permitting:
sudo iptables -A INPUT -p icmp -j ACCEPT

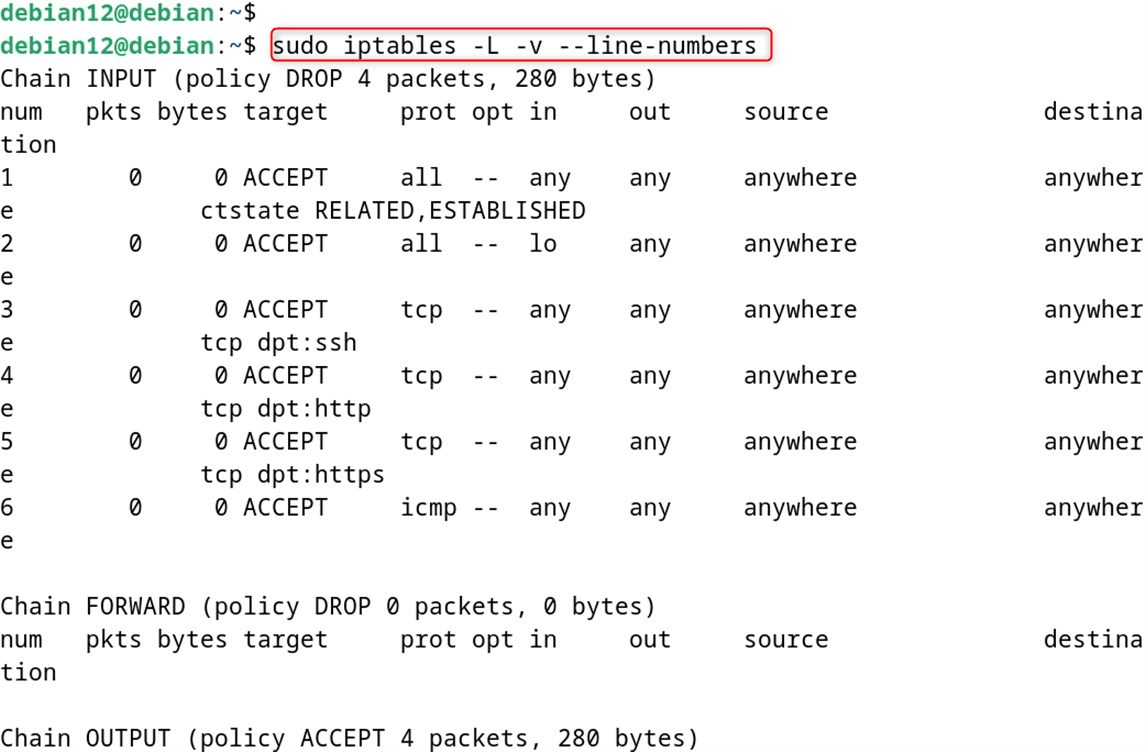
To view rules that have been edited:
sudo iptables -L -v --line-numbers
Step 7: Save Your Rules
In order to allow changes after every reboot:
sudo netfilter-persistent save

Or alternatively:
sudo iptables-save > /etc/iptables/rules.v4
sudo ip6tables-save > /etc/iptables/rules.v6
Step 8: Enable and Start the iptables Service
The system guarantees that iptables are on during boot when activated:
sudo systemctl enable netfilter-persistent
sudo systemctl start netfilter-persistent

Step 9: Firewall Testing
After configuring, start testing the firewall:
- Verify if SSH is operational (If pre-set for configuration)
- Attempt server ping
- Attempt any service that has been permitted.
- Make an attempt to connect to a blocked port to ensure that the firewall is configured.
Advanced iptables Configuration
Once you have the basics working, you might want to implement more advanced rules:
Rate Limiting SSH Connections
SSH connection attempts can be limited to one per five-second interval to block automated login attempts:
sudo iptables -A INPUT -p tcp --dport 22 -m conntrack --ctstate NEW -m recent --set
sudo iptables -A INPUT -p tcp --dport 22 -m conntrack --ctstate NEW -m recent --update --seconds 60 --hitcount 4 -j DROP
Port Forwarding
Change external port 8080 to internal port 80:
sudo iptables -t nat -A PREROUTING -p tcp --dport 8080 -j REDIRECT --to-port 80
Dropped Packet Logging
Enable logging for dropped packets:
sudo iptables -N LOGGING
sudo iptables -A INPUT -j LOGGING
sudo iptables -A LOGGING -m limit --limit 2/min -j LOG --log-prefix "IPTables-Dropped: " --log-level 4
sudo iptables -A LOGGING -j DROP
Listing Rules
For viewing all rules along with line numbers (handy for deletion):
sudo iptables -L -v --line-numbers
Deleting Rules
Delete a specific rule (replacing NUMBER with actual line number):
sudo iptables -D INPUT NUMBER
Inserting Rules
Insert a rule at a specific position:
sudo iptables -I INPUT 3 -p tcp --dport 3306 -j ACCEPT
Troubleshooting Common Issues
- If you make the mistake of blocking SSH, you might need console access to the device to manage and is needed to fix the rules.
- Make sure you have iptables-persistent installed and you’re saving the rules to prevent loss on reboot or restriction not persisting.
- Remember that using both may interfere with one another if you’re using them: conflicts with nftables.
- Ensure the right ports and protocols have been permitted and check if working services are, in fact, not working.
Conclusion
In this guide, we have covered how to Install Iptables on Debian 12 and perform basic to advanced configurations alongside rule persistent setups. Although Debian 12 has transitioned to using nftables as the default access control system, it is still comforting to know that iptables is an option for many sysadmins out there.
For environments where firewalls are crucial, documenting and enabling a controlled process to update such configurations. It may reduce the chances of unintended disruptions to other network services on the system.
Frequently Asked Questions
sudo apt update && sudo apt install iptables in the terminal. This installs the iptables package from the Debian repository. iptables --version. sudo iptables -L -v -n to list current rules with details and without resolving hostnames. sudo iptables -A INPUT -p tcp --dport 22 -j ACCEPT to allow incoming SSH connections. sudo iptables-save > /etc/iptables/rules.v4 after installing iptables-persistent. 




Leave feedback about this