
Apache is renowned for its performance and reliability, as well as its strong security features and its ability to integrate in conjunction with various software elements. Debian 12, being a long-term support version, provides an extremely secure and stable environment for running services such as Apache. Together, they provide an ideal foundation for providing web-based content to people around the world.
In light of its importance in this article, we will provide the steps to install Apache and set up a virtual host for Debian 12:
Table of Contents
Let’s start by installing.
How to Install Apache on Debian 12?
The reason for the installation of Apache for Debian 12 is to set up a reliable, efficient web server that is able to handle the hosting requirements of websites and web applications. For installing Apache for Debian 12, follow the steps below:
Step 1: Update Packages List
Before installing any software, ensuring that you update the list of system packages is always a good idea.
sudo apt update && sudo apt upgrade


Step 2: Install Apache
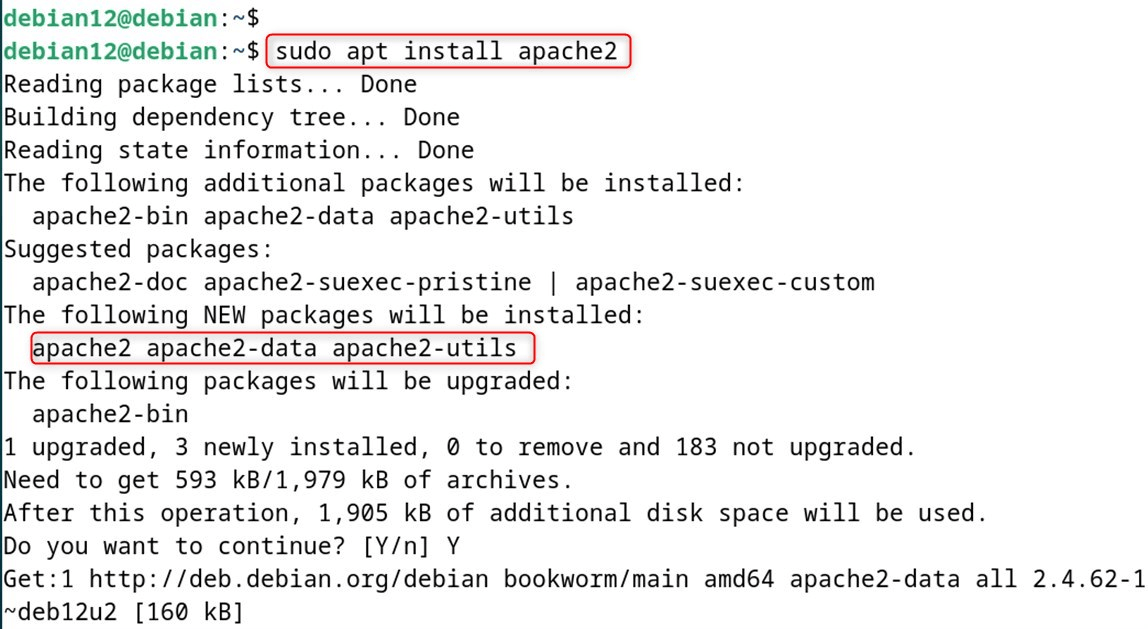
After the repositories are updated, install Apache through the command below:
sudo apt install apache2

Step 3: Adjust the Firewall
Secure now, secure the Apache server by altering the settings for firewalls. It lets traffic through ports 80 as well as 443 run:
sudo ufw enable # Activate Firewall
sudo ufw allow 'Apache Full' # Allow Traffic
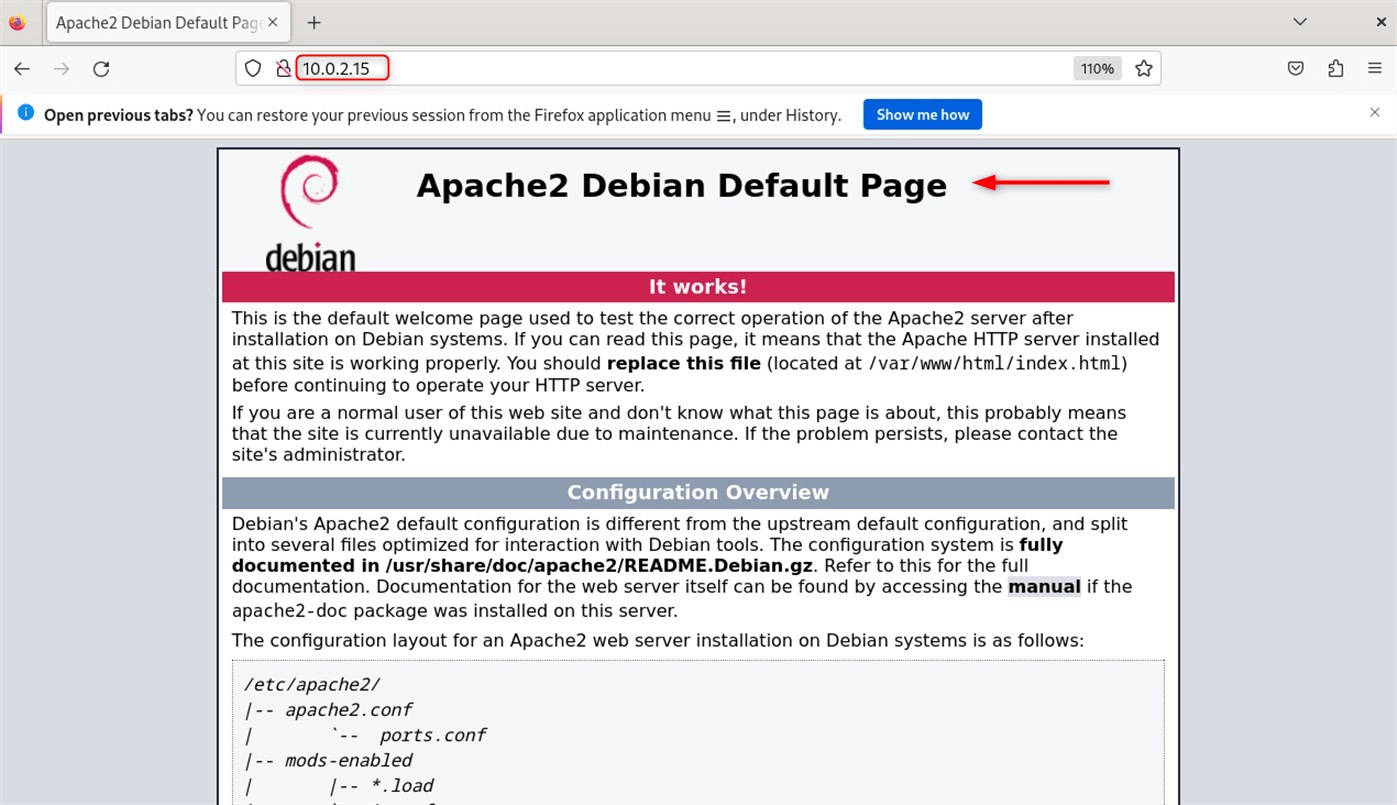
Step 4: Check Web Server
Now, authenticate that the standard Debian 12 Apache web page by navigating to the public IP address in the browser:

Note: Users can locate the server’s IP address on their working machine using the following command:
hostname -I


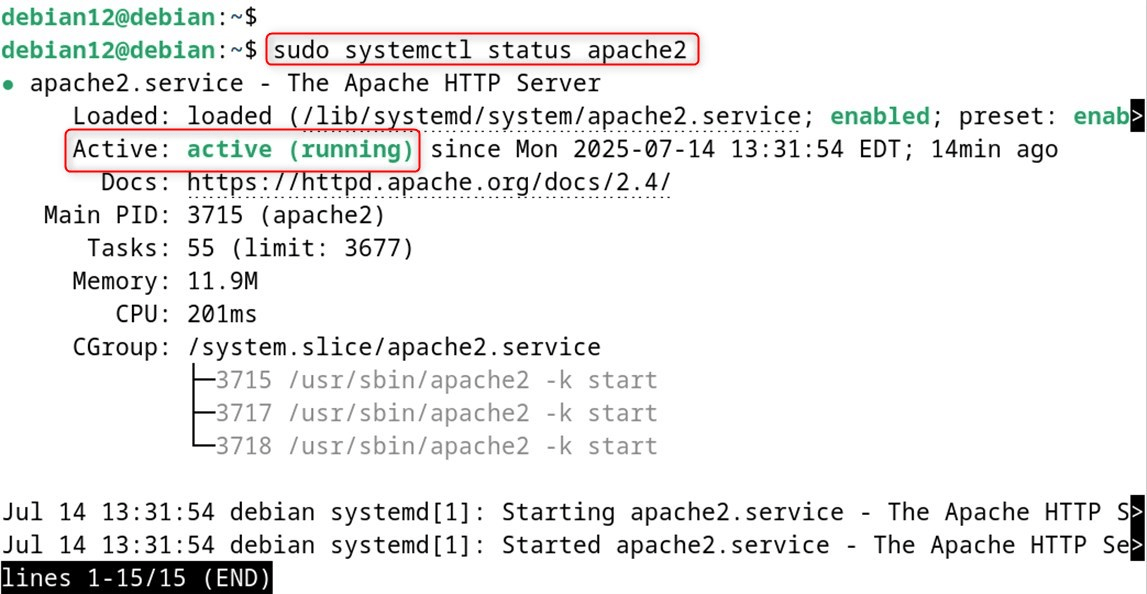
Step 5: Verify Apache Installation
Users may also examine the Apache services through the “systemctl” command with the “status” utility as below:
sudo systemctl status apache2

Optional: Configure Apache Services
To configure Apache, utilize the “systemctl” command:
sudo systemctl start apache2 # Start Apache
sudo systemctl enable apache2 # Enable Apache
All that is left from the installation. We’ll move on to the setup.
How to Configure Hosts Using Apache on Debian 12?
The process of setting in place Virtual Hosts using Apache is an essential task for server administrators as well as web developers who want to host several websites on one server. To create virtual hosts with Apache to run Debian 12, follow the steps below:
Step 1: Creating a Directory for Host Files
Create a folder for the site within “/var/www/” and give the permissions. Let’s make the “debian12.com” directory as below:
sudo mkdir /var/www/debian12.com


Be sure to browse via “/var/www/html” to find the default index.html file. Replace or alter it using your website’s files.
Step 2: Assign Ownership of the Directory
After that, permit ownership of the folder:
sudo chown -R $USER:$USER /var/www/debian12.com


Step 3: Create a Webpage
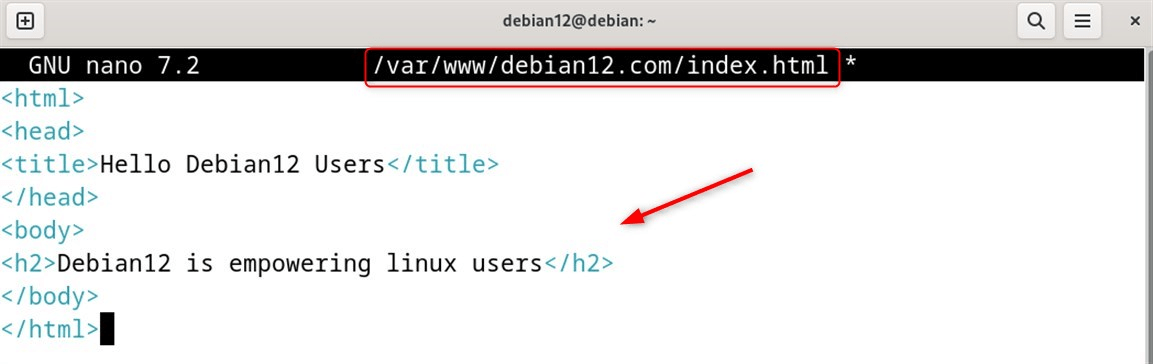
It is the right time to build the web page titled “index.html” under the above-created “debian12.com” directory:
sudo nano /var/www/debian12.com/index.html
Incorporate the following lines into this .html file. The user can also display web content based on their preferences or requirements:
<html>
<head>
<title>Hello Debian12 Users</title>
</head>
<body>
<h2>Debian12 is empowering linux users</h2>
</body>
</html>

Step 4: Create a Host File
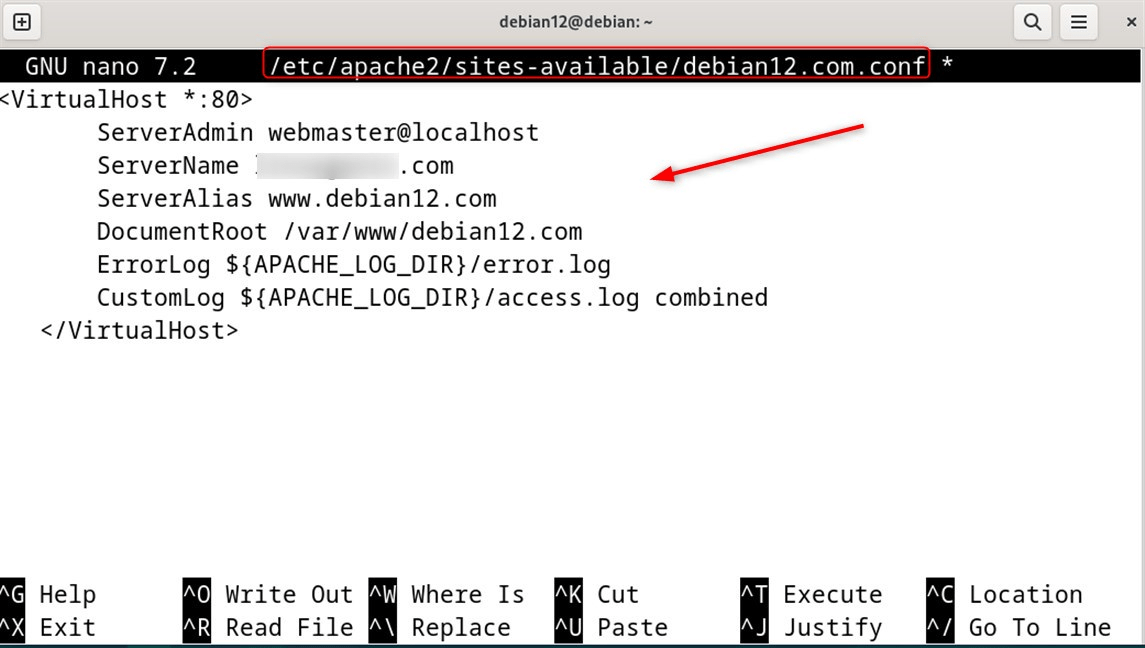
Now, edit the host file in “/etc/apache2/sites-available/your_domain.conf”. Our file is “debian12.com.conf”:
sudo nano /etc/apache2/sites-available/debian12.com.conf
Incorporate the following configuration into the file and replace “debian12.com” with your actual domain name:
<VirtualHost *:80>
ServerAdmin webmaster@localhost
ServerName debian12.com
ServerAlias www.debian12.com
DocumentRoot /var/www/debian12.com
ErrorLog ${APACHE_LOG_DIR}/error.log
CustomLog ${APACHE_LOG_DIR}/access.log combined
</VirtualHost>

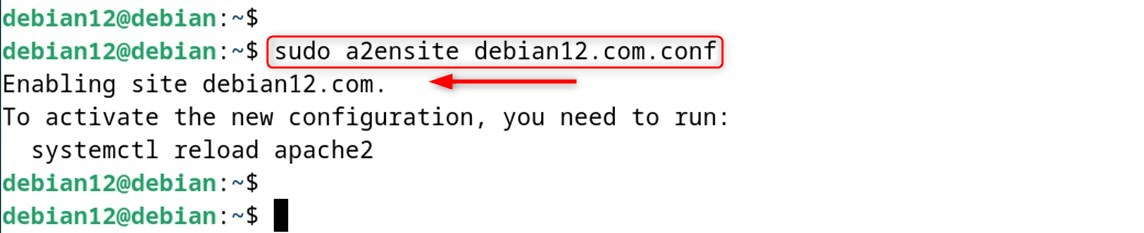
Step 5: Enable the Virtual Host Files
Finally, enable new sites by specifying the host file:
sudo a2ensite debian12.com.conf

You can also disallow the default site through the below command by specifying the name of the file configuration:
sudo a2dissite 000-default.conf


Step 6: Test Configuration Errors
Now verify for errors using the “apache2ctl” utility:
sudo apache2ctl configtest


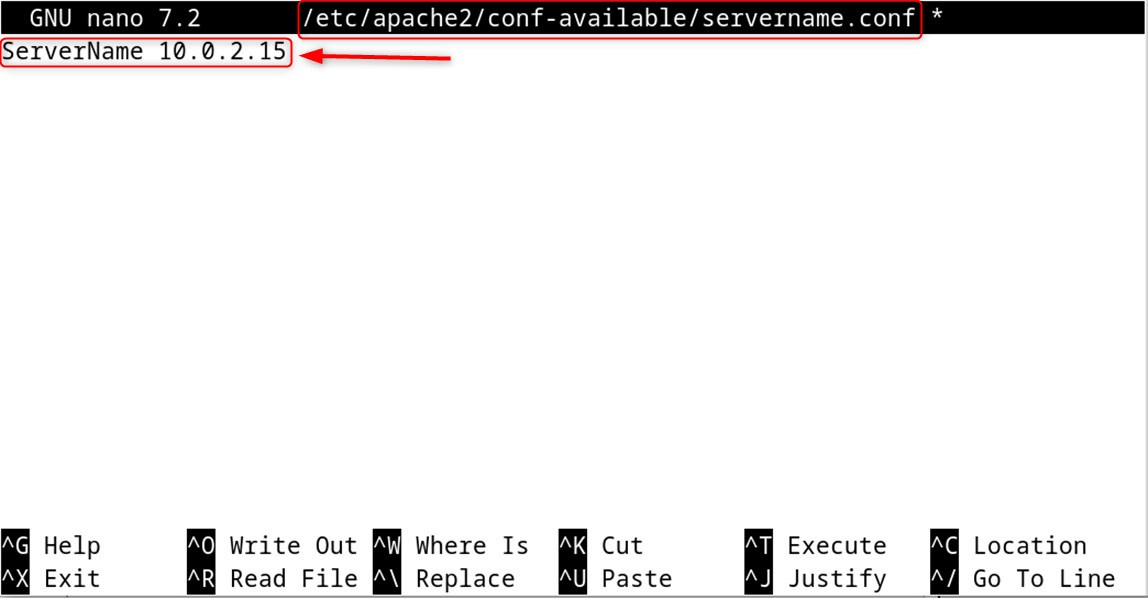
If they encounter any issues, include the server’s name along with the IP address inside the “servername.conf” configuration file, such as “10.0.2.15”:
sudo nano /etc/apache2/conf-available/servername.conf

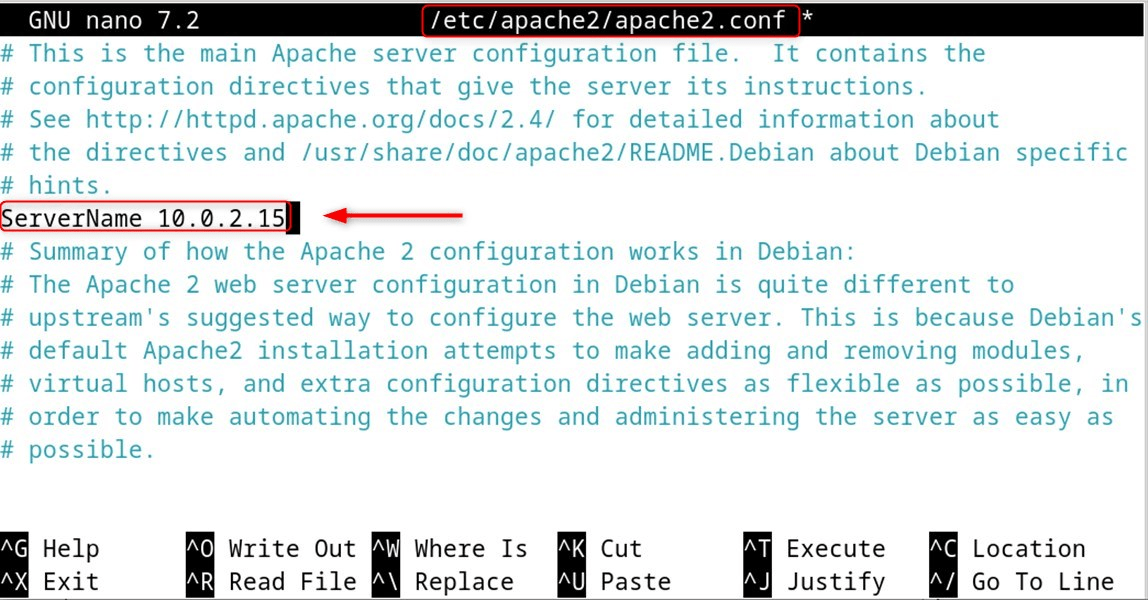
Now, input the server name in the “/etc/apache2/apache2.conf” file:

Step 7: Reload Apache
Users must restart their Apache service (for applying modifications) by using the systemctl command
sudo systemctl reload apache2


Step 8: Verification
Make sure that you have the name of your domain pointing at the IP address of your server in the web browser.


Optional: Secure Apache With Encryption
Protect your website with an SSL/TLS certificate for free from Encryption.
sudo apt install certbot python3-certbot-apache
sudo certbot --apache
If you follow these instructions, you’ll get an unassuming website running Apache within Debian 12. Your virtual hosts are in place and ready to be able to service the domain.
Conclusion
To configure and install Apache for Debian 12, update system packages and install Apache by using the “sudo apt install apache2” command. Then, you must enable Apache to start on boot by using “sudo systemctl enable apache2”. To begin Apache, start the Apache service. You can use the”sudo systemctl start apache2″ command. Finally, open the web browser and verify that Apache is running by visiting “http://your_server_ip“.
Following installation, the users are able to configure virtual hosts following the procedure above. This way, Apache has been successfully installed for Debian 12. After installation, users can set up virtual hosts by following the above procedure. In this way, Apache has been successfully installed as well as configured on Debian 12.