Conda is a powerful advanced tool that helps users manage software and its associated dependencies more efficiently. With Conda, you can build separate environments for different projects. This ensures that your project does not conflict with other packages.
In short, using Conda helps better organize your projects and ensures everything runs smoothly on your machines, such as Linux, Windows, and macOS.
The primary objective of this blog is to explain the complete procedure for installing Conda on Ubuntu 24.04, a Linux-based distribution.
How to Install Conda on Ubuntu 24.04?
These are the key topics that will explain the complete process of installing Conda:
How to Get the Latest Conda for Ubuntu 24.04?
How to Configure the Conda Package on Ubuntu 24.04?
How to Activate/Deactivate Conda on Ubuntu 24.04?
How to Launch Conda Navigator on Ubuntu 24.04?
How to Get the Latest Conda for Ubuntu 24.04?
The below command will download the Conda “.sh” file from the official repository.
Step 1: Get the Latest Conda.sh File
Visit the official Anaconda repository, where you can find and get the latest source file for your machine:
https://repo.anaconda.com/archive/
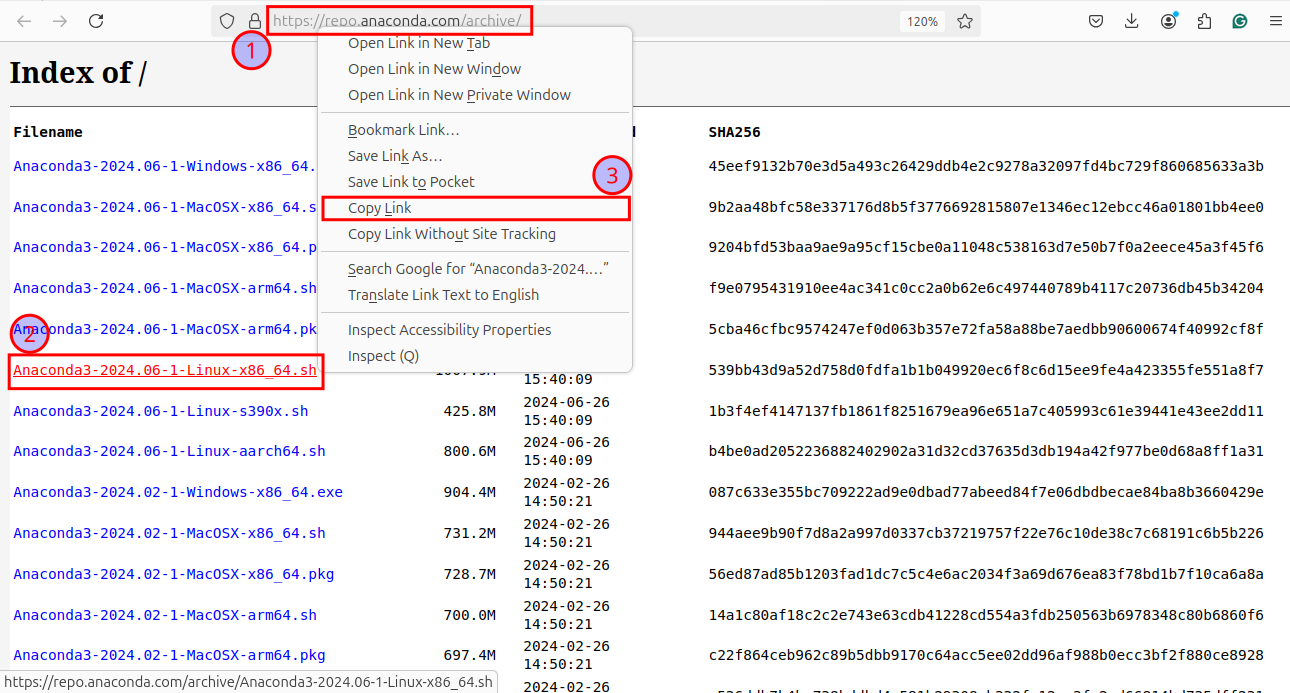
The screenshot above clearly demonstrates the process of selecting and copying the Anaconda file for your Linux system, such as Ubuntu 24.04.
Step 2: Download Conda via “wget”
The copied link to the Anaconda file can be used with the ”wget” command to download it to the current directory of your system:
wget https://repo.anaconda.com/archive/Anaconda3-2024.06-1-Linux-x86_64.sh
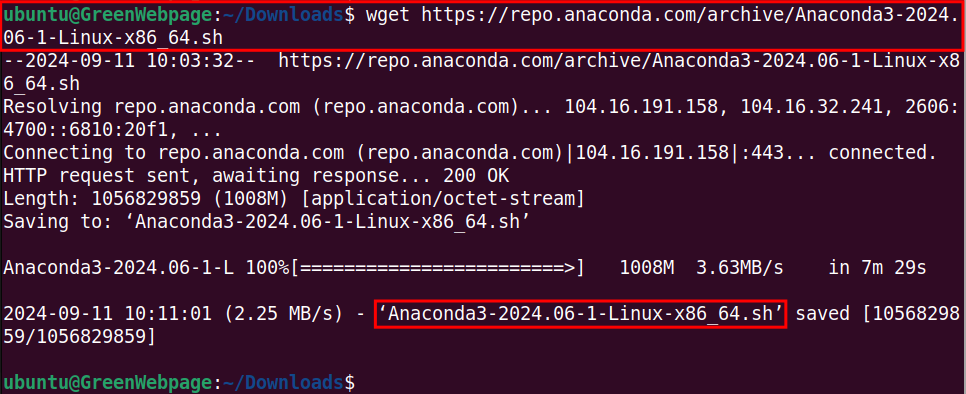
As presented above, the file, “Anaconda3-2024.06-1-Linux-x86_64.sh”, has been downloaded to the current directory, such as “~/Downloads”.
How to Configure the Conda Package on Ubuntu 24.04?
This part will elaborate the installation process of Conda on your Ubuntu 24.04 machine.
Step 1: Install Conda from Terminal
On Linux systems, including Ubuntu 24.04, the “.sh” file can be executed with the Bash command as shown below:
bash Anaconda3-2024.06-1-Linux-x86_64.sh
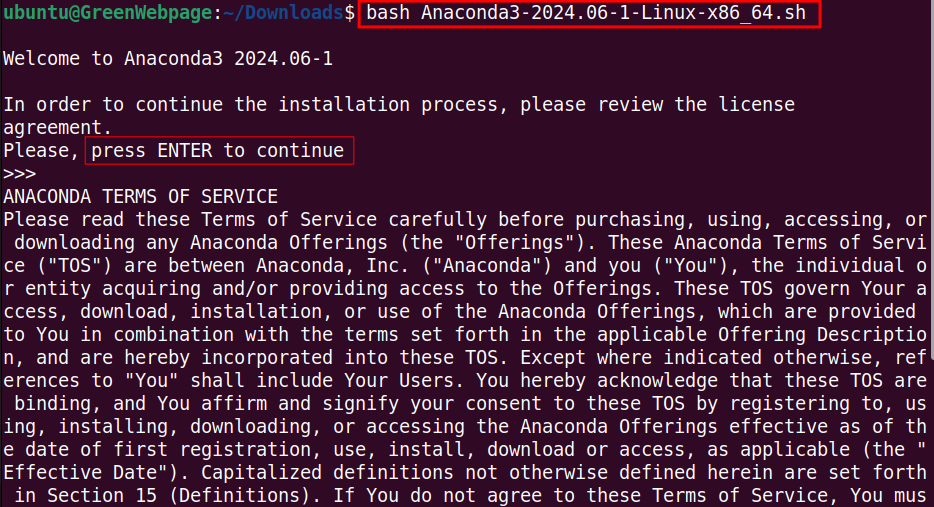
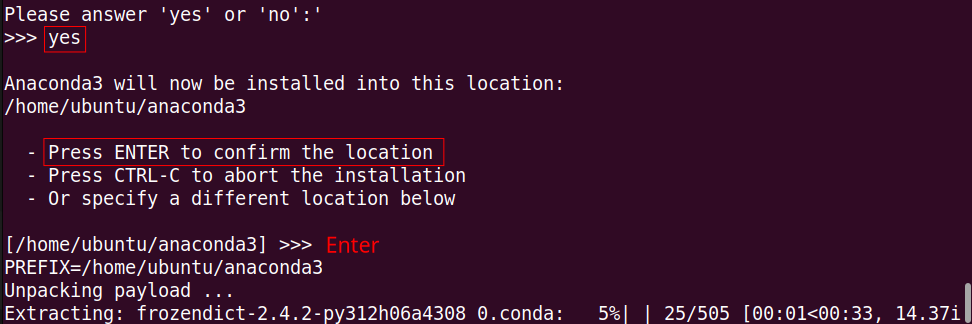
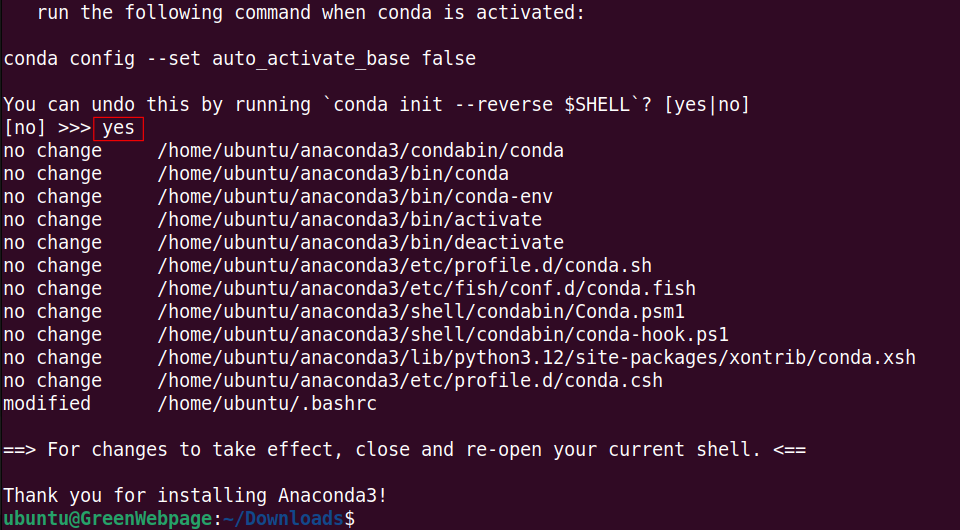
After responding to the prompted questions, you will see a confirmation message indicating that Anaconda has been successfully installed on Ubuntu 24.04.
Step 2: Initialize Conda
After installing the Conda package, activate it in your terminal by executing this command:
source ~/.bashrc

If you see “(base)” at the start of the prompt, it means that Conda has been activated and initialized without any errors.
Step 3: Disable Default Conda Activation
Conda activates the “base” environment on startup by default. The attached command will disable and prevent it from activating automatically:
conda config --set auto_activate_base false

You can activate the Conda base environment when needed.
Step 4: List Conda Environments
You can list the existing Conda environments via the command:
conda env list

This will display all the existing Conda environments on your Ubuntu 24.04 terminal.
How to Activate/Deactivate Conda on Ubuntu 24.04?
You will see how to activate or deactivate the Conda environment through this section.
Step 1: Deactivate Conda Environment
To deactivate the currently running or active Conda environment, execute this command:
conda deactivate

The removal of “(base)” from the start of the prompt indicates that the Conda environment is now deactivated.
Step 2: Activate Conda Environment
You can activate the Conda environment anytime using the command:
conda activate /home/ubuntu/anaconda3

You can either use the absolute path to the Conda environment or use (base) to reactivate the base environment.
Step 3: Display Conda Information
To display the details about the Conda after installation, run this code:
conda info
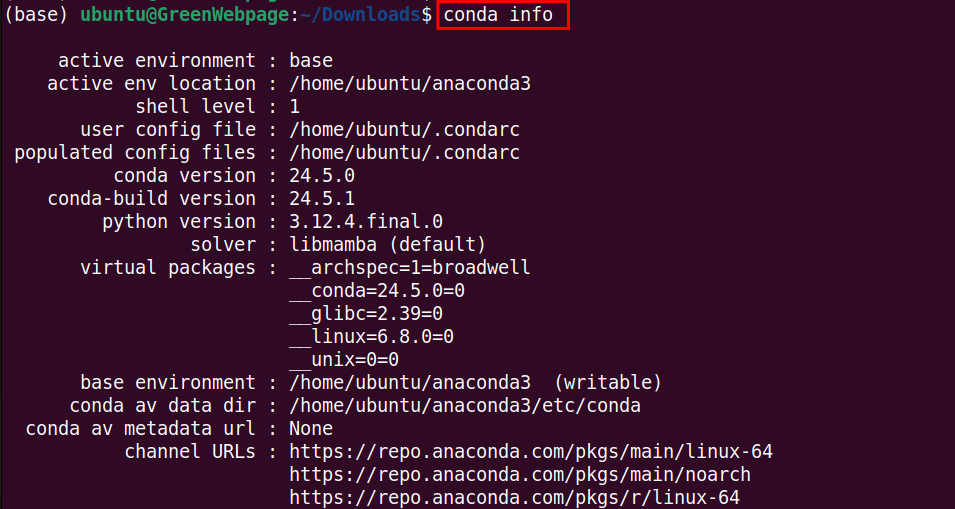
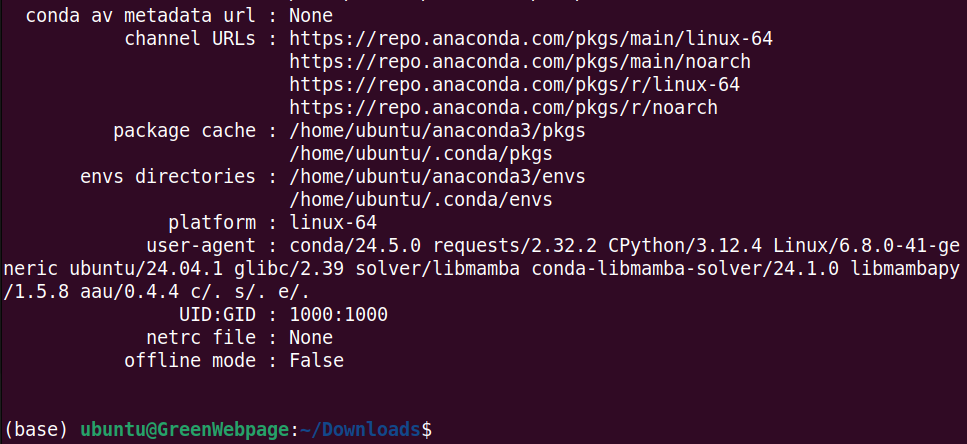
If you want to check the Conda version use the below command:
conda --version

At the time of installation, the latest version of Conda is 24.5.0.
How to Launch Conda Navigator on Ubuntu 24.04?
Here you will learn how to start the Conda Navigator, a graphical user interface on Ubuntu 24.04.
Step 1: Launch Conda Navigator
Use the command to open Conda graphical interface:
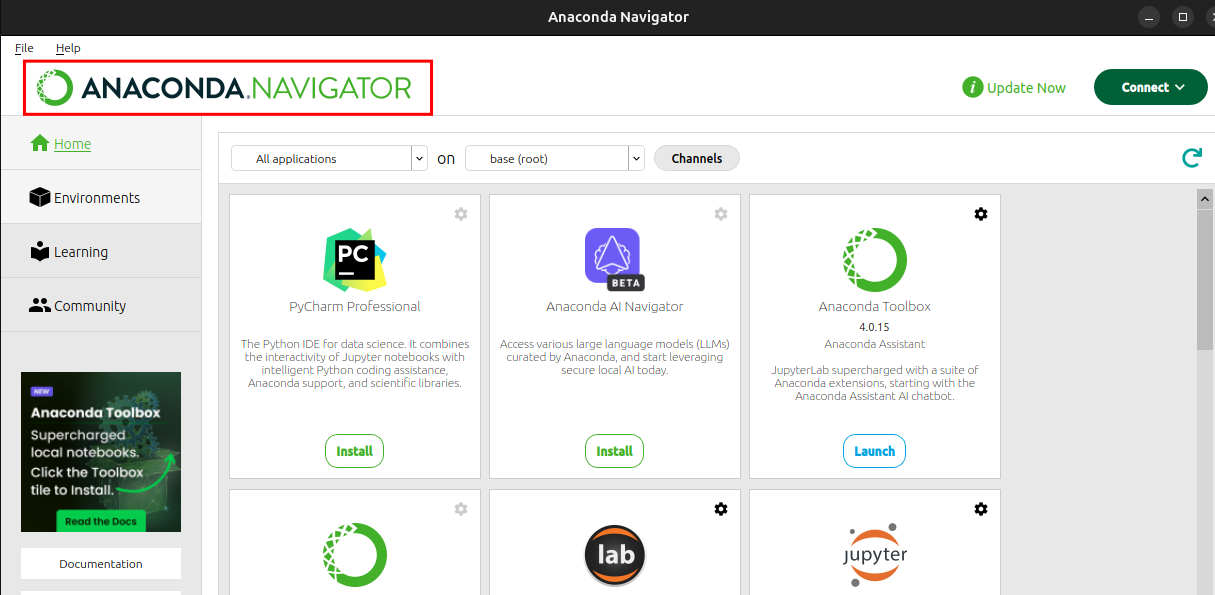
anaconda-navigator

Here is the Anaconda Navigator graphical interface, where you can find many useful plugins and applications:
Conclusion
Install Conda on Ubuntu 24.04 with easy commands from the terminal. Download the Conda file with the “.sh” extension and use the command bash Anaconda3-2024.06-1-Linux-x86_64.sh to install it on your Ubuntu 24.04 system.
You can access Conda’s graphical user interface with the command “anaconda-navigator” from the terminal.




Leave feedback about this