
In the ever-evolving landscape of system administration, efficient multitasking and streamlined workflow management are very important. Enter tmux, a powerful terminal multiplexer that allows users to split their terminal window into multiple panes, navigate between them effortlessly, and run commands concurrently. Whether you’re a seasoned developer seeking enhanced productivity or a Linux enthusiast exploring the versatility of the command line, mastering tmux can significantly elevate your terminal experience. With our guide, learn core concepts for creating, managing, and navigating sessions effortlessly. Whether on a remote server or your local machine, mastering tmux basics enhances command-line multitasking, boosting efficiency. So, buckle up, and dive deep with us as we unlock tmux’s potential, guiding you how to install tmux on Ubuntu 22.04 and its foundational usage.
Updating system repositories
Before installing tmux on Ubuntu, it’s crucial to ensure that your system is up to date. Execute the command in the terminal:
$sudo apt update && sudo apt upgrade -y
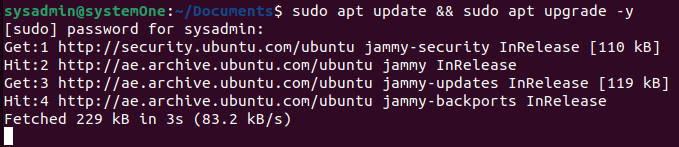
This will refresh the system repositories and upgrade installed packages. This command first updates the package lists to retrieve information on the latest versions of software available in the repositories. The “sudo apt upgrade -y” part then automatically installs the latest versions of the installed packages without prompting for confirmation.
This step ensures that you have the latest software versions and sets the stage for a smooth installation of tmux, helping you benefit from any security patches, bug fixes, or improvements that may have been released since your last update.
Installing tmux
Once the update is complete, execute the following command to install tmux on your Ubuntu:
$sudo apt install tmux
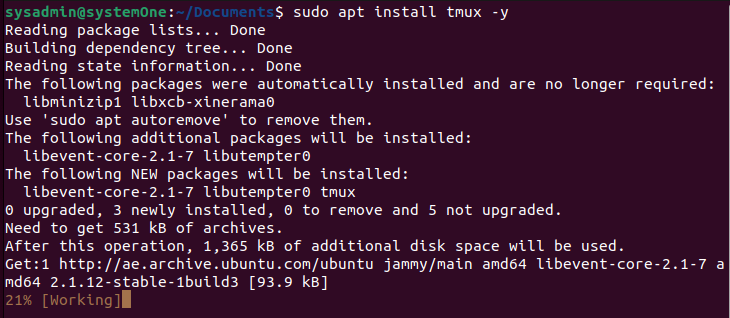
This will prompt the package manager to download and install tmux and its dependencies. The progress will be displayed within the terminal and once done, you will be ready to configure it and launch it.
Basic Configuration
Here are some basic configurations you can add to your ~/.tmux.conf:
# Remap the prefix key to Ctrl+a (optional, but common)

set -g prefix C-a

unbind C-b

bind C-a send-prefix

# Enable mouse support (optional)

set -g mouse on
Feel free to explore additional configurations based on your preferences.
Now you are ready to take things to the next step and become a multitasking pro.
Using tmux
To start a new tmux session, open a terminal and type:
$tmux

Basic Commands
Below I am listing a detailed instruction set for creating new sessions and how to cycle between them.
Creating Multiple Sessions with tmux
Creating and managing multiple sessions in tmux is a powerful feature that allows you to organize your work efficiently. Here’s a step-by-step guide on how to create two sessions with tmux on Ubuntu:
Start a New Session: To start a new tmux session, simply type the following command and press Enter:
$tmux
Create a Second Session: While inside the first tmux session, you can create a second session. Press Ctrl-b followed by :, which brings up the tmux command prompt at the bottom of the terminal. Then, type:
$new-session -s session_name
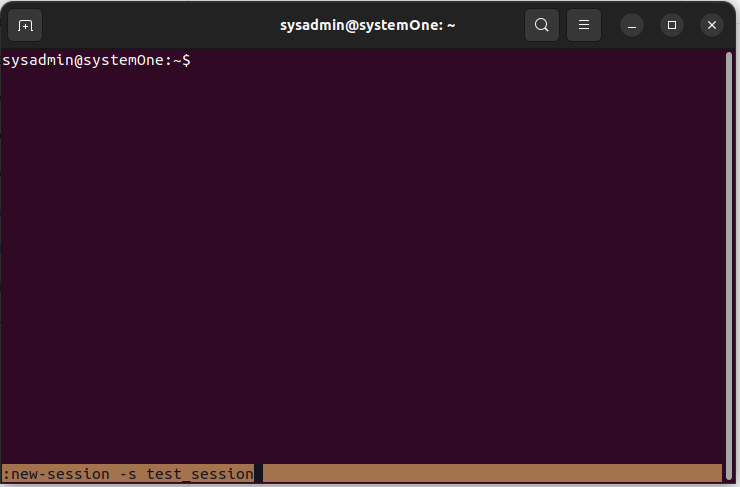
Replace session_name with a descriptive name for your second session. Press Enter to create the new session. You will see the session name reflected down at the lower left corner.

Switch Between Sessions: You can switch between tmux sessions using the following command:
$tmux switch-client -n
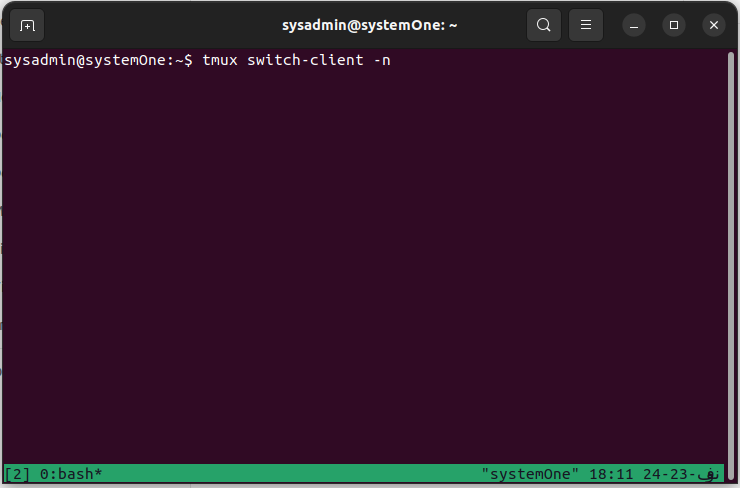
This command cycles through the available sessions, allowing you to move between them.
Detach and Reattach: To detach from a tmux session without closing it, press Ctrl-b followed by d.
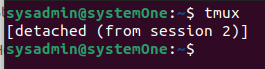
This leaves the session running in the background. To reattach to a detached session, use the following command:
$tmux attach-session -t session_name
Replace session_name with the name of the session you want to reattach to.
By following these steps, you can create and manage multiple tmux sessions on your Ubuntu system. Each session acts as an independent workspace, allowing you to organize and switch between different tasks seamlessly. Experiment with these commands to become more comfortable with tmux’s session management capabilities. Below you can find the other commands that will come in handy when navigating through tmux
Session Management:
tmux new-session -s session_name: Create a new session.
tmux attach-session -t session_name: Attach to an existing session.
tmux switch-client -n: Switch to the next session.
Window Management:
Ctrl-b c: Create a new window.
Ctrl-b n: Switch to the next window.
Ctrl-b p: Switch to the previous window.
Ctrl-b 0-9: Switch to windows 0-9.
Pane Management:
Ctrl-b %: Split the current pane horizontally.
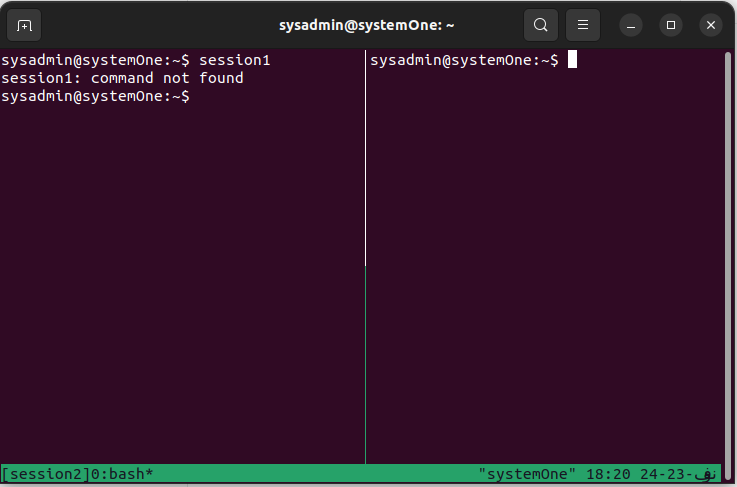
Ctrl-b “: Split the current pane vertically.
Ctrl-b arrow keys: Navigate between panes.
Ctrl-b x: Close the current pane.
Example usage of tmux: Development involving multiple files
Imagine you’re deeply engrossed in a software development project, navigating through multiple code files, running tests, and monitoring a development server simultaneously. The complexity of the task requires an organized workspace that can accommodate these various activities seamlessly. This is where tmux shines.
By leveraging tmux, you can split your terminal into panes, assigning each pane a dedicated role in your workflow. Picture one pane displaying your main codebase, another running unit tests, and perhaps a third actively showcasing the development server logs. With this setup, you gain a holistic view of your project within a single terminal window. This not only streamlines your development process but also allows you to efficiently manage and switch between tasks, enhancing your productivity in the coding realm.
Exiting tmux
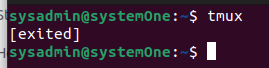
To exit tmux, simply type “exit” in the terminal or press “Ctrl-b” followed by “d” to detach from the session without closing it.
Uninstalling tmux
To uninstall tmux from a Debian-based Linux system, you can use the following command:
$sudo apt autoremove tmux --purge -y
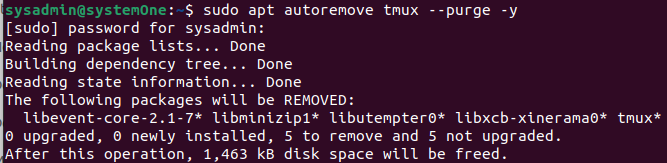
This command combines several options for a thorough removal process. The autoremove option ensures that any unused dependencies are also removed, helping to clean up the system. The –purge option not only uninstalls tmux but also deletes its configuration files, providing a clean slate. Finally, the -y option automatically confirms any prompts during the uninstallation process, streamlining the operation. Make sure to execute this command with caution, as it irreversibly removes tmux and its associated files from the system.
Conclusion
tmux is a powerful tool that can greatly improve your terminal workflow. By mastering its installation, configuration, and basic usage, you’ll be better equipped to manage multiple tasks efficiently. Experiment with the configurations and commands to tailor tmux to your specific needs, and watch your productivity soar in the terminal.
Happy tmuxing!


Leave feedback about this