Java is an open-source programming language that is recognized worldwide for its use in developing web applications, mobile applications, and even games. Java is well-known for its robust features including being object-oriented, security, scalability, and others. Furthermore, Java is known for its multi-platform functionality and can be installed and used on several Operating systems, such as Linux, Windows, and Mac OS.
Debian 12 represents the fan’s latest release and can be downloaded from Debian’s official page. We can install Java on Debian 12 and take advantage of these features. For this reason, several package managers such as apt, .deb and others can be used.
Table of Contents
- How to Install Java on Debian 12
- Switching Default Java Version on Debian 12
- Setting JAVA_HOME Environment Variable on Debian 12
- How to Uninstall Java From Debian 12
- Final Thoughts
How to Install Java on Debian 12
Installation of Java on Debian 12 can be done using the “Apt” package manager and “Deb” package. For now, we will focus on the apt package manager as the point of starting.
Method 1: Installing Java on Debian 12 Using Apt
Java may be installed on Debian 12 using either JDK or JRE. Apt is an easy command-line utility for installing default or specific versions of Java. Although JDK and JRE have the same purpose for running Java programs, it is recommended that you install JDK on Debian because it offers additional functionalities for both executing and developing Java software.
For Java installation using Apt on Debian 12, follow the simple steps outlined below:
Step 1: Update and Upgrade System Repositories
In order to install Java, the command below needs to be executed first in order to update and upgrade the repository.
|
sudo apt update && sudo apt upgrade |
|---|
Next, any outdated packages are scanned. As the repositories are updated and upgraded on the system, we can now proceed to step two.
Step 2: Check Available Java Versions
To list all the available versions of Java that can be installed on the system, run the command below:
|
javac –version |
|---|

The snippet of output indicates that Java is not installed on my machine but still presents a range of versions that can be added.
You can select the Java version that you need and run the respective command that will configure it on your computer.
Step 3: Install Java Using Apt
Choose the version of Java you would like to install from the available options and run the command below to install it on your Debian 12:
|
sudo apt install default-jdk -y |
|---|
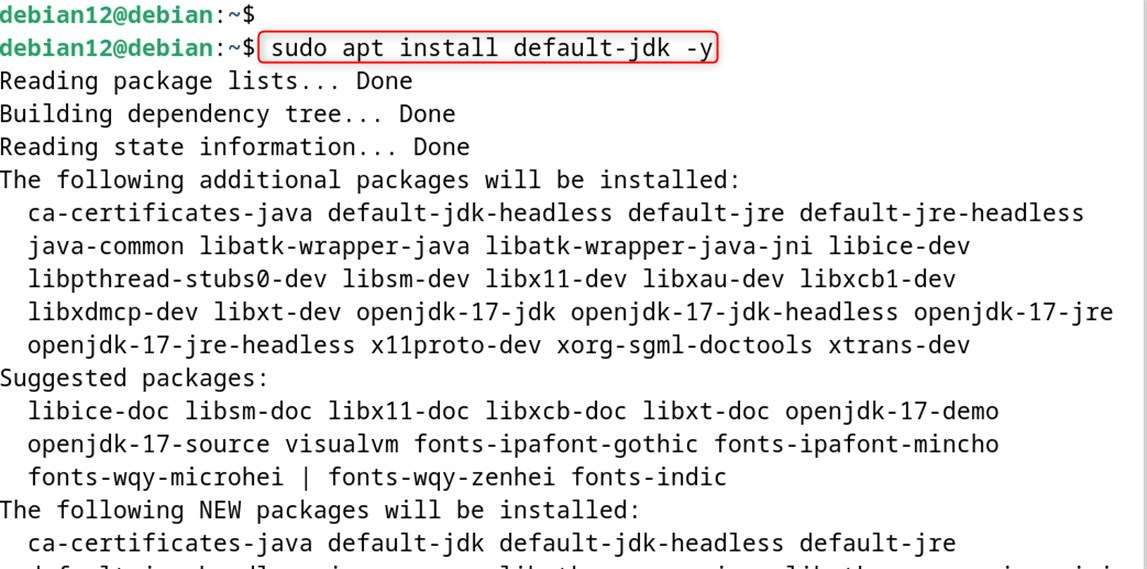
The command prompt shows that the JDK is installed, which will also be reflected on the default screenshot.
Below is an example of how you can change “default-jdk” to any specific version to install other versions.
|
sudo apt install java_version |
|---|
Step 4: Verify Java Installation
To check that Java is installed on your Debian 12 machine, use the command below that checks which version is available on your system.
|
java –version |
|---|

The result indicates that our Debian 12 now has “openjdk 21.0.3” Java installed.
Method 2: Installing Java on Debian 12 Using Deb
We can utilize the command wget for downloading the deb package of Java and use the apt command for its installation. To make things simple, follow the sequential steps listed below:
Step 1: Download the Deb Package
Wget is a CLI tool that downloads documents from the internet. Run the command below in the terminal to get the Java deb package from the Oracle Website:
|
sudo wget https://download.oracle.com/java/21/latest/jdk-21_linux-x64_bin.deb |
|---|
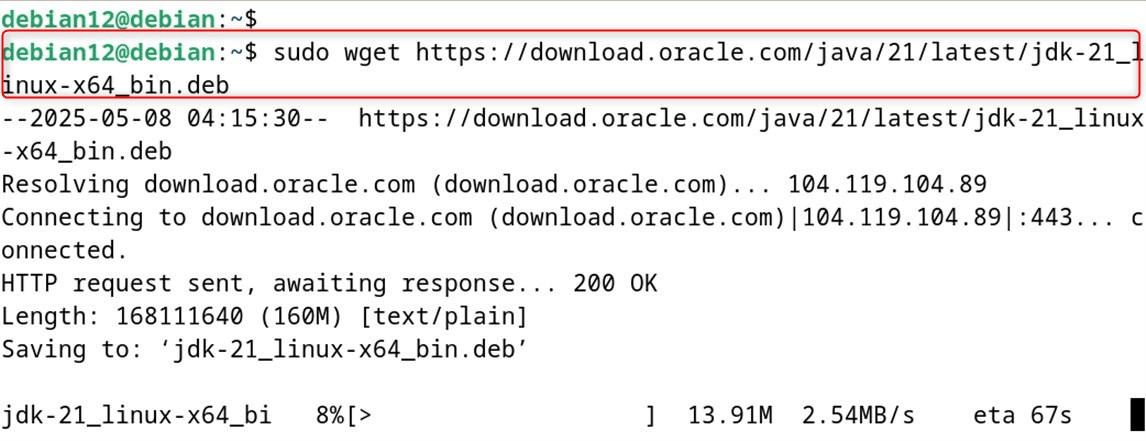
Step 2: Install Java Using Deb
After that, utilize the below command line for installing Java through the deb package.
|
sudo apt install ./jdk-21_linux-x64_bin.deb |
|---|
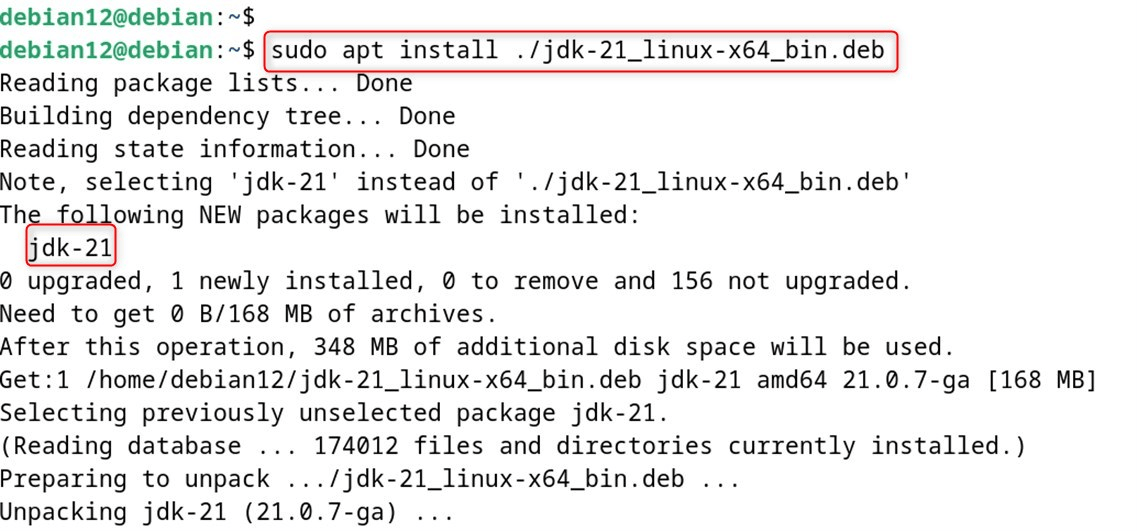
Step 3: Confirm Java Installation
Now, you can enter the command required to check that Java has been installed on Debian 12.
|
java –version |
|---|

Switching Default Java Version on Debian 12
In case one is running multiple Java versions, one can change them with the specified command.
|
sudo update-alternatives –config java |
|---|
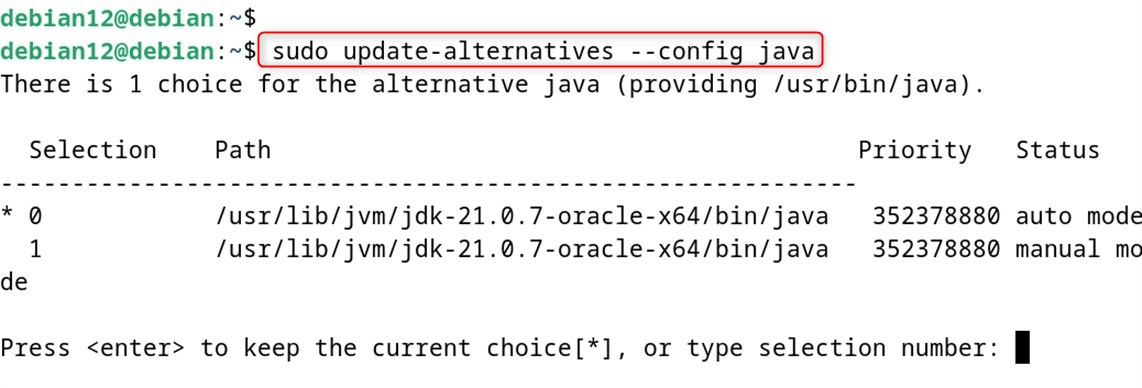
One can either press “Enter” to keep the default Java version as is or change one by entering a selection number corresponding to the desired version.
Setting JAVA_HOME Environment Variable on Debian 12
If you wish to change the JAVA_HOME path variable on Debian, you may do so by editing the /etc/environment file using nano. You can open it by entering the command below.
|
sudo nano /etc/environment |
|---|
Then, as seen in the example below, change the variable definition in the file to the path for the chosen version of Java you would like to use.
|
JAVA_HOME=”/usr/lib/jvm/java-21-openjdk-amd64/bin/java” |
|---|
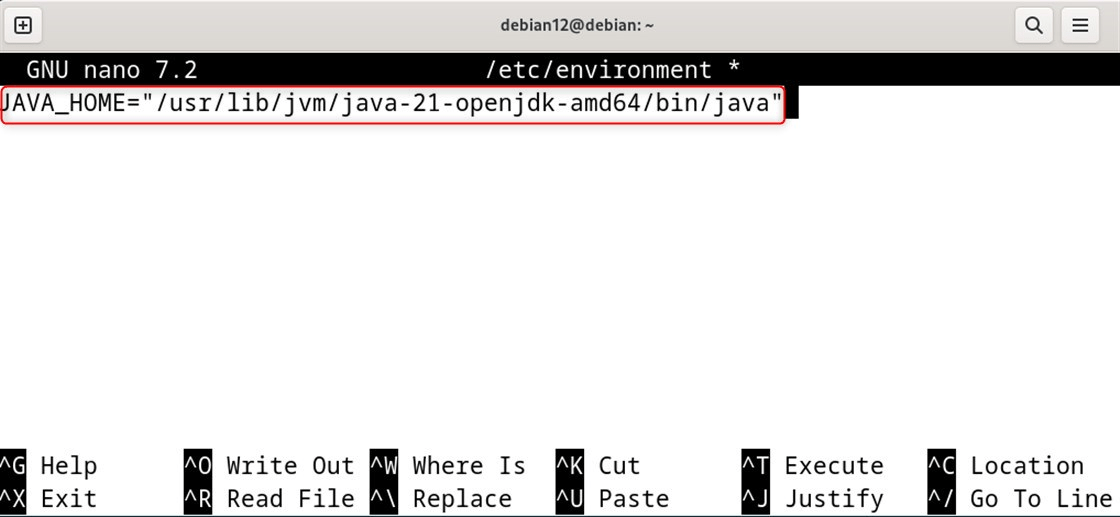
In the nano editor, hit “CTRL+S” as well as “CTRL+X” to save the line and exit the interface.
To apply the newly defined JAVA_HOME variable for the active session, use the command below to reload the /etc/environment file.
|
source /etc/environment |
|---|

Run the command below to check if the JAVA_HOME variable is properly defined.
|
echo $JAVA_HOME |
|---|

How to Uninstall Java From Debian 12
In the event that Java is deemed unnecessary, one can remove it to recover hard drive space. In any case, the manner in which Java is installed determines how it can be uninstalled.
Method 1: Uninstalling Java From Debian 12 Using Apt
If Java was added via Apt, it can also be removed from Debian 12 using the following command:
|
sudo apt autoremove java* -y |
|---|
Method 2: Uninstalling Java From Debian 12 Using Deb
If Java is installed on Debian using the deb package, it can be removed by executing:
|
sudo apt autoremove jdk-21 -y |
|---|
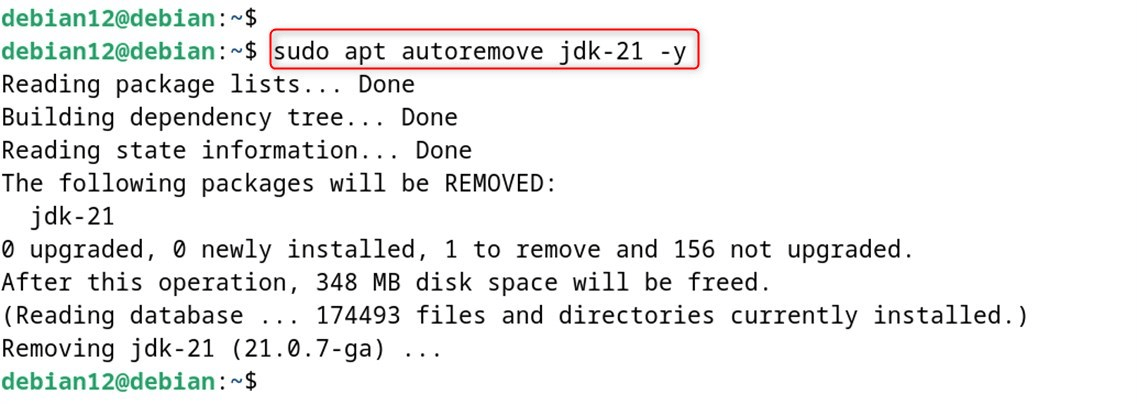
This sums up the installation and uninstallation of Java on Debian 12.
Final Thoughts
Using both “apt” and “deb”, Java can be installed on Debian 12. As noted, all methods allow the installation of Java on Debian 12. Still, each installation technique comes with advantages and disadvantages. For example, once Java is added through apt or deb, multiple versions can be interchanged swiftly. This guide has covered all possible methods to install Java on Debian 12.
Frequently Asked Questions
sudo apt update followed by sudo apt install default-jdk to install the default Java Development Kit available in Debian’s repositories. java --version or javac --version to see if Java and the compiler are already installed on your system. sudo apt install openjdk-17-jdk to install OpenJDK 17 specifically. update-alternatives tool. sudo update-alternatives --config java and choose the desired version from the list. 




Leave feedback about this