
If you are tired of managing your teams and project plans, Jira Software can be the best option for you. It is known for its modern features, which include creating teams, building plans, and managing and tracking your project and team tasks efficiently.
In short, Jira is a tool designed for complete project management, from small to large scale.
This blog aims to provide a complete guide for installing Jira software on Linux distributions, such as Ubuntu 24.04.
How to Install Jira on Linux (Ubuntu 24.04)?
We will be covering the below sections in the educational blog:
How to download and set up Jira on Linux (Ubuntu 24.04)?
How to Set up Jira on Localhost on Ubuntu 24.04?
How to Download and Set up Jira on Linux (Ubuntu 24.04)?
The following sequence-wise step will download and set up Jira software on your Linux base Ubuntu 24.04 system.
Step 1: Download Jira via “wget”
The wget is a simple command for downloading files from the source link. For instance, let’s download the latest Jira software using wget:
wget https://product-downloads.atlassian.com/software/jira/downloads/atlassian-jira-software-9.12.13-x64.bin
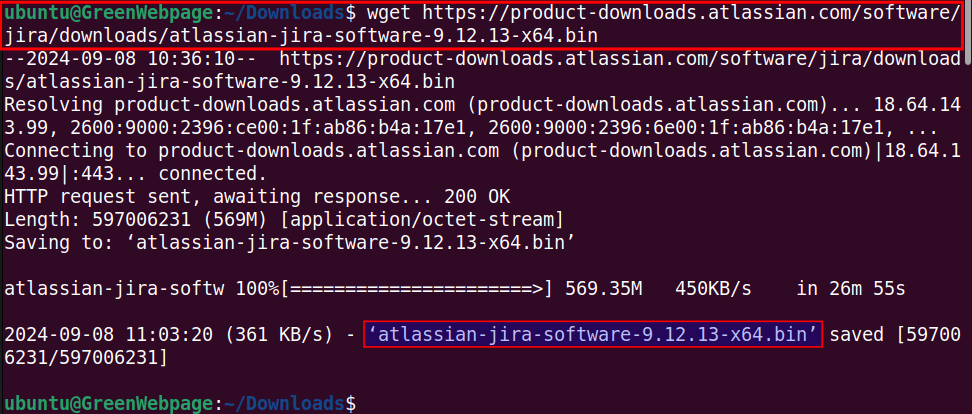
This simple code will save the Jira in your system directory like “Downloads”.
Step 2: Make “Jira*.bin” Executable
The “.bin” file will not be executed directly. Therefore, you must use this command to allow the downloaded (i.e. atlassian-jira-software-*.bin) file to run and execute:
sudo chmod +x atlassian-jira-software-9.12.13-x64.bin

This step allows you to run the jira*.bin file to install from the terminal.
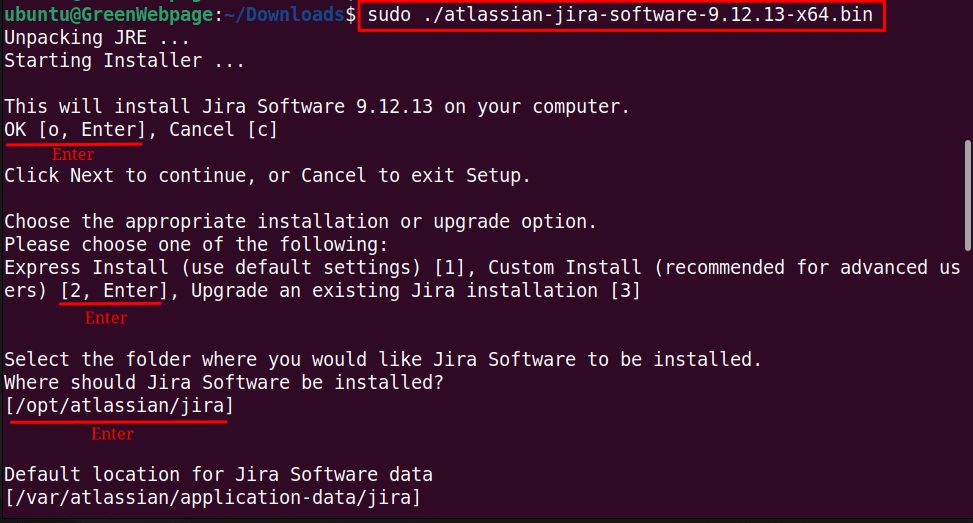
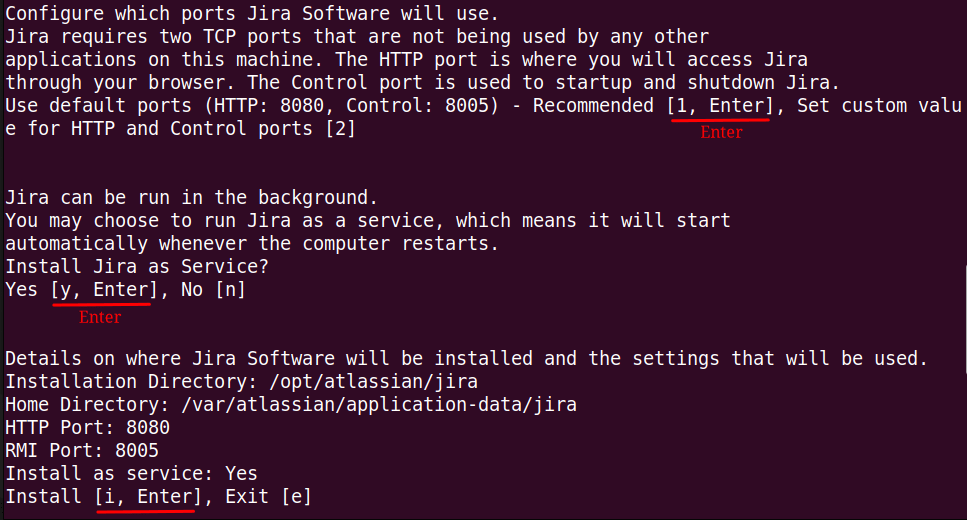
Step 3: Install Jira from the terminal
The next step, after downloading and executing, you can initialize the installation process of Jira. when the software installation begins, you will be prompted for a few permissions, simply press Enter to complete the installation:
sudo ./atlassian-jira-software-9.12.13-x64.bin
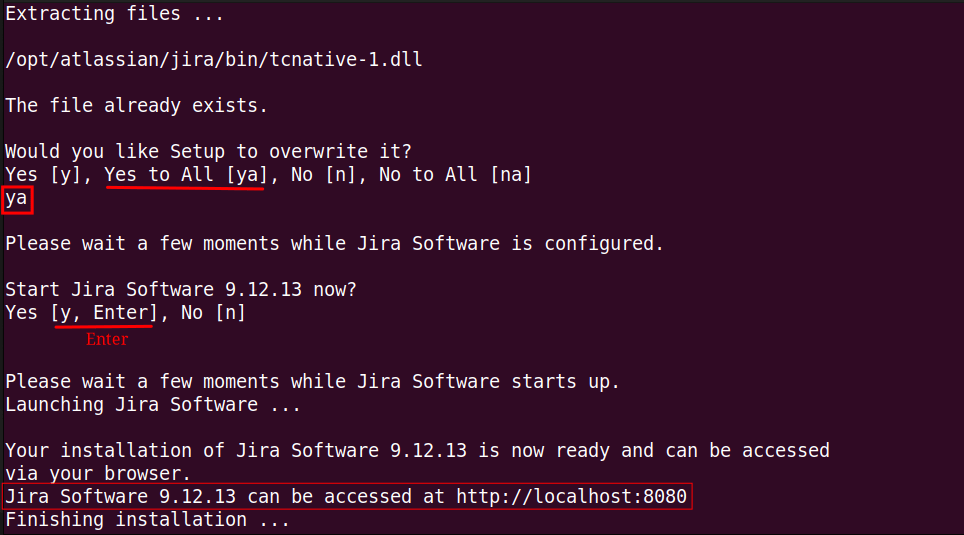
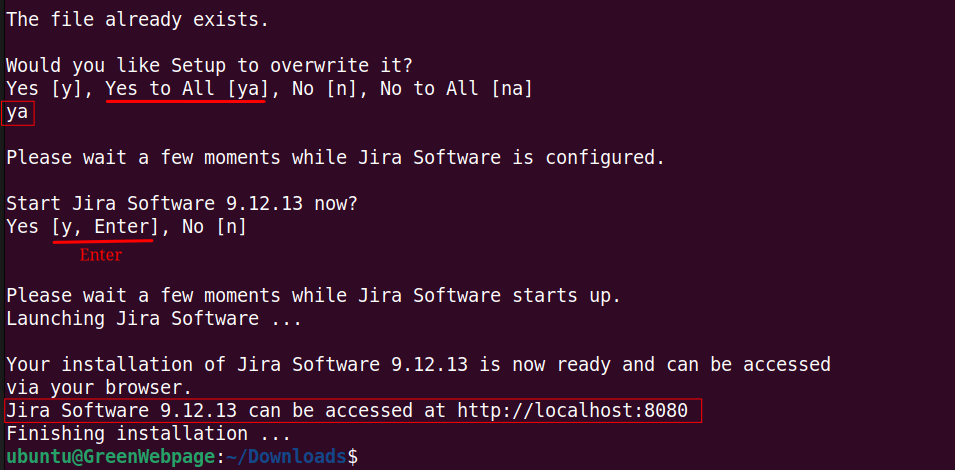
Upon completing the Jira software installation, a confirmation message along with the access link will be provided at the end.
How to Set up Jira on Localhost on Ubuntu 24.04?
Through this section, you will easily set up Jira software on your Ubuntu 24.04 Localhost.
Step 1: Access Jira
When you have completed the installation process on the Ubuntu 24.04 machine, now proceed to set up the process on localhost:
http://localhost:8080
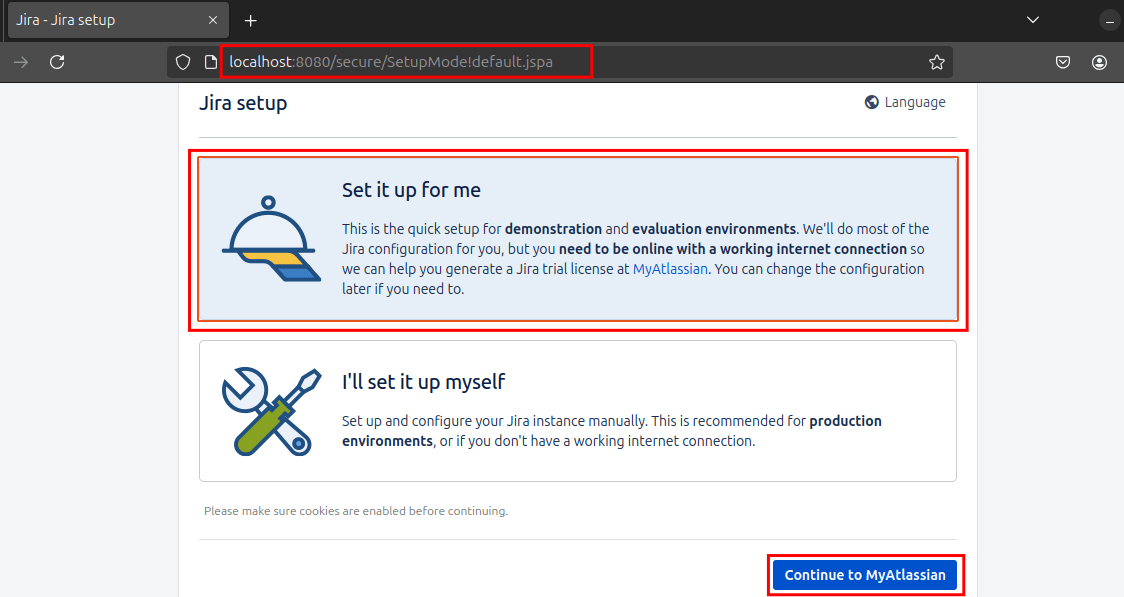
You can choose the setup methods between “Set it up for me” and “I’ll set it up myself”.
Step 2: log in to “Jira Atlassian”
Choose your preferred account to log in to the Jira Atlassian” account:

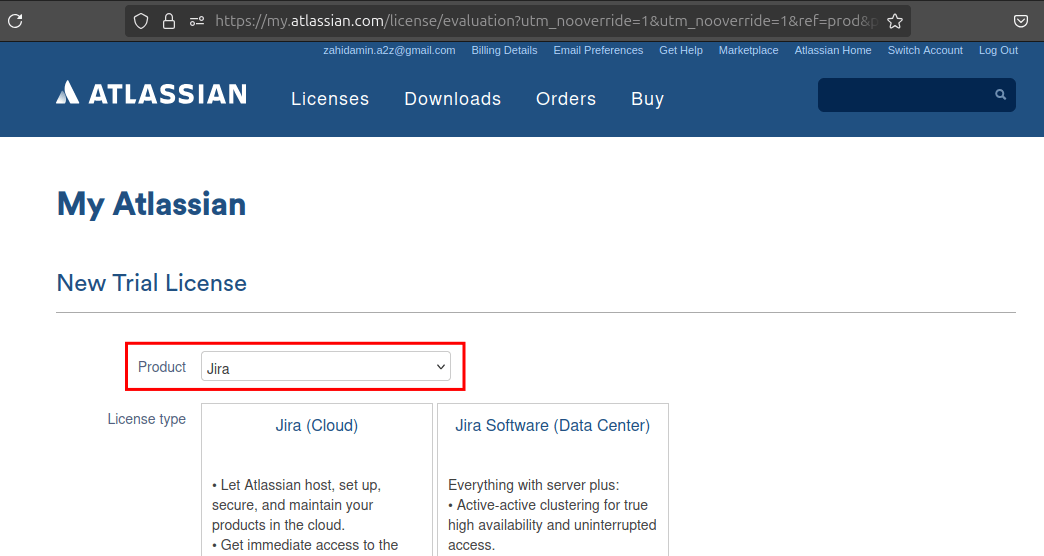
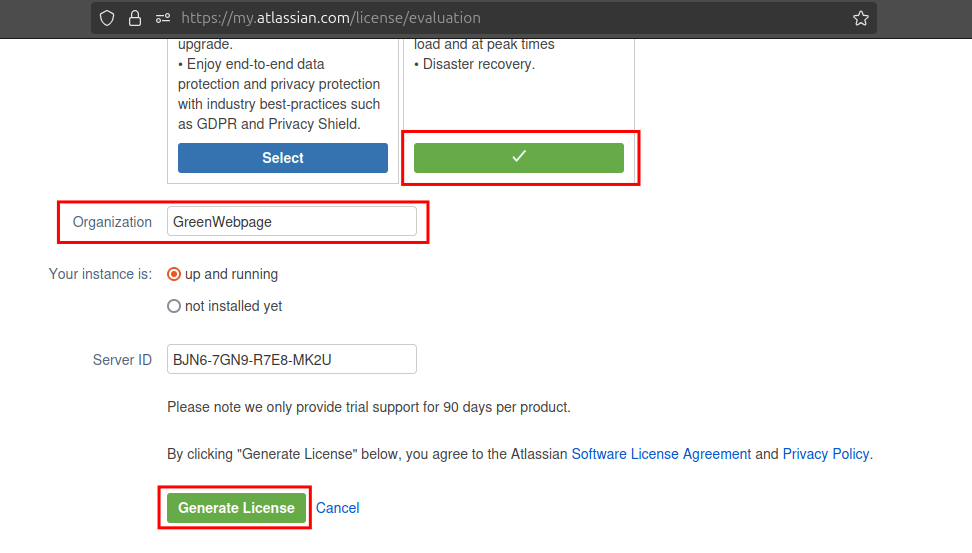
Step 3: Generate the Jira License
To generate a license for Jira:
- Select a product like “Jira”.
- Enter your organization name (i.e. GreenWebpage)
- Click on “Generate License”.
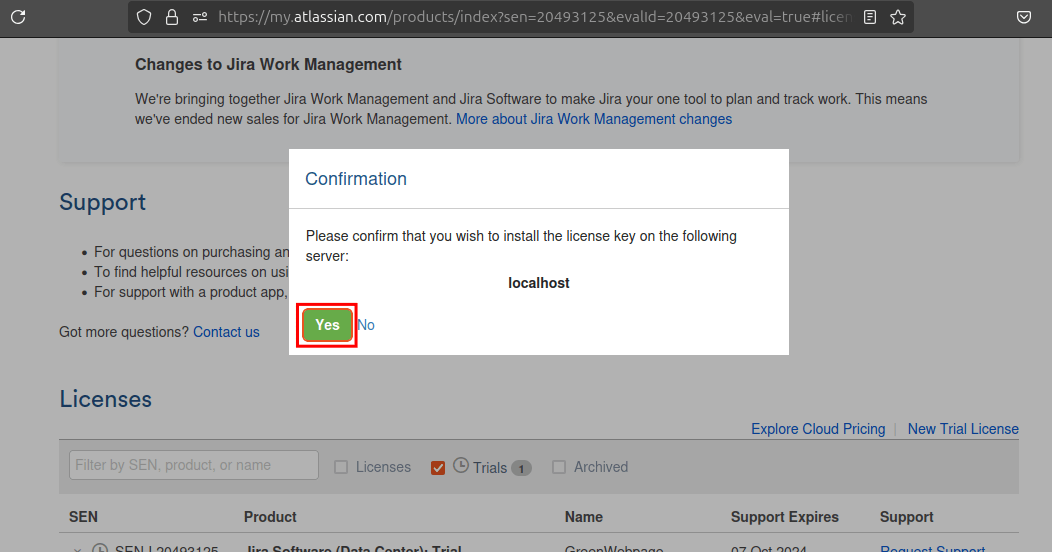
Permit to generate and install the Jira license key by clicking “Ok” button:
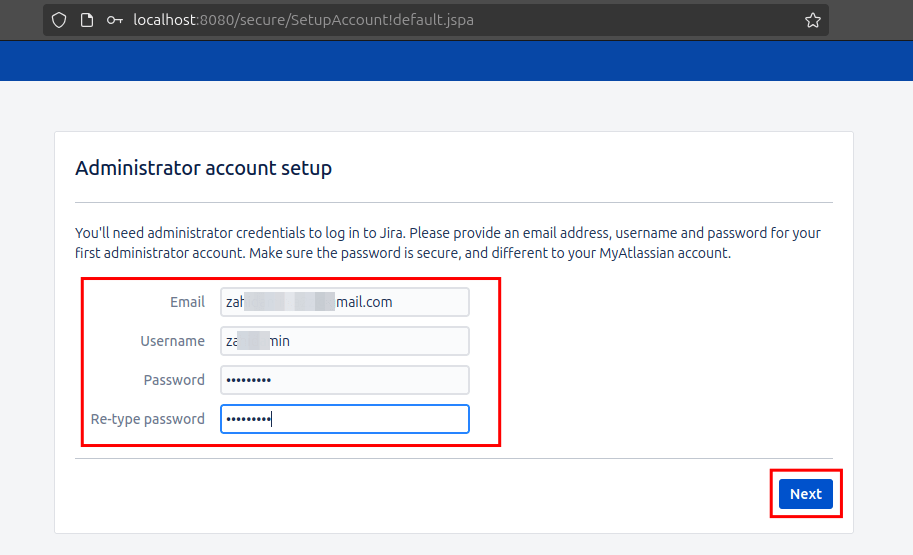
Step 4: Set up Jira Administrative Account
Specify your account details to create the administrative account at Atlassian:
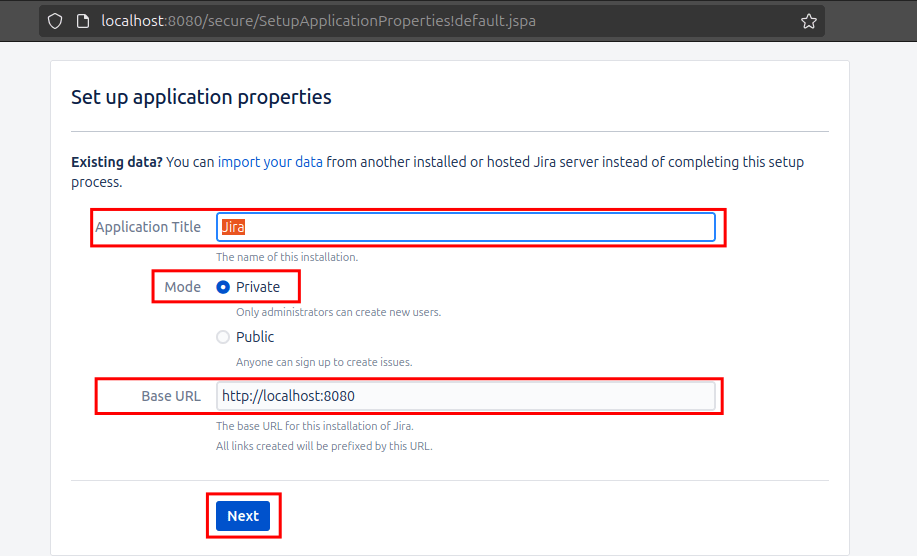
Step 5: Set up the Application
Provide the Application title, mode (Private/Public), and base URL, for example, “http://localhost:8080”:
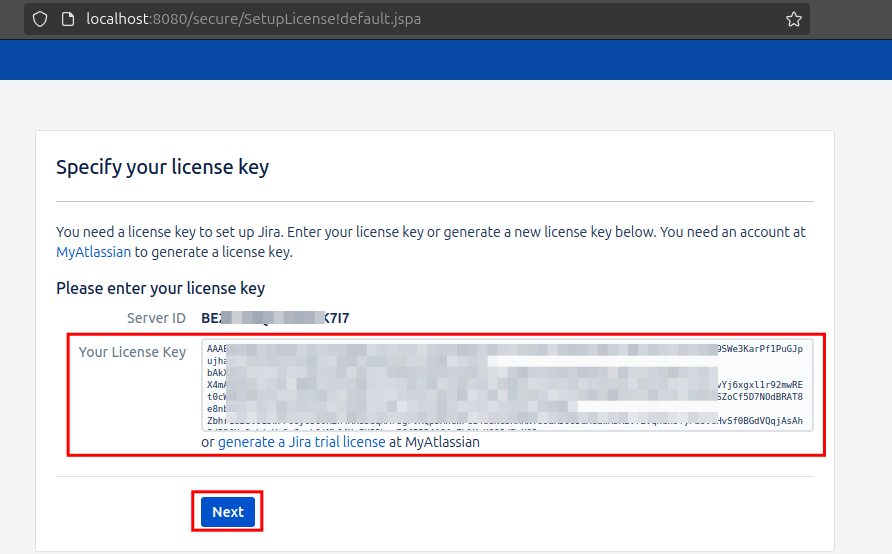
Step 6: Provide License Key
In the license key field, copy the generated key and proceed next:
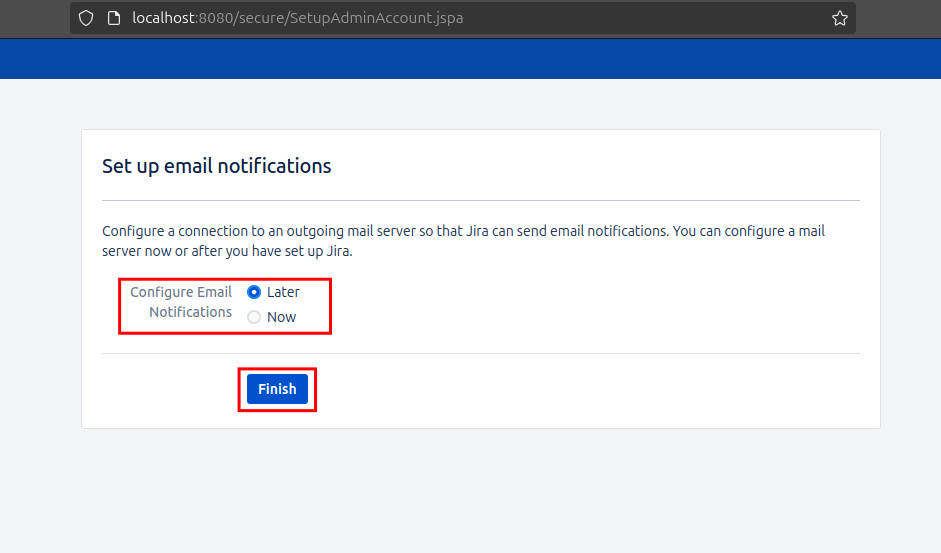
Step 7: Set up Email Notification
Choose the option for configure email notification and select the “Finish” to complete the Jira Setup process:
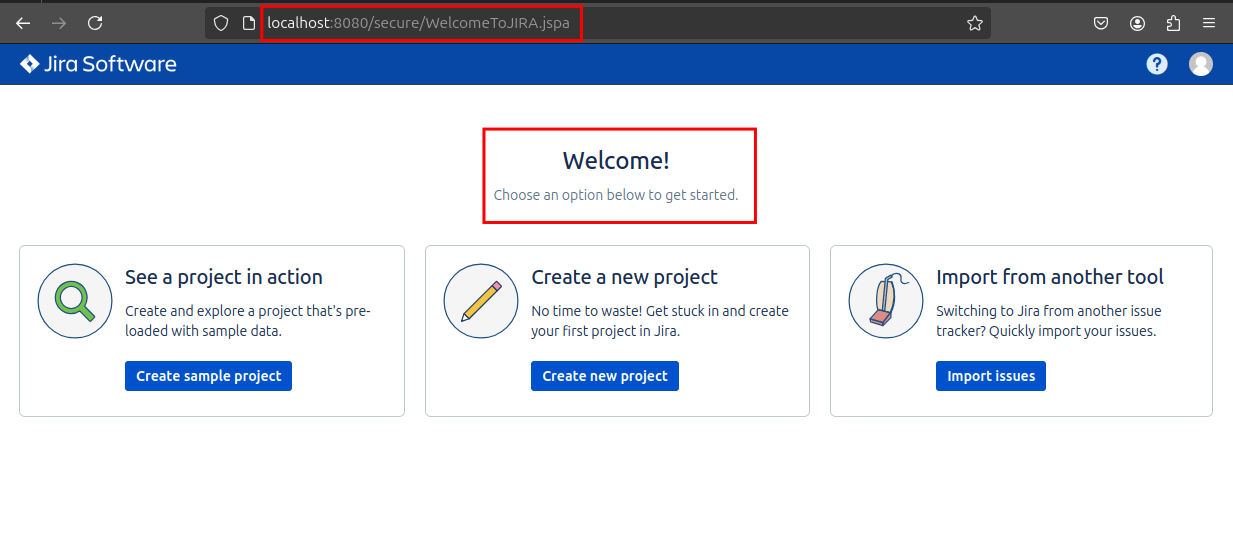
Finally, a greeting message will be displayed on your browser screen, confirming the Jira software setup:
Bonus Tips:
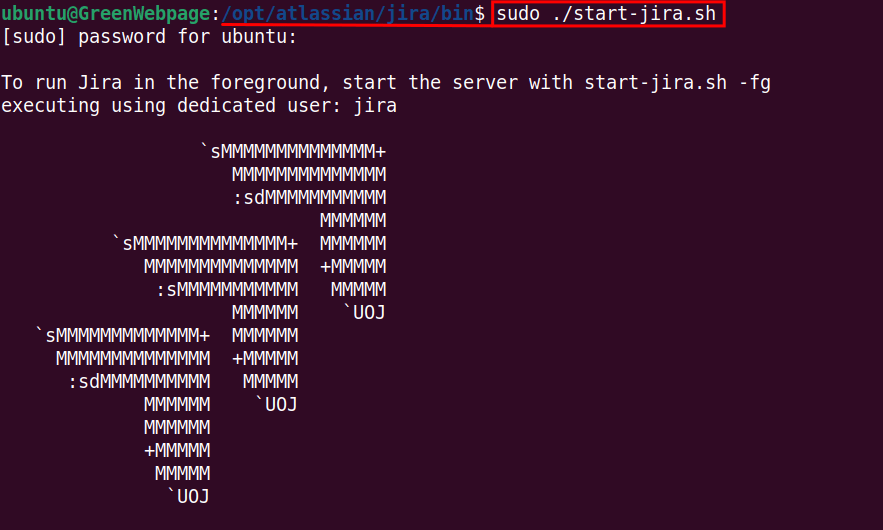
If Jira is not running on the localhost:8080, then perform these commands:
Navigate to the Jira directory:
cd /opt/atlassian/jira/bin
Then;
sudo ./start-jira.sh
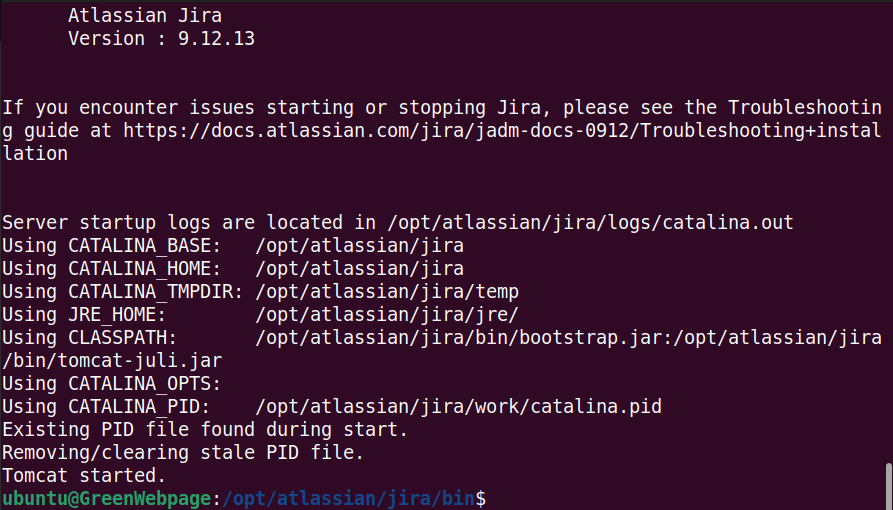
The above commands will start the Jira on Localhost, you can open the web browser and copy the base link to access Jira:
http://localhost:8080
Conclusion
Jira software can easily be set up on Linux systems like Ubuntu 24.04. Visit the Atlassian website, locate the Jira on the products page, and download the Jira “,bin” file. After installing Jira software, access it via “http://localhost:8080” and complete the setup process.


Leave feedback about this