Kernel-based Virtual Machine, commonly referred to as KVM, is a virtualization technology that allows you to run multiple Virtual machines on a single physical server. Each Virtual machine installed on a server will operate in its isolated environment having its hardware support, such as Memory, CPU, storage, and more.
If you want to turn your Ubuntu 24.04 system into a powerful and versatile hypervisor, you can install KVM on it. It adds additional capabilities to your Ubuntu system so that you can manage complex Virtualization tasks with ease.
How to Install KVM on Ubuntu 24.04
Before installing the KVM on Ubuntu 24.04, you must ensure Virtualization is enabled on your system in case you are using Ubuntu as a stand-alone operating system. By default, Virtualization is enabled on a computer, however, if it is not, you can enable it from the BIOS settings of your computer. The BIOS settings will vary based on the computer model you are using.
Pre-requisite: Enable Virtualization
Apart from that, if you are using Ubuntu 24.04 on a VirtualBox, you have to enable the Virtualization support on VirtualBox using the below-given steps:
Step 1: First, run Command Prompt or PowerShell on your system as an Administrator.
Step 2: Then navigate to the VirtualBox installation folder from the cd command. By default, VirtualBox is installed at the location C:\Program Files\Oracle\VirtualBox:
cd C:\Program Files\Oracle\VirtualBox

Step 3: Then use the following VBoxManage command to enable the nested virtualization support on Ubuntu 24.04 installed on VirtualBox. Ensure replacing the Machine Name with the actual name of the machine you have assigned for the Ubuntu 24.04 system:
.\VBoxManage modifyvm "Machine Name" --nested-hw-virt on

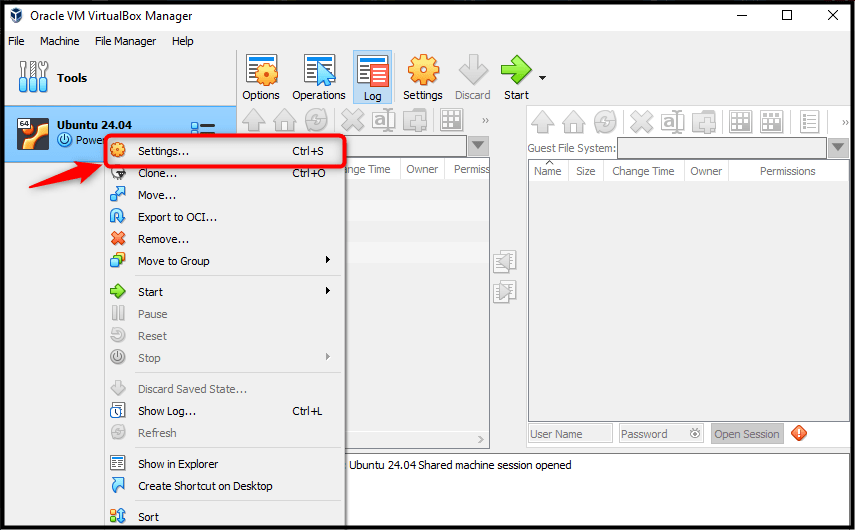
Step 4: You can verify whether the nested virtualization is enabled on VirtualBox by right-clicking on the Machine name and navigating to Settings:
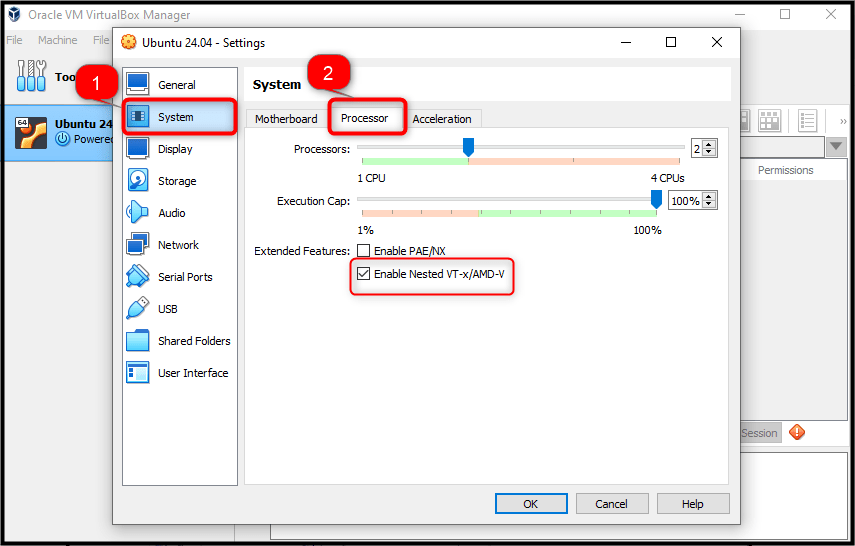
Step 5: Then, navigate to the Processor tab in the System section. There, you will be able to see that the Nested VT-X/AMD-V is enabled on VirtualBox:
Installing KVM on Ubuntu 24.04
After you perform the above process, you can now follow the below-given steps to install and use KVM on Ubuntu 24.04:
Step 1: Check KVM is Supported on Ubuntu
First, ensure KVM is supported on your Ubuntu system, you can do this by simply running the below-given command:
egrep -c '(vmx|svm)' /proc/cpuinfo

If the above command returns a number other than 0, it means that KVM is enabled on your system.
Alternatively, users can also utilize the kvm-ok command to authenticate KVM is supported on the system. But, to execute kvm-ok command, users first require to install the cpu-checker package on the Ubuntu system via the below command:
sudo apt install cpu-checker -y
Then use the kvm-ok command to check for the KVM support on Ubuntu 24.04:
kvm-ok

Step 2: Install KVM on Ubuntu
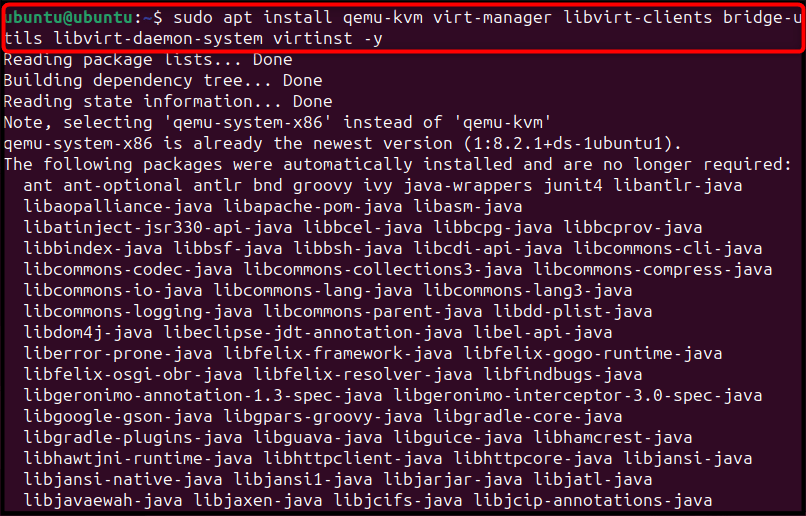
After ensuring KVM is supported on Ubuntu, you can now install KVM and additional virtualization packages through the following command:
sudo apt install qemu-kvm virt-manager libvirt-clients bridge-utils libvirt-daemon-system virtinst -y
Step 3: Enable Virtualization Daemon on Ubuntu
After installing all the packages, it’s now time to enable the Virtualization daemon on your Ubuntu system so that it will restart at the system startup. You can enable the Virtualization daemon on Ubuntu from the following command:
sudo systemctl enable libvirtd

Step 4: Start Virtualization Daemon on Ubuntu
Once the Virtualization daemon is enabled, run the below-given command to start it on Ubuntu:
sudo systemctl start libvirtd

Step 5: Check Virtualization Daemon Status on Ubuntu
In this way, users can authenticate for the Virtualization daemon status on the Ubuntu system via the following command:
sudo systemctl status libvirtd
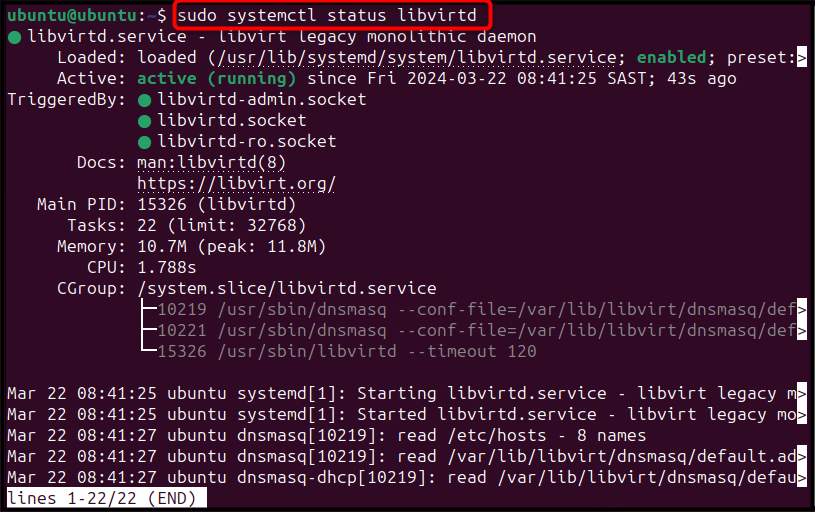
The active (running) status of the Virtualization daemon ensures that it is successfully running on Ubuntu.
Step 6: Add a User to libvirt and KVM Groups
Additionally, you should also add the currently logged-in user to libvirt and KVM groups. Doing this will allow them to create and manage the Virtual machines on your system.
For adding the currently logged-in user to libvirt group, users can utilize the following command by replacing the $USER with your system username:
sudo usermod -aG libvirt $USER

For adding the currently logged-in user to kvm group, users can utilize the below-given command:
sudo usermod -aG kvm $USER

Step 7: Download an ISO Image
You must also download an ISO file of any operating system since you can use it later on to create a Virtual machine of that operating system. For example, we have downloaded the ISO file of TinyOS on Ubuntu.
Step 8: Open Virtual Machine Manager on Ubuntu
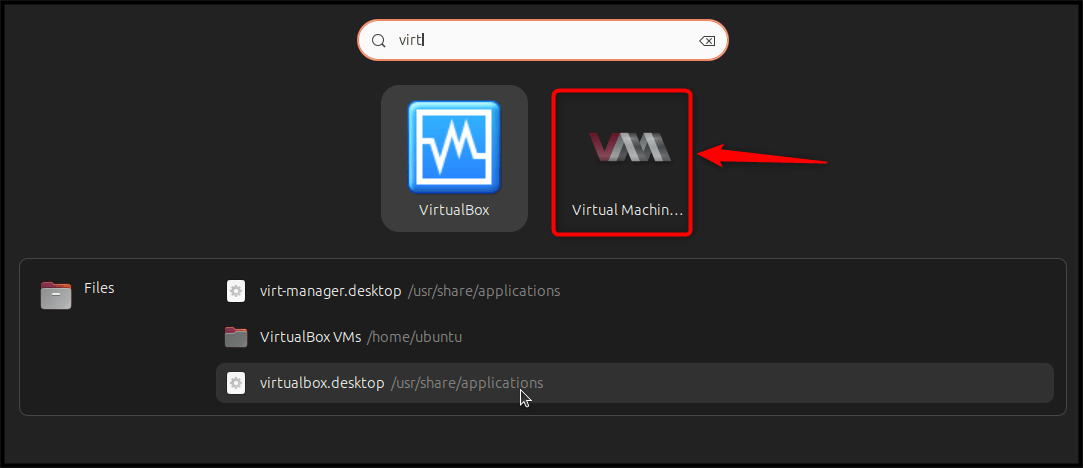
After downloading the ISO file, search for Virtual Manager from the Application Menu and open it on your desktop:
Step 9: Create a Virtual Machine on Ubuntu
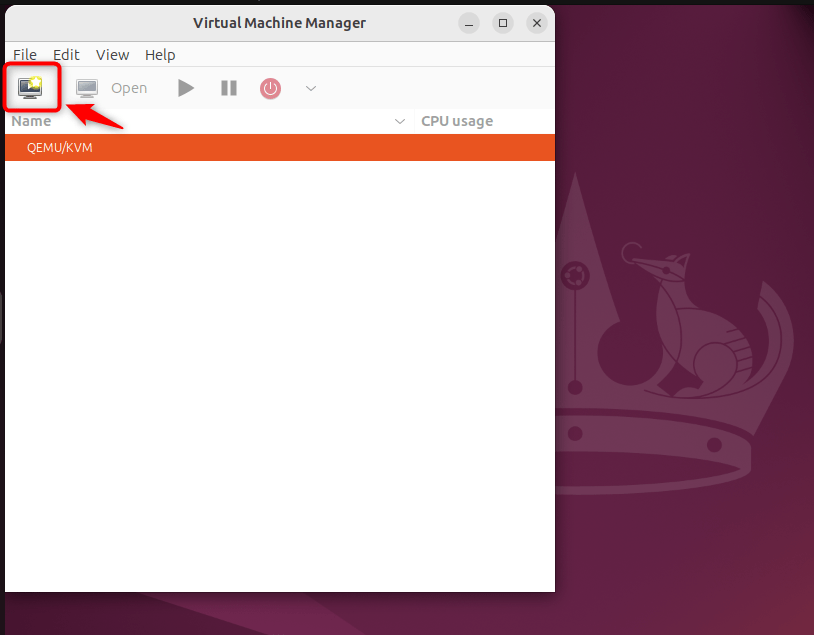
Then, click on the computer icon:
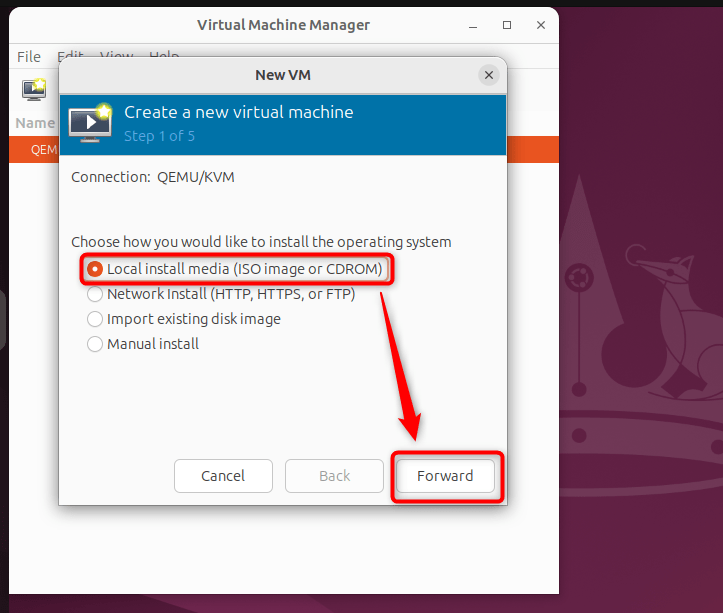
Choose the Local install media option if you have downloaded the ISO file in the previous step, then click the Forward button:
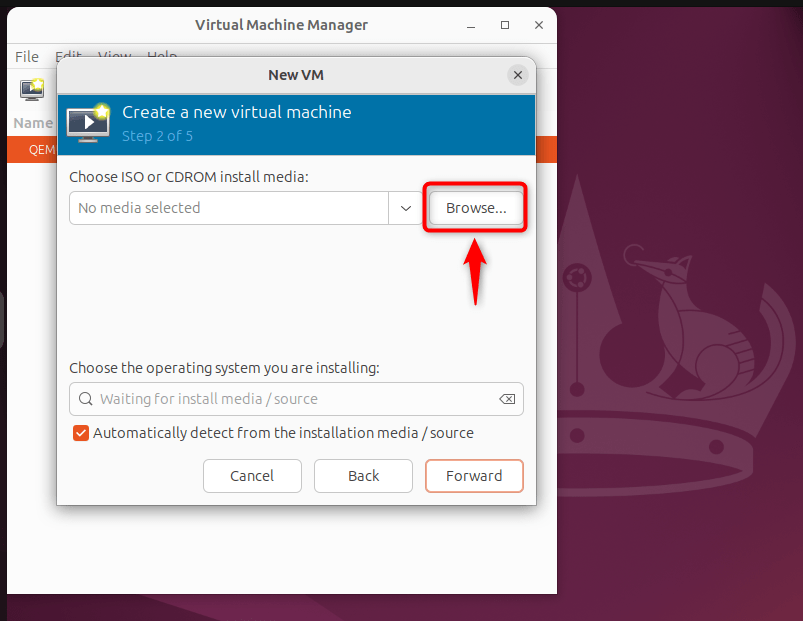
Click on the Browse option:
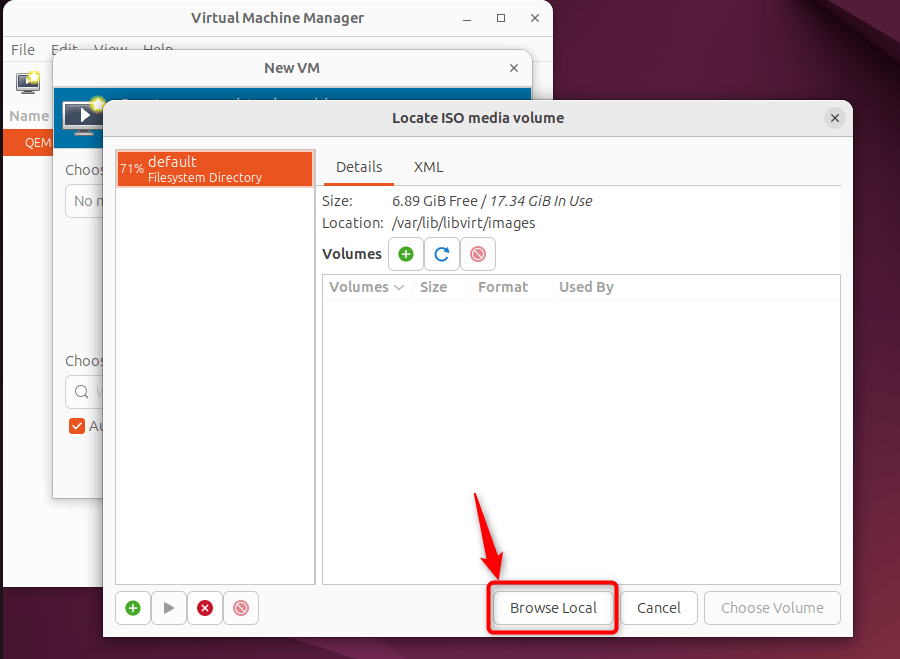
Then select the Browse Local option:
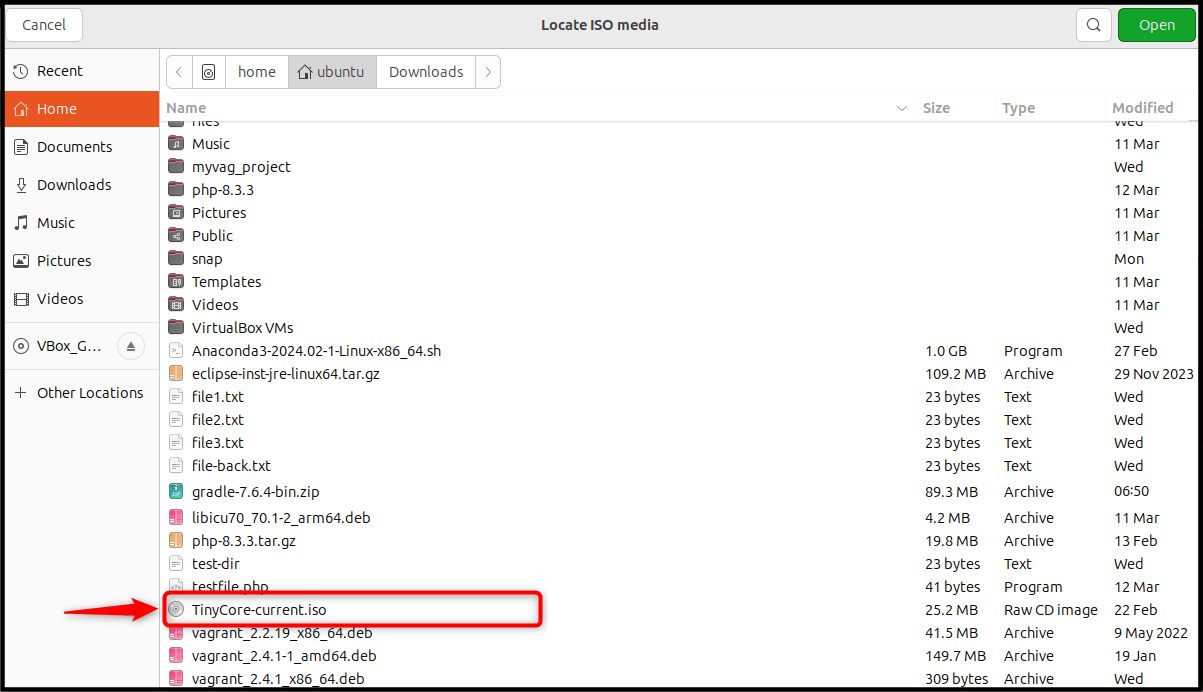
Select the ISO file from your system:
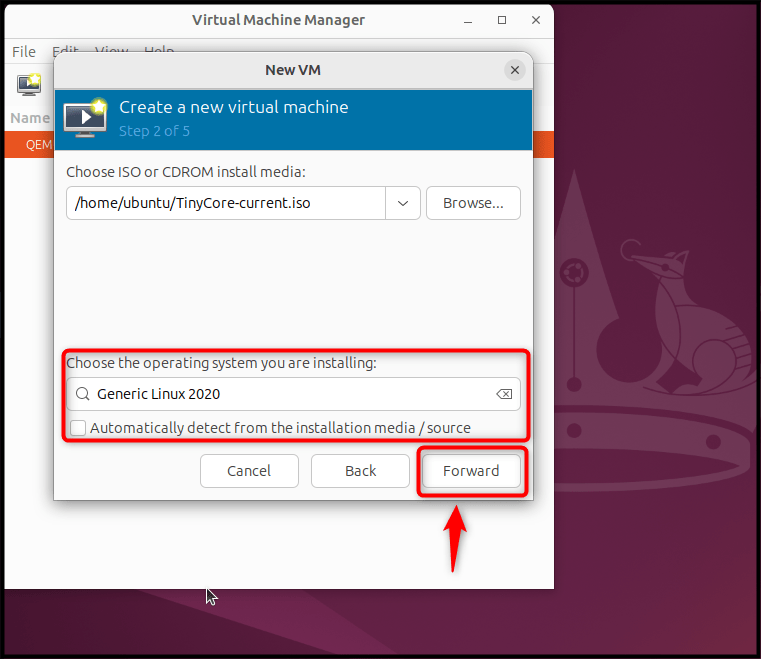
Then choose the operating system you are installing, once done, click the Forward button:
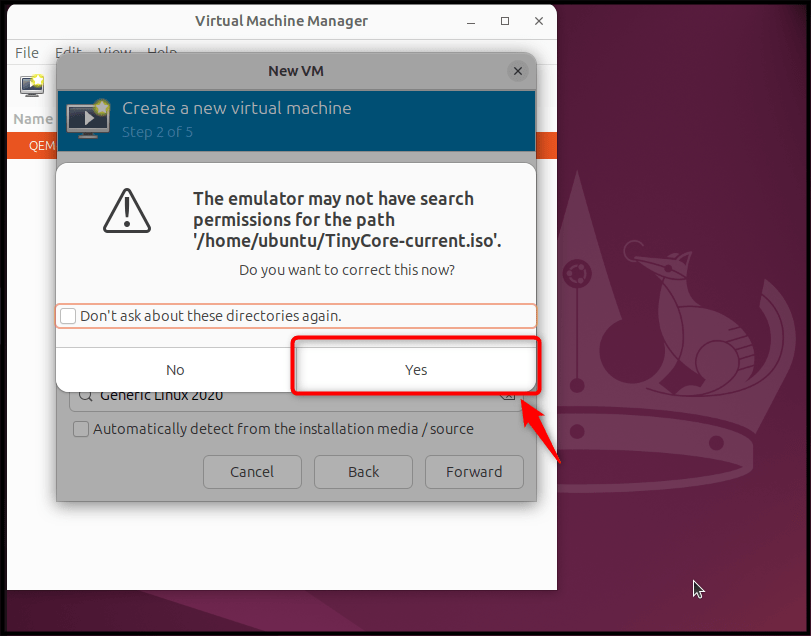
Click the Yes button on the onscreen warning:
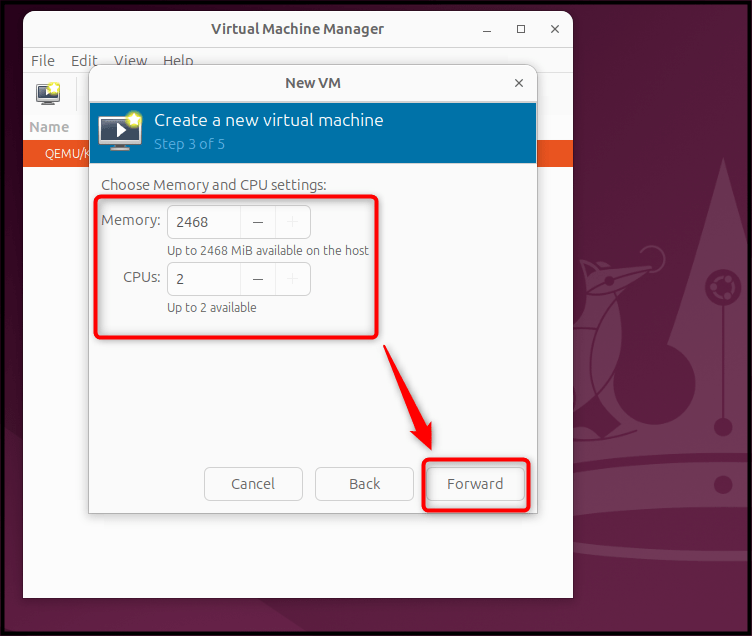
Then choose the Memory and CPU cores according to your choice:
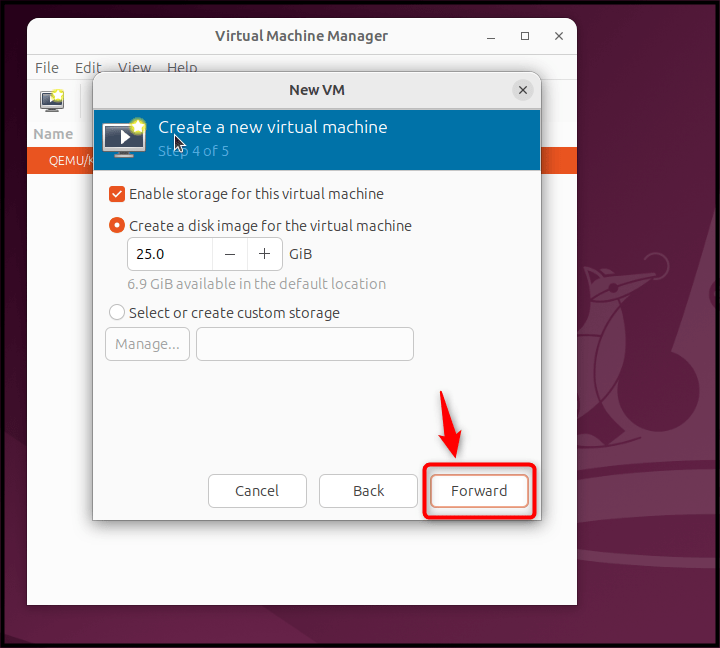
Further, select the amount of storage for your operating system:
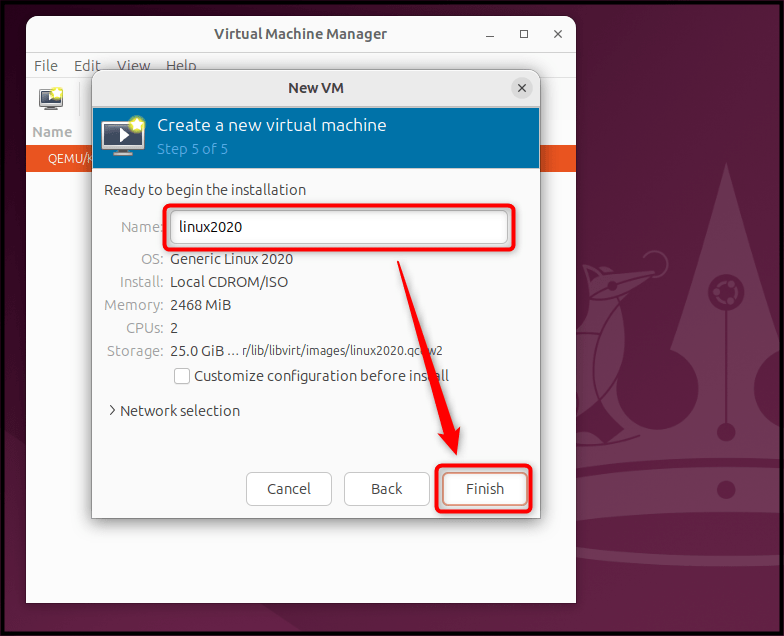
Then finalize the installation by giving your operating system a proper name, once done, click the Finish button to start the process:
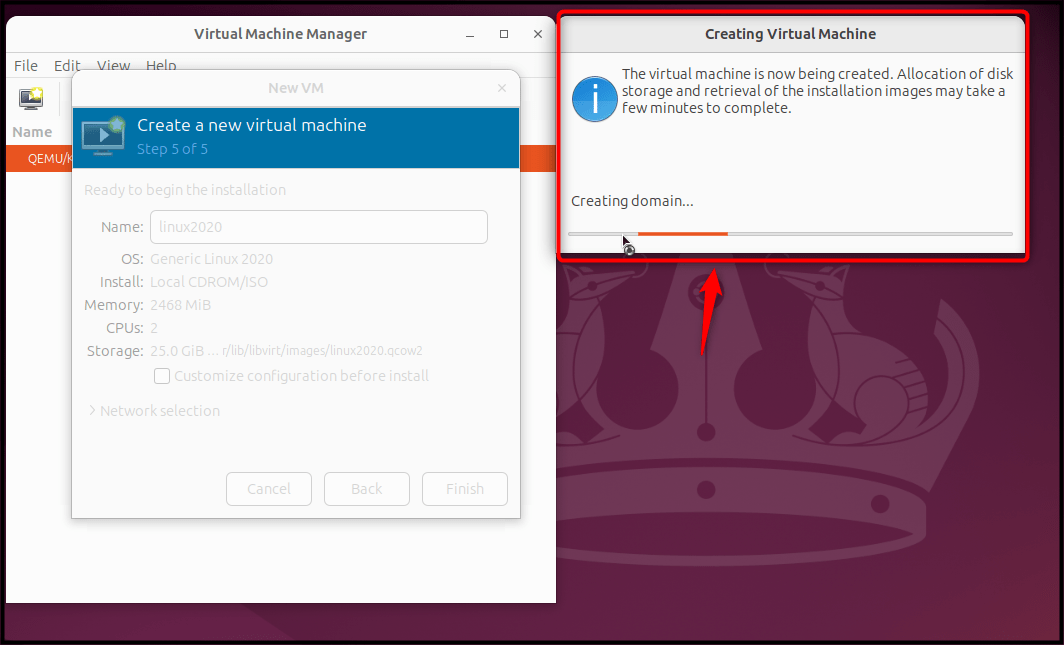
This will start creating your Virtual Machine on the Ubuntu system:
You can follow the onscreen instructions to boot your operating system on Virtual Manager:
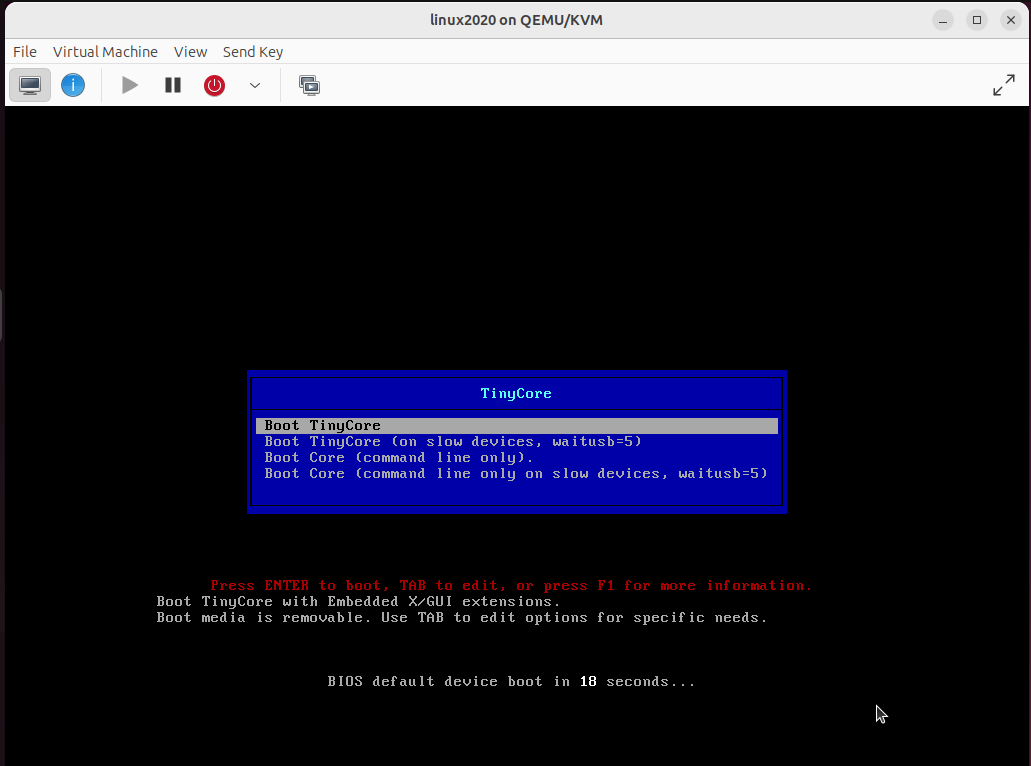
Once everything is done, you will be able to use the operating system on the Virtual Manager installed on the Ubuntu system:

At this point, we have completed the installation and use of KVM on Ubuntu 24.04.
Conclusion
KVM is a powerful technology used for running multiple Virtual Machines in a server. You can install KVM on Ubuntu 24.04 by first enabling the Virtualization support on the computer and VirtualBox. After that, you can then install KVM with additional Virtualization packages from the apt command.
Once installed, you can enable and start the Virtualization daemon, and install an operating system as a Virtual Machine on your Ubuntu system. The complete details to enable Virtualization, install KVM, and run a Virtual Machine are provided in the above section of this guide. You can follow the guide and start running multiple Virtual Machines on Ubuntu 24.04.
Frequently Asked Questions
egrep -c '(vmx|svm)' /proc/cpuinfo
A non-zero value indicates that hardware virtualization is supported.
sudo apt install virt-manager
lsmod | grep kvm
If the output shows kvm_intel or kvm_amd, KVM is installed and working. You can also use the virt-manager tool to see and manage virtual machines. 


Leave feedback about this