
Magento is an eCommerce platform for building and managing online stores. It is highly scalable, making it suitable for businesses of all sizes. It offers numerous features, including product display customization and order management.
Additionally, it supports various payment methods and shipping options, which can help grow your business.
This detailed and comprehensive article will present you with the installation of Magento on Ubuntu 24.04.
How To Install Magento on Ubuntu 24.04?
Through this post, the following topic will be illustrated with real-time commands:
How to Install Required Software for Magento on Ubuntu 24.04?
How to Install Magento on Ubuntu 24.04?
How to Install Required Software for Magento on Ubuntu 24.04?
In the first part of this article, you will learn how to install the required software for Magento on the Ubuntu 24.04 system.
How to Install Apache2 Server on Ubuntu 24.04
The following command can be utilized for installing Apache2 on Ubuntu 24.04 machine.
Step 1: Install Apache2 Server
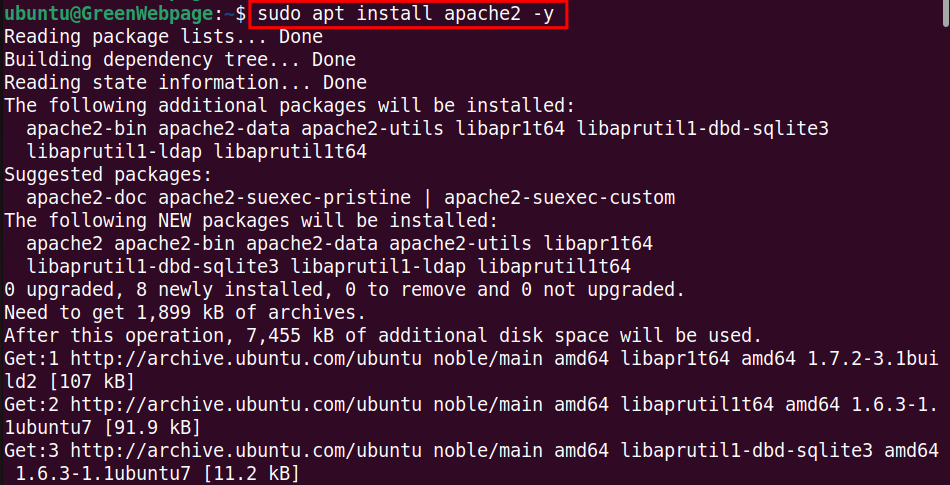
For properly running the Magento on your system, install the Apache2 through the command:
sudo apt install apache2 -y
Step 2: Check Apache2 Status
The Apache2 status can be verified using the “status” option with the command below:
sudo systemctl status apache2

If you find that Apache2 is enabled and active, it shows that the Apache2 package has been configured without occurring any error.
How to Install PHP Modules on Ubuntu 24.04?
Install PHP and Its associated modules through the following commands.
Step 1: Install PHP Modules
The Magento also relies on the PHP package. Therefore, you have to run the attached command to install the complete set of PHP modules::
sudo apt install php libapache2-mod-php php-mysql php-cli php-curl php-xml php-mbstring php-zip php-intl php-bcmath php-gd -y

Step 2: Verify PHP Version
When the installation process completes, you can check the PHP version to ensure the latest release on your Ubuntu 24.04:
php -v

The latest stable release, PHP 8.3.6 is now installed on your Ubuntu machine.
How to Install Composer for Magento on Ubuntu 24.04?
Composer is essential for running the Magento on your Ubuntu machine, follow these steps for setting up.
Step 1: Install “curl”
To install the Composer package, ensure that you have installed the “curl” on your Ubuntu 24.04 system:
sudo apt install curl -y

Step 2: Install Composer
Next, use the “curl” to install and set up the Composer on your system:
sudo curl -sS https://getcomposer.org/installer | sudo php -- --install-dir=/usr/bin --filename=composer

Composer 2.7.7 has been successfully installed in the /usr/bin directory.
Step 3: Confirm Composer Version
To print the installed version of the Composer, run this command:
composer --version

How to install MySQL Package on Ubuntu 24.04?
Perform these steps to install MySQL for Magento database management.
Step 1: Install MySQL server
Magento depends on a database to store all its data, so it is essential to install the MySQL server package on your Ubuntu 24.04:
sudo apt install mysql-server -y
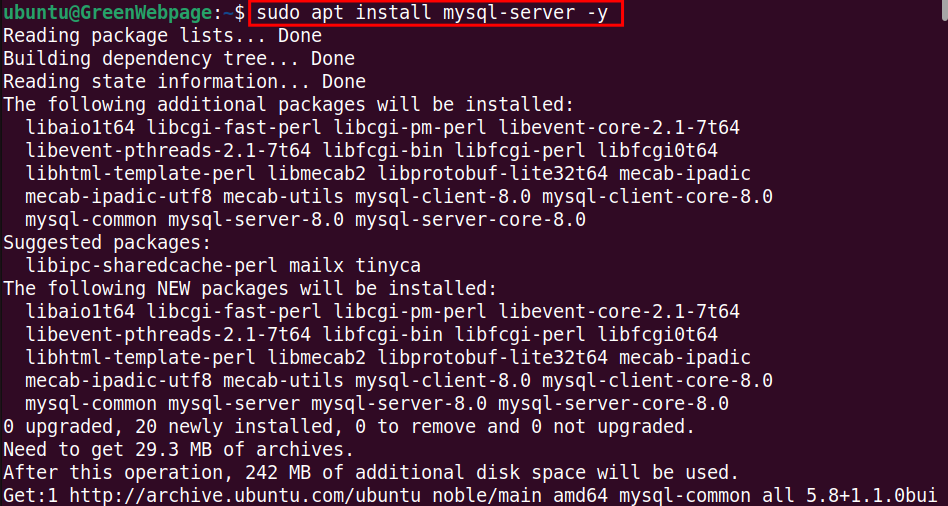
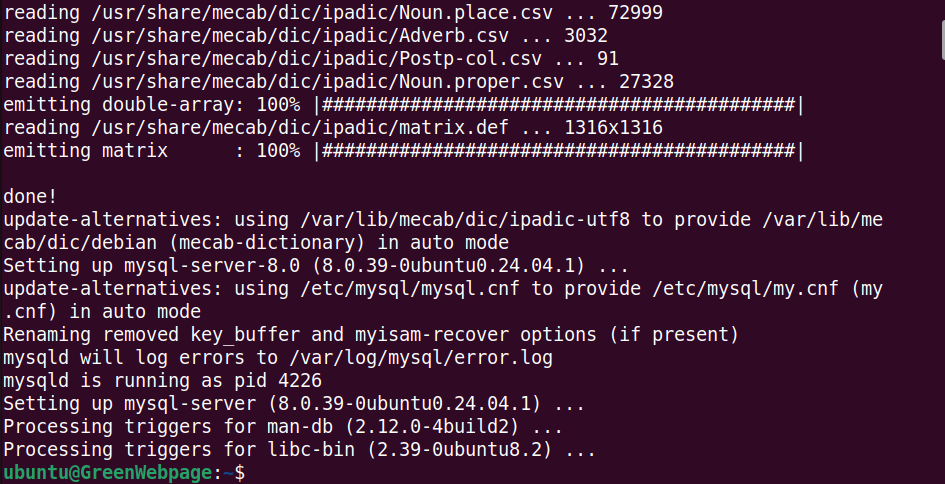
The installation process of the MySQL server is completed without any errors.
Step 2: Check MySQL Version
Run this simple command to ensure the installed version of MySQL on your Ubuntu machine:
mysql --version

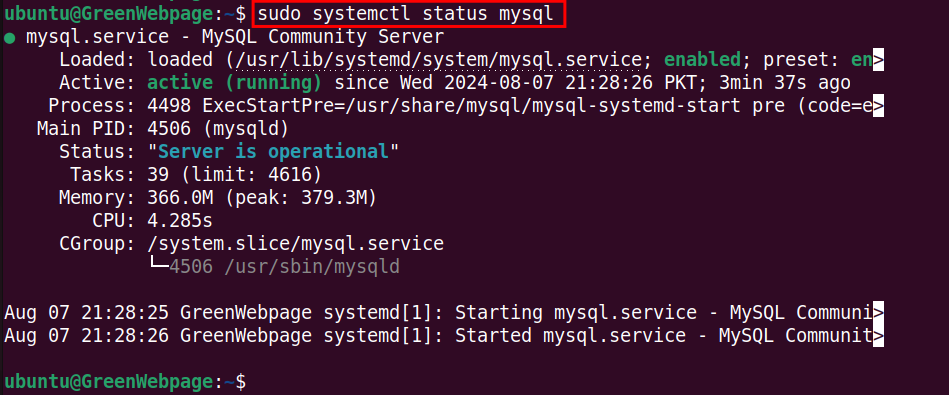
Step 3: Confirm MySQL Status
Make sure that the MySQL server is running on your system:
sudo systemctl status mysql
Step 4: Secure the MySQL installation
Execute this important command to secure and protect your MySQL server from security vulnerabilities:
sudo mysql_secure_installation
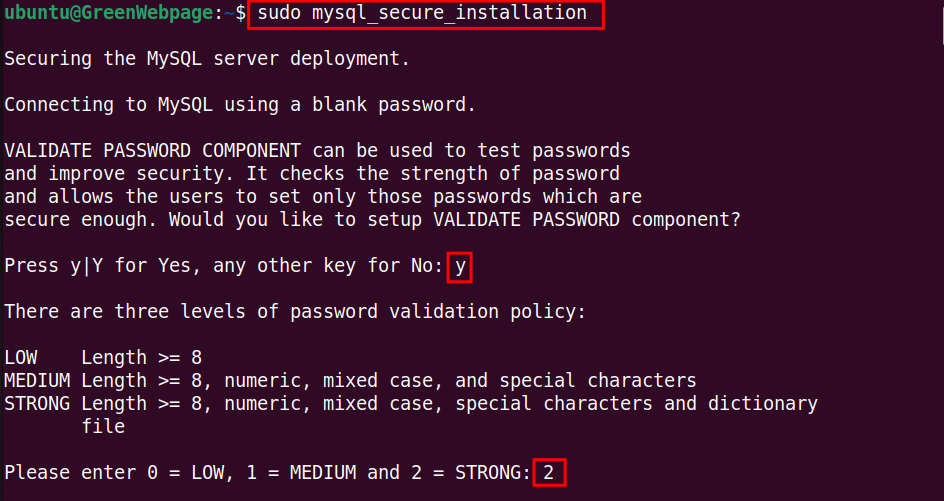
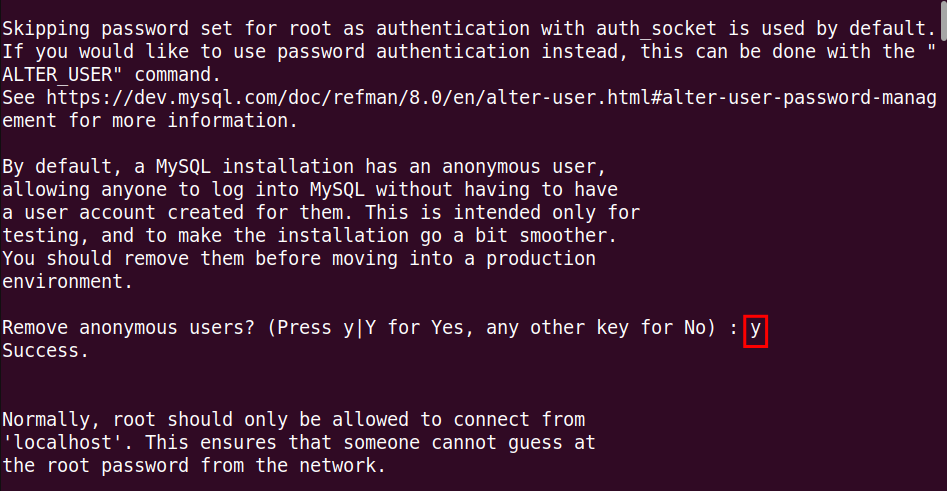
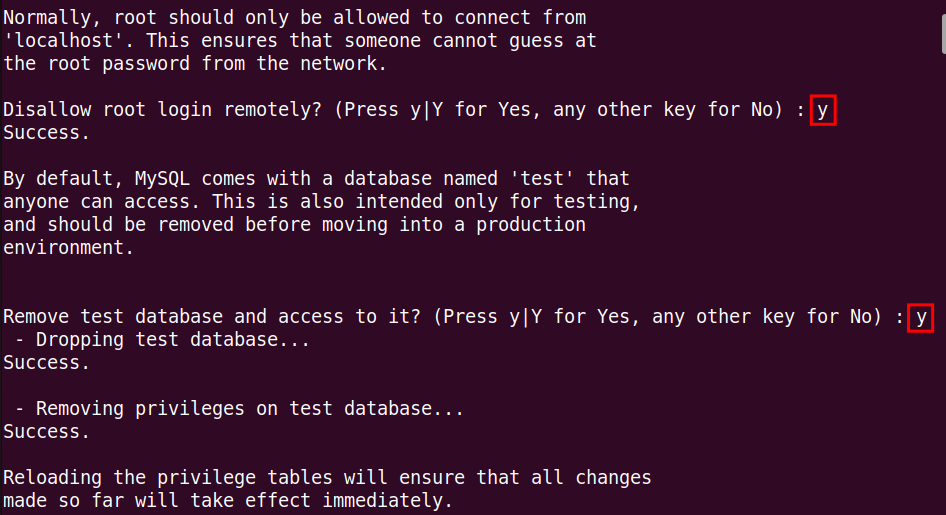
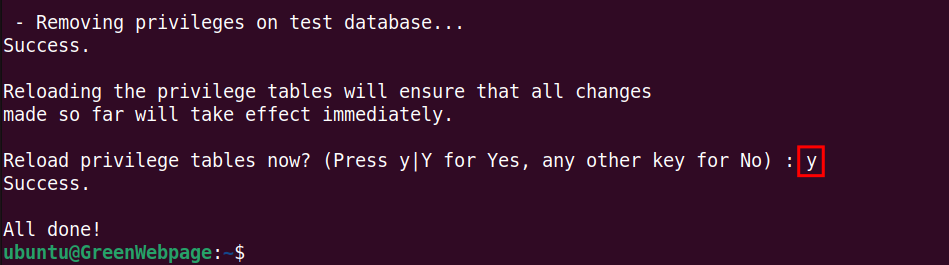
Respond to the prompt questions to ensure that your database is secure to store data for Magento.
How to Install Elasticsearch for Magento on Ubuntu 24.04?
You can utilize Elasticsearch, a search engine by installing it through the following commands.
Step 1: Install “apt-transport-https” Package
To allow “APT” to use HTTPS for fetching and downloading files from repositories, execute the provided command:
sudo apt install apt-transport-https -y

Step 2: Download GPG key for Elasticsearch
Run the command to download the GPG key for Elasticsearch:
wget -qO - https://artifacts.elastic.co/GPG-KEY-elasticsearch | sudo gpg --dearmor -o /usr/share/keyrings/elasticsearch-keyring.gpg

This is required to verify the authenticity of the Elasticsearch packages.
Step 3: Add the Elasticsearch Repository
Next, add the Elasticsearch repository to your system’s sources:
echo "deb [signed-by=/usr/share/keyrings/elasticsearch-keyring.gpg] https://artifacts.elastic.co/packages/8.x/apt stable main" | sudo tee /etc/apt/sources.list.d/elastic-8.x.list

The above command is used to get access to Elasticsearch packages on your Ubuntu 24.04 system.
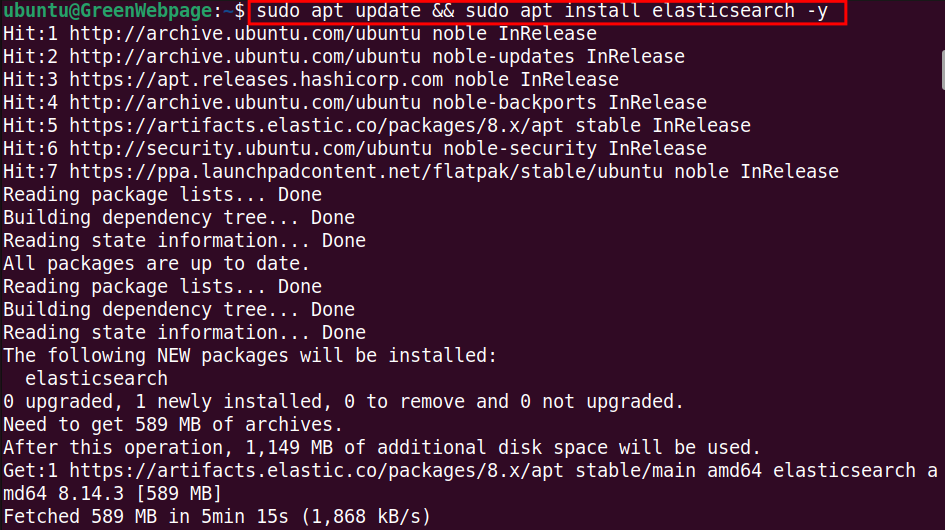
Step 4: Install Elasticsearch
Once the above steps have been completed, update your package list and install Elasticsearch via the command:
sudo apt update && sudo apt install elasticsearch -y
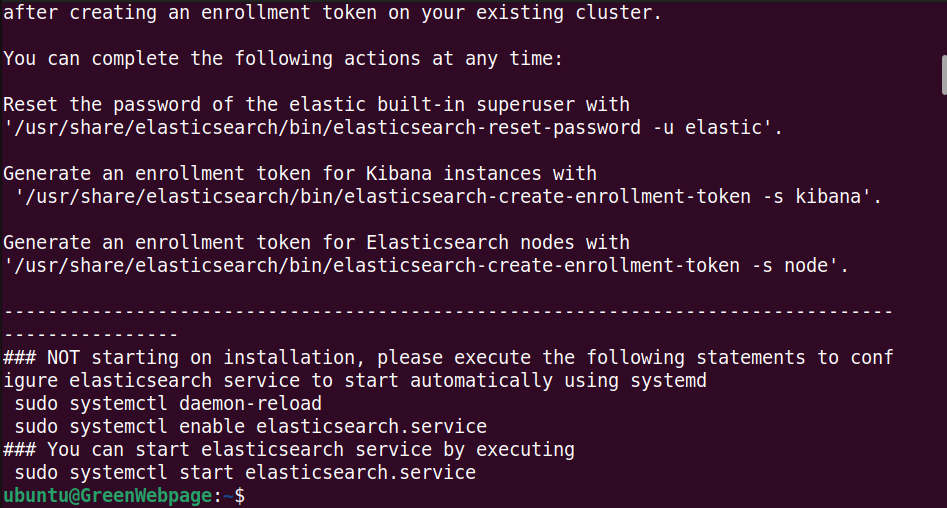
Step 5: Enable Elasticsearch Service
Run this essential command to enable the Elasticsearch service to start on boot, automatically:
sudo systemctl enable elasticsearch.service

Step 6: Start Elasticsearch Service
Start the Elasticsearch service by utilizing the “start” option:
sudo systemctl start elasticsearch.service

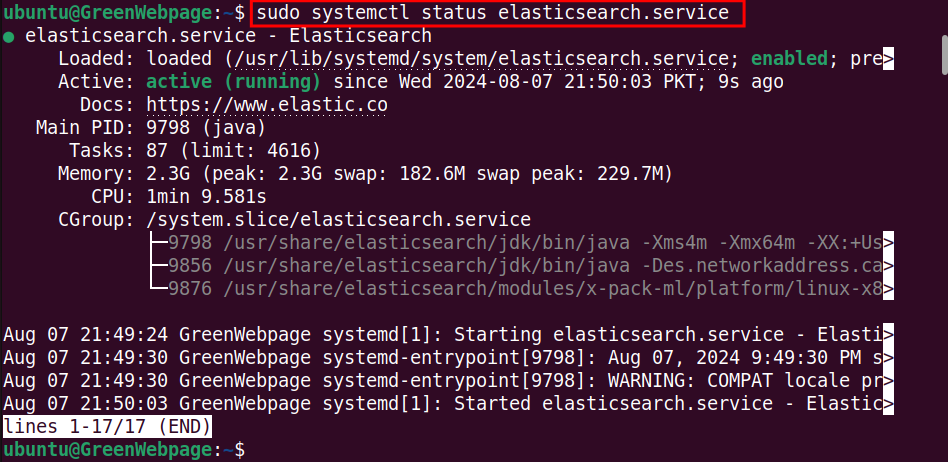
Step 7: Check Elasticsearch Service Status
Finally, confirm that the Elasticsearch service is configured and running correctly on your Ubuntu 24.04 system:
sudo systemctl status elasticsearch.service
How to Configure Elasticsearch for Magento?
Utilize the below steps to configure Elasticsearch for Magento on the Ubuntu 24.04 system.
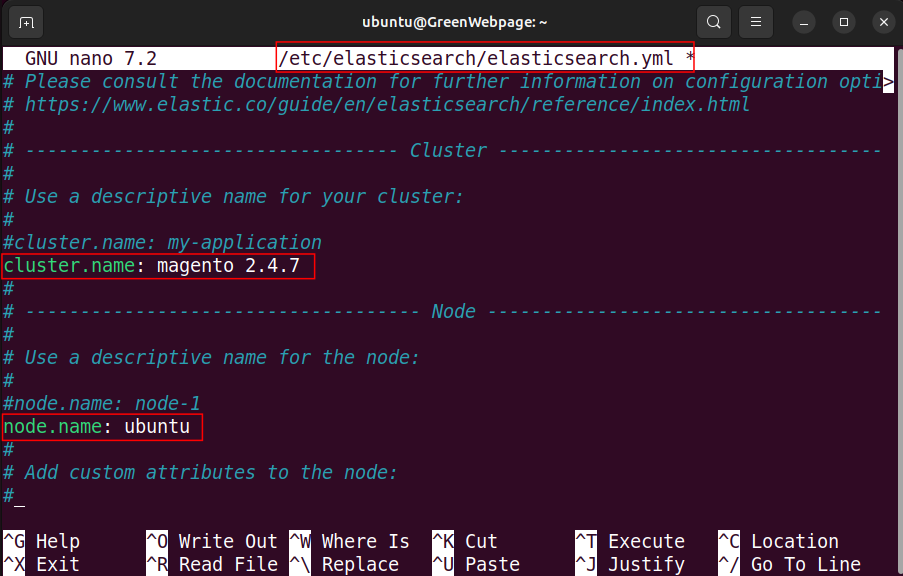
Step 1: Configure Elasticsearch for Magento
Access and modify the Elasticsearch configuration file for Magento:
sudo nano /etc/elasticsearch/elasticsearch.yml

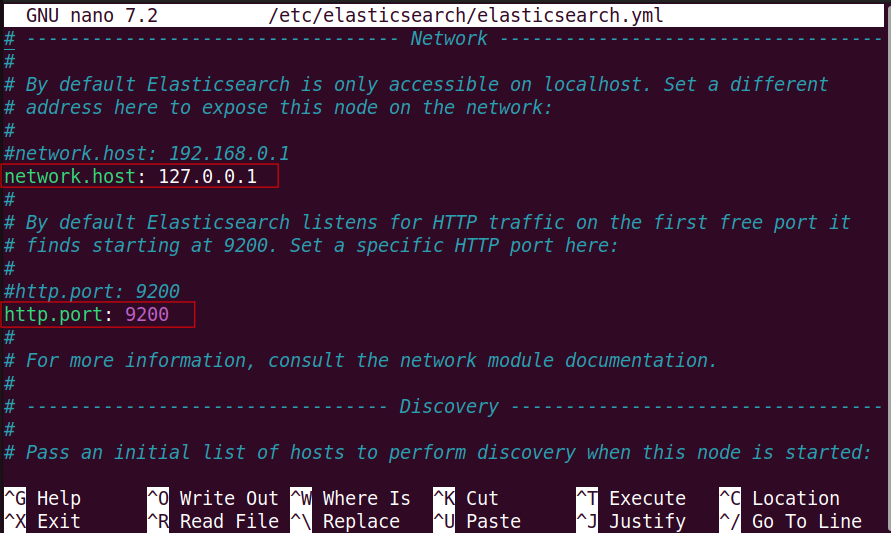
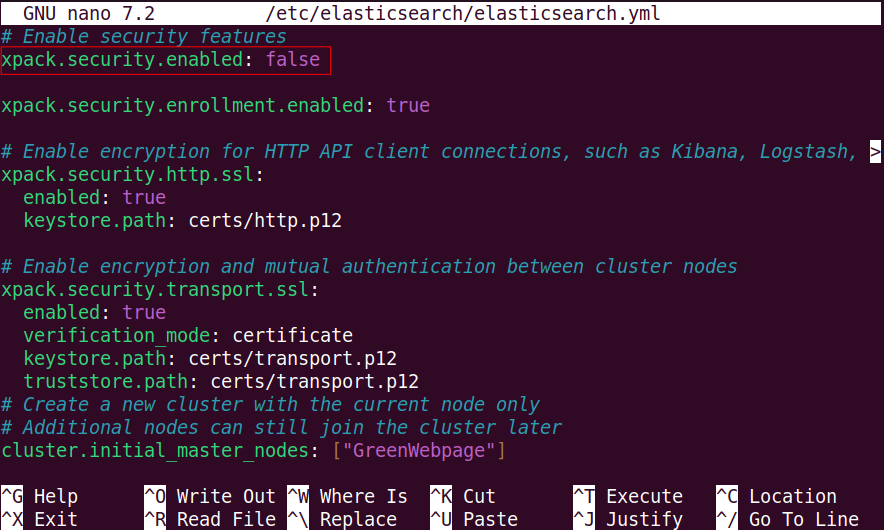
Make sure to modify and update the following settings:
cluster.name: "magento 2.4.7"
node.name: "ubuntu"
network.host: 127.0.0.1
http.port: 9200
xpack.security.enabled: false
Return to the main terminal window after saving the changes.
Step 2: Reload Elasticsearch
Reload the system configuration to apply the changes:
sudo systemctl daemon-reload

Step 3: Restart Elasticsearch
Also, run the command to restart the Elasticsearch service to update the new configuration:
sudo systemctl restart elasticsearch

Step 4: Test Elasticsearch
You can run the below command to verify that Elasticsearch is properly configured and running on your Ubuntu 24.04 machine:
curl -XGET 'http://localhost:9200'

If you see the above-mentioned output, it means that Elasticsearch is running on your Ubuntu 24.04 machine.
How to Install Magento on Ubuntu 24.04?
Learn how to Install Magento, an eCommerce platform, on Ubuntu 24.04 through this guide.
Step 1: Setup MySQL Database
Upon successfully installing and configuring the required software packages, let’s start the installation process of Magento by creating the MySQL database for Magento:
sudo mysql -u root -p

Type your script, such as given below:
CREATE DATABASE magento;
CREATE USER 'magento_gwp'@'localhost' IDENTIFIED BY 'Pass@123';
GRANT ALL PRIVILEGES ON magento.* TO 'magento_gwp'@'localhost';
FLUSH PRIVILEGES;
EXIT;
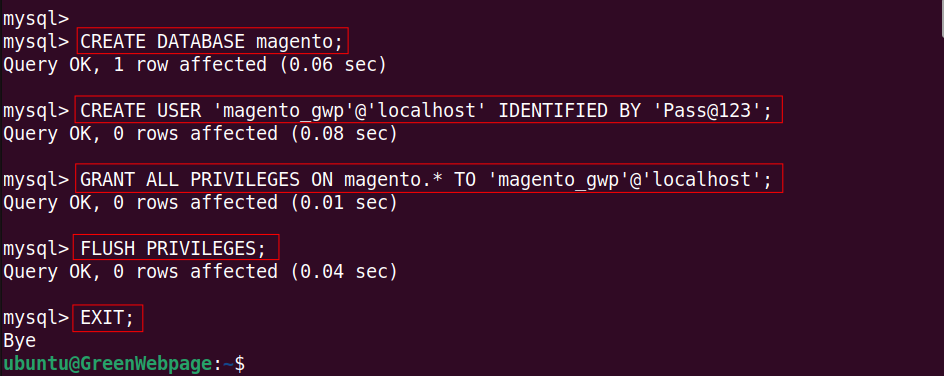
This SQL script creates a database “magento” and a user “magento_gwp” with a strong password. You are also required to grant all privileges on the Magento database to the specified user.
Step 2: Set Directory (/var/www/html) Permissions
The following command is used to change the ownership of all files and directories within “/var/www/html” directory to the current user:
sudo chown -R $USER:$USER /var/www/html

Use the command to set the proper permissions to “/var/www/html” directory:
sudo chmod -R 755 /var/www/html

The above two commands are essential for setting permissions, which allow the web server to read and execute files while restricting access to authorized users only.
Step 3: Create Magento Access Key
To create the Magento access key:
- Log in to your Magento account.
- Go to My Profile.
- Locate the Access Key in the Marketplace.
- Create a New Access Key.
https://account.magento.com/customer/account/login/

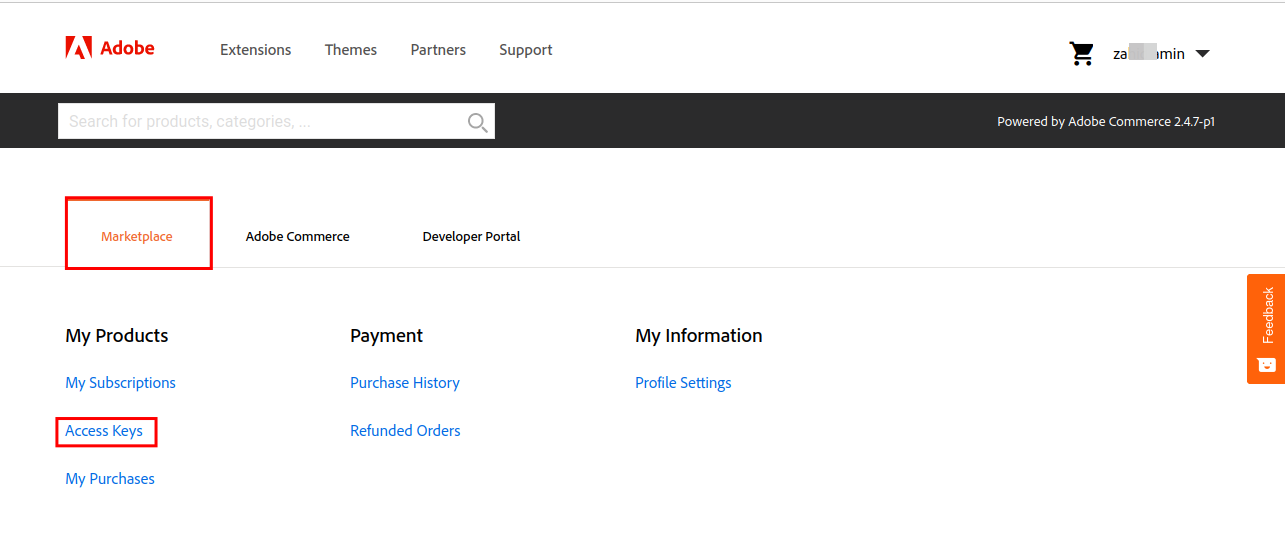
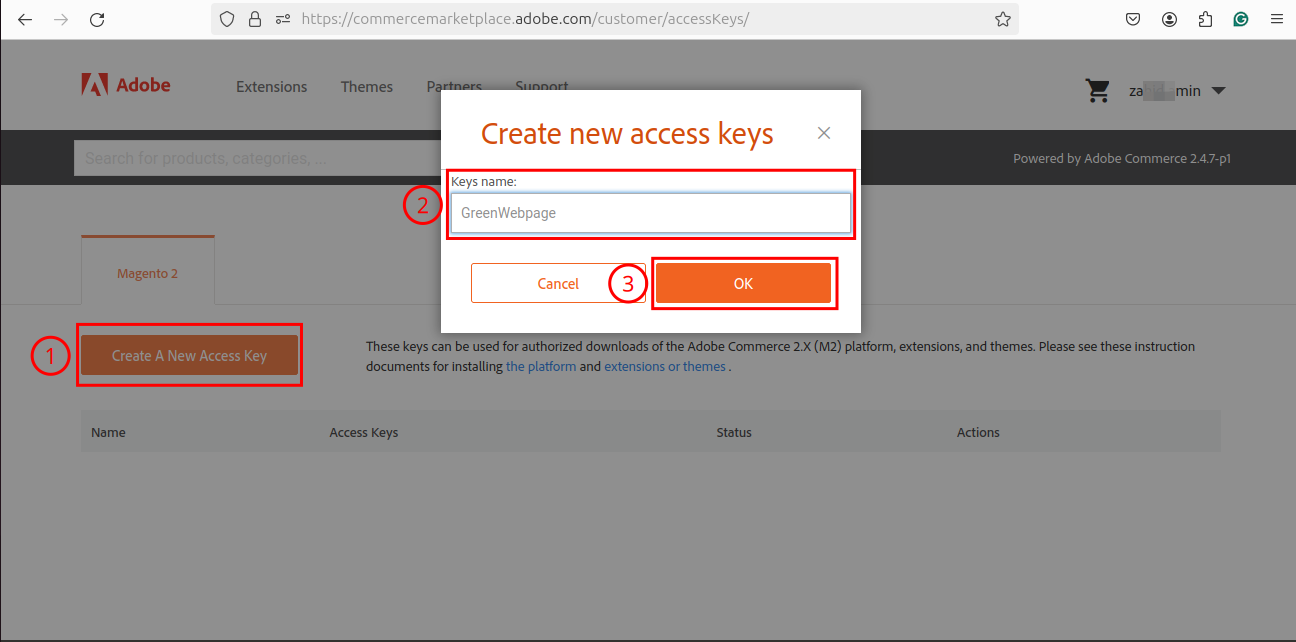
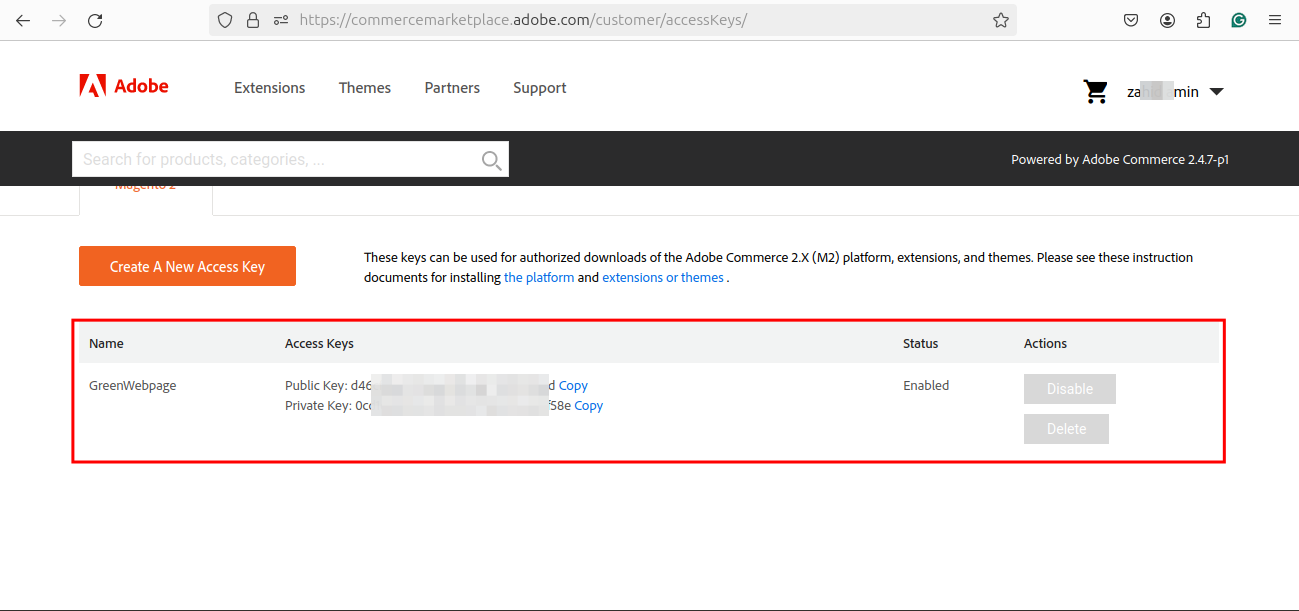
The Magento Access Keys are used to authenticate access to the Magento repository when using Composer to install Magento software.
Note: The Magento access keys are confidential therefore do not share with others.
Step 4: Create a Magento Project
Now, utilize the following script to create a new Magento project in the “/var/www/html/magento” directory:
composer create-project --repository-url=https://repo.magento.com/ magento/project-community-edition /var/www/html/magento
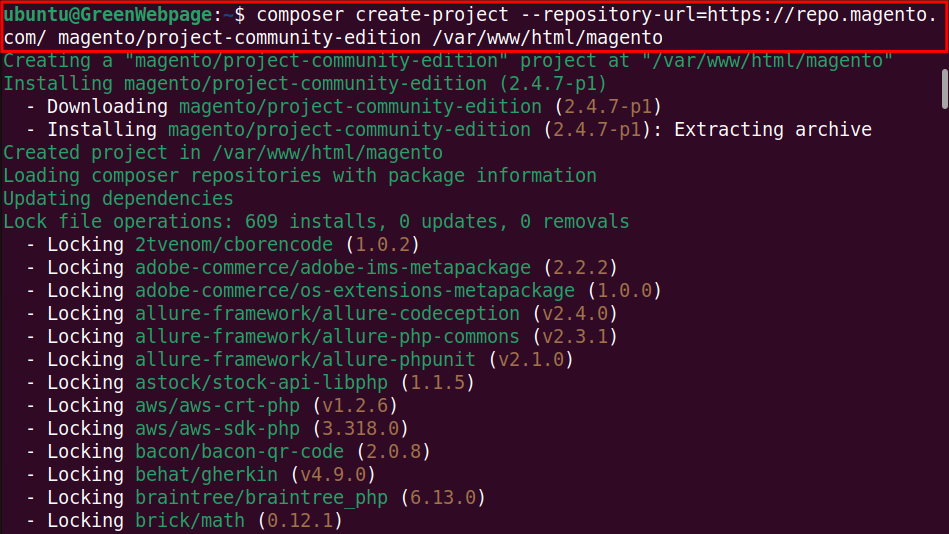

During the configuration process, you will be prompted to enter the Public Key and Private Key that you created via Magento Access Keys.
Step 5: Set File Permissions for Magento
Execute the command to set the ownership of the “/var/www/html/magento” directory to the specified user and group:
sudo chown -R www-data:www-data /var/www/html/magento

The following command ensures that the specified directories are accessible and executable by the owner and readable by others:
sudo find /var/www/html/magento -type d -exec chmod 755 {} \;

Also, run the command to set permissions that ensure files can be read by the owner and other users while preventing unauthorized changes:
sudo find /var/www/html/magento -type f -exec chmod 644 {} \;

Step 6: Install Magento Packages
Run the provided Magento setup script from the “/var/www/html/magento” directory, to complete the installation:
sudo php bin/magento setup:install \
--base-url=http://localhost/ \
--db-host=localhost \
--db-name=magento \
--db-user=magento_gwp \
--db-password=Pass@123 \
--admin-firstname=admin \
--admin-lastname=admin \
--admin-email=admin@example.com \
--admin-user=admin \
--admin-password=Admin123 \
--language=en_US \
--currency=USD \
--timezone=America/Chicago \
--use-rewrites=1

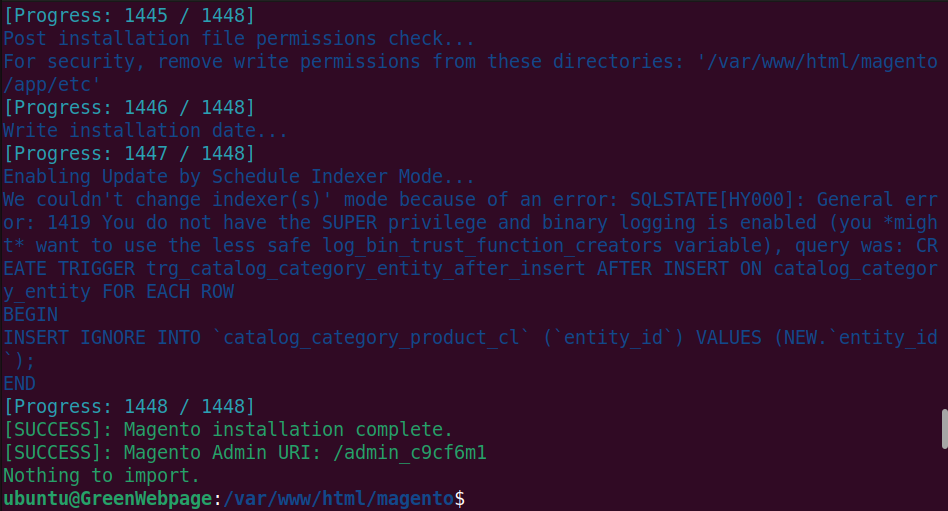
While executing this command, ensure the MySQL database is configured correctly, use strong admin credentials, and set the correct URL and site settings.
How to Configure Apache2 for Magento on Ubuntu 24.04?
For Magento, use these steps to configure Apache2 on Ubuntu 24.04.
Step 1: Configure Apache File for Magento
To run Magento, you will need an Apache configuration file:
sudo nano /etc/apache2/sites-available/magento.conf

Type your configuration script, for instance:
<VirtualHost *:80>
ServerAdmin admin@localhost
DocumentRoot /var/www/html/magento
ServerName localhost

<Directory /var/www/html/magento/>
Options Indexes FollowSymLinks
AllowOverride All
Require all granted
</Directory>

ErrorLog ${APACHE_LOG_DIR}/error.log
CustomLog ${APACHE_LOG_DIR}/access.log combined
</VirtualHost>
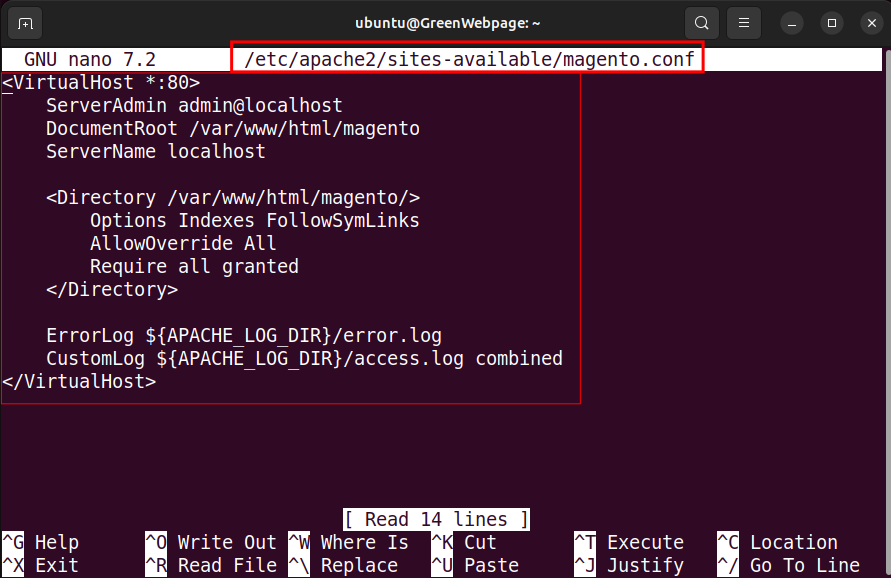
Save the configuration settings for Magento and close the file.
Step 2: Enable the Magento Site and Apache modules
Utilize this command to enable the Apache configuration file, such as “magento.conf” for Magento:
sudo a2ensite magento.conf

Run the command below to enable necessary Apache modules, such as the rewrite module:
sudo a2enmod rewrite

Step 4: Restart the Apache Server
Update the changes by restarting the Apache web server from your Ubuntu 24.04 terminal:
sudo systemctl restart apache2

This command will restart the Apache2 server and apply the changes made to the configuration file.
Step 5: Access Magento via “Localhost”
You can now access Magento at your domain, such as localhost:
localhost
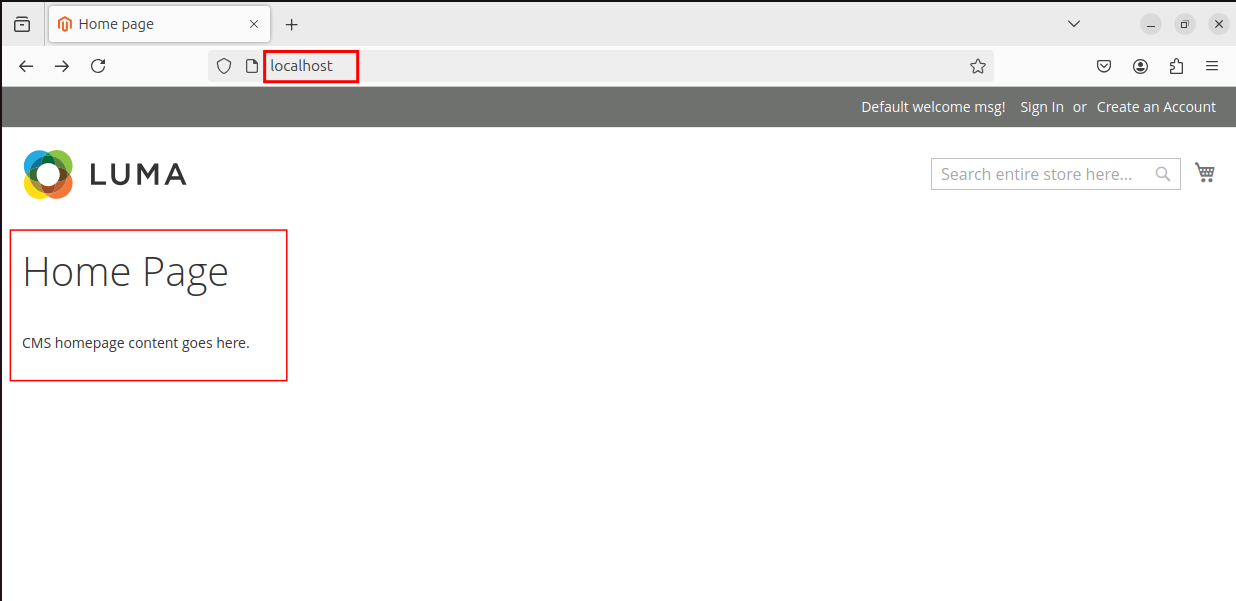
The Home Page on your web page shows that you have successfully installed Magento on Ubuntu 24.04 machine.
Conclusion
Magento can be installed on Ubuntu 24.04. First, install the required software packages, such as Apache2, PHP modules, Composer, MySQL server, and Elasticsearch. Then, install the Magento package on your Ubuntu machine using the Composer.


Leave feedback about this