Installing MySQL on Debian 12 will help someone from a structured and adaptable database framework. This integrates with several systems and services. Furthermore, its dependable and durable features make it more renowned than the others. Setting it up helps users maneuver operations quite easily and improves the overall productivity of the DB infrastructure.
MySQL manual, along with active community support, helps to ease problem-solving and other operational improvements, making this combination useful even in complex scenarios. Furthermore, this makes it more appropriate for administrators, businesses, data analysts or anyone working with large databases who expect an efficient DBMS solution as the system is fairly easy to troubleshoot.
This guide provides the iterative steps involved in installing and configuring MySQL on Debian 12.
Table of Content
How to Install MySQL on Debian 12?
The default repositories on Debian 12 do not find the MySQL package. Without the provided instructions, it isn’t possible to install it on this Linux system. Thus, consider the below suggestions as they provide the most up-to-date version of MySQL.
Step 1: Download MySQL Package
Let us first download the repository information package of MySQL that comes in .deb format.
wget https://dev.mysql.com/get/mysql-apt-config_0.8.30-1_all.deb

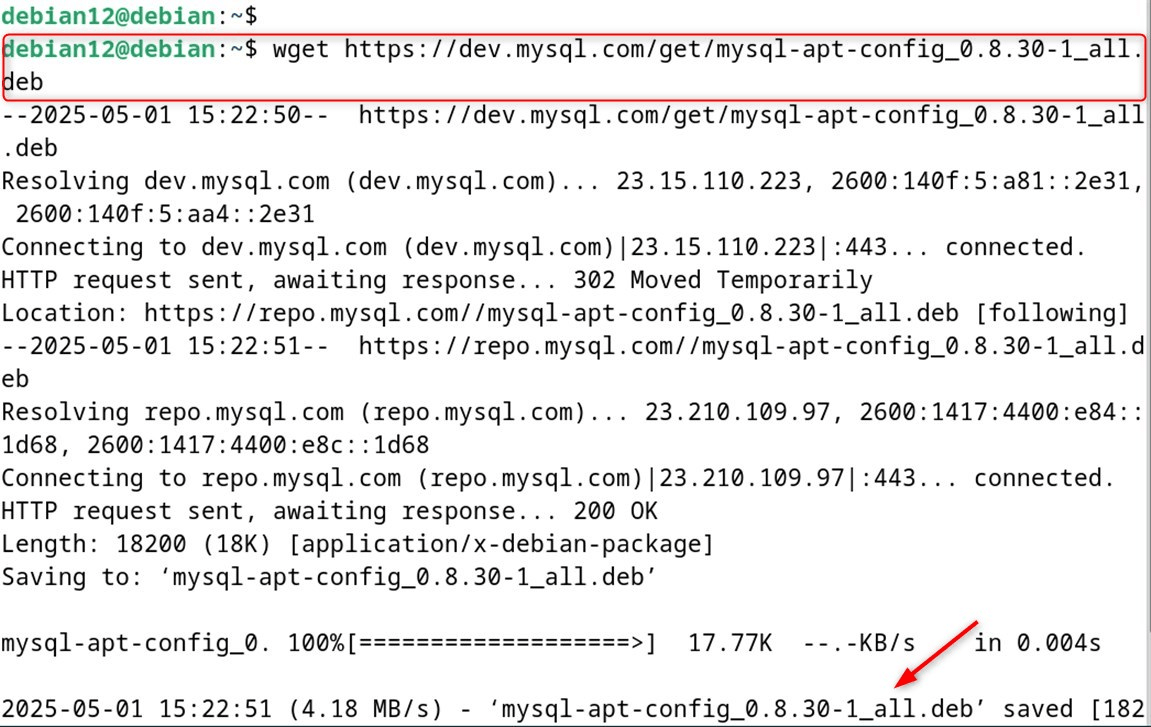
Reminder. For the most recent release you should always check the repository page of MySQL.
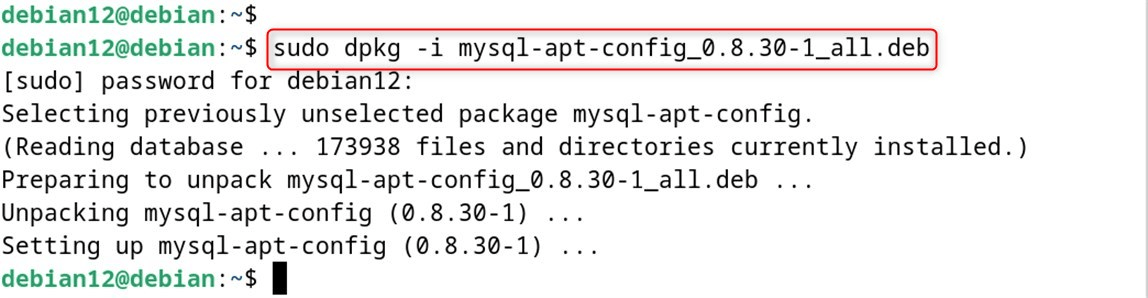
Step 2: MySQL Configuration Package Installation
Then, utilize the .deb package file to initialize the installation:
sudo dpkg -i mysql-apt-config_0.8.30-1_all.deb

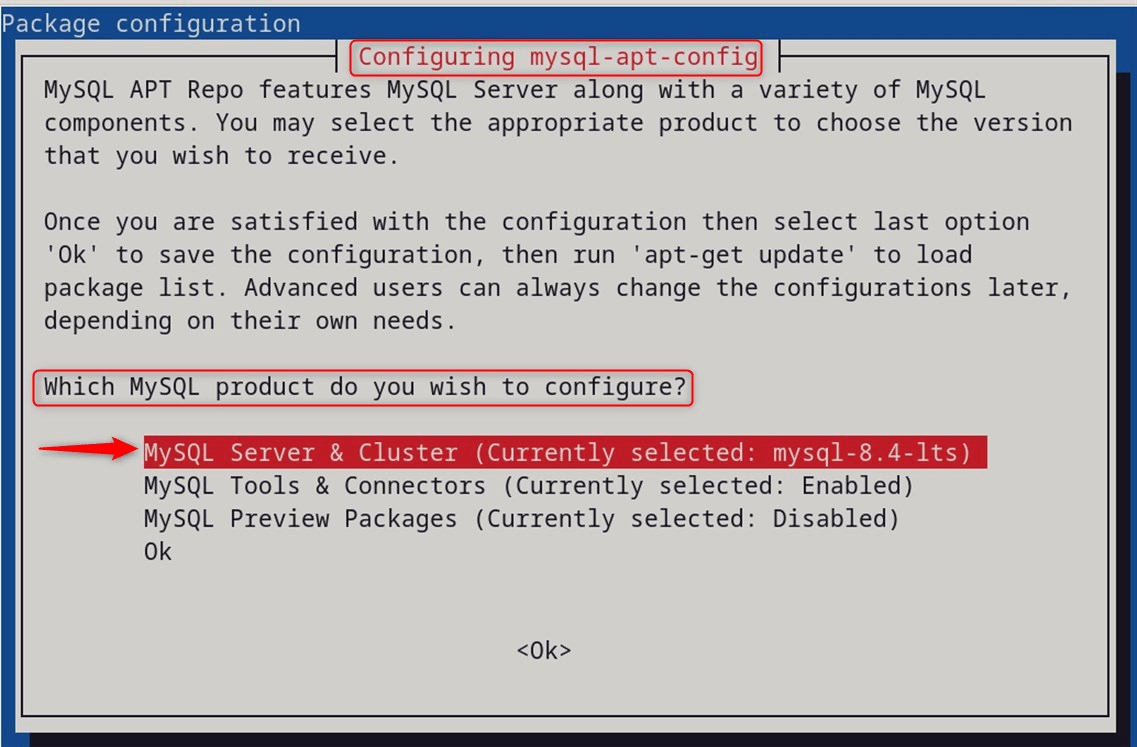
Modify the product and update the existing DB server sources so they respond to the MySQL repository. For example, select the option for initializing configurations:

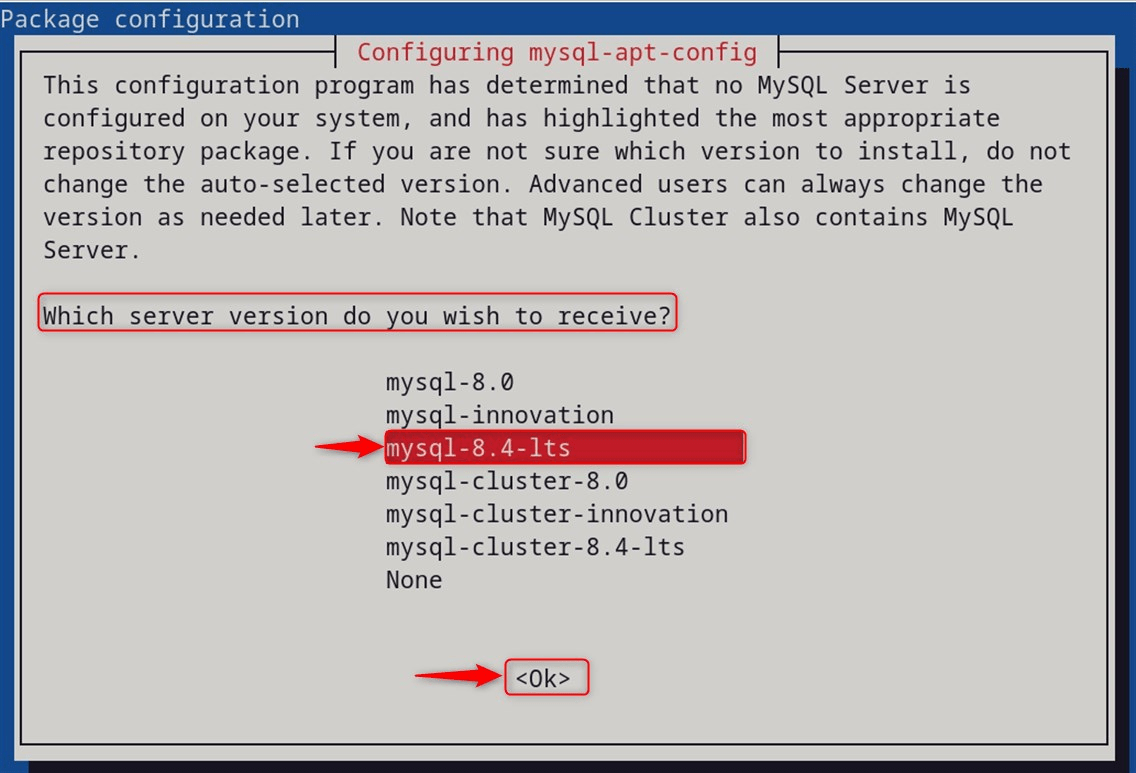
To choose a version like (mysql-8.4-lts), and hit OK to proceed:

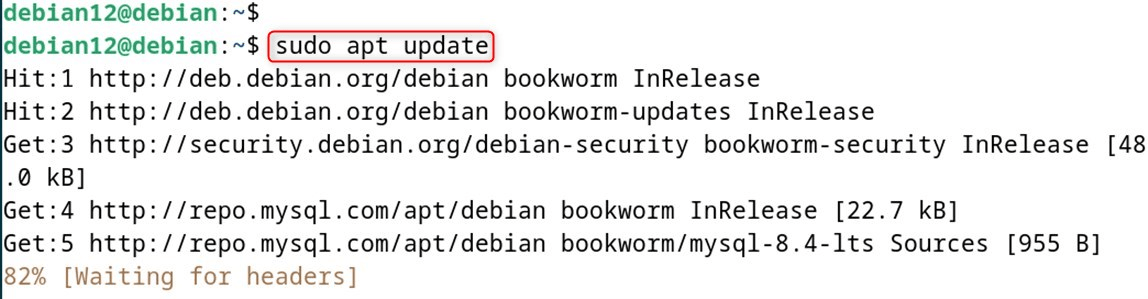
Step 3: Refresh the System
Now, users need to modify the server package index on the server to accommodate the newly set MySQL information:
sudo apt update

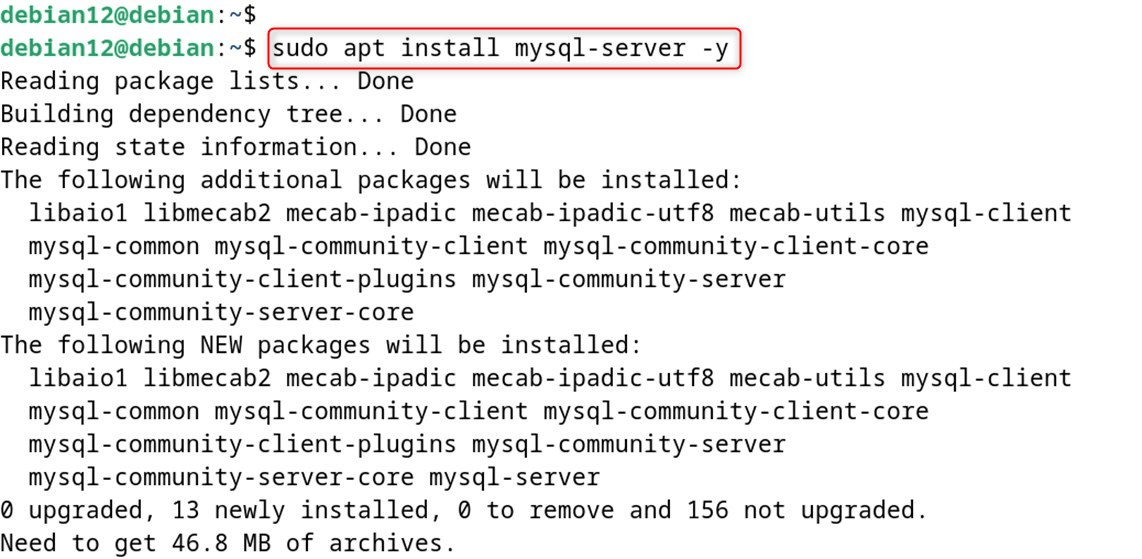
Step 4: MySQL Installation
Let’s install MySQL. The steps needed to install the package are provided in the following code line:
sudo apt install mysql-server -y

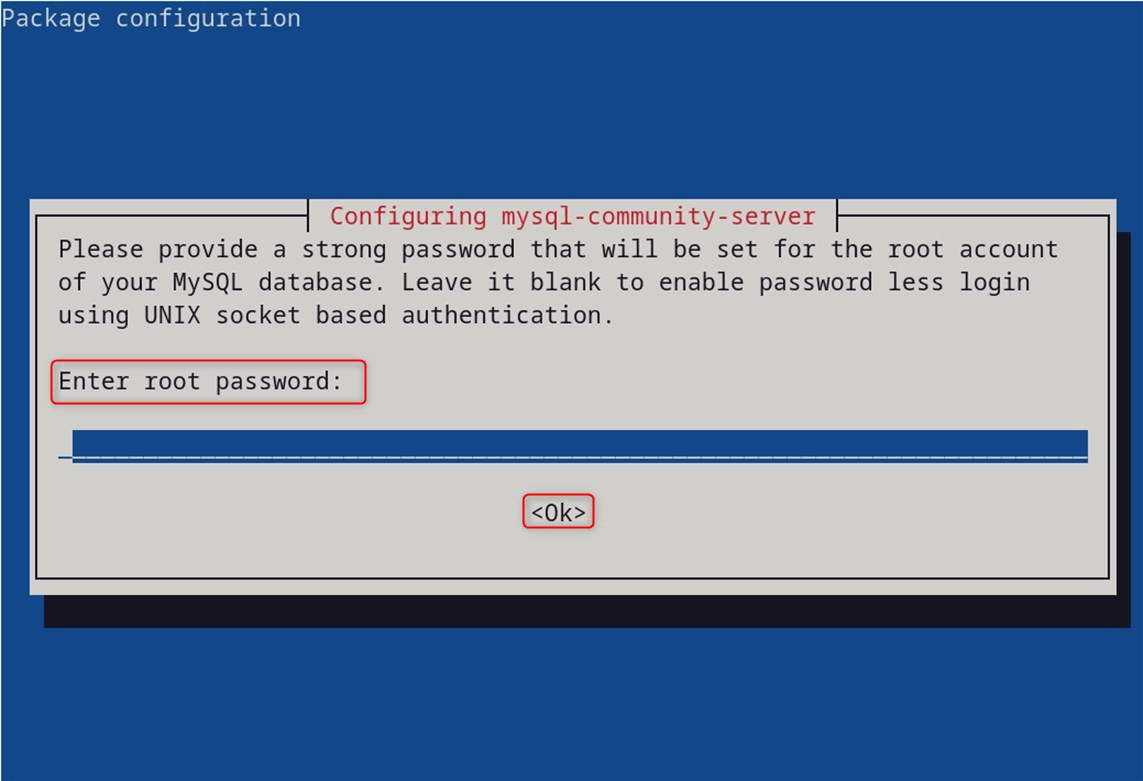
You will be directed to the dialog box for configuring the root account. For this option, set a stronger password to secure the database. Finally, click the Ok button:

Let’s verify the version installed:
mysql --version


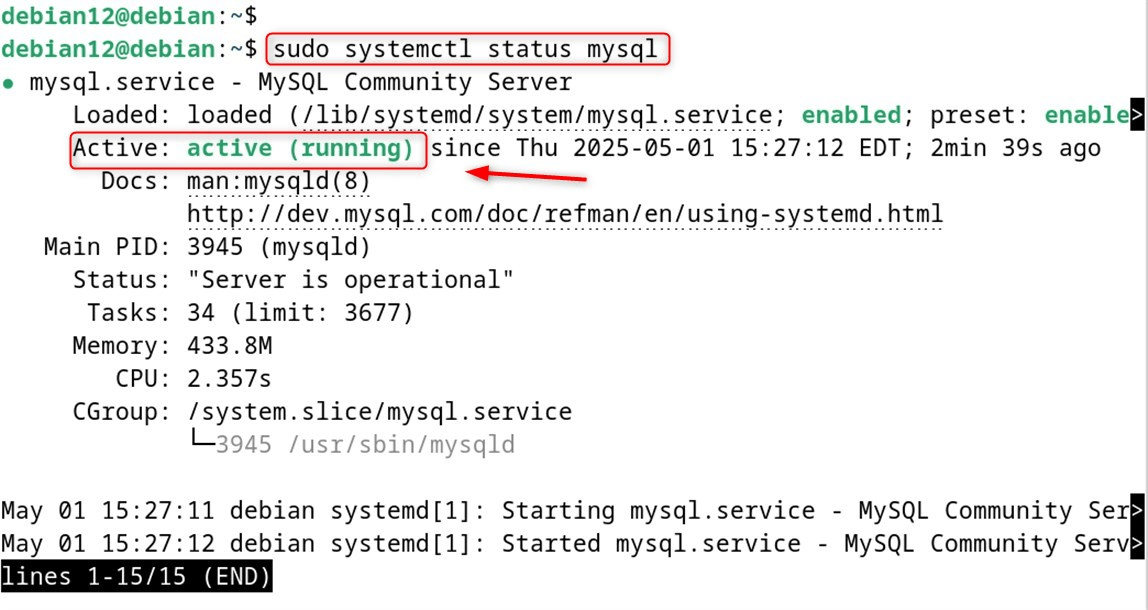
Step 5: Managing the Services
The installed unit uses the systemd daemon which manages the runtime functions for the DB server. The next listed steps will help users manage the services and set the DB server to start automatically with the computer:
Let’s activate services to start at the time of booting:
sudo systemctl enable mysql


Enable the services through the systemctl utility:
sudo systemctl start mysql


In the end, confirm the status of the system service:
sudo systemctl status mysql

Step 6: MySQL Secure Installation
MySQL has other insecure defaults like permitting remote connections to the test databases as well as controlling the root database user of the server.
The following steps will secure exposing the DB server and will disable all insecure default configurations:
Completing administrative privileges is crucial, especially In securing MySQL after commencing the installation. MySQL provides an automation security script which helps in performing these changes:
sudo mysql_secure_installation

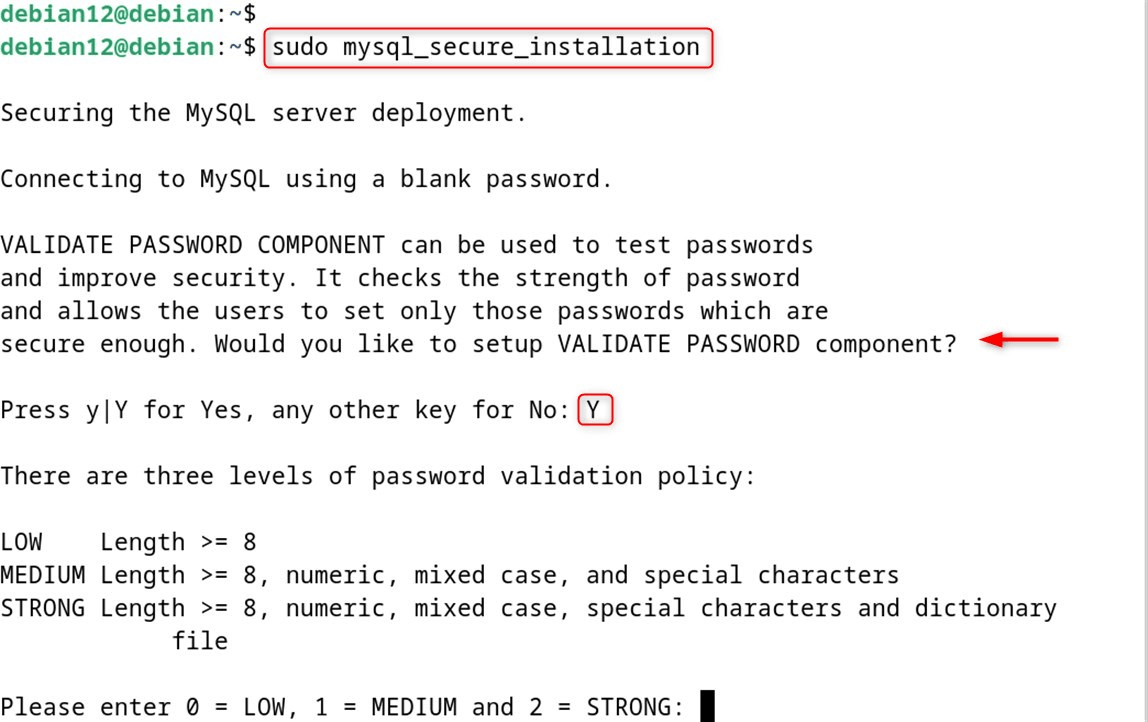
As for the VALIDATE PASSWORD policies, we are bound to strict password requirements: answer Y, then hit Enter.
Certain security measures will need to be implemented by yourself:
1. Set the Root Password: Choose an appropriate value and make sure it is not too simple. Set the password policy according to the DB server that users desire. For example, to allow strong passwords on the server, type 2 and press Enter. If you’re prompted to change the root password, type N, or if you do want to change the password, type Y.
2. Remove Anonymous Users: In order to restrict unwanted access, removing anonymous user permissions is recommended. For instance, input Y and Enter.
3. Prevent Accessibility of Remote Root: For various security reasons, it is preferable to disable remote root login. For blocking remote access, input Y and hit Enter.
4. Remove the Test DB: To increase security, the test database meant for testing can be removed. To implement this, input Y and hit Enter.
5. Refreshing Privilege Tables: This ensures that all the changes are put into effect immediately. To apply the changes and modify the privilege table, hit Enter.
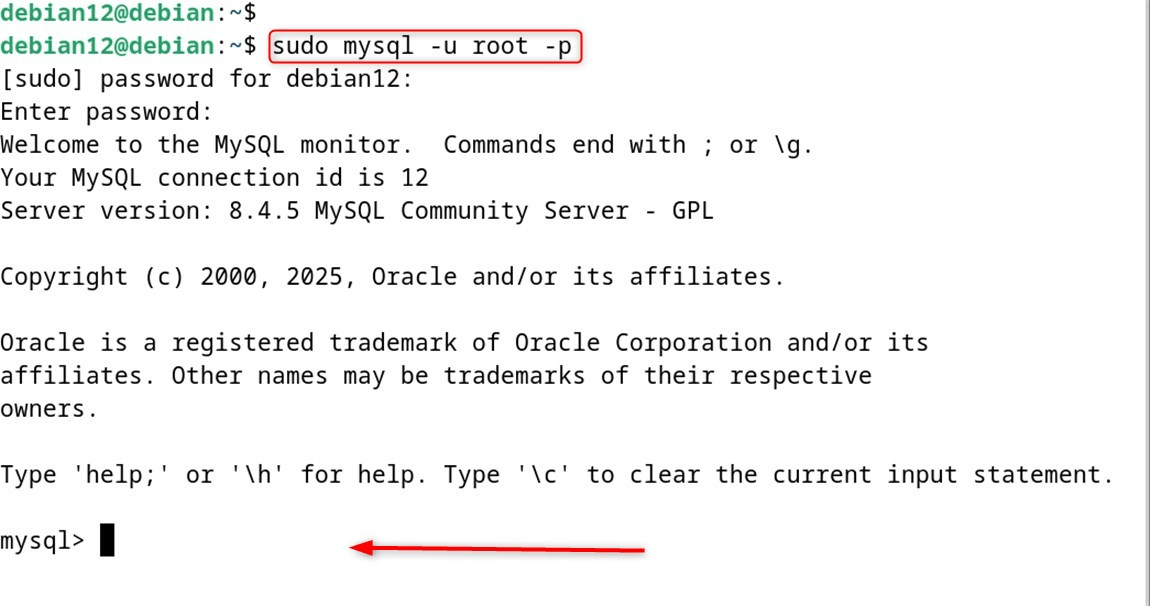
Step 7: Accessing MySQL
MySQL will use the command line client to connect with and access the MySQL database server console.
You should now be able to log in on the shell and execute commands against the database server. Type in root along with the password that was set during the safe installation steps:
sudo mysql -u root -p

Step 8: Basic MySQL Tasks
The created user should have their very own database and a unique username for login instead of the root user. Do the following to achieve this:
1. Creation of the Particular DB:
Users should first initiate the creation of the DB. For demonstration, we will use example_db, which can be created with the command below:
CREATE DATABASE example_db;


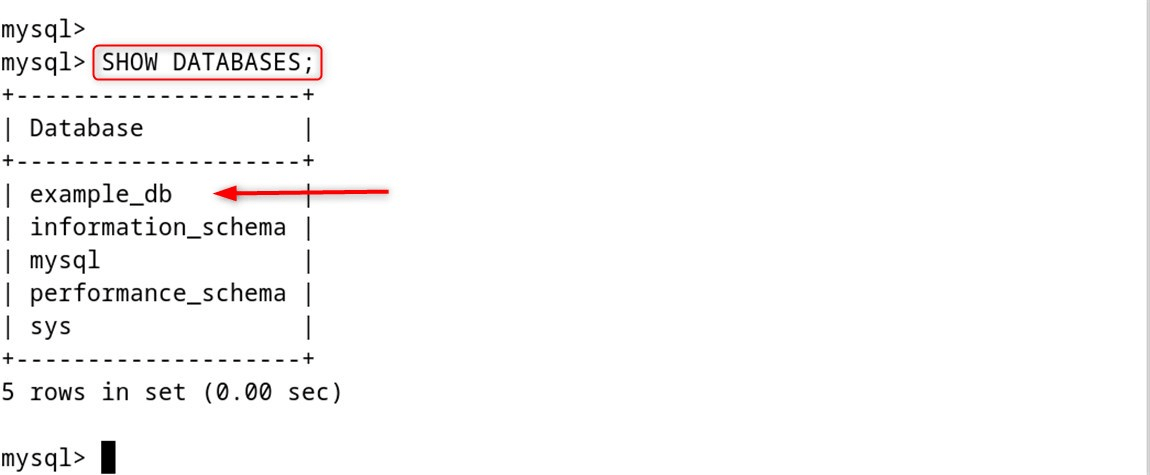
2. Display all DBs
Access all the databases to check whether the example_db has been created with the following command:
SHOW DATABASES;

3. Creation of a New User:
Use a database managed by the newly created user, such as debian12, for the granted permissions on the example_db. The new user called example_db has to have a strong password assigned:
CREATE USER 'debian12'@'localhost' IDENTIFIED BY 'Qwer@1234';


4. Give Permission to the User:
Do not deny the user complete access of the example_db to the debian12:
GRANT ALL PRIVILEGES ON example_db.* TO 'debian12'@'localhost';


5. Flush Privileges:
For refreshing the user table to enforce the modifications:
FLUSH PRIVILEGES;


6. Exit the Shell:
Users can end the session using the EXIT statement. EXIT;
EXIT;


Conclusion
MySQL environment is one of the common types an individual should consider as important in today’s digital world. The installation of MySQL on a Debian-based system enables an individual to experience the full efficiency of the DB operations and, therefore, optimize the overall functioning of the DB infrastructure. Following the steps given above will ensure that an individual is able to securely install and connect to his MySQL DB. Such an approach enhances the security of a system and also adds to the remote database maintenance efficiency. It assists in protecting unauthorized access and ensures information confidentiality.
The article has described the steps required for installation of the MySQL effective database environment. However the author strongly recommends one to constantly monitor and optimize the performance of the MySQL servers in order to assure the reliability and efficiency of the system.
Frequently Asked Questions
sudo apt update to ensure your package list is up to date before installation.
sudo apt install mysql-server in your terminal. This installs the default MySQL version from Debian’s repository. sudo systemctl status mysql to check the service status. You should see it listed as "active (running)". sudo systemctl start mysql to start and sudo systemctl stop mysql to stop the service. sudo mysql_secure_installation to configure root password, remove test users, and disable remote root login.