Nextcloud behaves much like Google Drive or Dropbox, letting you save, organize, and share files via cloud servers. The primary difference is that it operates on its open-source code and is self-hosted, allowing you to determine where the data resides and who controls it. Because it syncs with PCs and mobile devices, the risk of losing files is low. This freedom has made Nextcloud a favorite among Linux enthusiasts, and a vibrant community keeps the project fresh with regular updates.
Debian 12 remains the go-to Linux distribution for anyone eager to tap into open-source tools like Nextcloud. This tutorial will walk through several methods for installing Nextcloud on Debian 12.
Table of Contents:
How to Install Nextcloud on Debian 12?
Nextcloud can run on your machine or on any domain you trust, serving files directly from a web browser. The standard method links it to Apache, MariaDB (or MySQL), and PHP that you install and tweak yourself, while the Snap route bundles everything and deploys the service in seconds. Because both approaches suit Debian 12, you pick the one that matches your comfort level and system goals.
Method 1: Install Nextcloud Using LAMP
- First, install a LAMP stack including Apache, MySQL, and PHP on Debian 12.
- Next, obtain the latest Nextcloud archive, unpack it, and point Apache to the new folder with a fresh virtual host.
- Once you tweak the database settings and run the web installer, Nextcloud becomes available on your local address.
Method 2: Install Nextcloud Using the Snap Store
- The faster path is to install the official Snap package with a single snap install nextcloud command.
- The package sets its own web server, database, and storage paths while managing updates automatically in the background.
- Finally, add the trusted domains and start the platform.
Let’s demonstrate these methods separately.
Method 1: Install Nextcloud Using LAMP
As mentioned earlier, the simplest way to run Nextcloud on Debian is to build a LAMP stack. The web app depends on Linux, Apache, MySQL, and PHP working smoothly together. You could skip all that and use the snap package, yet the manual method still offers better control. If you want to see every step, keep reading this tutorial.
Follow the actions below to install Nextcloud on your Debian 12 machine.
Step 1: Install Apache, MySQL, and PHP
Begin by refreshing your package index with this command:
|
sudo apt update |
|---|

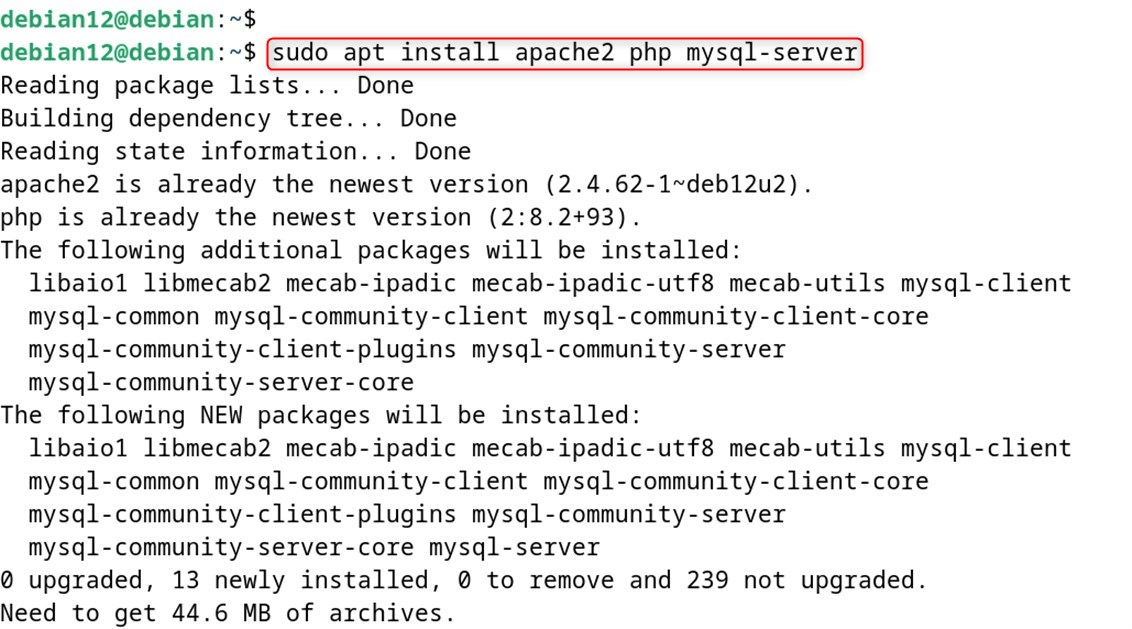
Next, install the three core Apache, MySQL, and PHP packages:
|
sudo apt install apache2 php mysql-server |
|---|
Step 2: Integrate Required Modules
Nextcloud needs a handful of extra PHP modules so its code can talk to the database and handle files. Install them with this line:
|
sudo apt install php-zip php-mysql php-gd php-mbstring php-curl php-intl php-bcmath php-gmp php-imagick php-xml libapache2-mod-php |
|---|
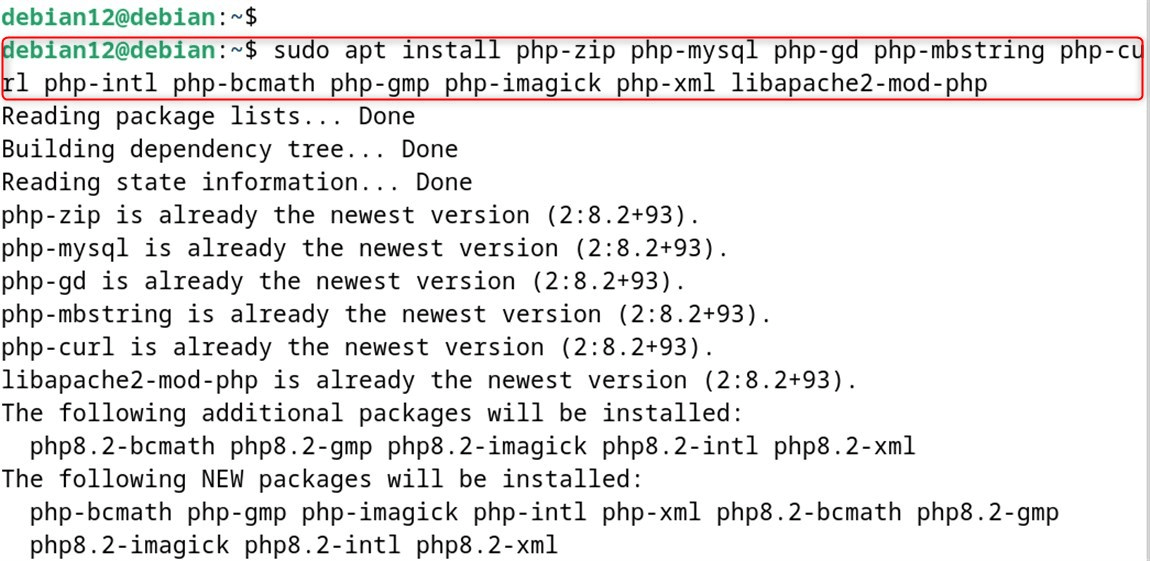
You may already have some modules from another project, so no worries if the system skips a few.
Step 3: Configure MySQL and Apache
Both Apache and MySQL run as system services, and you must start them before anything else. Use these commands:
|
sudo systemctl start apache2 |
|---|

Now set them to launch on boot, keeping your cloud up even after a restart:
|
sudo systemctl enable apache2 |
|---|

Before we continue, let us first confirm that both services are running correctly:
|
sudo systemctl status apache2 |
|---|
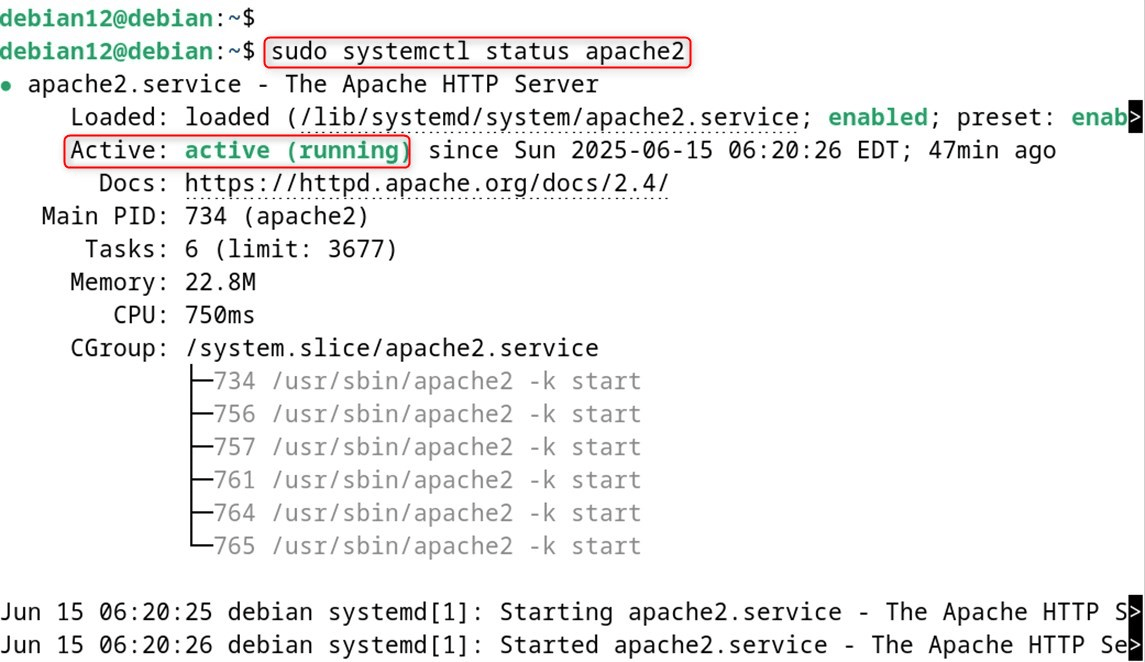
With Apache now showing active, we will turn our attention to the MySQL service:
|
sudo systemctl status mysql |
|---|
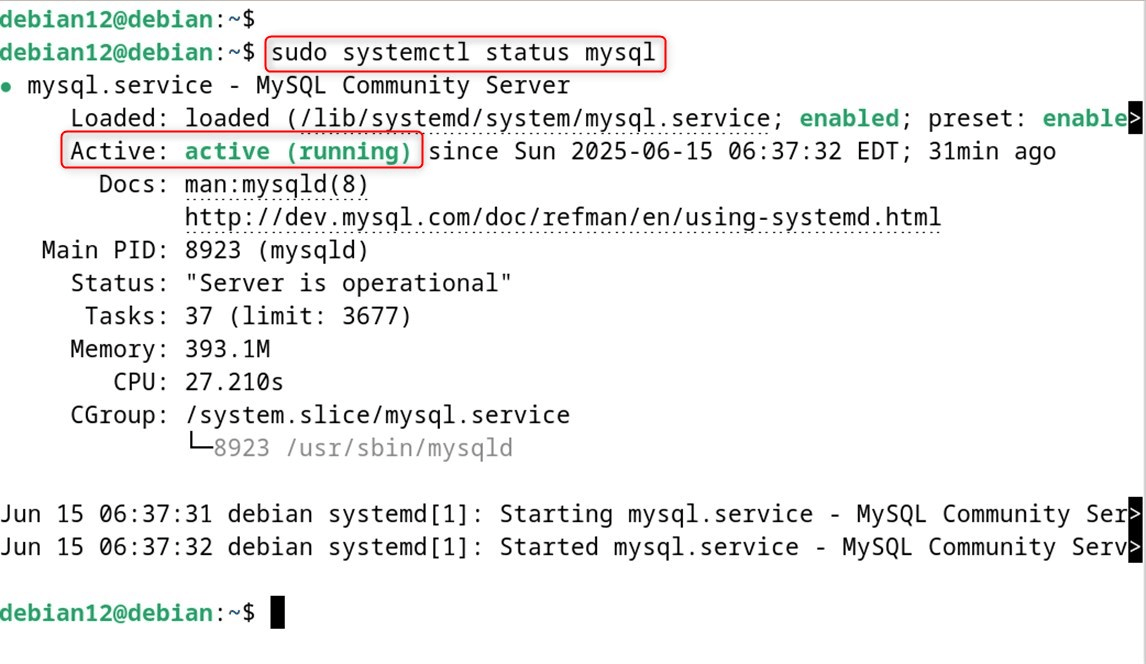
Both services are set up, and the next step is to configure the firewall.
For this task, we use UFW, the simple firewall tool that handles rules by ports. Because Apache includes a complete profile, you don’t have to open each port manually.
To let Apache serve pages and talk securely over the Web, turn on the full firewall profile with this command:
|
sudo ufw allow ‘Apache Full’ |
|---|
After that, tell Debian Firewall to reload the rules and restart the Apache server so it picks up the changes:
|
sudo ufw reload |
|---|

Step 4: Create a Database and User
Next, you need a fresh database, a user to own it, and the right grants so that the user can work on the local machine. Here’s how:
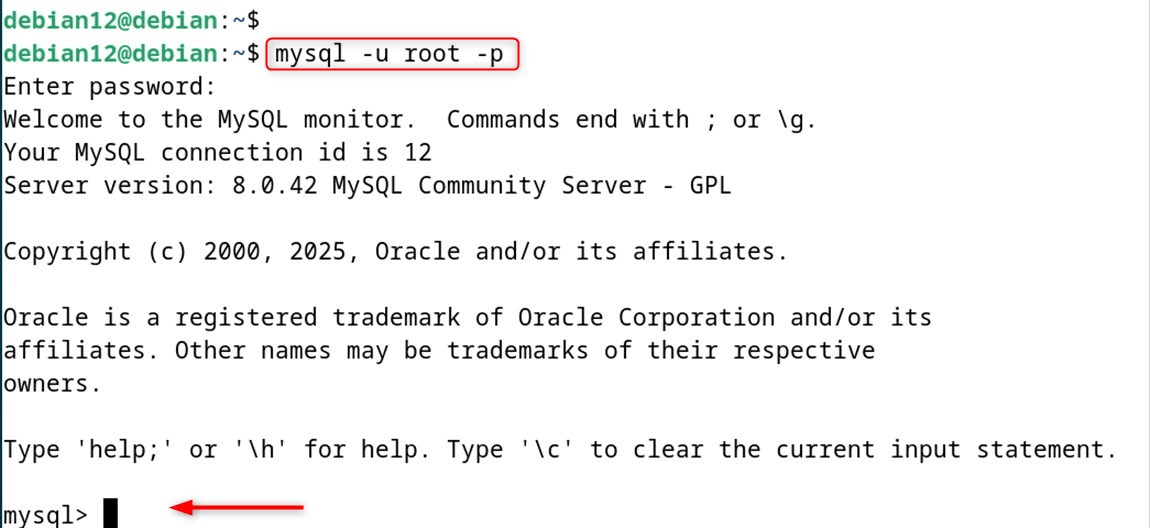
So, log in to MySQL as the admin:
|
mysql -u root -p |
|---|
Create the database; we call it debian12_cloud:
|
CREATE DATABASE debian12_cloud; |
|---|

Now, create a user called debian12 on the local host and set a password:
|
CREATE USER ‘debian12’@’localhost’ IDENTIFIED BY ‘password’; |
|---|

Now, permit that user access to the specific database:
|
GRANT ALL PRIVILEGES ON debian12_cloud.* TO debian12@’localhost’; |
|---|

Don’t forget to reload the grants so the changes take effect:
|
FLUSH PRIVILEGES; |
|---|

With these steps done, the core of Nextcloud is already in place; carry on:
Step 5: Download the NextCloud File
Obtain the latest Nextcloud directly from the project’s servers or the Releases Download Page:
|
wget https://download.nextcloud.com/server/releases/nextcloud-29.0.0.zip |
|---|
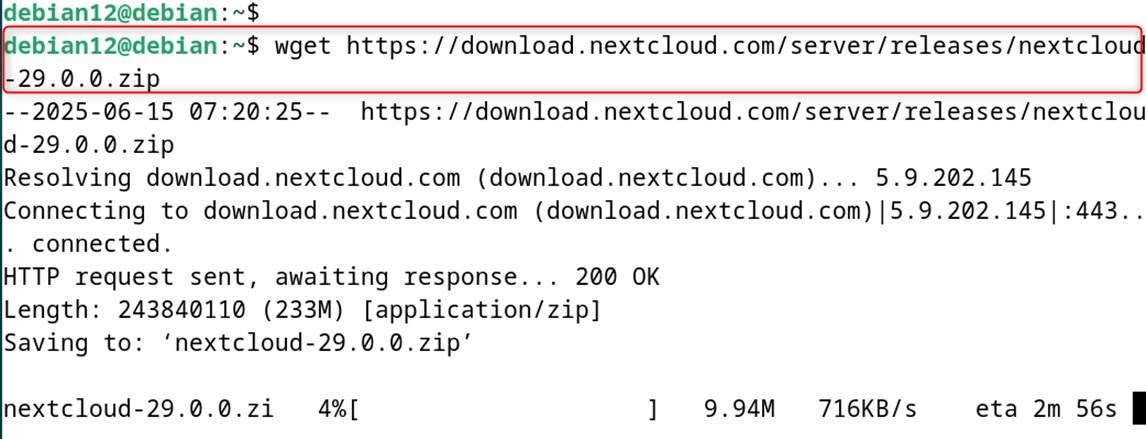
After that, extract the required package:
|
unzip <zip-file-name> |
|---|
Remember that after unpacking, you may want to clean up the zip file and check that the permissions look correct before moving on.
Step 6: Copy the File into /var/www/html
Now, send the extracted directory to the web root. That folder lives in /var/www/html on both Apache and NGINX:
|
sudo cp -r nextcloud /var/www/html/nextcloud |
|---|

After that, modify ownership so Apache has access to read as well as write to the new directory:
|
sudo chown -R www-data:www-data /var/www/html/nextcloud |
|---|

Step 7: Create a Configuration File
Before adding a new site, turn off the default Apache configuration:
|
sudo a2dissite 000-default.conf sudo systemctl restart apache2 |
|---|

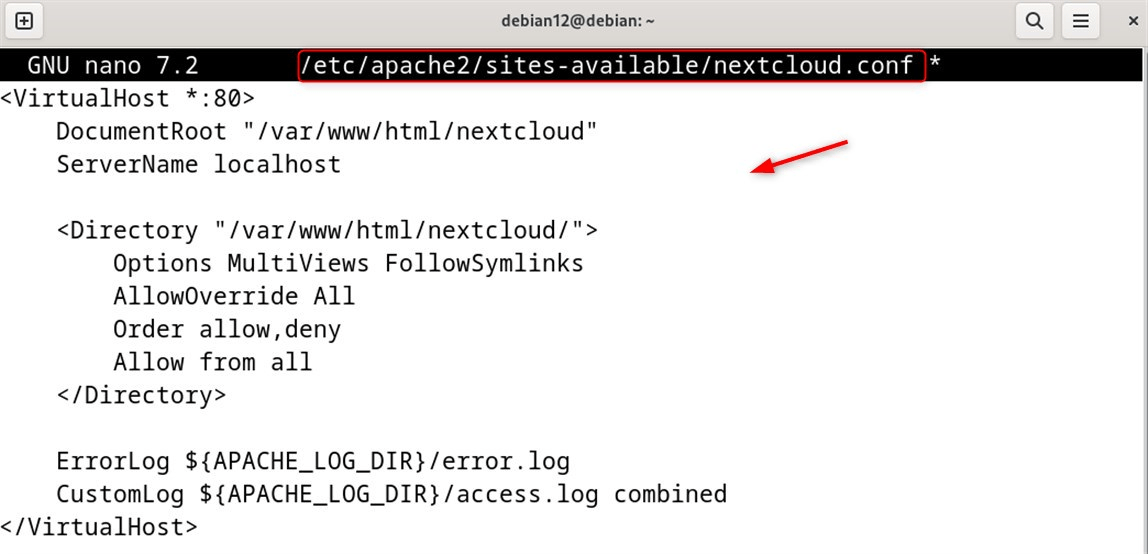
Now, make a clean configuration file in the sites-available folder:
|
sudo nano /etc/apache2/sites-available/nextcloud.conf |
|---|
Inside, paste this block:
|
<VirtualHost *:80> |
|---|
Here, two entities are recommended to configure always:
Two lines to pay attention to are DocumentRoot and ServerName. DocumentRoot tells Apache where to find files, while ServerName defines the address the site responds to.
The <Directory> section is optional but useful; it sets extra permissions for the Nextcloud folder so rewrite rules and symbolic links work as intended.
Step 8: Enable the Newly Configured Site
First, tell Apache to start serving the site you just set up with this command:
|
sudo a2ensite nextcloud.conf |
|---|

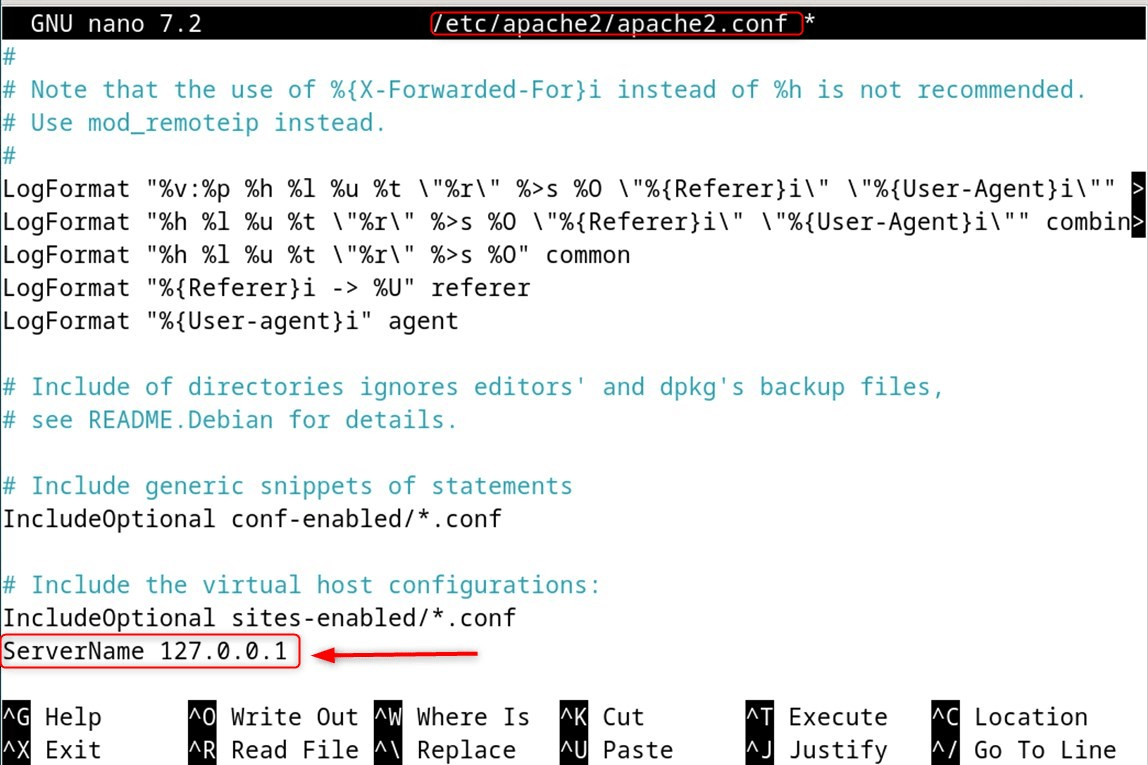
While you are at it, confirm that the ServerName line points to the right IP or domain you will use to reach Nextcloud. The example below shows it set to 127.0.0.1 in the main config file:
|
sudo nano /etc/apache2/apache2.conf |
|---|
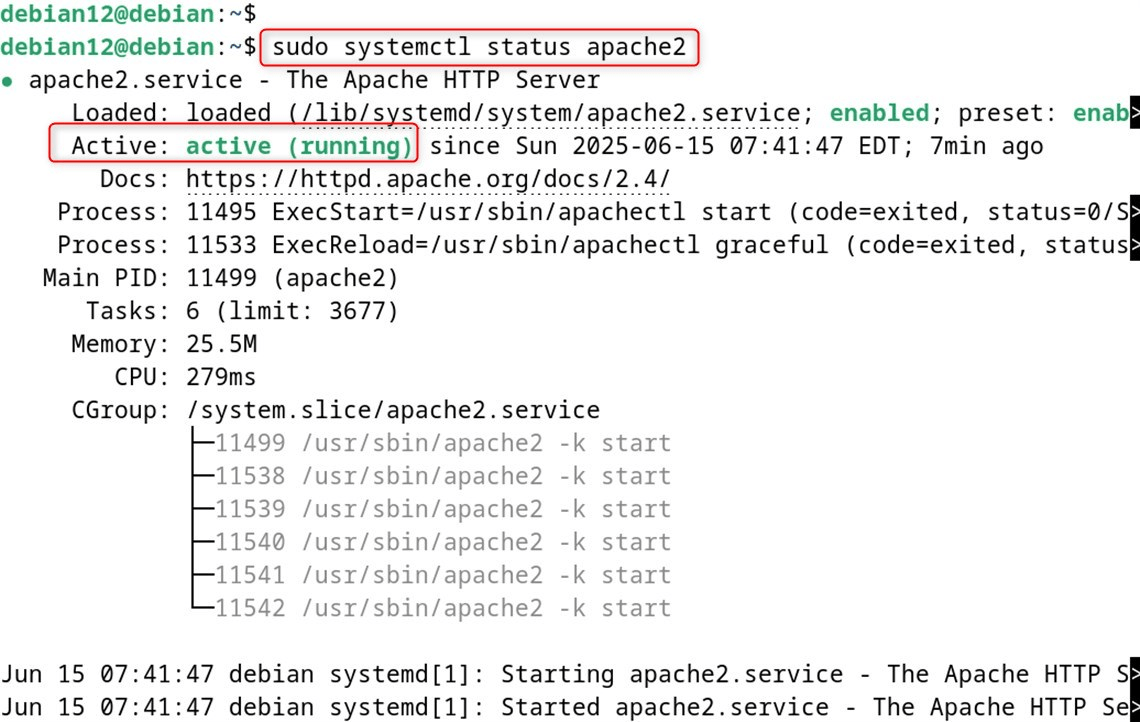
After saving those tweaks, restart the Apache server and quickly check that it is running cleanly:
|
sudo systemctl status apache2 |
|---|
Step 9: Test the Changes
To see that Nextcloud is active, list the sites Apache has turned on with this command:
|
ls /etc/apache2/sites-enabled/ |
|---|

You should spot nextcloud.conf among the other entries, like this.
Finally, run a quick syntax test to catch any leftover misconfigurations:
|
sudo apache2ctl configtest |
|---|

Step 10: Install and Set Up Nextcloud
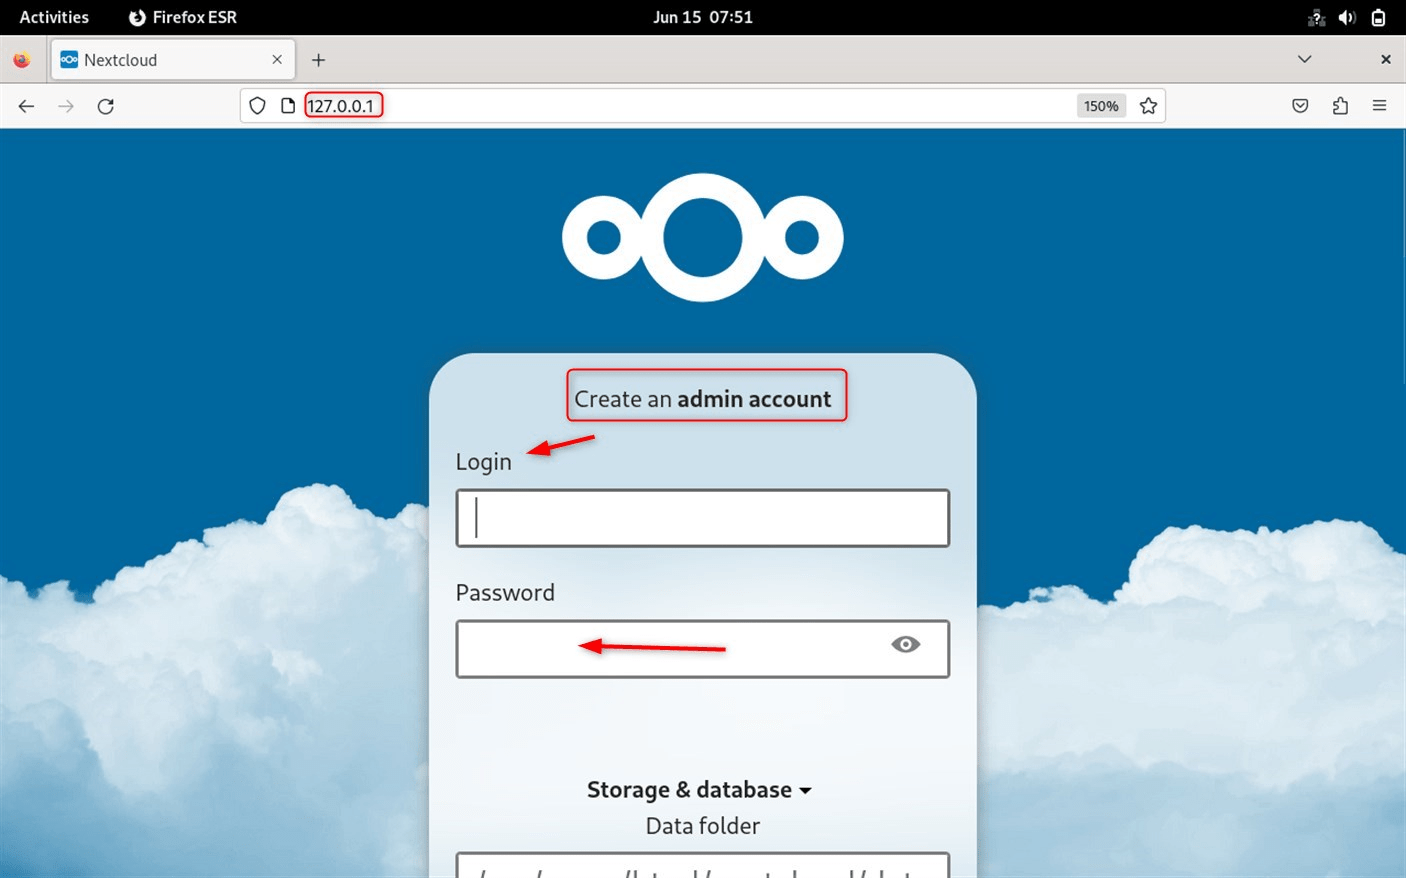
If all the previous commands reported success, open a web browser and go to localhost or the domain you set in Apache. That will launch the Nextcloud setup wizard, where you can create your admin account and link the data folder.
As soon as you start the installer, make an admin account with a username and password that you’ll remember. Keep the password safe, because you’ll need it every time you log in.
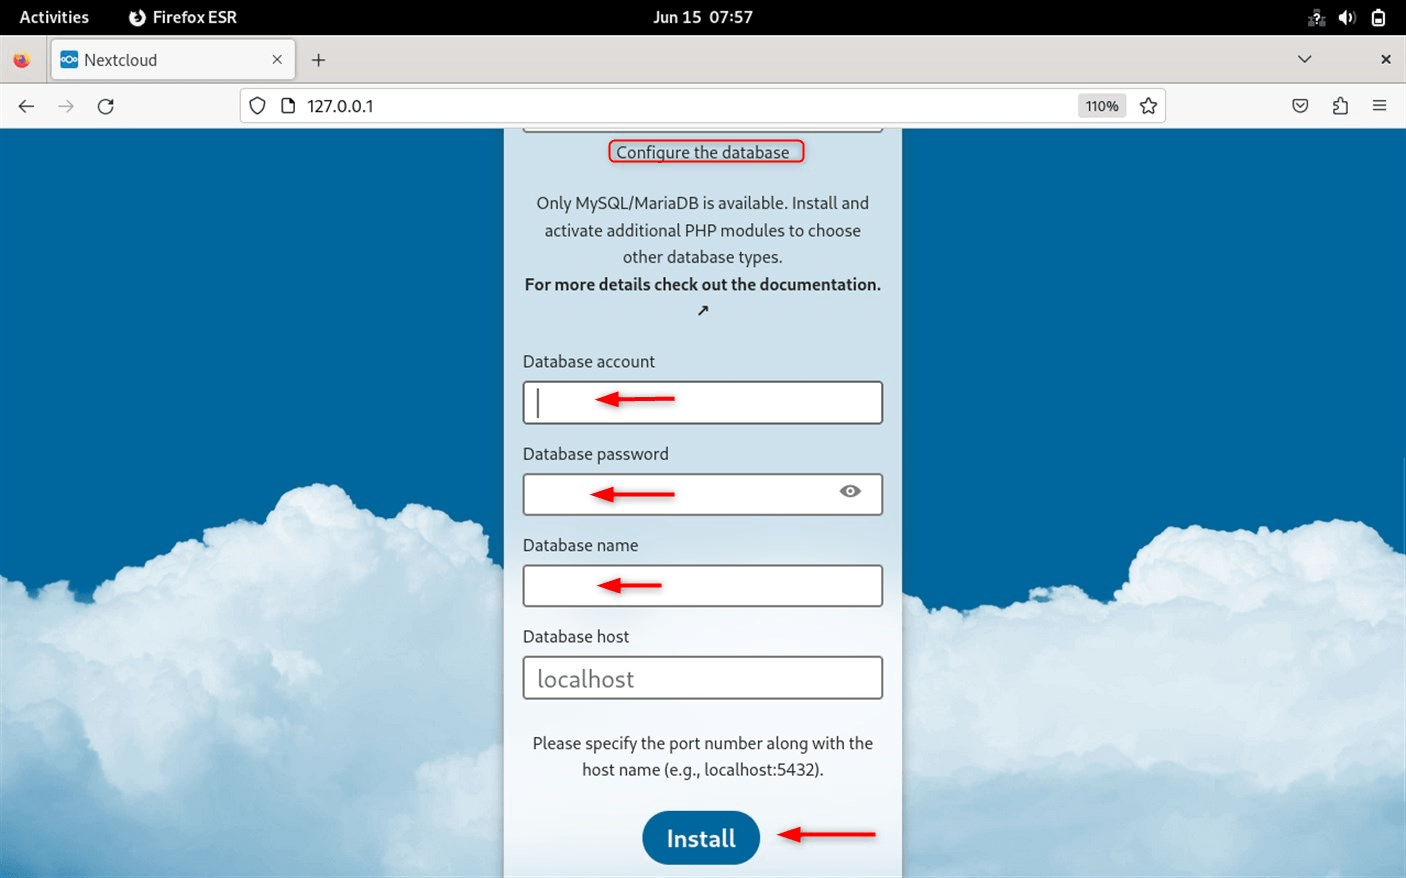
On the same page, fill in the database user, the exact name you chose, and the password you set in Step 4 so Nextcloud can link with the database. Double-check these fields to avoid connection errors later.
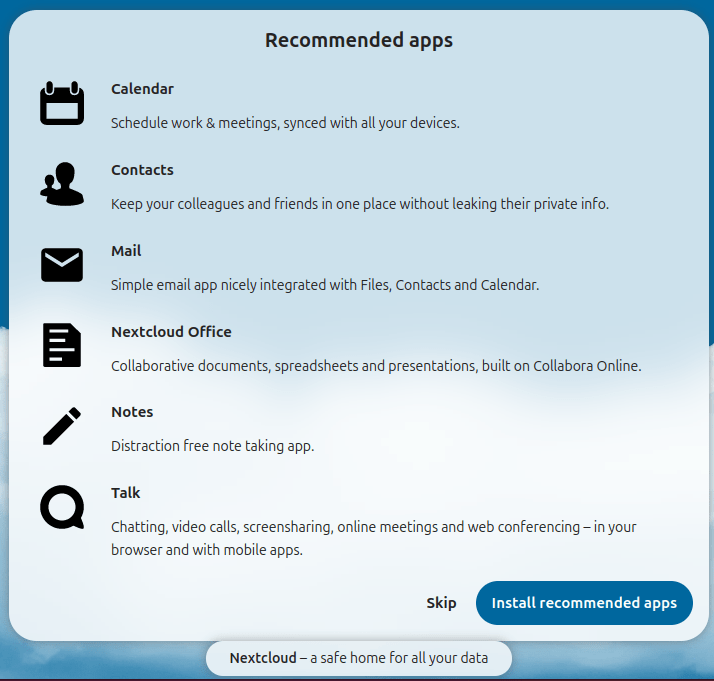
Nextcloud will suggest a list of useful apps; pick the ones you really want or skip them for now and add extras later. Nothing breaks if you decide to come back and install more.
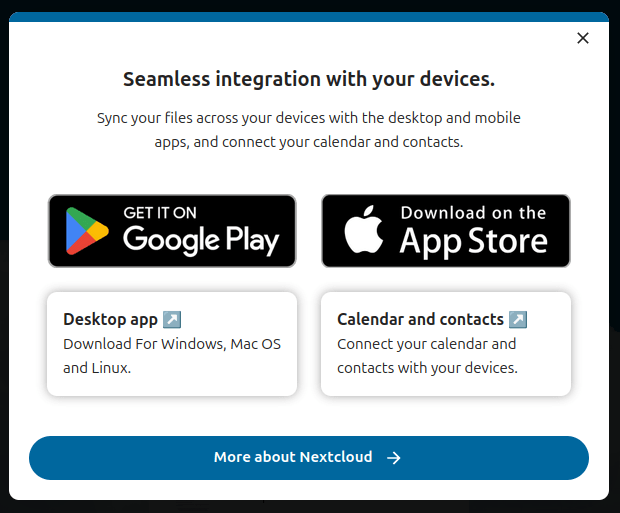
You can also set up the mobile apps on your phone while the server runs, letting you upload files and check shares in minutes. Just scan the QR code that appears once the web setup finishes.
Follow the rest of the prompts, and before long, you’ll see the friendly dashboard with storage usage, recent files, and activity notifications: Take a moment to explore, because this is where the real work gets done.
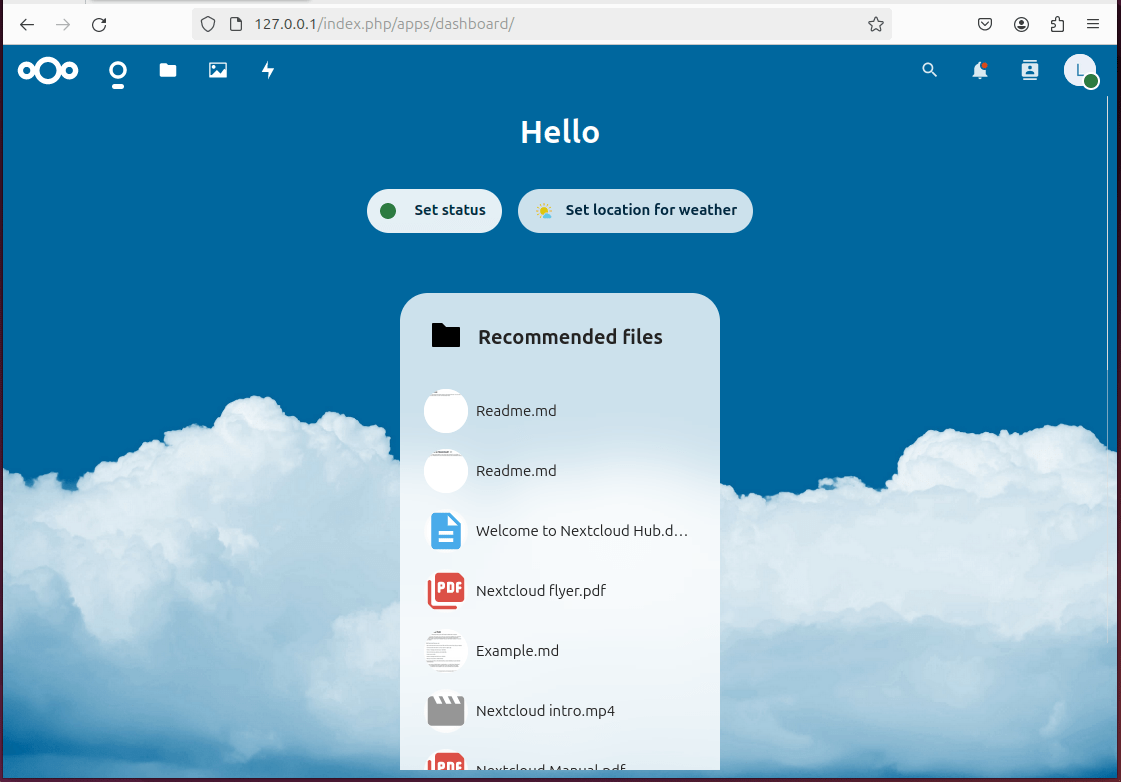
And that is all there is to installing Nextcloud on Debian 12; you can now store, share, and sync your files the way you prefer.
Method 2: Install Nextcloud Using the Snap
The Snap Store provides a quick, self-contained version of Nextcloud. You can run this instance on any domain you trust and configure yourself. Follow the steps below to install and start Nextcloud through Snap.
Step 1: Install and Enable Snap
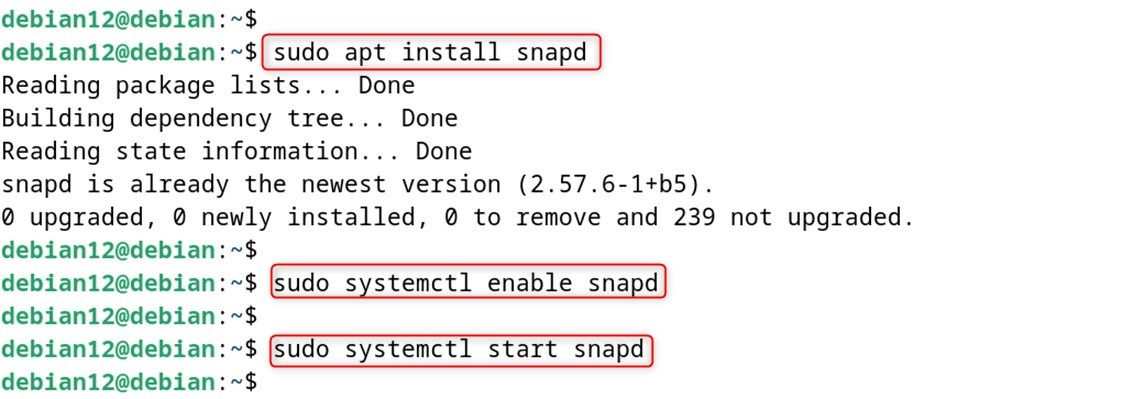
Snap support is usually active by default in Debian 12. If for some reason it isn’t, run these commands to set it up:
|
sudo apt install snapd |
|---|
Step 2: Install Nextcloud
Get the Nextcloud package from the Snap Store with the command:
|
sudo snap install nextcloud |
|---|

After installation, follow the prompts to create your admin account and finish the configuration.
Optional: Create an administrative account with a username and a password that the system will use for login:
|
sudo nextcloud.manual-install debian12 <password> |
|---|
As an example, we set up a user called debian12 and supplied a secure password during that command.
Step 3: Launch Nextcloud
When the installation finishes, you can open Nextcloud on the same computer. Just point your web browser to localhost, and the welcome screen will appear.
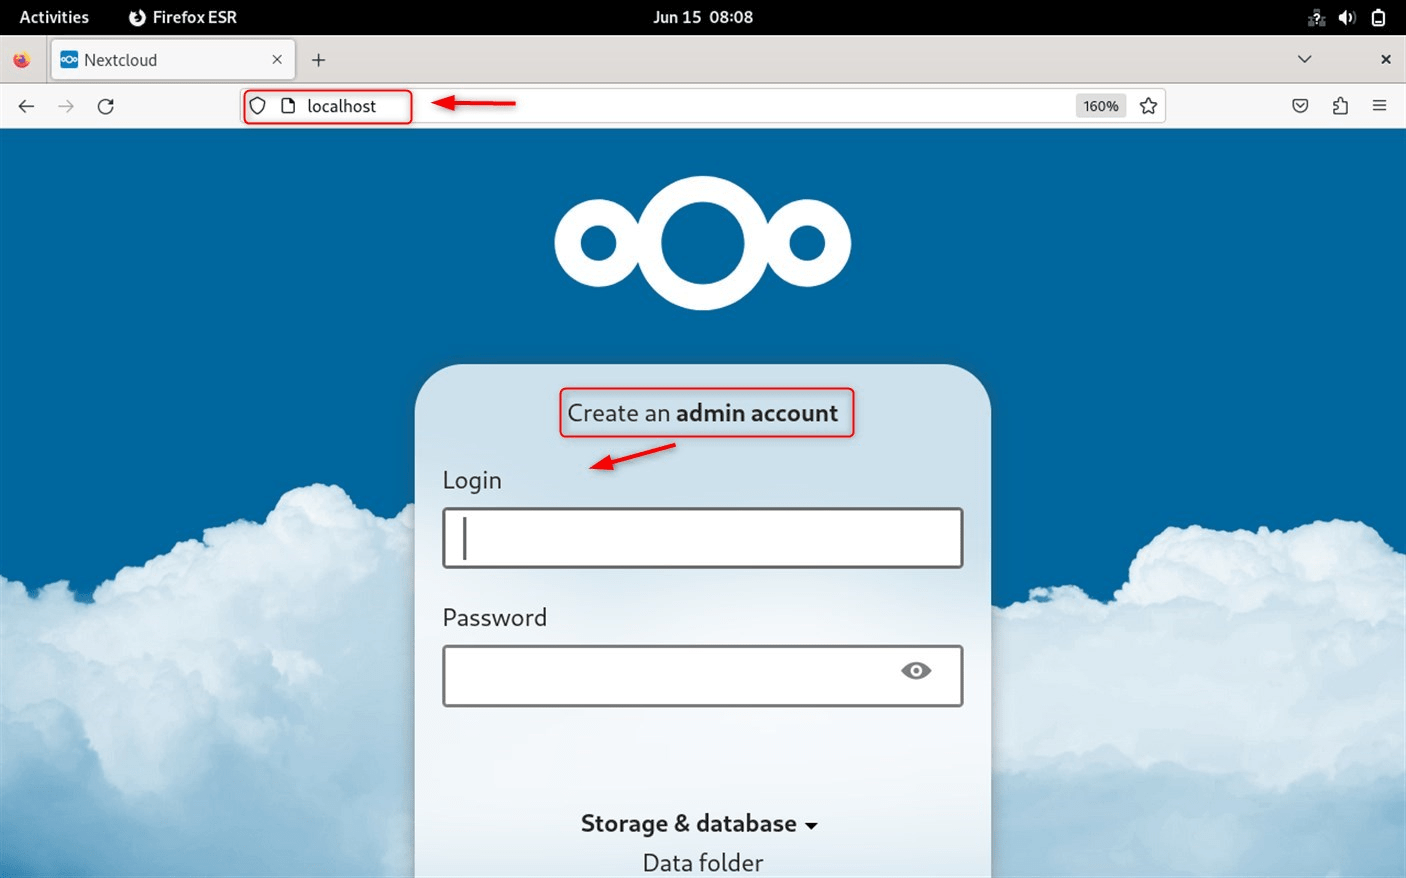
Log in with the username and password you chose earlier, like we did in Step 2. After entering those credentials, your personal dashboard loads.
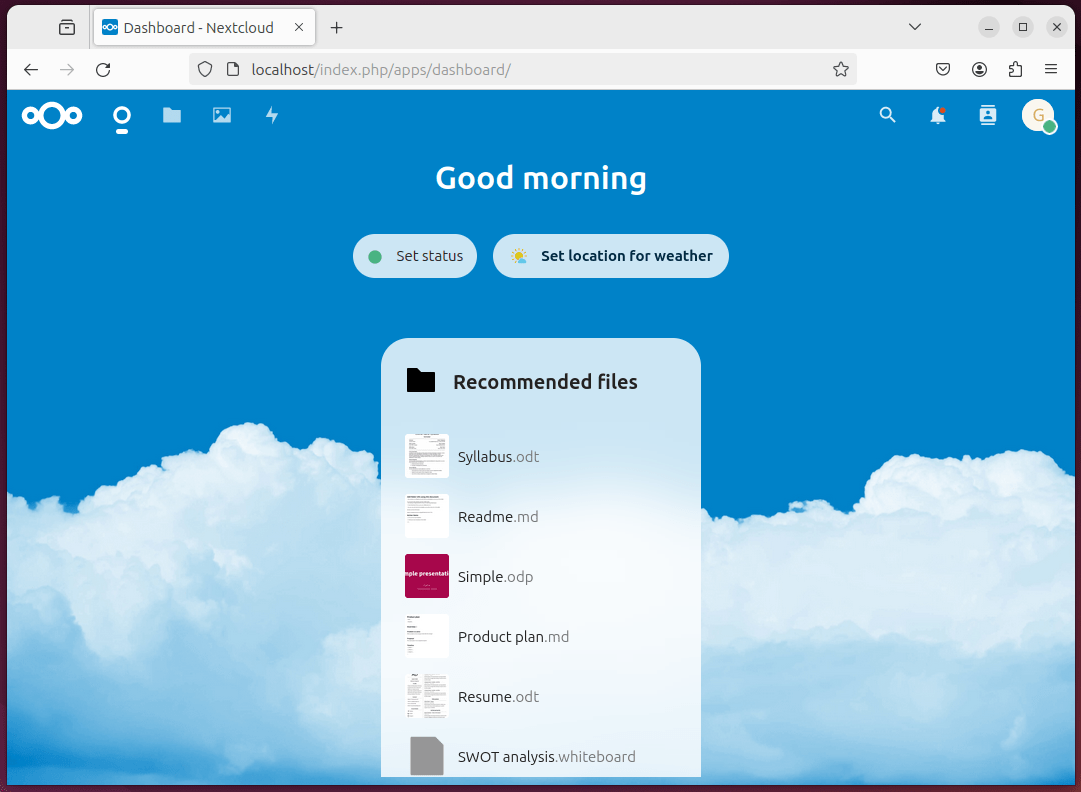
And that’s all it takes to set up Nextcloud using the Snap package.
How to Uninstall Nextcloud on Debian 12
Nextcloud can be set up in two different ways, as we covered earlier. Which method you choose will guide how you turn it off. Below, we walk through both approaches so you can disable Nextcloud safely.
If Installed Manually
First, shut off the related site configuration by running the a2dissite command:
|
sudo a2dissite nextcloud.conf |
|---|

Next, delete the Nextcloud files stored in /var/www/html/:
|
sudo rm -r /var/www/html/nextcloud |
|---|

If Installed Using Snap
If you used Snap, simply remove the package with:
|
sudo snap remove nextcloud |
|---|

After you run the steps for your method, Nextcloud will no longer appear on your trusted domain.
Conclusion
Nextcloud is a popular self-hosted hub where you can store files, photos, and notes, and it packs dozens of handy add-ons such as media players, activity monitors, and more. To install it on Debian 12, simply install a LAMP stack- Apache, MySQL or MariaDB, and PHP. Then build a VirtualHost, and your instance will be reachable through any web browser. If you prefer speed over, get the Snap package, and the entire service will land on your machine.
Among these choices, Method 1-the LAMP install is still the favourite for power users who crave deep control and endless tweaking options. You have now seen both paths; pick the one that suits your style and get Nextcloud running in no time.






Leave feedback about this