“Proxmox” is a full-fledged, open-source, and powerful virtualization server. It is relatively easy to manage as it offers a web GUI to access the remote servers. It encapsulates KVM & OpenVZ virtualization technologies and has wide hardware support. It is currently the best-suited virtualization server to manage the VMs and containers. Installing and configuring “Proxmox” on Debian 12 requires some knowledge.
This tutorial offers detailed steps for installing Proxmox on Debian 12.
Quick Outline
How to Install Proxmox on Debian 12?
How to Access the Web GUI of Proxmox on Debian 12?
How to Create a Virtual Machine Using Proxmox on Debian 12?
How to Install Proxmox on Debian 12?
Follow the steps to “Install Proxmox on Debian 12”.
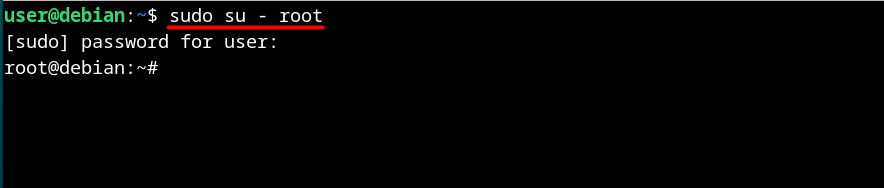
Step 1: Switch to the “root” User
To import the “Proxmox Repository,” users must switch to the “root” user via the “su” command as follows:
sudo su - root

Step 2: Import Proxmox Repository
Now, import the “Proxmox Repository” by using the following command. Doing this enables the OS to download the Proxmox package:
echo "deb [arch=amd64] http://download.proxmox.com/debian/pve bookworm pve-no-subscription" > /etc/apt/sources.list.d/pve-install-repo.list

![echo "deb [arch=amd64] http://download.proxmox.com/debian/pve bookworm pve-no-subscription" > /etc/apt/sources.list.d/pve-install-repo.list](http://greenwebpage.com/community/wp-content/uploads/2025/05/word-image-14066-2.png)
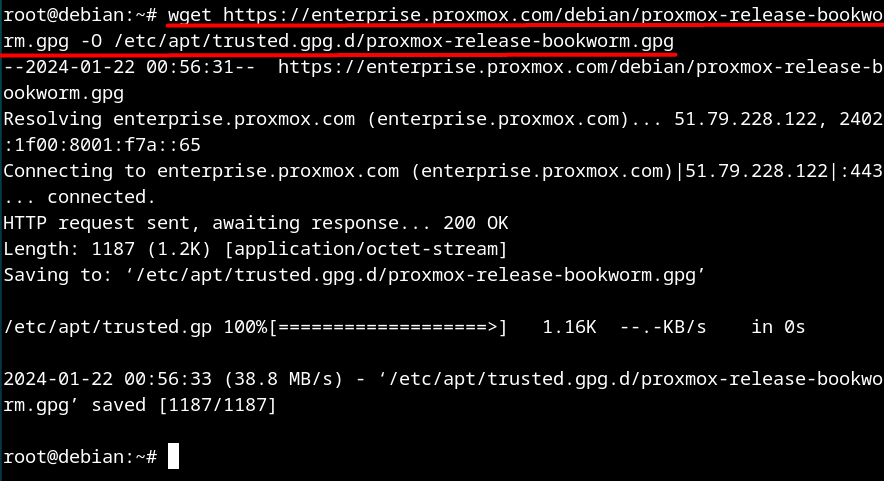
Step 3: Add the “gpg” Key to “/etc/apt/trusted.gpg”
Next, add the “Proxmox GPG Key” to the “/etc/apt/trusted.gpg” and make the OS authenticate the origin of the file using:
wget https://enterprise.proxmox.com/debian/proxmox-release-bookworm.gpg -O /etc/apt/trusted.gpg.d/proxmox-release-bookworm.gpg

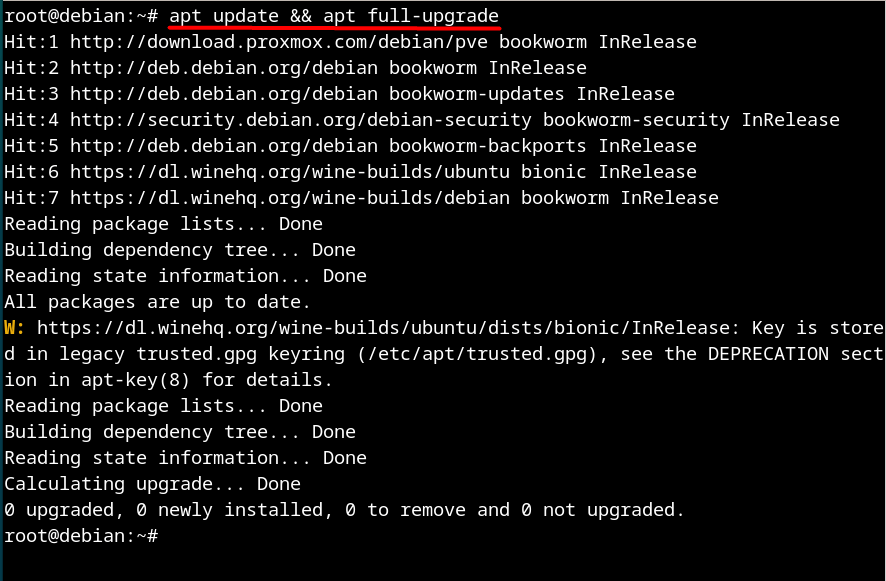
Step 4: Update System Repositories
Now, use the following command to update & upgrade the system repositories:
apt update && apt full-upgrade

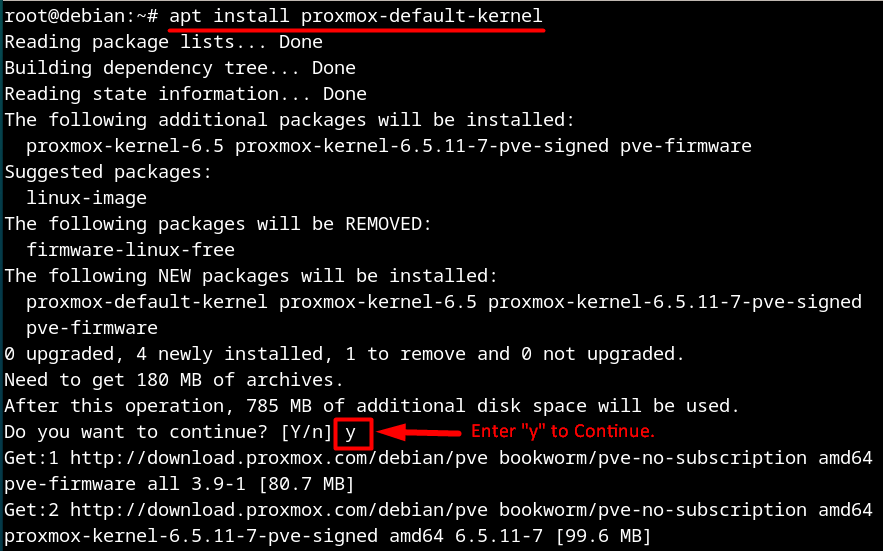
Step 5: Install Proxmox Kernel
The “Proxmox” is based on the “Debian GNU/Linux” and requires a custom kernel to run. To add the Kernel, run the following command:
apt install proxmox-default-kernel

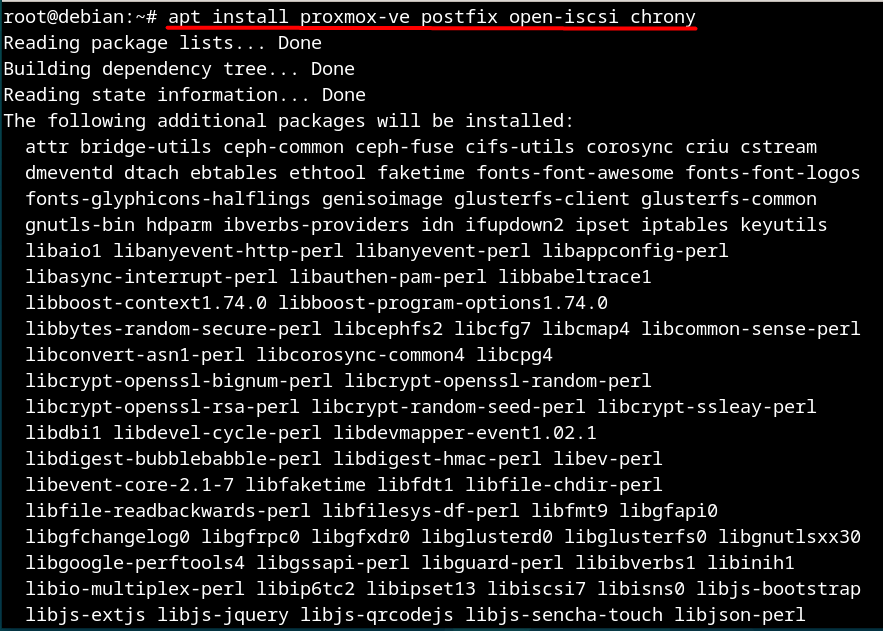
Step 6: Install the Proxmox Packages
The “Proxmox” requires the “postfix” and “chrony” packages. To install the required “Proxmox” packages, use the following command:
apt install proxmox-ve postfix open-iscsi chrony

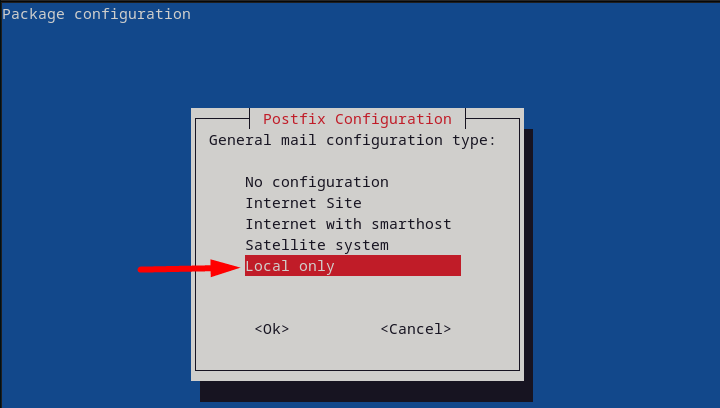
During the installation process, the following screen may appear, and from here, users can do basic “Postfix Configuration”:

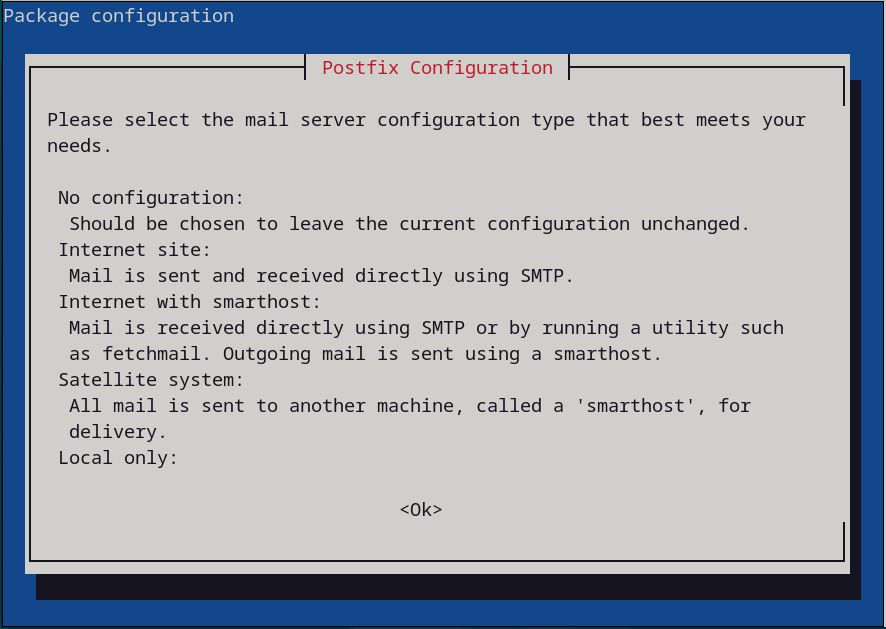
Next, select the “General mail configuration type”. In this tutorial, the “Local only” configuration option is used. Users can choose from any of their preferences:

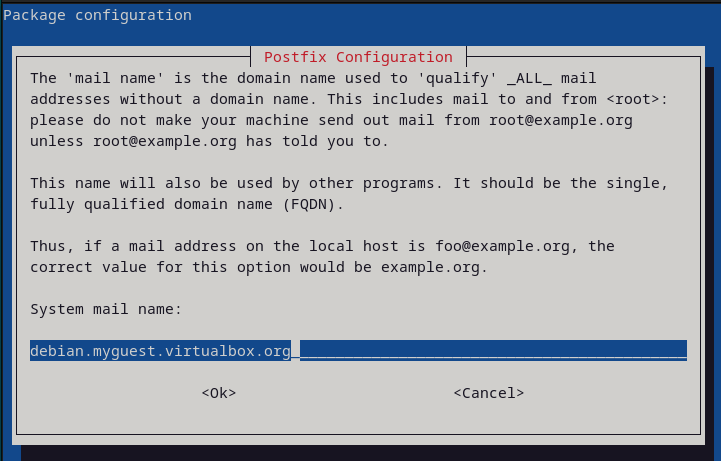
From here, select the “System mail name”, specify it, and use the “<Ok>” to proceed:

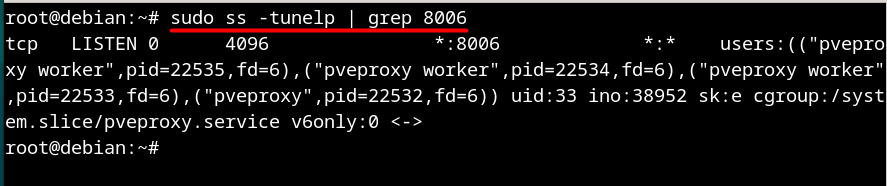
Step 7: Check if Proxmox is Listening
The “Proxmox” server listens to “Port 8006” by default. To check if it is listening to it, run the following command:
sudo ss -tunelp | grep 8006

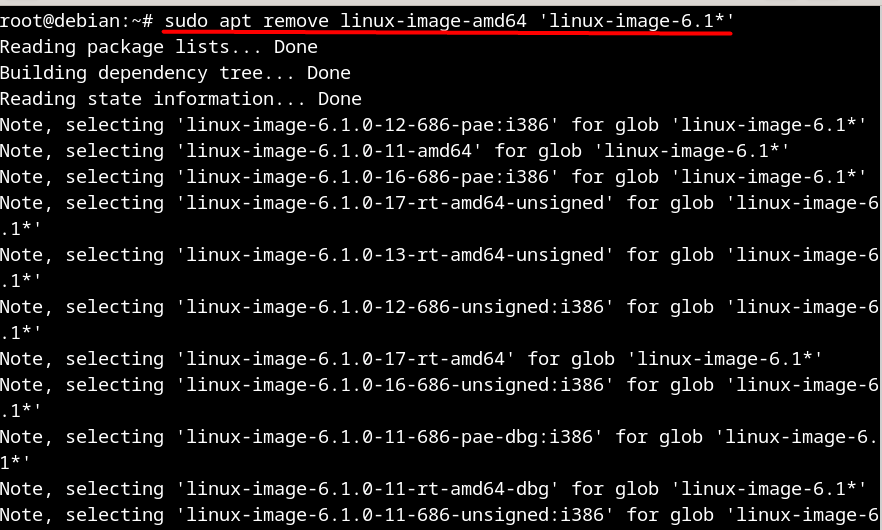
Step 8: Remove Linux Kernel (Optional)
Although it is optional, we recommend using a single kernel (Proxmox Kernel) as it often causes issues, especially while upgrading. To remove the Linux kernel, run:
sudo apt remove linux-image-amd64 'linux-image-6.1*'

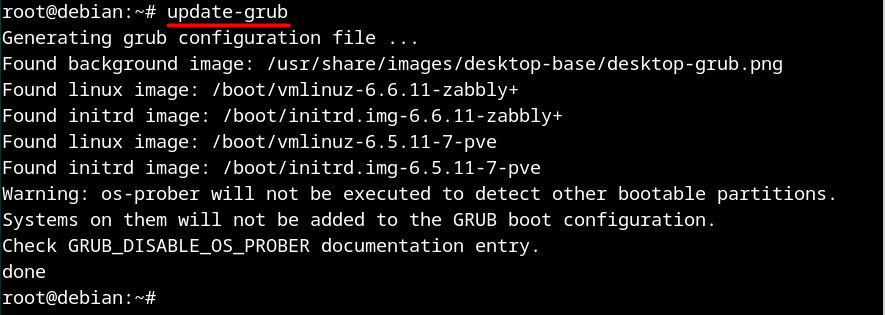
Now update the “GRUB Configuration File” for the changes to take effect, using the command below:
update-grub

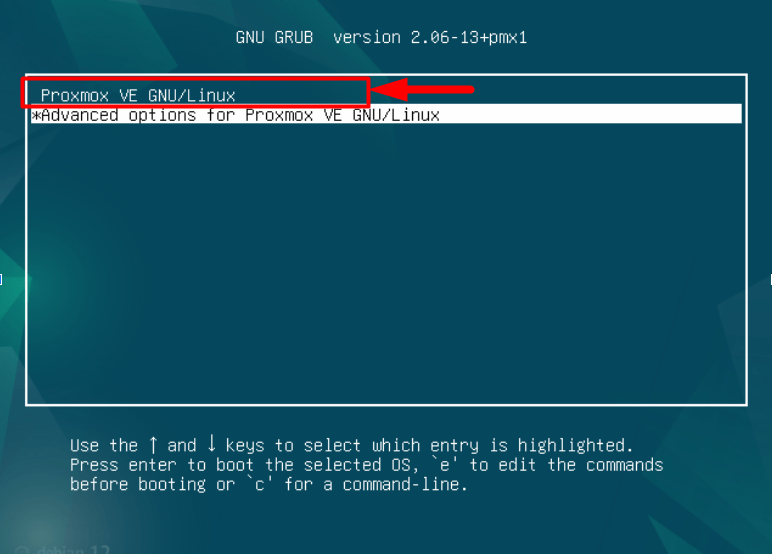
Step 9: Sign In to the Proxmox VE Linux Kernel
Here, reboot the system and select the “Proxmox VE GNU/Linux” from the grub menu to boot into the “Proxmox Kernel”:

How to Access the Web GUI of Proxmox on Debian 12?
To access the web GUI of Proxmox to manage it on Debian 12, follow these steps:
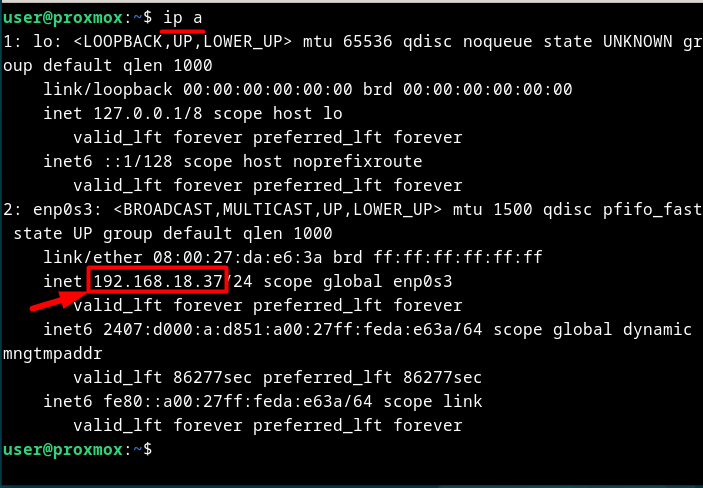
Step 1: Check the System’s IP
Users can use their system’s IP and the local IP (127.0.0.1) as well to access the “Proxmox Web GUI”. To find your system’s IP address, run the following command:
ip a

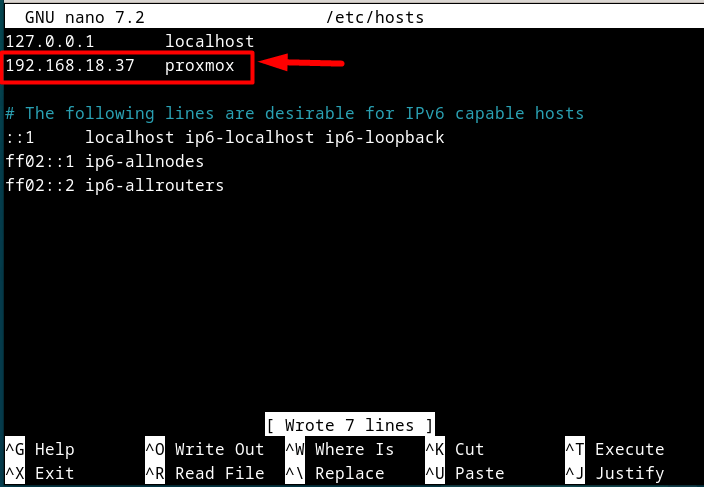
Step 2: Edit the “/etc/hosts” File
The “/etc/hosts” file allows users to map the hostnames to the IP address before the system references the DNS. Here, users must map their hostname with their system’s IP or use the local IP (127.0.0.1):

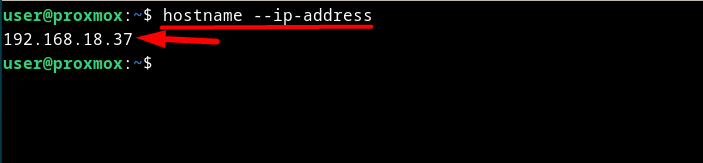
Step 3: Check the System’s IP
Now check the system’s IP against the mapped user:
hostname --ip-address

Step 4: Access the Proxmox Web GUI
Now open your internet browser and type in the IP address of your system, followed by the Proxmox Port (8006). Here, the Local IP address is used:

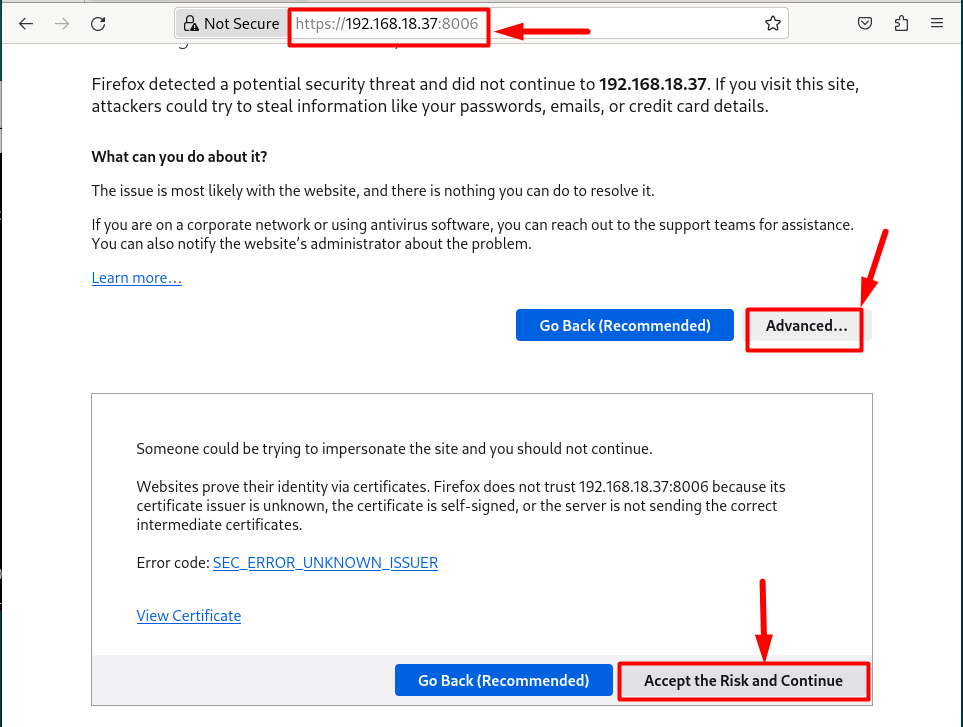
As seen above, the browser warns of the security risks as it does not recognize the IP address. To go forward, hit the “Advanced…” button and then “Accept…Continue”, as highlighted.
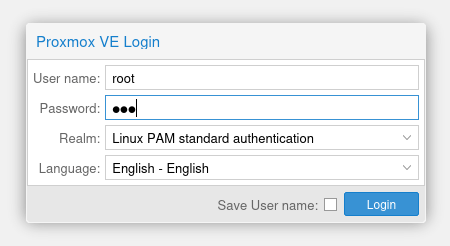
Now, utilize the “root” as username and your system’s password:

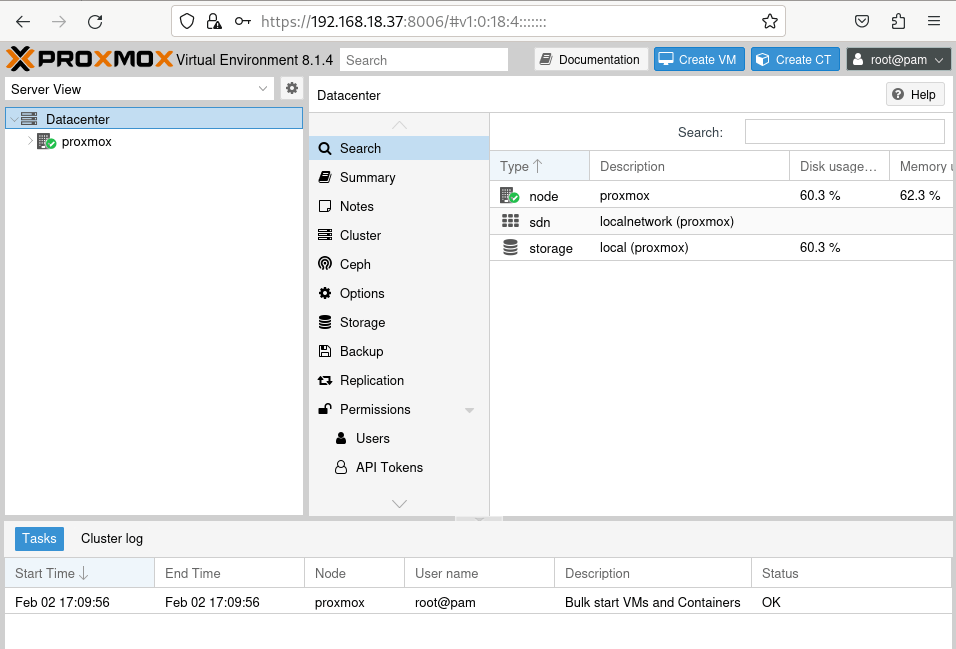
The successful login triggers the dashboard of the “Proxmox Virtual Environment”. From here, users can manage the virtual machines and containers with ease:

How to Create a Virtual Machine Using Proxmox on Debian 12?
To create the virtual machine through the “Proxmox on Debian 12”, follow the steps below:
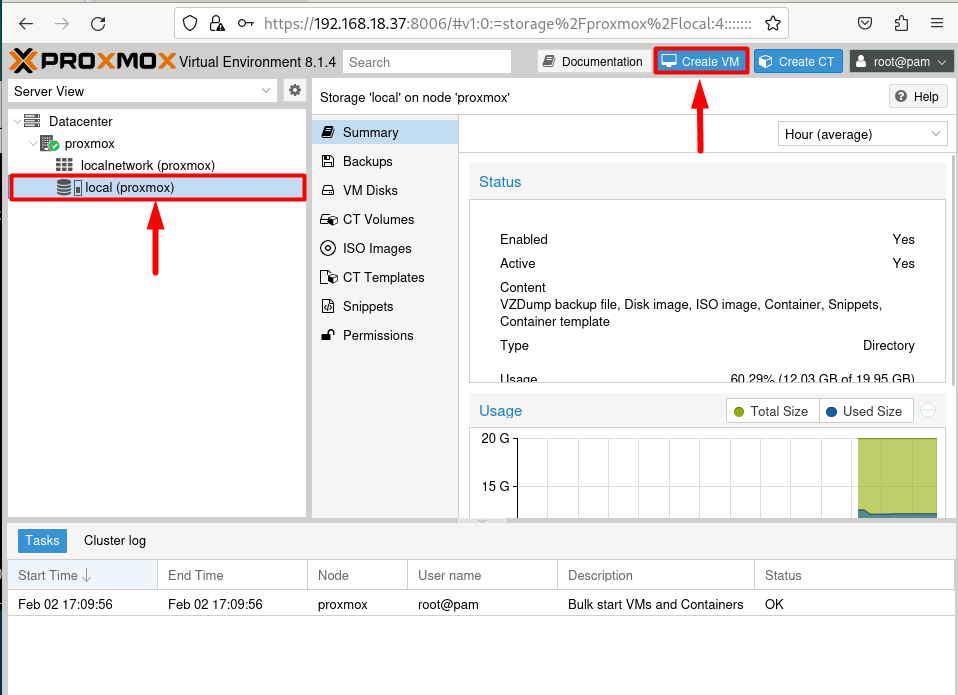
Step 1: Open the “Create VM” Wizard
From the left pane, select the “local (Debian)” using the Debian ⇒ localnetwork (Debian). Then hit the “Create VM” button that creates a new VM:

Step 2: Name the Virtual Machine
Next, name (Node) the virtual machine you want to create (Linuxmint-VM in this case):
Step 3: Choose ISO File
From here, specify the iso file. Whether it is on the disk (hard drive) or the USB/CD:


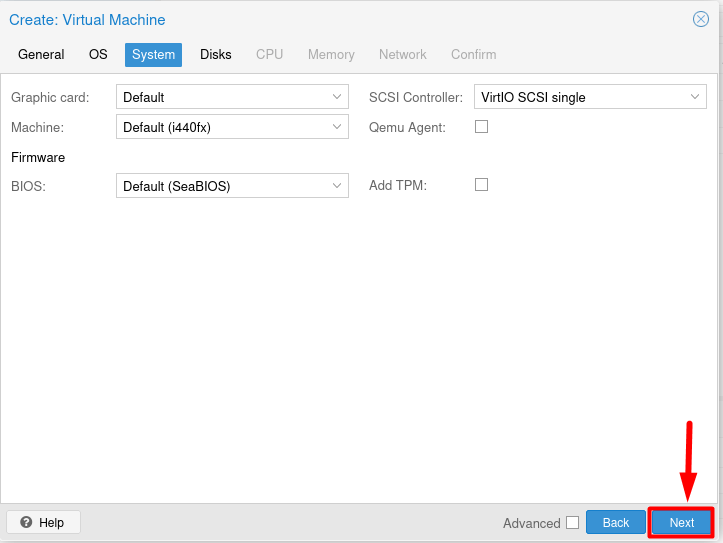
Step 4: Assign the System’s Resources
Now, select the graphics card, SCSI Controller, Machine, and BIOS, and specify other settings:

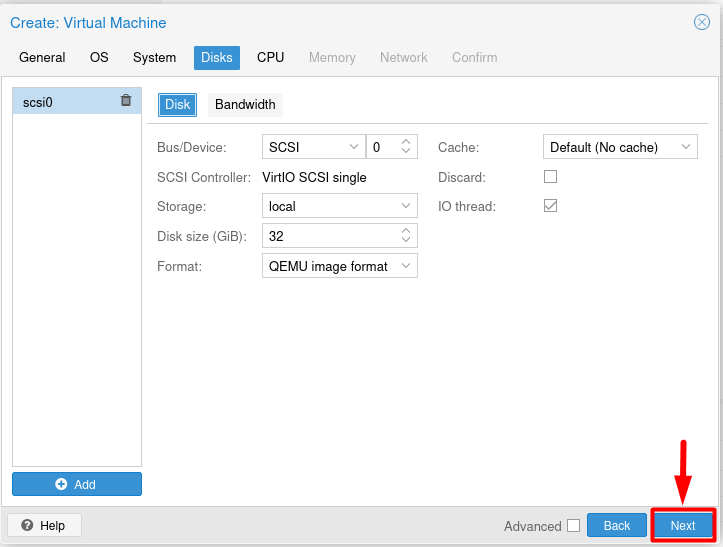
Step 5: Modify Disk Properties
Next, modify the “Disk” properties and allocate the space for the VM:

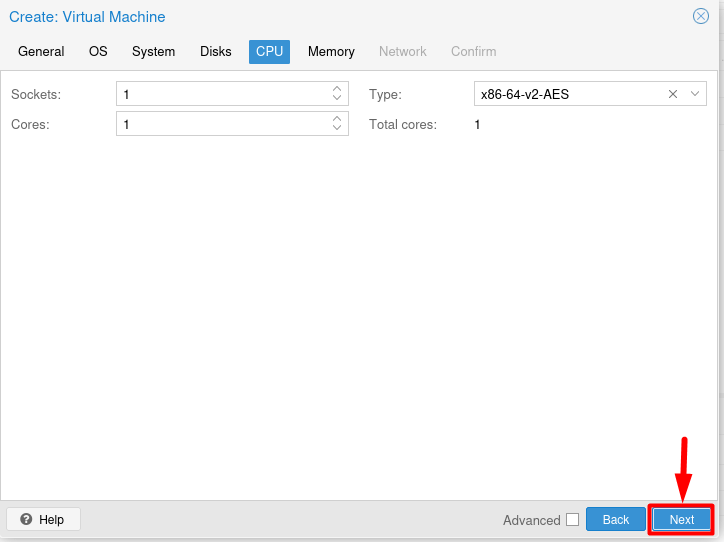
Step 6: Allocate the CPU
In the “CPU” tab, assign the number of Sockets and Cores to the VM:

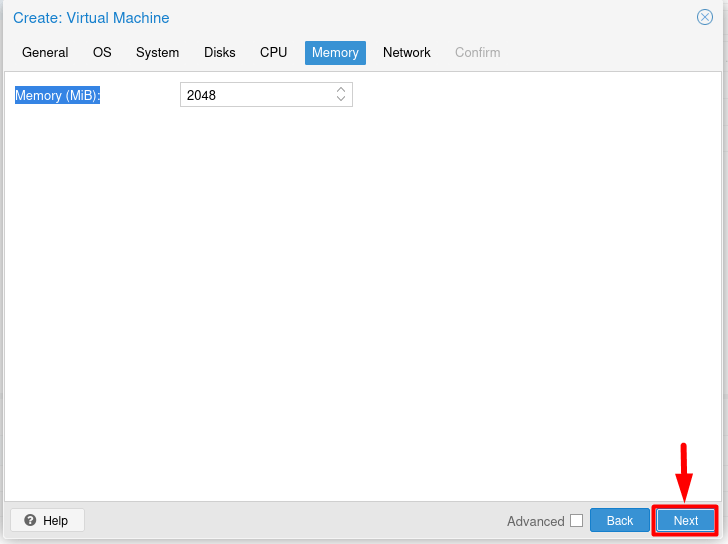
Step 7: Allocate Memory
Use the “Memory” tab to change the amount of memory assigned to the VM:

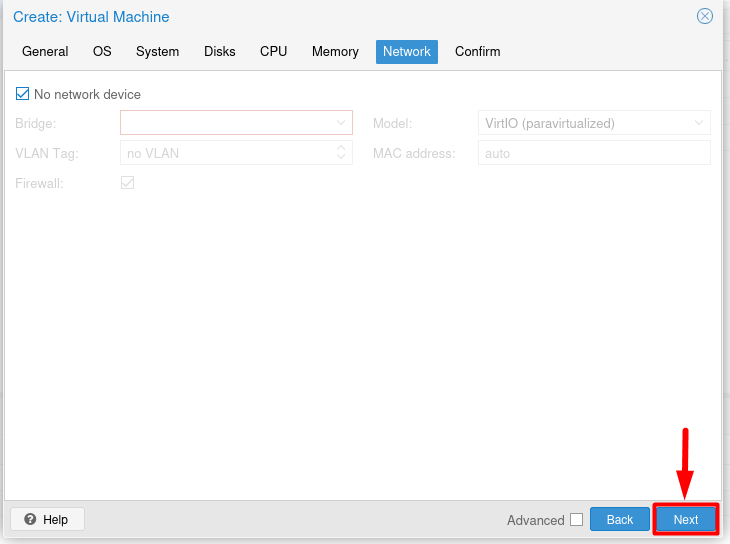
Step 8: Select Network
The Network tab allows changing the network properties (Bridge, VLAN Tag, Model, Mac address, and more). Specify the desired settings from here:

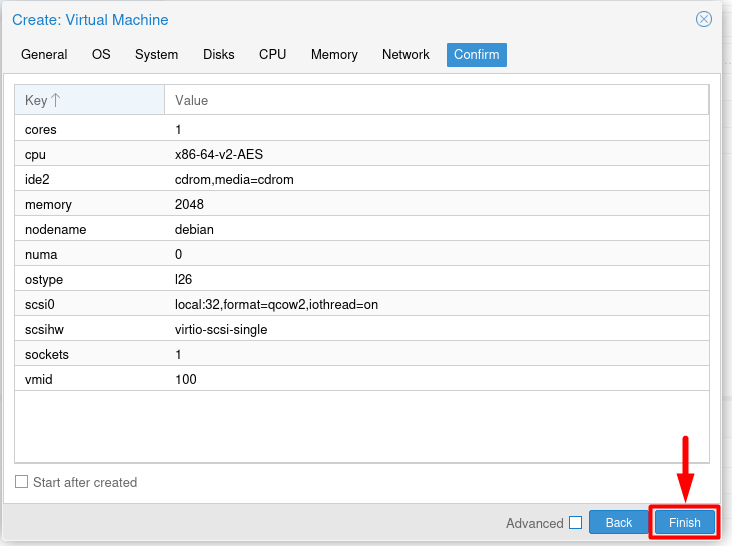
Step 9: Confirm Changes
In the final step, the Confirm tab lets you view the configurations of the specified VM:

How to Fix the “Task Error: KVM Virtualization” Error in Proxmox Web GUI?
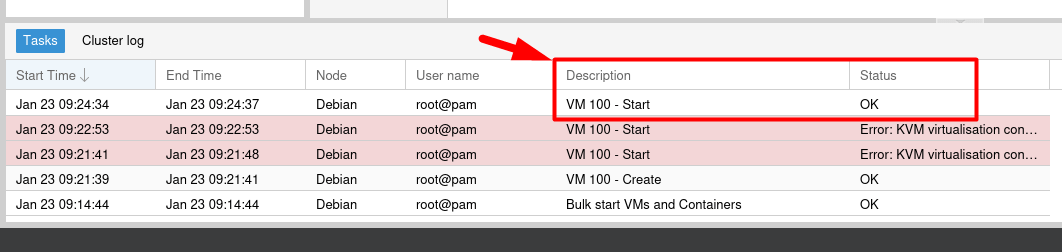
After creating the VM, users may face the “Task Error: KVM Virtualization…”. To fix this error, select the options and then double click/tap on the “KVM virtualization hardware” and disable it:

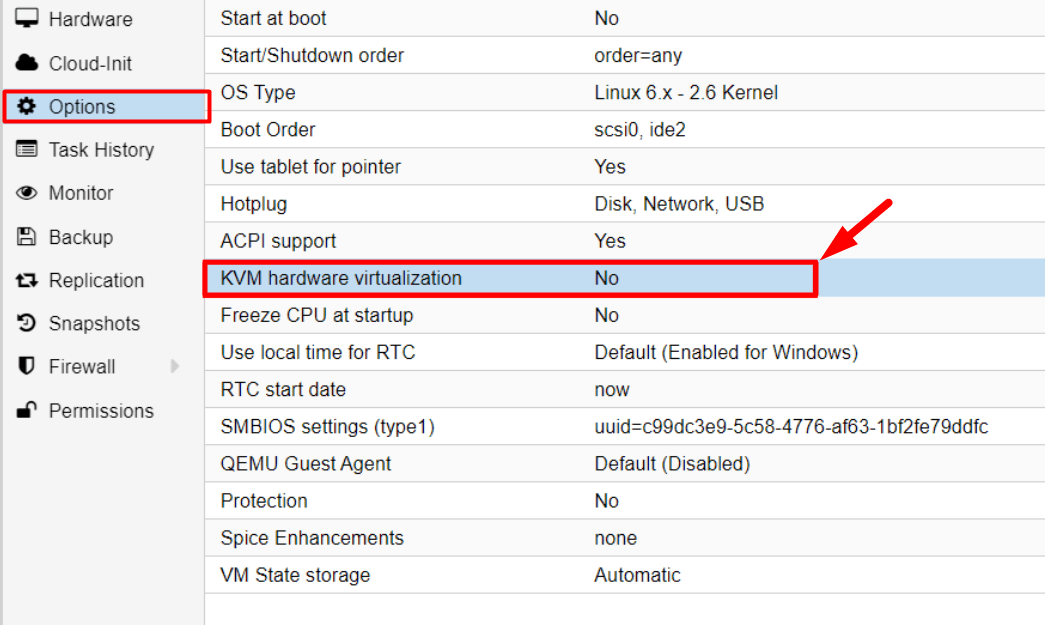
The virtual machine will now load correctly with the “OK” status:

Conclusion
“Proxmox” is a cutting-edge virtualization server offering several features that allow users to manage virtual machines and containers. To install “Proxmox” on Debian 12, switch to the “root” account, and import its repository and GPG key. Install its kernel and required packages, reboot the system, and use the “Proxmox Kernel” to boot.
Next, use the format “<system’s IP:8009>”, log in, and create & manage the virtual machines/containers from a simplified web GUI. This guide has presented the complete process to install and manage “Proxmox” on Debian 12.
Frequently Asked Questions
/etc/apt/sources.list and import the Proxmox GPG key using wget and apt-key.