Raspberry Pi is a powerful gadget that has revolutionized the DIY tech scene. You can build multiple projects using the Raspberry Pi device, such as creating a web server, building a home automation system, and more. However, to fully utilize the Raspberry Pi device capability, you must install an operating system onto the device. With the release of the Ubuntu 24.04 LTS, it’s now time to unleash the Raspberry Pi device capability.
Ubuntu 24.04, code-named Noble Numbat is the latest release of the Ubuntu series that brings new and exciting features for the users. It includes the latest Kernel version 6.8, GNOME 45 desktop environment, enhanced security bug fixes, patches, and enhancements like disk encryption, secure boot, and better hardware support.
Read this guide to learn:
- How to Install Ubuntu 24.04 LTS on Raspberry Pi
- How to Install Ubuntu 24.04 LTS on Raspberry Pi Through Raspberry Pi Imager
- Conclusion
How to Install Ubuntu 24.04 LTS on Raspberry Pi
You can install Ubuntu 24.04 on Raspberry Pi by using the following steps:
Step 1: Download Ubuntu 24.04 Image File
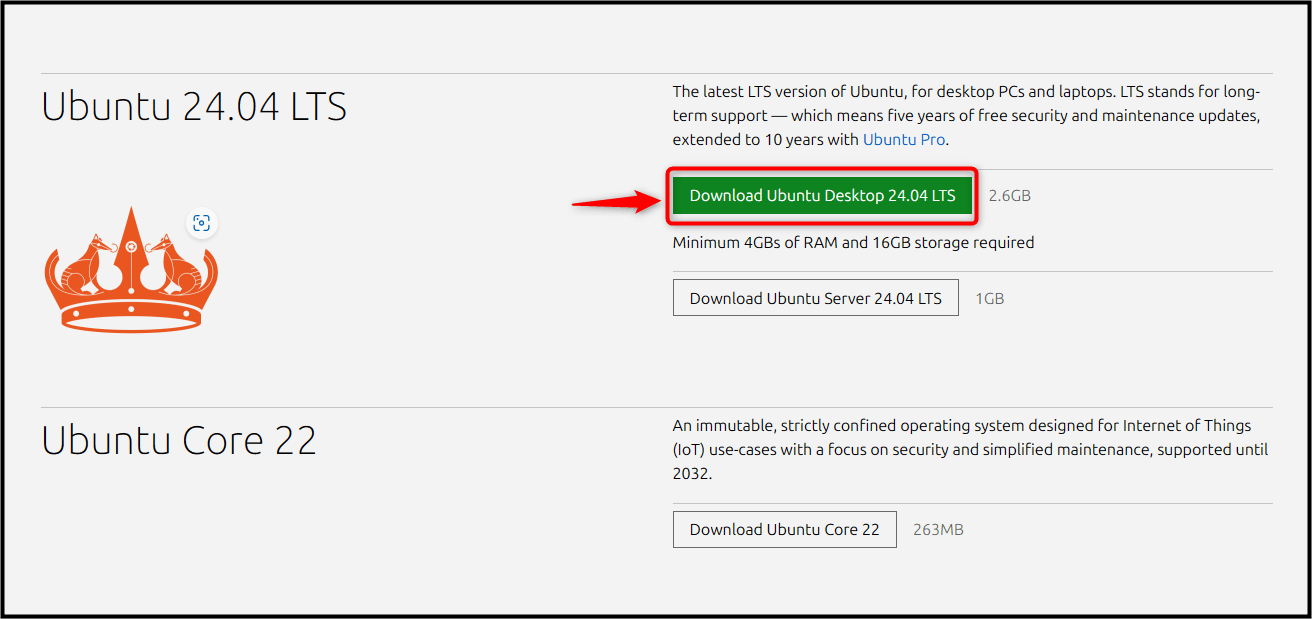
First, navigate here and download the Ubuntu 24.04 LTS image file for Raspberry Pi. You will find the preinstalled-desktop-arm64 version of Ubuntu 24.04 on the website once you scroll down the page; click on the image file to download it:
Step 2: Download and Install the BalenaEtcher Application
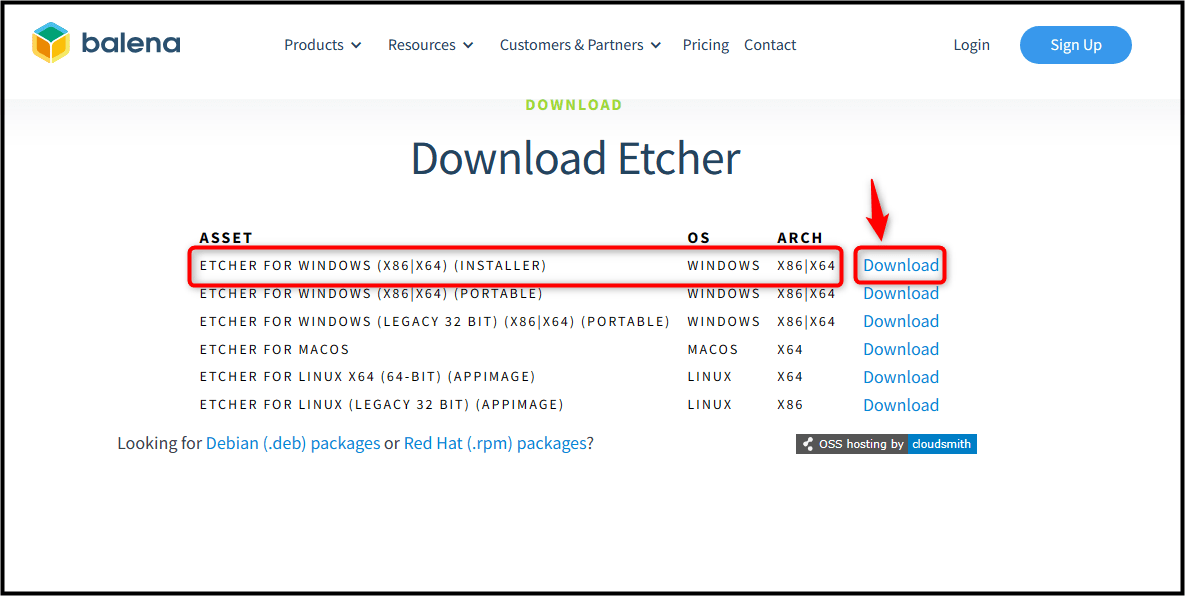
Now, download and install an imager tool so that you can create the image of Ubuntu 24.04 on a USB or SD Card. BalenaEtcher is a powerful imager tool that allows you to flash the image of an operating system onto external devices like a USB, SD Card, or hard drive. You can download the BalenaEtcher application based on your system:
Here, we have downloaded and installed BalenaEtcher on the Windows system:
Step 3: Load Ubuntu 24.04 Image in BalenaEtcher
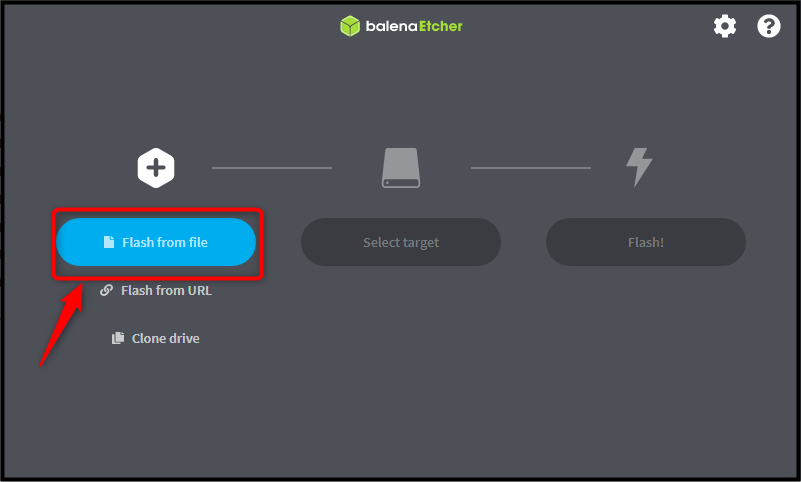
Next, open the BalenaEtcher application on your system and click the Flash from file option from the menu:
Navigate to the folder where you have downloaded the Ubuntu 24.04 image file. Then load it by double-clicking on the image file or using the Open button after selecting the image file:
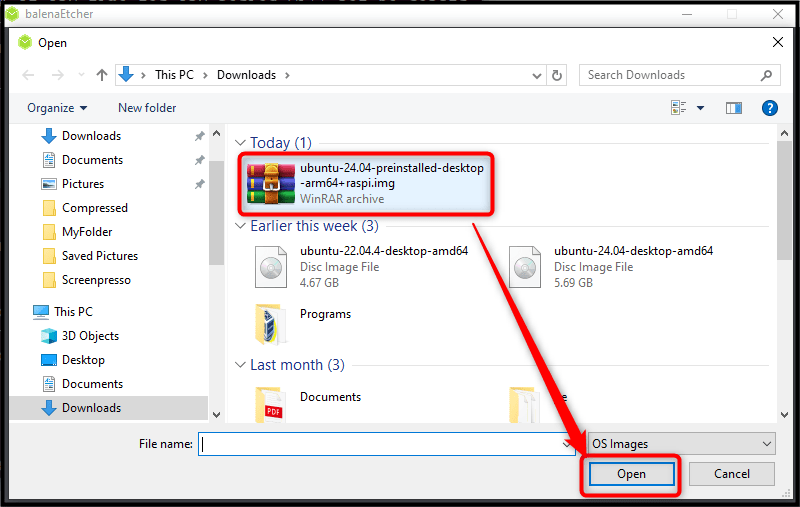
This will load the Ubuntu 24.04 image archive file in BalenaEtcher.
Step 4: Select Target Location
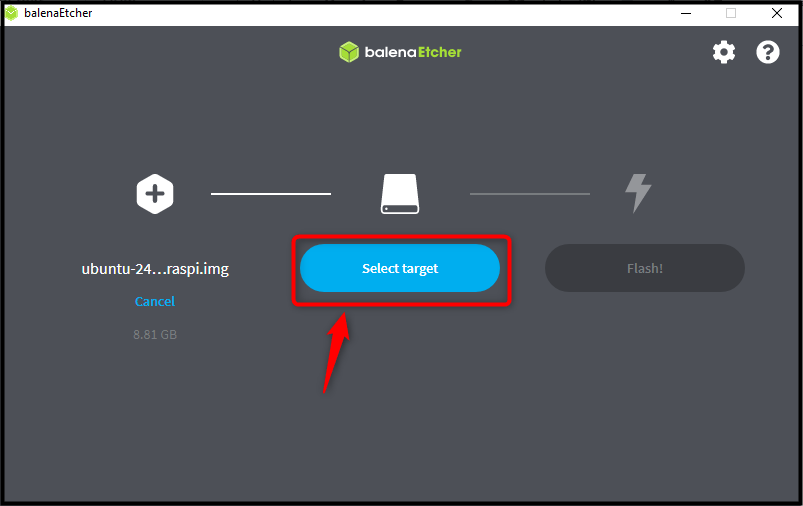
Now, insert the SD Card into your system and format it properly. You can insert the Raspberry Pi’s SD Card into the system through an SD Card reader. Once, complete, users can hit the Select target button from the menu:
Your Raspberry Pi’s SD Card will show up in the menu, choose the desired SD Card and then click the Select 1 button:
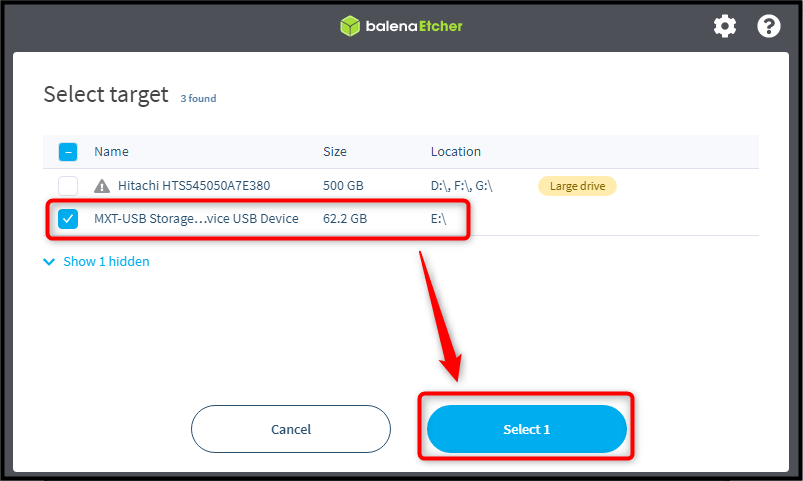
This will select the Raspberry Pi’s SD Card as the default target location for Ubuntu 24.04.
Step 5: Flash Ubuntu 24.04
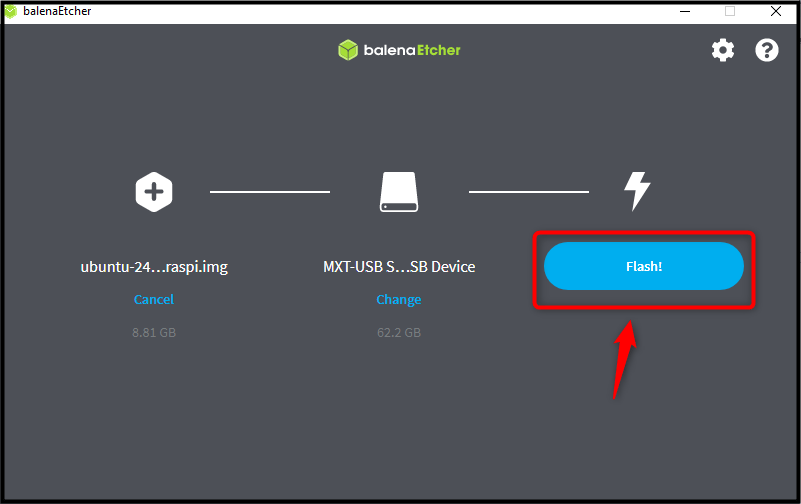
Now, choose the Flash! A button from the menu to start Flashing the Ubuntu 24.04 system onto the Raspberry Pi’s SD Card:
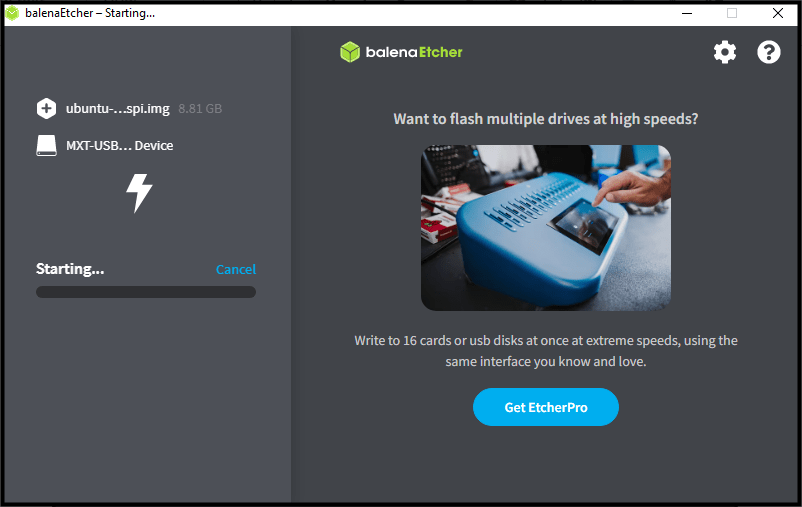
Wait for the Flash process to be completed, which usually takes a few minutes to complete, depending on how fast your SD Card speed is:
Step 6: Load Ubuntu 24.04 in Raspberry Pi
Once the Flash process is done, simply remove the SD Card and insert it into the Raspberry Pi’s SD Card port. Power on your Raspberry Pi device and wait for a few seconds until the device loads the Ubuntu 24.04 system.
Note: Ensure you have set up a complete Raspberry Pi desktop with a display monitor, mouse, and keyboard.
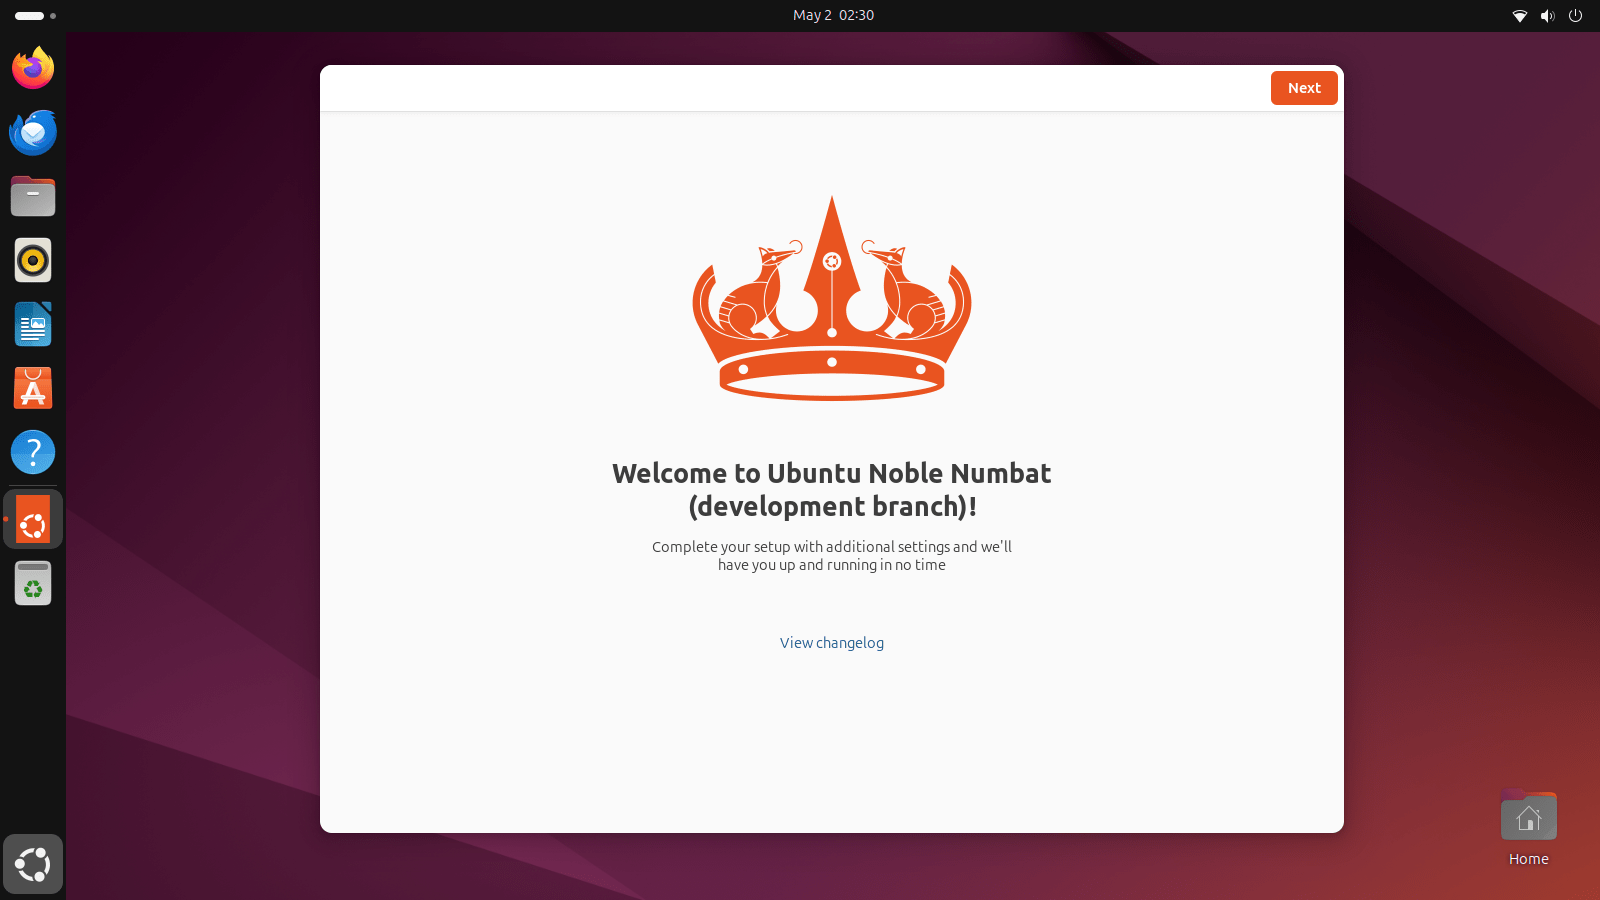
After a while, you will be able to see the Ubuntu 24.04 system configuration, simply complete the steps which include, keyboard layout, connecting to a Wi-Fi network, selecting the location, and adding your computer details. It include the name of computer, username, as well as password. You have to do this on your own and once it is done, you will be able to use the Ubuntu 24.04 desktop on Raspberry Pi:
How to Install Ubuntu 24.04 LTS on Raspberry Pi Through Raspberry Pi Imager
You can also download and install the Raspberry Imager tool’s latest version on your system to directly load Ubuntu 24.04 on the SD Card. The advantage of using the Raspberry Pi Imager tool is that you will not be required to download the Ubuntu 24.04 image file. To install Ubuntu 24.04 on a Raspberry Pi device using Raspberry Pi Imager, follow the below-given steps:
Step 1: Download Raspberry Pi Imager
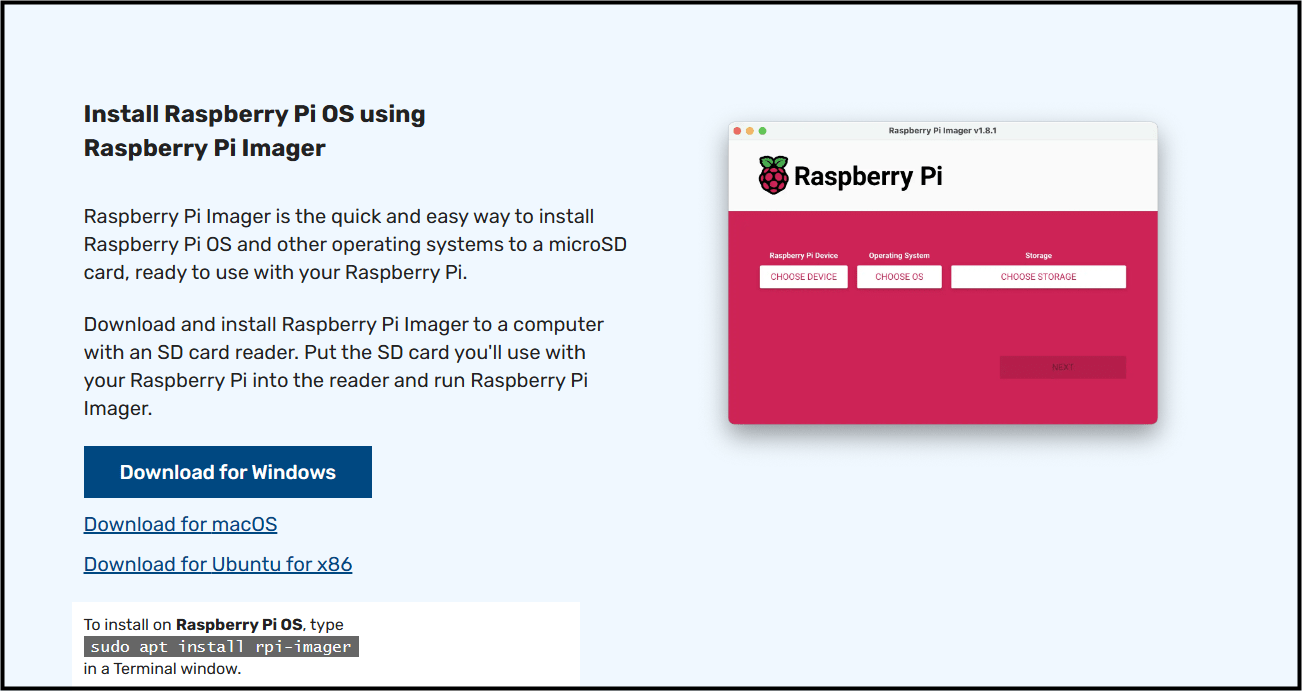
First of all, navigate to the Raspberry Pi website, download the Raspberry Pi Imager stable release on the system:
Step 2: Create a Raspberry Pi Image on an SD Card
Now, first, insert your SD Card into your computer and open Raspberry Pi Imager on your desktop:
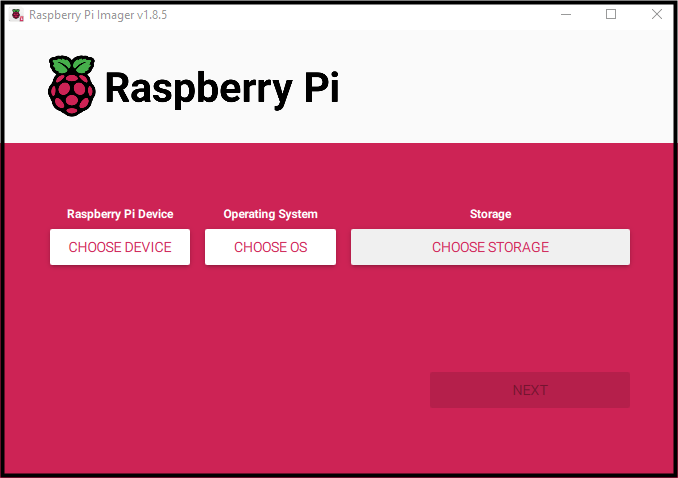
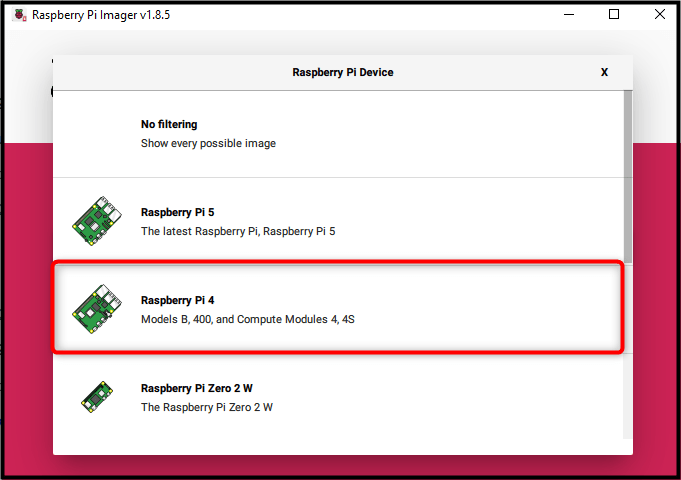
Then select the Raspberry Pi device model using the CHOOSE DEVICE option:
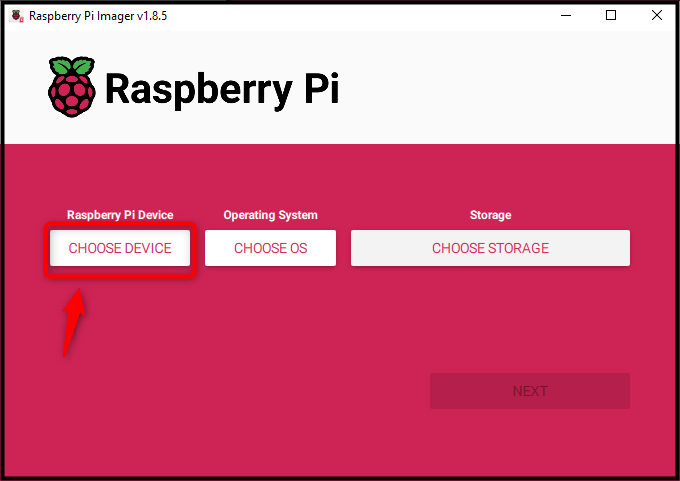
Here, I am using Raspberry Pi 4, thus selected Raspberry Pi 4 device from the menu:
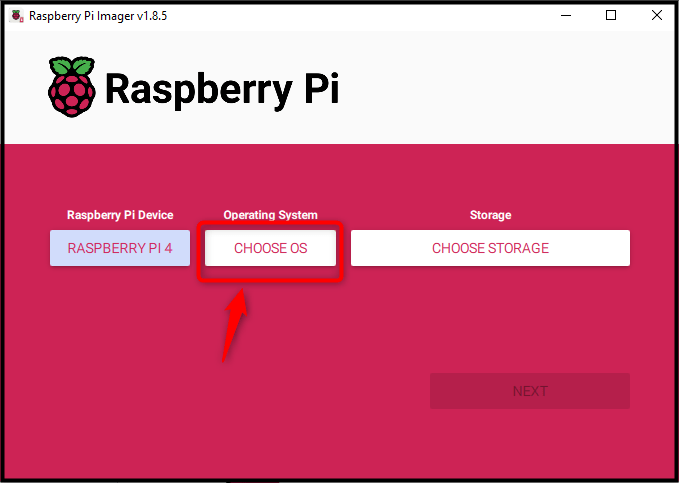
Then select CHOOSE OS:
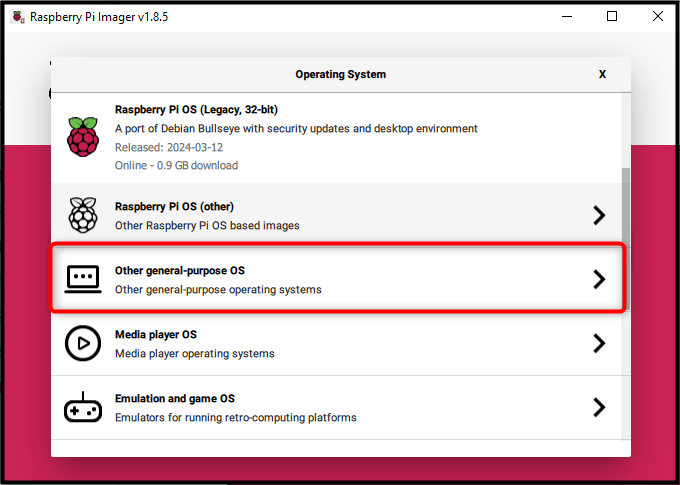
Navigate towards the Other-general-purpose OS:
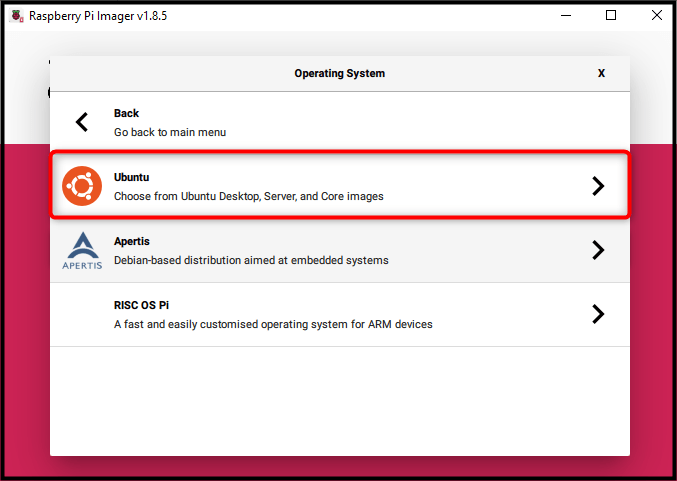
Select Ubuntu:
Choose Ubuntu Desktop 24.04 LTS (64-bit):
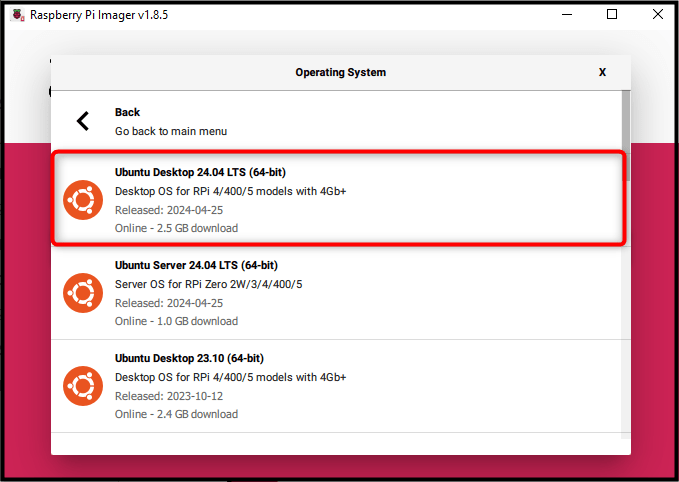
Then click the CHOOSE STORAGE option later on:
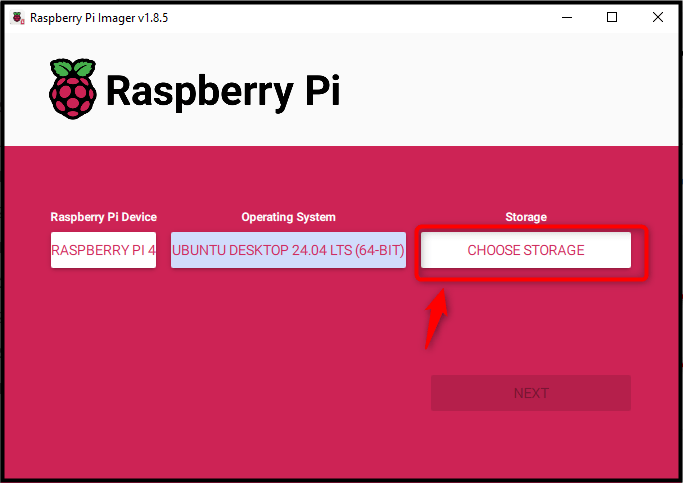
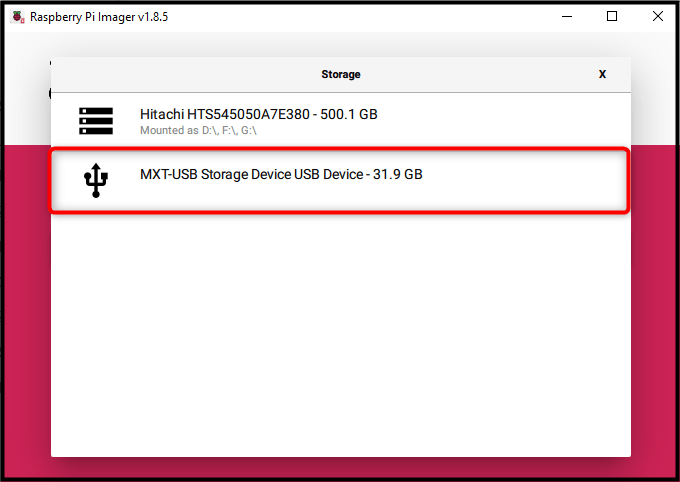
Select USB Storage option:
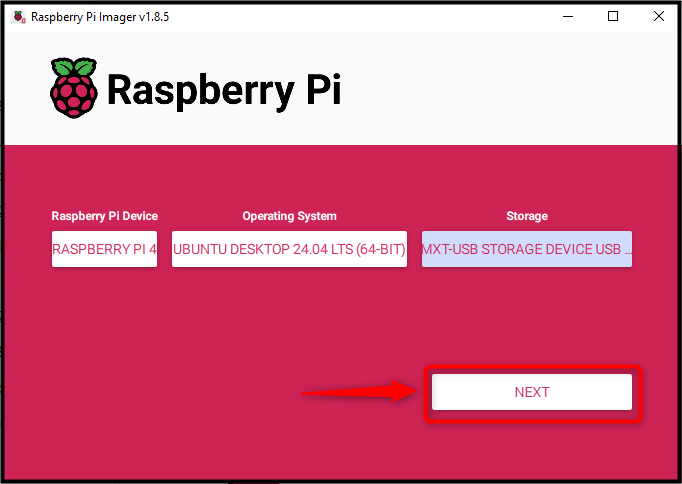
Then click the Next button once everything is done according to the above steps:
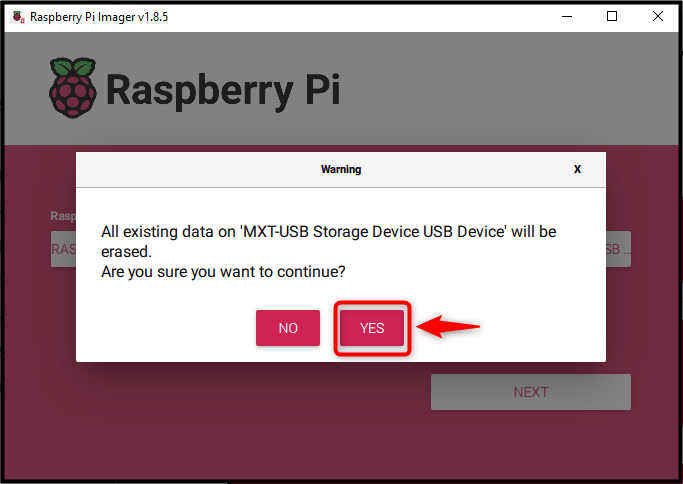
Finally, click the YES option to allow Raspberry Pi Imager to format your SD Card:
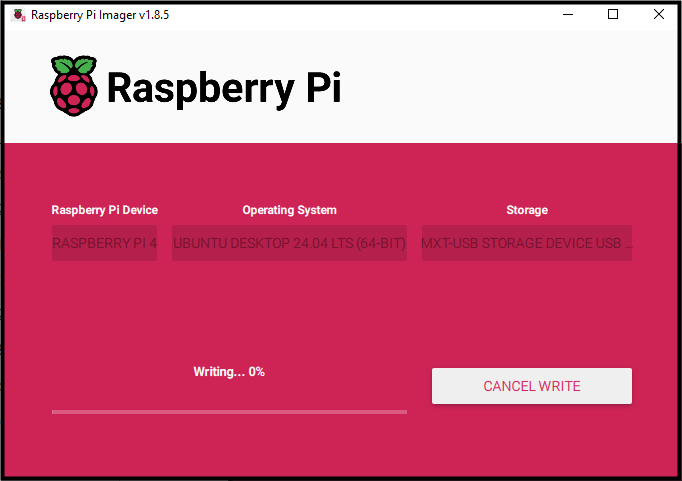
After this phase, the Raspberry Pi Imager will start writing the image of Ubuntu 24.04 onto the SD Card:
After completing the Ubuntu Image writing process, you can use Step 6 of the first method and start using Ubuntu 24.04 on a Raspberry Pi device.
Conclusion
Ubuntu 24.04 is the latest release of the Ubuntu series that can be installed on Raspberry Pi through the BalenaEtcher application. First, download the Ubuntu 24.04 ARM64 archive file from the official website. Then insert the SD Card into your system, run the BalenaEtcher application, load the image file and flash it on the SD Card through BalenaEtcher. Once complete, remove the SD Card from the system, insert it back into the Raspberry Pi device, and power it on. Then complete the configuration steps to start using Ubuntu 24.04 on your Raspberry Pi device.
Apart from that, the Raspberry Pi Imager can also be used to install Ubuntu 24.04 on Raspberry Pi without downloading a separate image from the website. The final selection for choosing the desired application for writing Ubuntu 24.04 onto the Raspberry Pi’s SD Card depends on your choice. Both tools will help you install and run Ubuntu 24.04 LTS on your Raspberry Pi device.




Leave feedback about this