
Visual Studio Code is often voted the best code editor among developers because it is very powerful and supported by a great deal of programming languages. It has a responsive look, but its extensions and features are deep and wide-ranging. For people trying to install VS Code in Ubuntu 24.04, you have come to the right place. This guide will help you install Visual Studio Code in Ubuntu 24.04 by choosing an option that best fits your needs.
Method 2: Using the .deb Package
Method 4: Using the Ubuntu App
Let’s start with the first.
Method 1: Using Snap
Snap simplifies how software is installed on Ubuntu systems; it defines packages and installs or updates software within the confines of those packages. Snap packages assist with the installation of VS Code:
Step 1: Install Snap
Like any other software, Snap must be installed first. You can install Snapd by running:
sudo apt install snapd

Step 2: Installing VS Code
The –classic option is required as this allows full access of the system to VS Code:
sudo snap install --classic code

Step 3: Verification
The user can confirm their installation with the snap list. Snap displays installed packages:
snap list

VS Code works perfectly fine with Ubuntu. You just need to type ‘code’ to open it in the terminal after installing it:

You can do any programming activities in the VS Code.
Optional: Remove VS Code
You need to use snap to remove VS Code in Ubuntu 24.04 using this command:
sudo snap remove --purge code
Method 2: Using the .deb Package
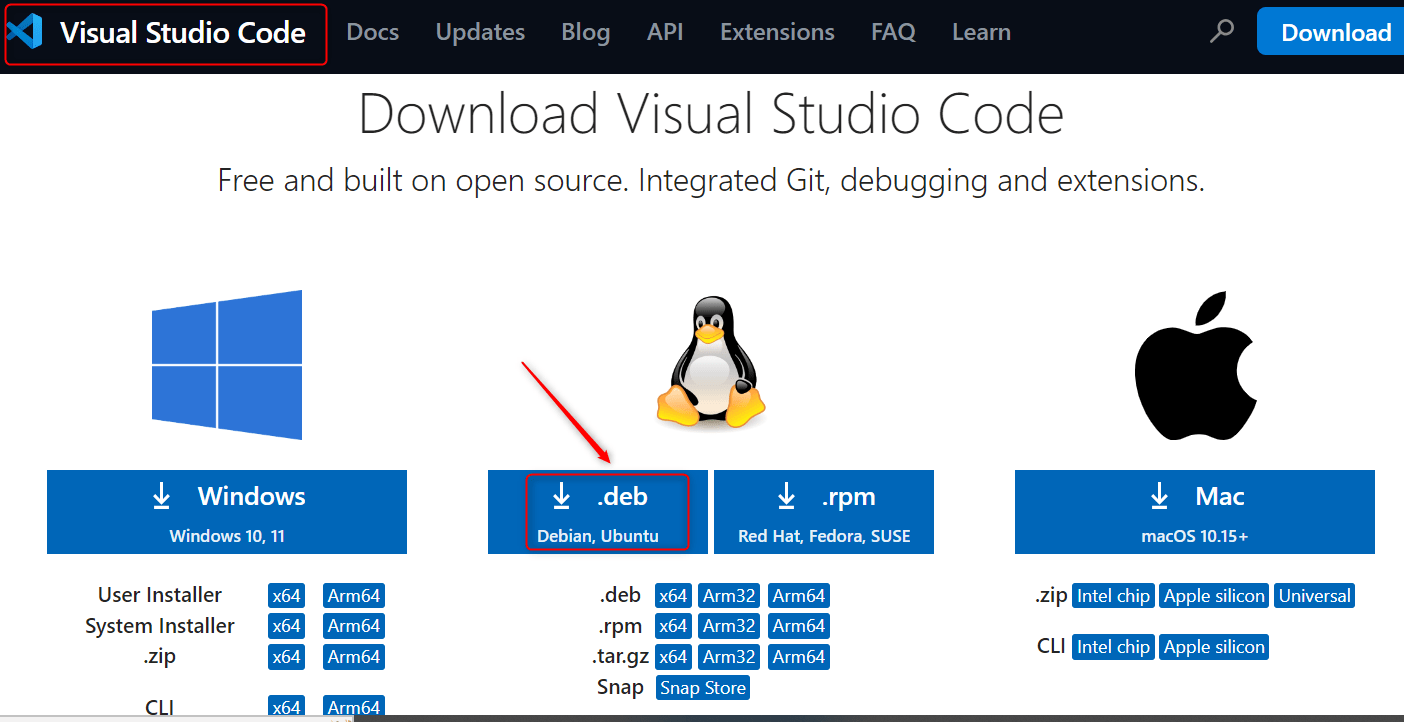
Users can install the VS Code’s 64-bit version by downloading the .deb package. To do so, follow the steps outlined below:
Step 1: Download the .deb Package
Now the users shall directly fetch the 64-bit version of VSCode from the VSCode website:
wget -O vscode.deb 'https://code.visualstudio.com/sha/download?build=stable&os=linux-deb-x64'

The GUI can also be fetched from here:
Step 2: Installing the .deb Package
In this step, you can download the .deb file for the VS Code using the wget command. Navigate toward the folder that contains the downloaded package then install the software using:
sudo apt install ./vscode.deb

If you have older versions or releases of Ubuntu you can also install it using the dpkg package:
sudo dpkg -i <file>.deb
The repository will be updated automatically with the key signed.
Step 3: Verification
To check if the VS Code is installed, you can use the version flag option.
code --version

Launch VS Code
To launch VS Code, please click on the application logo that shows up on the desktop after installation. Alternatively, you can also access Visual Studio Code from the terminal by executing the command below:
code

This section has presented the installation of .deb packages in Ubuntu 24.04.
Method 3: Using APT Repository
With the official Apt repository provided by Microsoft, you are now able to use the package management system to install VS Code on your Ubuntu.
Step 1: Import the Microsoft GPG Key
In this step, users need to download the gpg key from Microsoft and for that, they will have to utilize the wget command:
wget -qO- https://packages.microsoft.com/keys/microsoft.asc | gpg --dearmor > packages.microsoft.gpg && sudo install -D -o root -g root -m 644 packages.microsoft.gpg /etc/apt/keyrings/packages.microsoft.gpg

Note: In case the user has not installed wget, gpg, then these can be fetched by using the below command:
sudo apt install wget gpg
Step 2: Enable VS Code Repository
After this, execute the command to enable Visual Studio code and this should also create your repository:
sudo sh -c 'echo "deb [arch=amd64,arm64,armhf signed-by=/etc/apt/keyrings/packages.microsoft.gpg] https://packages.microsoft.com/repos/code stable main" > /etc/apt/sources.list.d/vscode.list'
 /etc/apt/sources.list.d/vscode.list'" class="wp-image-13931 webpexpress-processed" srcset="https://greenwebpage.com/community/wp-content/uploads/2025/04/word-image-13920-11.png 1241w, https://greenwebpage.com/community/wp-content/uploads/2025/04/word-image-13920-11-300x44.png 300w, https://greenwebpage.com/community/wp-content/uploads/2025/04/word-image-13920-11-1024x152.png 1024w, https://greenwebpage.com/community/wp-content/uploads/2025/04/word-image-13920-11-768x114.png 768w" sizes="(max-width: 1241px) 100vw, 1241px">
Step 3: Update Repository and Install Packages
After the repository has been set up, handle any dependencies that are needed and refresh the listing of your packages on the system:
sudo apt install apt-transport-https && sudo apt update

Step 4: Installing VS Code
Finally, install VS Code through the code package as given below:
sudo apt install code

Step 5: Verify VS Code
The “version” option can be used to authenticate that VS Code has been installed:
code --version

Optional: Remove/Uninstall VS Code
Use the apt command for uninstalling VS Code on Ubuntu 24.04:
sudo apt autoremove code

This concludes the installation of Visual Studio Code for Ubuntu 24.04.
Method 4: Using the Ubuntu App
The GUI allows the installation of code quite easily. Follow the instructions below for installing the requested program:
Step 1: Launch Software Center
Open the “Ubuntu Software”, which you can find in the Applications menu:

Step 2: Install VScode
Simply look for the application in the search bar, click “Install” and wait for the automatic installation to finish:

Step 3: Launch VS Code
After this process is finished, users can now launch the code from the system tray or shortcut button on the desktop by just clicking “Open” and confirming the interface so that it can commence the use of this application:

Remove/Uninstall VS Code
Launch the Ubuntu App and look for the code. Then click the “Uninstall” option. The “code” is now completely removed:

This concludes the installation.
Conclusion
Visual Studio Code on Ubuntu 24.04 is easy to install. There are a couple of options available, depending on which you prefer. This guide will go over all of your options whether you want to use Snap, .deb package, APT, or GUI. With the installation of VS Code, you will have a powerful, flexible, and user-friendly environment for coding. Select the best-suited method for you and get started with coding using one of the most popular editors today.
Frequently Asked Questions
software-properties-common and apt-transport-https is required for APT-based installations to add the Microsoft repository. sudo apt remove code if installed via APT, or sudo snap remove code if installed via Snap. 


Leave feedback about this