Screen recording is an important aspect of Windows. Screen recording is the process in which the screen gets recorded for later playback. Screen recording lets you save video calls, record conferences, create how-to tutorials, and record gameplays. Windows 11 users can record screens with its built-in tools like the “Snipping tool” and “Xbox Game bar” applications. Additionally, there exist lots of third-party applications that you can use to record screens on Windows 11.
In this article, you will get an overview of multiple methods to record screen on Windows 11.
How to Record Screen on Windows 11
These are the methods to record screen on Windows 11:
- Method 1: Record Screen on Windows 11 Using Snipping Tool
- Method 2: Record Screen on Windows 11 Using Xbox Game Bar
- Method 3: Record Screen on Windows 11 Using Microsoft Clipchamp
- Method 4: Record Screen on Windows 11 Using PowerPoint
Method 1: Record Screen on Windows 11 Using Snipping Tool
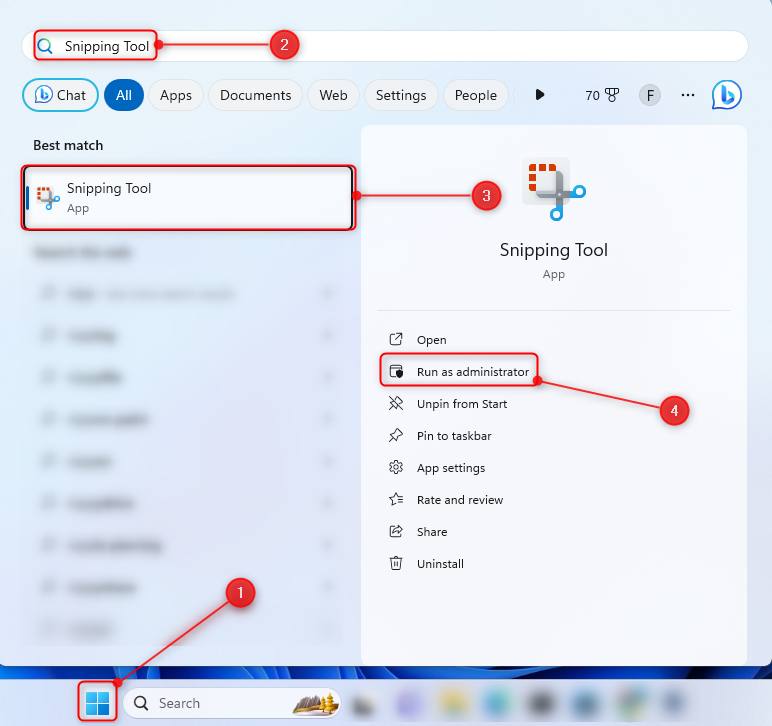
Windows 11 has a built-in “Snipping tool” used for screen recording and taking screenshots. To record the screen using the “Snipping tool”, check the below instructions.
Step 1: Launch “Snipping Tool” from the Start menu, as demonstrated below:
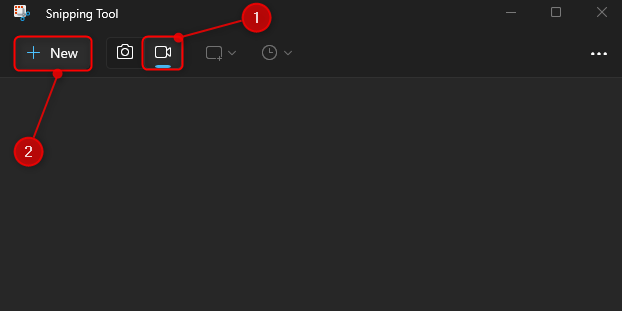
Step 2: Choose the “Video” icon and click on the “New” button:
Step 3: Select the area and click on the “Start” button to begin the screen recording:
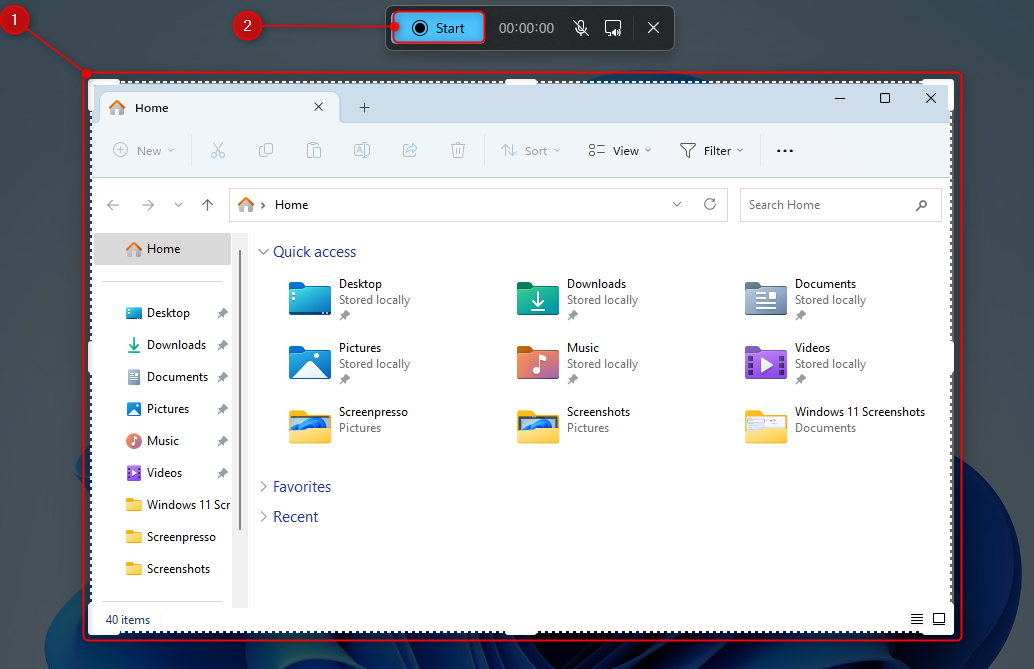
When you are done with the screen recording click on the “Stop” button to stop the recording. To save the video, click the “Save” icon or press the “CTRL + S” shortcut.
Method 2: Record Screen on Windows 11 Using Xbox Game Bar
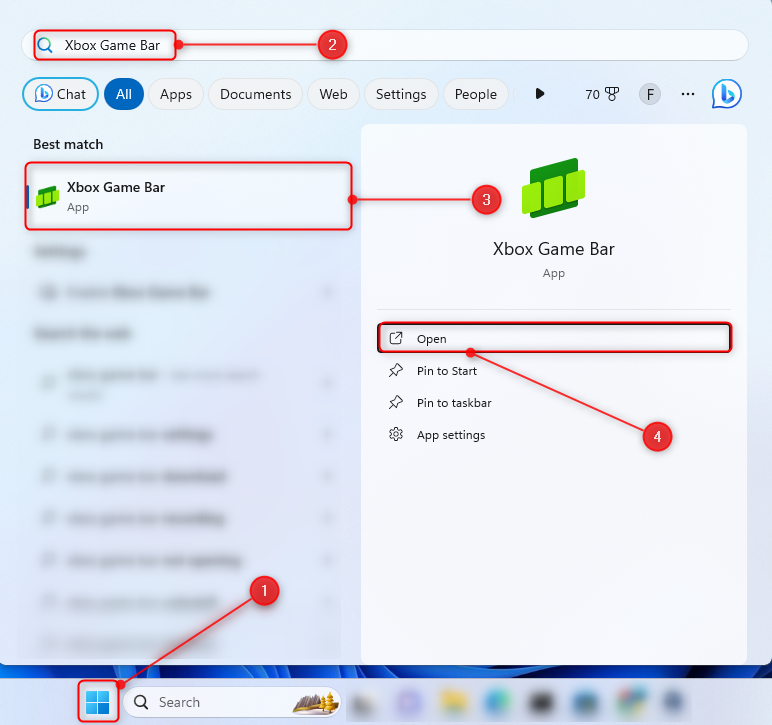
Another built-in screen recording tool that is generally used to record gameplay on Windows is “Xbox Game Bar”. You can record the screen on Windows 11 using “Xbox Game Bar” by checking the instructions given below.
Step 1: First, launch “Xbox Game Bar” from the Start menu, as shown below:
Step 2: then, click on the “Record” button to start the screen recording:
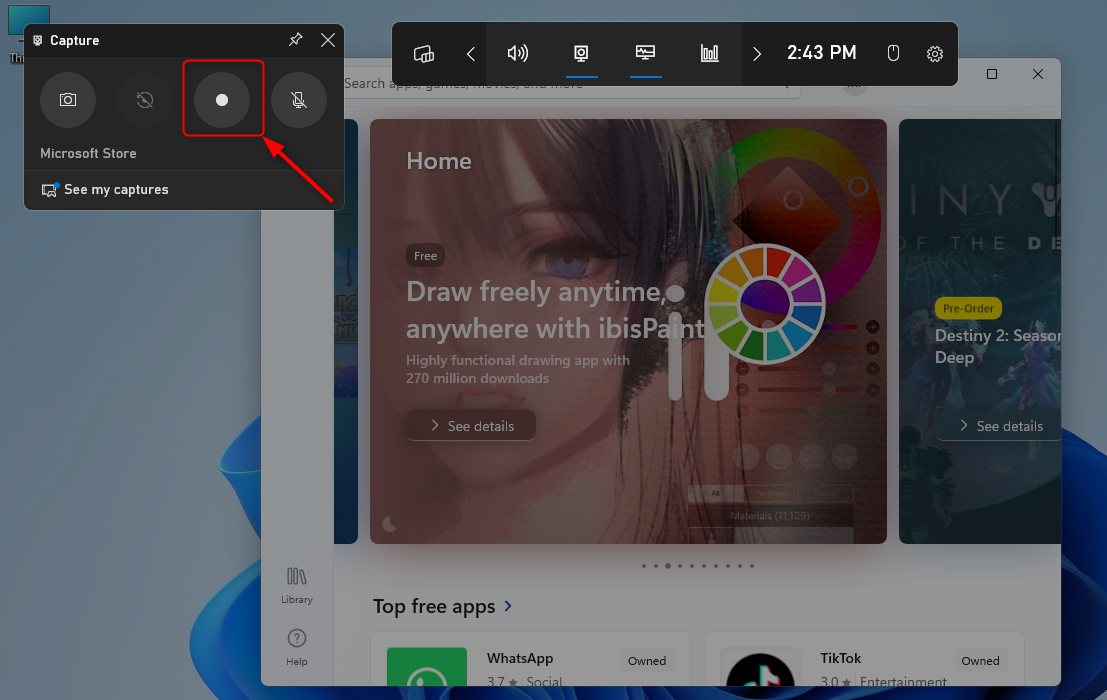
When you are done with recording, simply click on the “Stop” button to stop the screen recording:
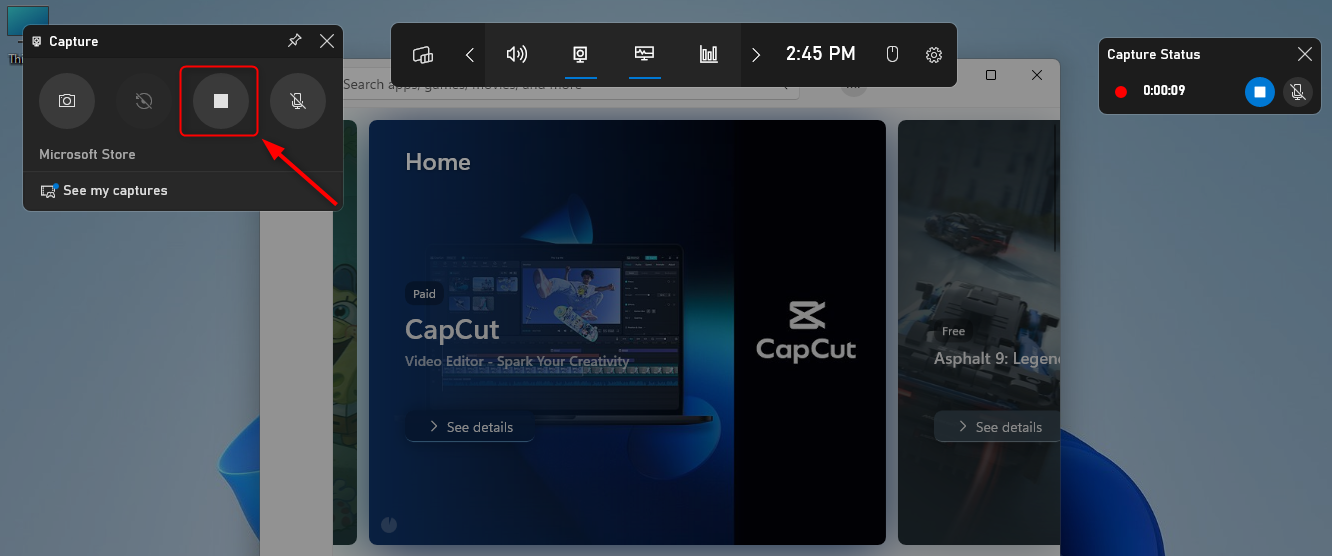
You can find the recorded video by navigating to the “This PC > Videos > Captures” directory.
Method 3: Record Screen on Windows 11 Using Microsoft Clipchamp
Microsoft’s Clipchamp is another video editing tool with a screen recording feature embedded in it. To record the screen on Windows 11 using the Clipchamp application, check the mentioned steps below.
Step 1: first, launch the “Microsoft Clipchamp” app from the Start menu:
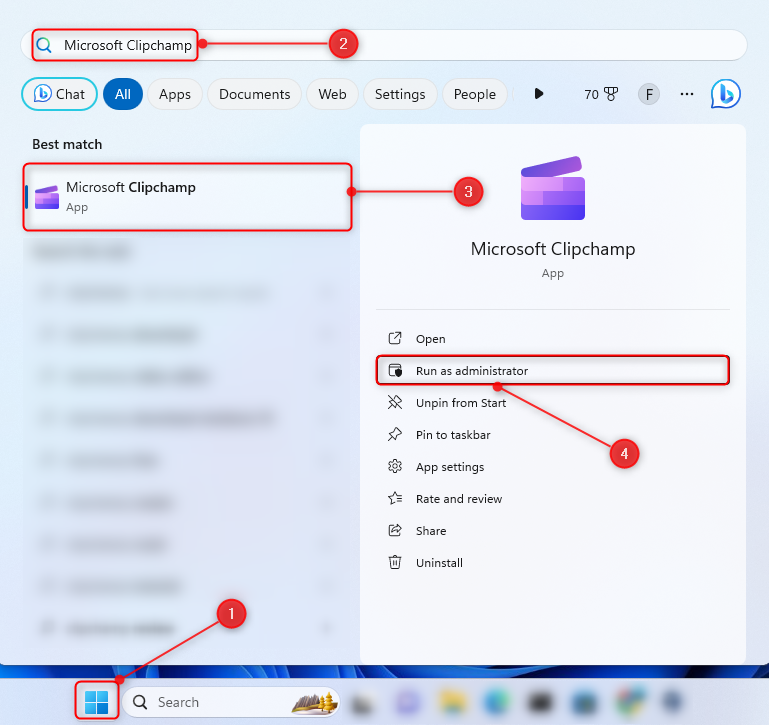
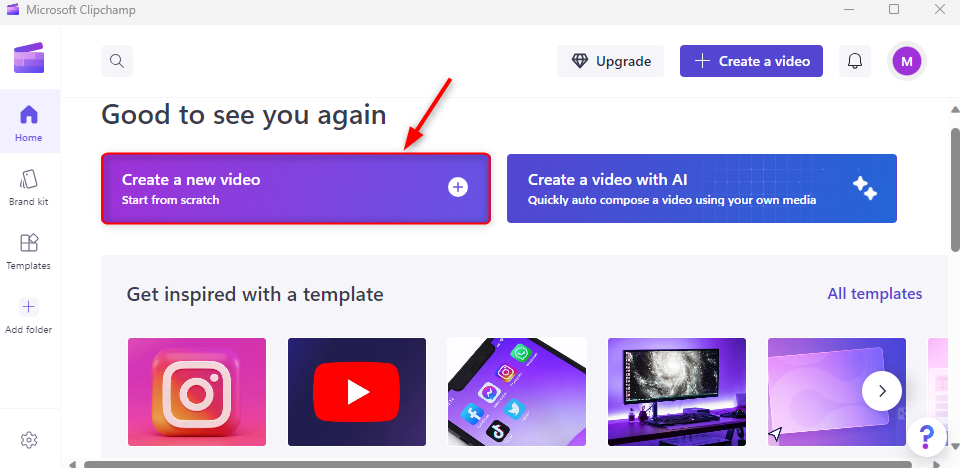
Step 2: After that, click on the “Create a new video” to open the “Record” window:
Step 3: Then, click on the “Record & create” option and select the “Screen” option:
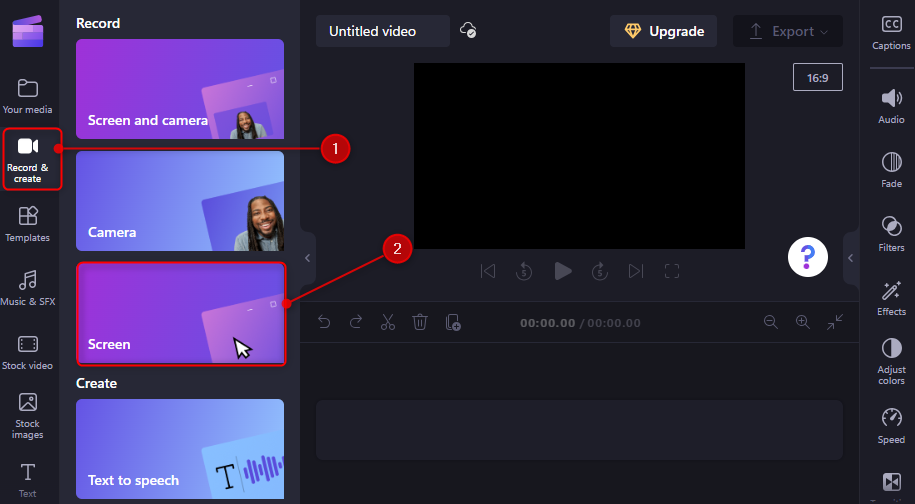
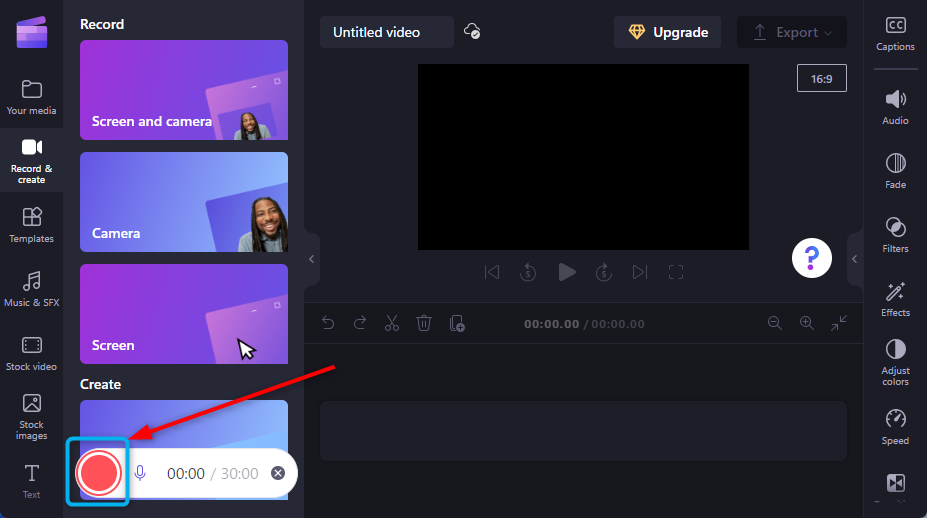
Step 4: Lastly, click on the “Record” button to start screen recording:
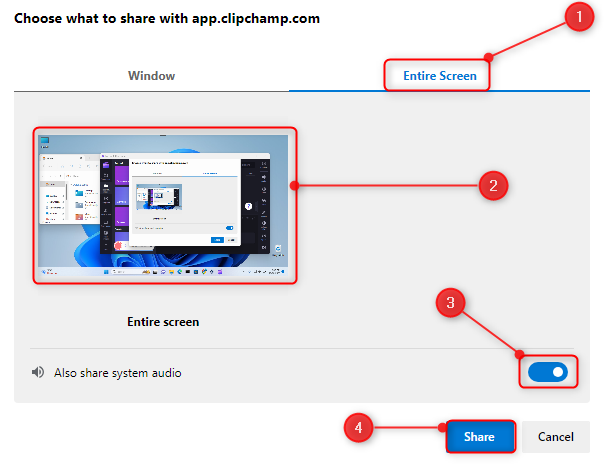
Following clicking the “Record” button, you will be asked whether you want to record the “Entire Screen” or a specific “Window”. Select any of the suitable options, toggle on the “Also share system audio”, if you want to share the system audio, and then click on the “Share” button to start recording:
Once you are done with the screen recording, click on the “Stop” button to stop the screen recording:
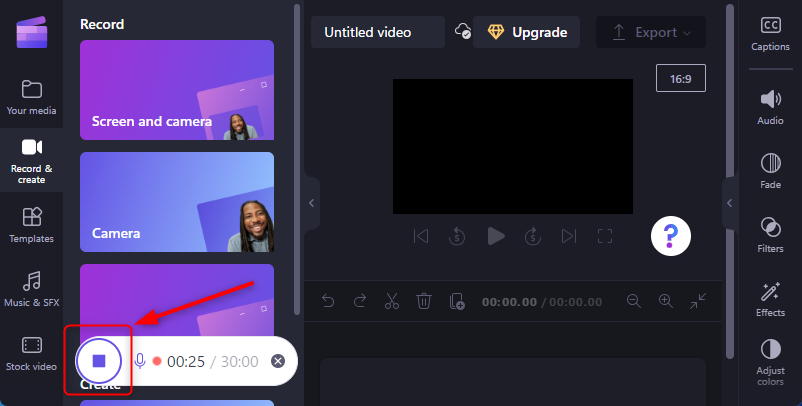
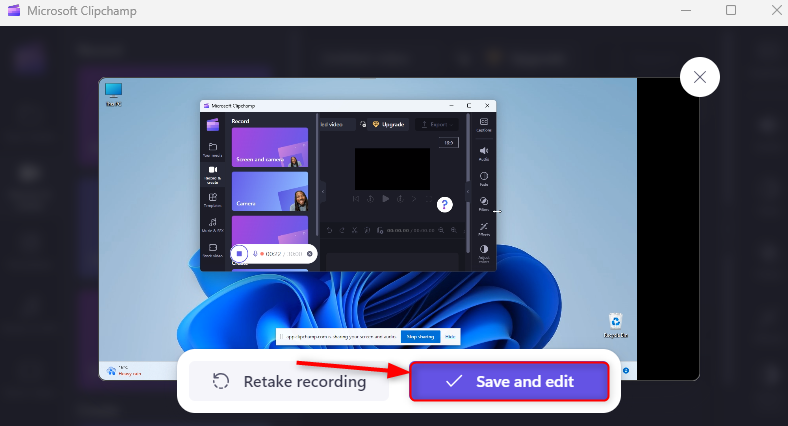
Then, to save the screen recording, simply, click on the “Save and edit” button:
Method 4: Record Screen on Windows 11 Using PowerPoint
Microsoft’s PowerPoint is another tool that you can use to record screen on Windows 11. PowerPoint does not come preinstalled on most Windows editions. However, you can still install it manually from the Microsoft store. To record the screen on Windows 11 using PowerPoint, check the steps given below.
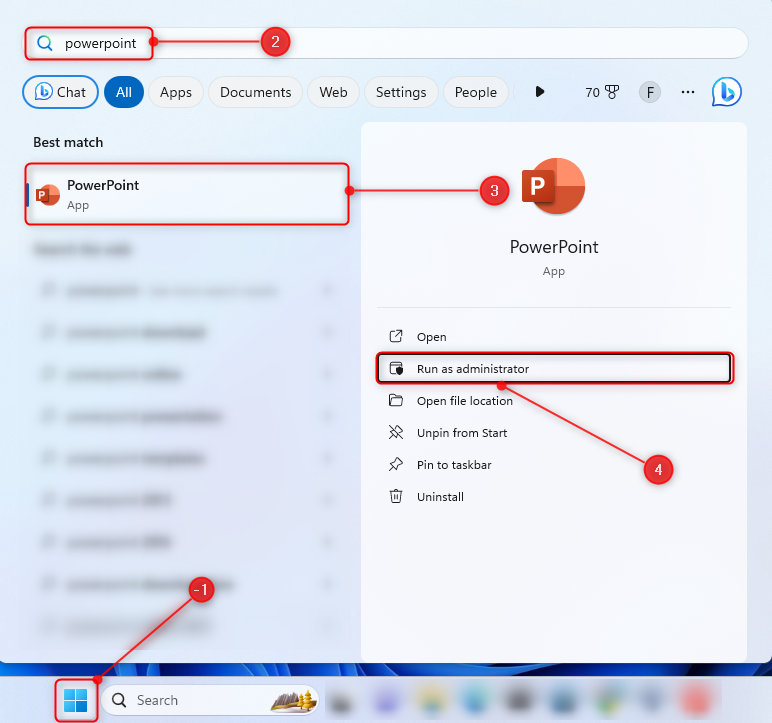
Step 1: First of all, launch “PowerPoint” application from the Start menu, as demonstrated below:
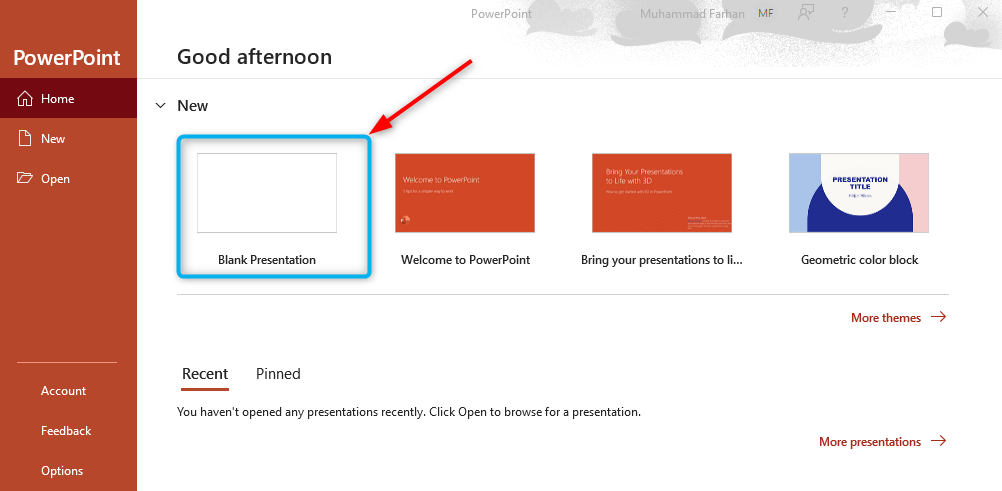
Step 2: Select the “Blank Presentation” from the “Home” section:
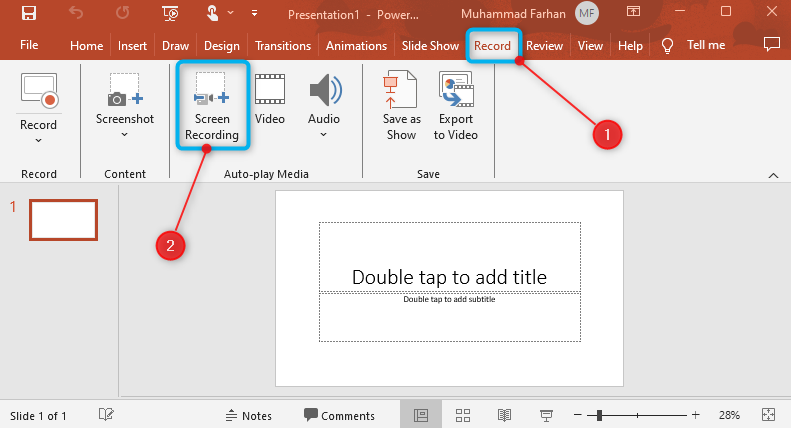
Step 3: Select the “Record” tab and then click on the “Screen Recording” option:
Step 4: Select the “Screen Pointer” and “Audio” option, and then click on the “Select area” option to select the screen area you want to record:

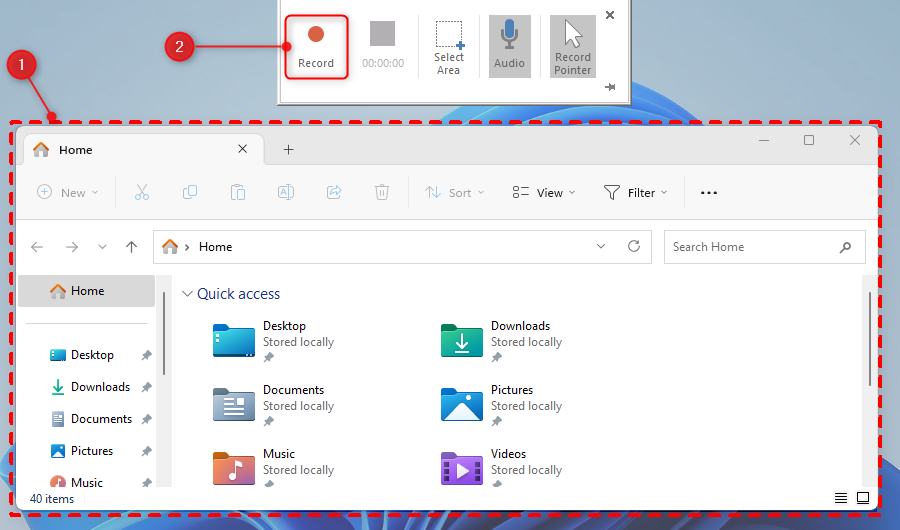
Step 5: then, select the screen area and click on the “Record” button to start the screen recording:
As you can see the screen recording is about to begin:
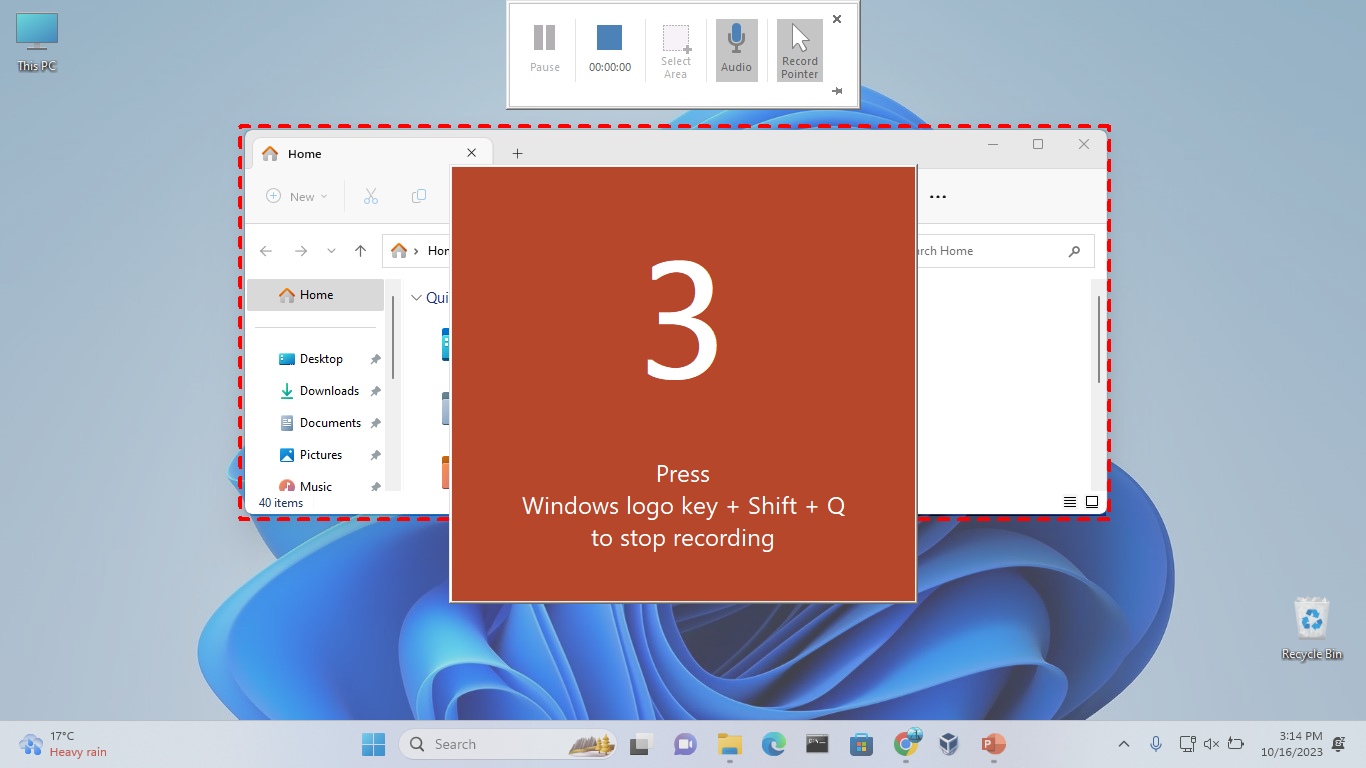
Step 6: To save the screen recording, click on the “Stop” button to stop screen recording:

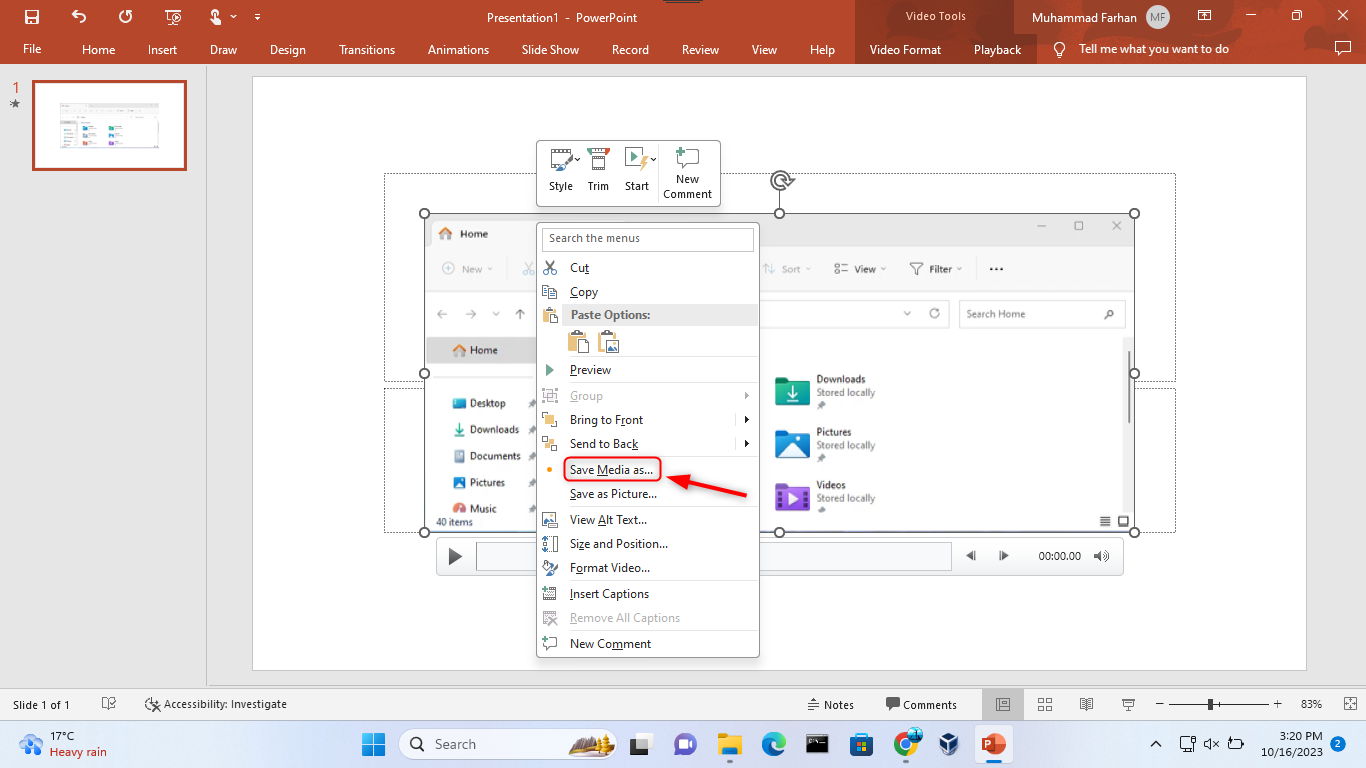
Then, right-click on the video and select the “Save Media as…” option:
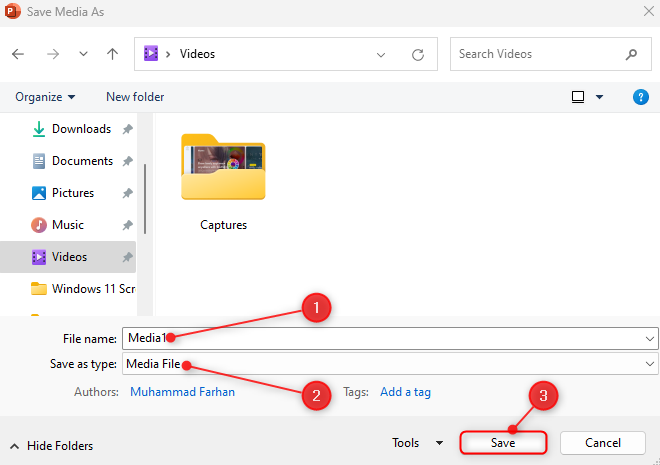
Write the name of the screen recording video, select the video format, and hit the “Save” button:
Conclusion
To record the screen on Windows 11, first, launch “Snipping Tool” from the Start menu. Then, choose the “Video” icon and click on the “New” button. After that, select the area and click on the “Start” button to begin the screen recording. Additionally, you can also use tools like “Xbox Game Bar”, “PowerPoint”, and “Microsoft Clipchamp” to record screen on Windows 11.




Leave feedback about this