AdSense is a free program by Google that enables us to earn revenue from our website by displaying advertisements alongside your content. If Google AdSense is approved, we earn money whenever a visitor clicks on an ad showing on our website.
Google AdSense handles the entire process of tracking the revenue generated from the ads displayed on our site and manages the payment process. Google also provides detailed reports of our earnings to ensure transparency. Google releases/processes payments on a regular schedule (usually on a monthly basis) so that we can receive our earnings without any hassle.
In this tutorial, we’ll walk you through a step-by-step guide on adding Google Adsense to a WordPress website.
Adding Google AdSense to a WordPress Website
Let’s go through the step-by-step instructions below to learn how to apply for Google Adsense. But before that, it is important to note that your website must contain original, unique content and offer easy navigation. Google ads are not allowed on sites that feature copied or copyrighted material.
Step 1: Sign up to Google AdSense
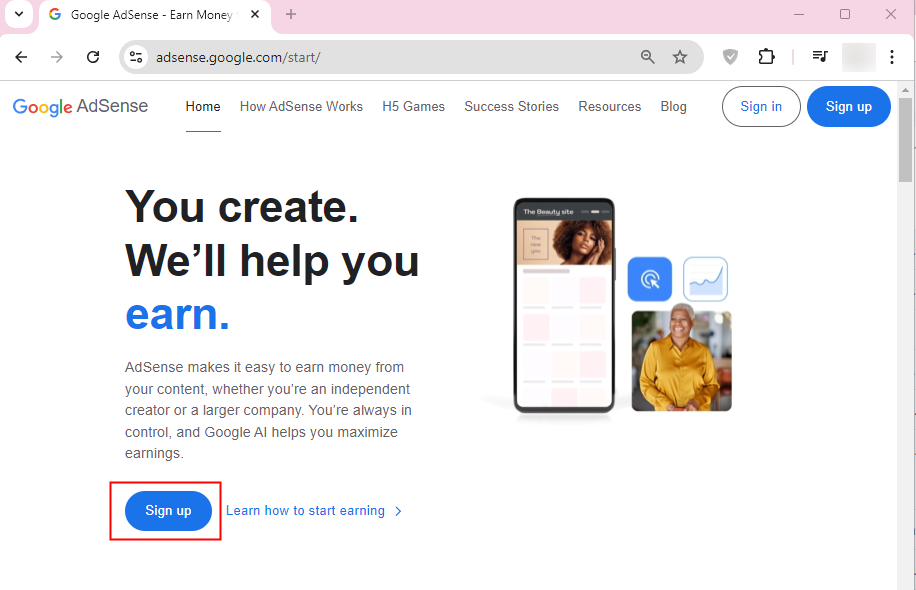
First, visit the official Google AdSense website and click on the Signup button to register an account:

Now specify the complete URL of your site, specify your country, tick the check box to accept terms and conditions, and hit the “start using AdSense” button to proceed:
There you go! Your Google AdSense account has been created:
Step 2: Get Started With Google AdSense
Now sign in to your AdSense account and click on the “Enter Information” button to fill in your basic info:
Specify your info like Account Type, Name, address, City, Postal Code, and Phone Number, and then hit the “Submit” button to send your information:
You can click on the “Explore” button to preview how ads look on your site:
Finally, click on the “Let’s go” button to connect your website to Google AdSense:
Step 3: Install Site Kit by Google
We can add the AdSense code to our website using several methods such as a Plugin, Theme Files, or manually adding it to the widgets. Among them, the simplest method is using a Plugin. For this purpose, go to the plugins section and click on Add new plugin:
On the Plugins page, search “Google AdSense”, and install the “Site Kit by Google” by clicking on the “Install” button. I’ve already installed it so it shows the Activate button, click on it to activate the plugin:
You will be welcomed with the following message, click on the “Start Setup” button to proceed further:
Step 4: Set up the Site Kit
Now set up the sit kit by signing in with Google:
Tick the following checkboxes and click on the Continue button to move to the next page:
On the Next page, click on the verify button to confirm that you own this website:
After this, click on the Allow button to turn on metrics on your website dashboard:
On the next page, click on the Set up button to set up the search console:
Finally, click on the “Go to My Dashboard” button and you’ll be welcomed with the following message:
Step 5: Monetize Your Content With AdSense
Now navigate to the “Monetization” section and click on the “Connect Now” button:
Make sure to use the same Google account that you originally used to set up Site Kit. Once you’ve selected your Google account, the plugin will link to your associated AdSense account. The following screenshot shows that there are still pending setup tasks for your AdSense account or site. You can address these by clicking the “Review AdSense Account” button. Doing this will take you to the AdSense platform, where you can follow the on-screen instructions to complete the review process:
Next, you will see the following message which indicates that your site is not yet approved to display ads. Click on the “Request Review in AdSense” button and follow the on-screen instructions on the AdSense platform to request a review:
Next, enable the auto ads for your site, and your AdSense account will be ready to connect to the Site Kit:
Click on the configure AdSense button to complete the setup and finally, your site is ready to use AdSense:
This is how you can add Google AdSense to your WordPress website.
Conclusion
To add Google AdSense to your WordPress website, first, Sign up for a Google AdSense account, configure your account information, install and activate the “Site Kit by Google” plugin, and link your AdSense account through the plugin. Make sure your site meets AdSense’s requirements, complete any pending setup tasks, and enable auto ads. In this article, we’ve discussed the process of integrating AdSense with WordPress, including account setup, plugin installation, and finalizing ad placement to begin monetizing your site.