WordPress is one of the popular content management systems (CMS) that users can utilize to create blogs and websites. It can also build a fully functional online store or business website. It includes built-in templates for websites and allows several options to customize the templates according to users’ choice.
WordPress is a smart choice for Linux users, including the newly released Ubuntu 24.04. The reason is these systems are secure and reliable, allowing users to run the personal WordPress server. With Apache installed on the system, it becomes a straightforward task to set up your WordPress server on Ubuntu.
This guide will demonstrate the step-by-step procedure for installing WordPress with Apache on Ubuntu 24.04:
How to Install WordPress with Apache on Ubuntu 24.04
To install WordPress with Apache on Ubuntu 24.04, use the following steps:
Step 1: Install Apache, PHP, and MariaDB Server on Ubuntu
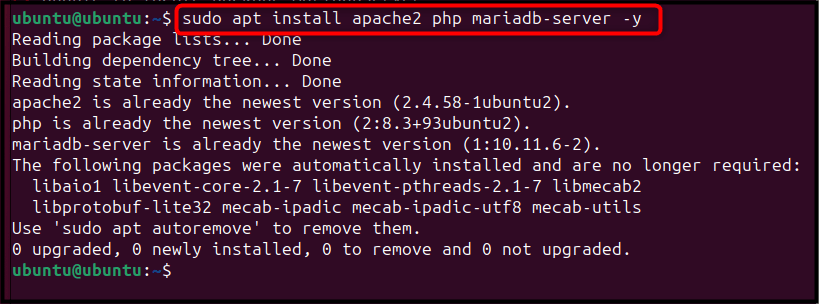
First, install the Apache server, PHP, and MariaDB server on Ubuntu from the default system repository using the following command:
sudo apt install apache2 php mariadb-server -y

Note: Ensure Apache service is up and running on your Ubuntu system, you can do this using the below-given command:
sudo systemctl status apache2
Step 2: Install WordPress on Ubuntu
Then users can install WordPress from the Ubuntu repository using the below-mentioned command:
sudo apt install wordpress -y
Step 3: Configure WordPress on Ubuntu
After the installation of the WordPress on Ubuntu, you have to configure it. You can do this by creating a configuration file in the Apache configuration directory using the following command:
sudo nano /etc/apache2/sites-available/wordpress.conf
Then inside the WordPress configuration file, add the following lines:
Alias /blog /usr/share/wordpress
<Directory /usr/share/wordpress>
DirectoryIndex index.php
Order allow,deny
Options FollowSymLinks
AllowOverride Limit Options FileInfo
Allow from all
</Directory>
<Directory /usr/share/wordpress/wp-content>
Allow from all
Options FollowSymLinks
Order allow,deny
</Directory>
After adding lines, save your WordPress configuration file via CTRL+X, add Y and hit Enter.
Once users can do it, next, enable the WordPress website via the below-given command:
sudo a2ensite wordpress
To activate the new configuration, you must reload the Apache server on Ubuntu using the following command:
sudo systemctl reload apache2
Step 4: Configure WordPress on Ubuntu
To configure your WordPress installation, you are required to create a config-localhost.php file. This file contains important information like database name, database user, password, etc. To create the config-localhost.php file on Ubuntu, you can run the below-given command:
sudo nano /etc/wordpress/config-localhost.php
Inside this PHP configuration file, add the following lines:
<?php
define('DB_NAME', 'database_name');
define('DB_USER', 'database_user');
define('DB_PASSWORD', 'database_password');
define('DB_HOST', 'localhost');
define('WP_CONTENT_DIR', '/usr/share/wordpress/wp-content');
define('WP_ALLOW_REPAIR', true);
?>
If users require to access WordPress on localhost, they can rename the file config-localhost.php. On the other hand, if users need to access WordPress on another computer, replace localhost with the IP address of the Ubuntu system. In our case, the IP address of Ubuntu is 192.168.221.130, so the file name should be config-192.168.221.130.php instead of config-localhost.php.
Further, replace the database name, user, and password according to your choice.
Once the changes are made, save the PHP file.
Step 5: Database and User Creation for WordPress
To store the data on the WordPress site, users need to create a database and a user with all the privileges to modify as well as access the site data. To do this, create a blank .sql file of the desired name using the nano editor through the following command:
sudo nano wordpress.sql
Then inside this SQL file, add the following information by ensuring that the database name, user, and password are the same as you previously set in Step 4.
CREATE DATABASE database_name;
CREATE USER 'database_user'@'localhost'
IDENTIFIED BY 'database_password';
GRANT ALL PRIVILEGES ON database_name.* TO 'database_user'@'localhost';
FLUSH PRIVILEGES;
Save your file and import the .sql ready file into your MySQL database using the following command:
cat wordpress.sql | sudo mysql --defaults-extra-file=/etc/mysql/debian.cnf
Note: The database information like database name, user, and password must be the same in both files; PHP and SQL.
Step 6: Access WordPress Dashboard
For accessing the dashboard of WordPress, open the browser, either on the same server or a different computer, and enter the following address:
http://localhost/blog/wp-admin/install.php
Note: Ensure replacing the IP address with localhost in case you are accessing WordPress on the browser of another computer.
At the dashboard, enter information like site title, username, password, and email address. Once complete, simply hit the Install WordPress button:
After providing the desired information, log in to WordPress utilizing the username as well as password:
This opens the dashboard of WordPress on the browser:
Now, users can work with WordPress and start adding posts, media, as well as comments, change appearance or install plugins.
Conclusion
WordPress is one of the popular choices for building the websites as well as blogs. Users can install WordPress on Ubuntu 24.04 with Apache by first installing an Apache, PHP, and MariaDB server. Then install WordPress from the Ubuntu standard repository through the apt install command. Once done, create an Apache configuration file, add the required information inside the file, and save it. Then create a PHP configuration file and add the desired database information. Also, create .sql file, add database information similar to the one you added in the PHP configuration file, and save it.
Once you finish everything, just import the .sql ready file into the MySQL database and then access the WordPress dashboard using the IP address of your system. After that, you can start using WordPress on any computer browser and start developing your websites seamlessly.