MySQL is a widely used and free database tool known for its excellent performance with large datasets. It allows its users to manipulate data according to their needs. Furthermore, one can create a user, assign them to full control or specific privileges, and remove a user. Many developers are considering MySQL because of its reliability and simplicity.
This educational article aims to empower you with the knowledge of creating new users and granting permissions within MySQL.
Prerequisites
Make sure MySQL is already installed (Follow our guide to Install MySQL on your Ubuntu 22.04 system).
How to Create a New User and Grant Permissions in MySQL in Ubuntu 22.04?
In the following, there are some useful steps to create a new user, grant permissions, and remove a user from MySQL.
How to Create a New User in MySQL?
Here are the steps to create a new user in MySQL:
Step 1: Check MySQL Version
Before proceeding, verify your MySQL installation and the version number using the command:
mysql --version |
|---|
The command will return the output showing the package name and its currently installed version, such as 8.0.35.
Step 2: Access MySQL Shell
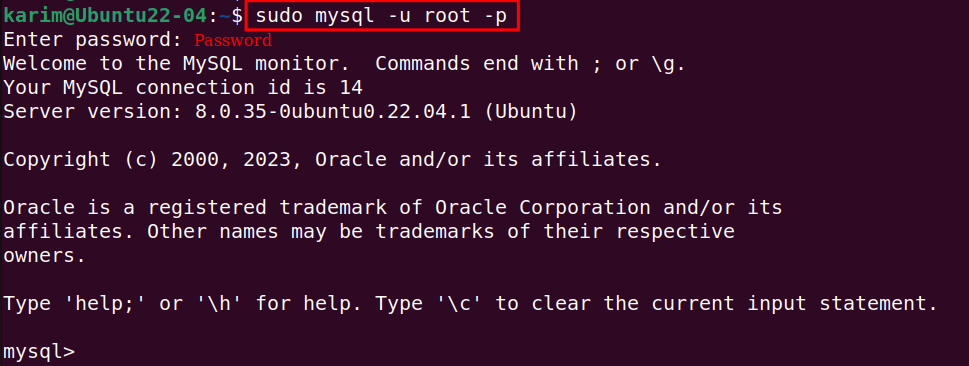
Use the one-liner command to access the MySQL Shell as the root user:
sudo mysql -u root -p |
|---|
You have entered the MySQL environment. Now, you can easily interact with MySQL and execute commands.
Step 3: Create a New User
Execute the command to create a new MySQL user named new_user with the password Password@123. This command confines the new user’s connection to solely the local machine:
CREATE USER 'new_user'@'localhost' IDENTIFIED BY 'Password@123'; |
|---|
If you see the Query OK message on your screen, your command has been executed successfully. Do not forget to replace the ‘Password@123’ with a strong password.
How to Grant All Permissions in MySQL?
In this section, we will explore how to grant all permissions to a user in MySQL.
Step 1: Grant All Privileges
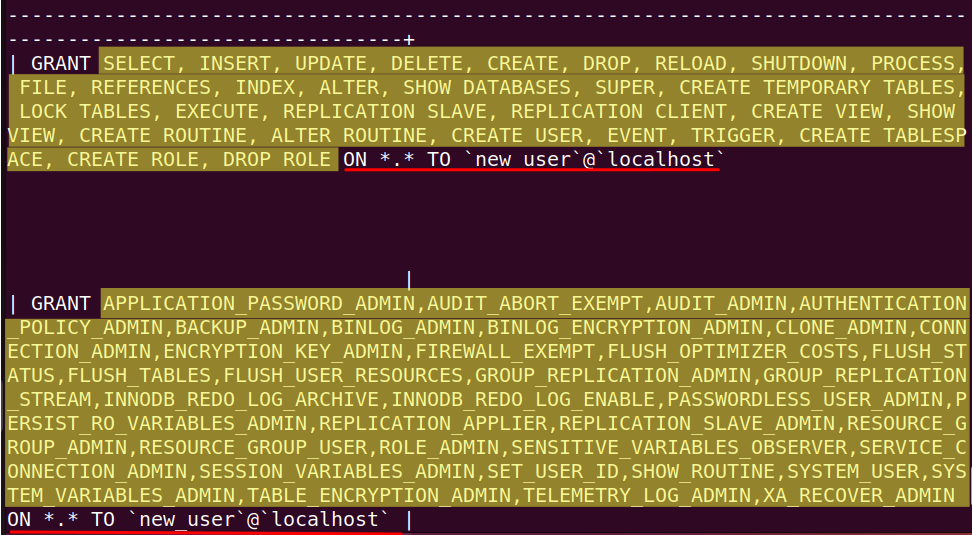
If you want to provide access and permissions to a specific user like new_user, you can use the command to grant them full control over all databases and tables in MySQL:
GRANT ALL PRIVILEGES ON * . * TO 'new_user'@'localhost'; |
|---|
The asterisk (*) used in the command indicates All. This command grants new_user permission to access all databases and tables within the MySQL server.
Step 2: Apply the Changes
This step is necessary to apply the changes you have made and reload the local server without restarting the system:
FLUSH PRIVILEGES; |
|---|
When the command runs, any changes made to the privileges of new_user are applied immediately.
How to Grant Specific Permissions in MySQL?
If you want to grant specific permissions to a user in MySQL, follow these instructions.
Step 1: Create a Database
In MySQL, you can easily create databases according to your needs. For instance, use the following command to create a database named Test_DB. You can Include IF NOT EXISTS in the command to avoid duplicates database:
CREATE DATABASE IF NOT EXISTS Test_DB; |
|---|
Step 2: Grant Specific Permissions
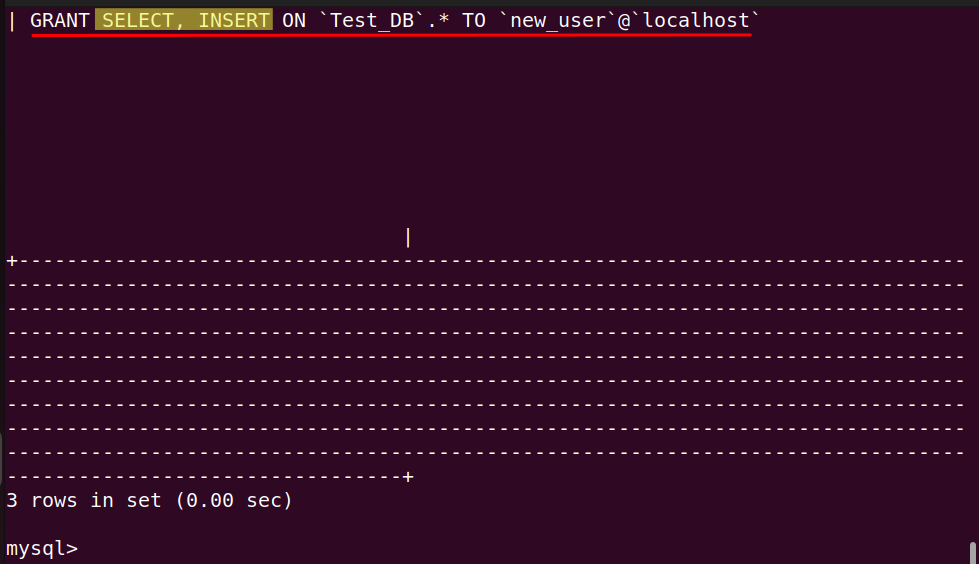
Within MySQL, it’s possible to grant particular privileges to a user for a specific database. For instance, execute the following command to grant the new_user permissions to insert data and select data from all tables within the Test_DB database:
GRANT INSERT, SELECT ON Test_DB . * TO 'new_user'@'localhost'; |
|---|
Step 3: View Granted Permissions
To view the details of privileges granted to the user new_user, execute the command in the MySQL shell:
SHOW GRANTS FOR 'new_user'@'localhost'; |
|---|
On your screen, you can see detailed information regarding privileges granted to the user new_user.
How to Delete Users on MySQL?
You can remove all permissions granted to a user with the help of these stepwise instructions.
Step 1: Revoke Privileges
Before dropping any user, run the provided command to remove all permissions previously granted to the user new_user within the MySQL environment:
REVOKE ALL PRIVILEGES ON * . * FROM 'new_user'@'localhost'; |
|---|
Step 2: Delete the User
Run the DROP USER in MySQL Shell to delete a specific user account from the MySQL local server:
DROP USER 'new_user'@'localhost'; |
|---|
This command will remove the new_user and remove all associated privileges. While executing this command, also keep in mind that this command will completely delete the user.
Step 3: Confirm Granted User
You can confirm about the user using the SHOW GRANTS command in your MySQL Shell:
SHOW GRANTS FOR 'new_user'@'localhost'; |
|---|
If you see the message, “There is no such grant defined for user ‘new_user’ on host ‘localhost’, it means the DROP USER command has been executed successfully.
Conclusion
In Ubuntu 22.04, you can create a new user in MySQL. You can also grant specific privileges or all privileges to a user using simple commands including CREATE USER, GRANT ALL PRIVILEGES, and DROP USER. With the help of this learning-based article, you can manage and control user accounts in MySQL.


Leave feedback about this