Squid is a popular open-source proxy server. It mainly filters web traffic and blocks access to specific sites or content on your system. It is used for handling web traffic both HTTP and HTTPS protocols. For corporate and educational setups, the Squid proxy server can be the best choice for enhancing your system’s security by controlling the traffic.
This post provides a real-time example of a complete configuration of the Squid proxy server on the Ubuntu 24.04 operating system.
How to Install and Configure Squid Proxy Server on Ubuntu 24.04?
This guided post will explain the following:
How to Install Squid Proxy Server on Ubuntu 24.04?
How to Configure Squid Proxy Server on Ubuntu 24.04?
How to Setup Squid Proxy Server on a Web Browser?
How to Install Squid Proxy Server on Ubuntu 24.04?
These commands can be performed to install Squid on Ubuntu machine.
Step 1: Update Your Machine
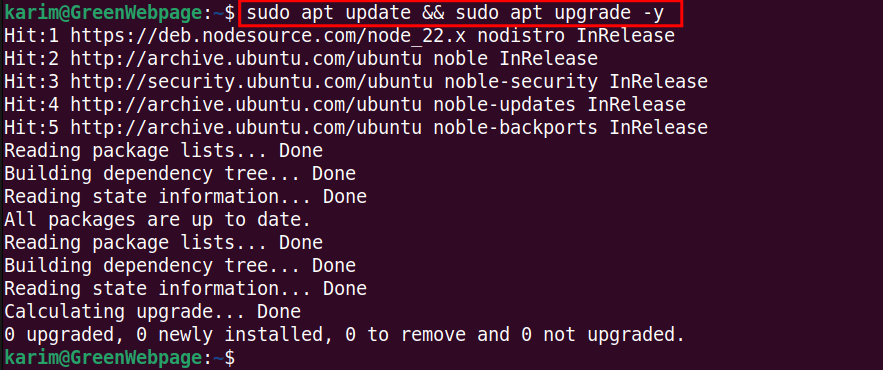
Updating your machine is an important step. This will search for missing package files, and if needed, it will update them using the command:
sudo apt update && sudo apt upgrade -y

As you can see, there are no missing package files, so you can proceed to install new packages on your system.
Step 2: Install Squid via “apt”
The Squid package is available in the APT repository, so you can install Squid from the terminal using this command:
sudo apt install squid -y
During installation, a complete list of Squid files will be printed on your screen, providing you with detailed information about the package.
Step 3: Verify Squid Status
After installation of the Squid, verify its status through the given-below command:
sudo systemctl status squid
If it is active, it means that the Squid proxy server has been installed correctly on your Ubuntu 24.04.
How to Configure Squid Proxy Server on Ubuntu 24.04?
Configure the Squid proxy server on your Ubuntu 24.04 system by performing the provided step-wise commands.
Step 1: Create Backup of Squid Configuration
Before making any necessary modifications to the Squid configuration file, create a backup:
sudo cp /etc/squid/squid.conf /etc/squid/squid.conf.backup
You can confirm the configuration files, both the original and backup file, using this code:
ls /etc/squid/
It will show both files, “squid.conf” and “squid.conf.backup”, in the /etc/squid/ directory.
Create a Block Site File
Step 1: Create File for Block Sites
For blocking specific sites, create a separate file, such as “blocked_sites”:
sudo nano /etc/squid/blocked_sites
Add the sites you want to block using the Squid proxy server, for instance:
www.youtube.com
You can add more sites in this “blocked_sites” file.
Update Squid Configuration File
Step 1: Open “squid.conf” file
You can now make necessary changes to the “squid.conf” file as per your needs. First, open the file with the command:
sudo nano /etc/squid/squid.conf
Locate the Squid’s default port number (i.e. 3128):
You can replace the port number with yours.
Next, go the line containing “INSERT YOUR OWN RULE(S)..”
  acl blocked_sites dstdomain "/etc/squid/blocked_sites"

  http_access deny blocked_sites

  acl localnet src 192.168.122.182

  http_access allow localnet
The first two lines will block the sites added to blocked_sites, while the other lines will allow access to the rest of the sites for the specified IP like “192.168.122.182”.
Step 2: Restart Squid
After making changes to the Squid configuration file, run the command to restart the Squid service and to apply the new settings immediately:
sudo systemctl restart squid
So far, the installation and configuration through the command line have been completed successfully.
How to Setup Squid Proxy Server on a Web Browser?
After completing the installation of the Squid proxy server via the terminal, set it up in a web browser.
Step 1: Open Application Menu
For setting up the Squid proxy server on web browser;
- Open your web browsers, such as Firefox.
- Open the Application Menu.
Step 2: Open Browser “Settings”
In the Firefox Application Menu, scroll-down to the Settings:
Step 3: Navigate Network Settings
Select the General category and navigate to the Network Settings:
Step 4: Configure Proxy Manually
Select the “Manual proxy configuration” and add the IP address and the port number in the required fields:
If you don’t know about your system IP address, use this command from terminal:
hostname -I
Step 5: Test Squid Proxy Server
Once the Squid configuration process is completed, test your Squid proxy server by visiting the blocked site:
www.youtube.com
If YouTube is not working or shows an error like “No internet connection”, it means the Squid proxy server is configured and is working correctly on your Ubuntu 24.04 machine.
Conclusion
On Ubuntu 24.04, the Squid proxy server can easily be installed and configured with small simple steps. After installing the Squid, modify the “squid.conf” file according to your needs. Finally, setup the Squid proxy on your web browser like Firefox.