Angular creates a wide range of applications, from simple to dynamic applications. Key aspects of Angular include advanced features like two-way data binding and a modular architecture. It also allows developers to easily reuse components and modules.
This learning-based article provides a step-by-step guide on easily installing Angular on Ubuntu 24.04.
How to Install Angular on Ubuntu 24.04?
Learn more about setting up Angular through this article:
Install Prerequisites for Angular on Ubuntu 24.04
How to Install Angular on Ubuntu 24.04?
How to Initiate Angular Projects on Ubuntu 24.04?
Install the Prerequisites for Angular on Ubuntu 24.04
This section explains how to prepare your Ubuntu machine for installing Angular.
Step 1: Install “Curl”
To fetch and download data from sources using the terminal, you need to install the “curl” command-line tool on your Ubuntu machine:
sudo apt install curl -y

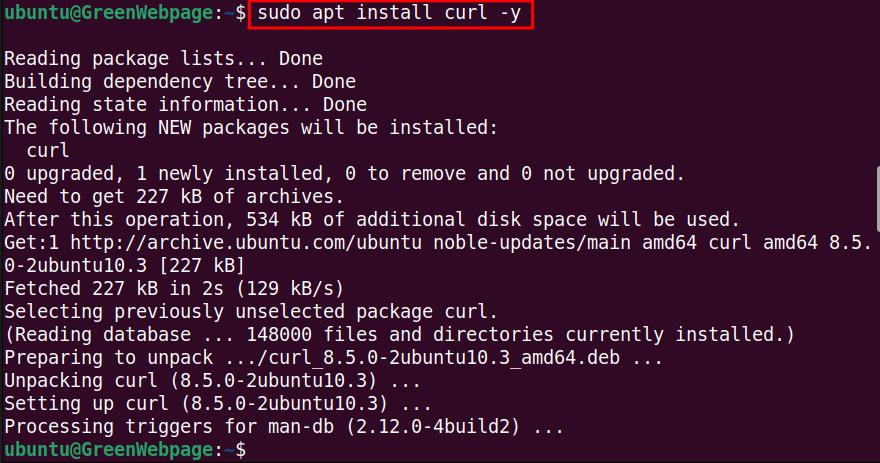
The above output confirms the installation of Curl on your system.
Step 2: Add NodeJS repository
Add the NodeJs repository using the command to enable you to install the latest version of NodeJS from the trusted source:
curl -fsSL https://deb.nodesource.com/setup_current.x | sudo -E bash -

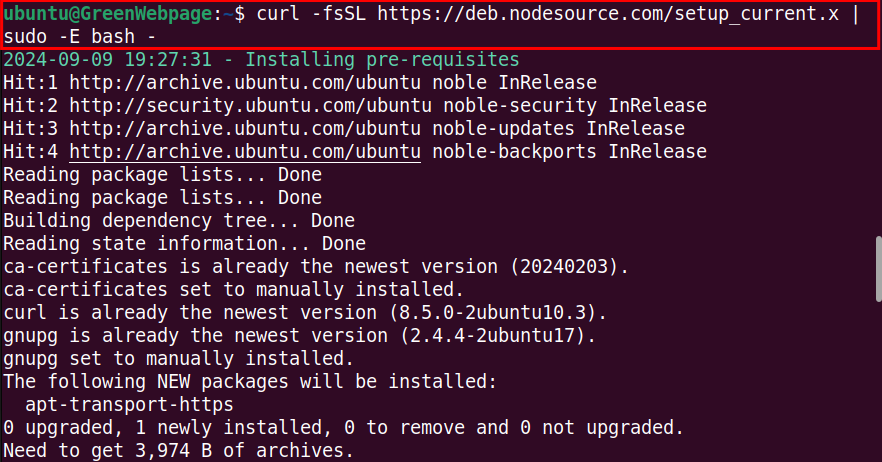

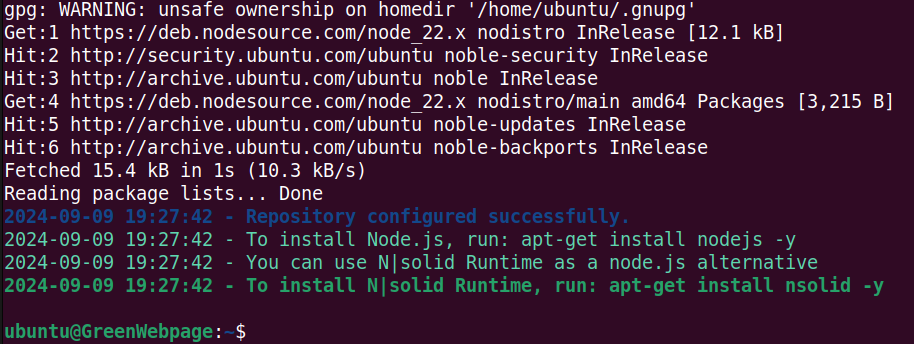
After the command has successfully added the NodeJS repository, you can install the NodeJS package on your Ubuntu 24.04 system.
Step 3: Install NodeJS
You can now utilize this simple command from the terminal to install the updated version of NodeJs:
sudo apt install nodejs -y

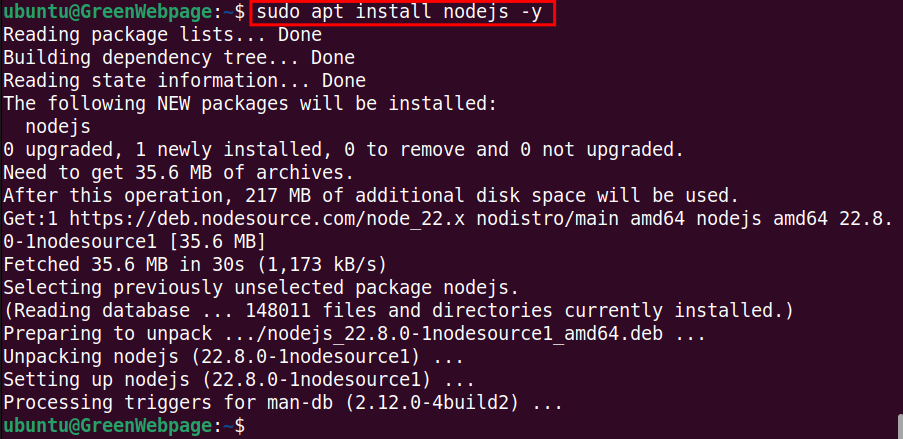
During the installation, you will see that the NodeJs and necessary package files are now installed on your system.
Step 4: Verify NodeJS and NPM
NodeJS and NPM, a Node Package Manager, can be verified with the below command:
node -v && npm -v


If you see the Node and NPM version numbers on your terminal, it indicates that all is done successfully.
How to Install Angular on Ubuntu 24.04?
Learn how to set up Angular by following these steps.
Step 1: Install Angular via NPM
Once the prerequisites are installed successfully, proceed with the installation of Angular using NPM:
sudo npm install -g @angular/cli

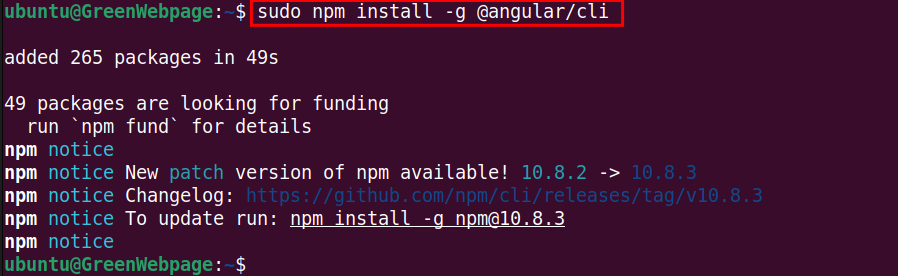
The output message in the terminal, along with a summary, confirms that Angular has been installed on Ubuntu 24.04 without any errors.
Step 2: Confirm Angular Installation
Utilize the version command to confirm Angular’s installation and release on your Ubuntu 24.04 system:
ng version

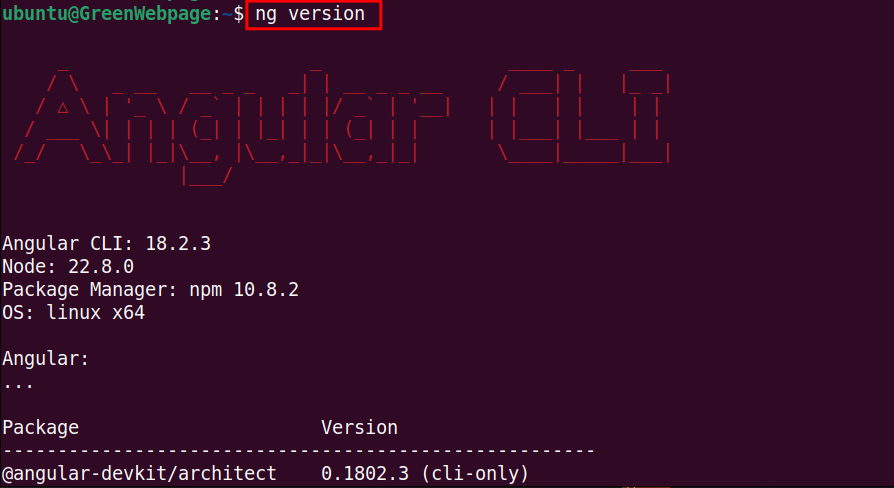

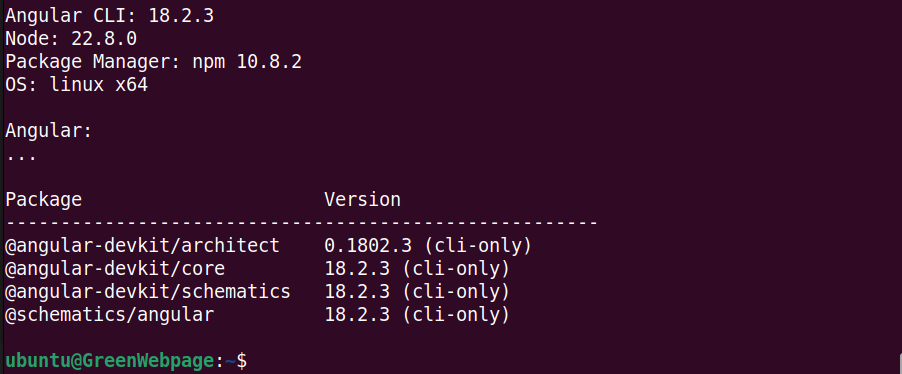
The Installed version of Angular will be displayed on your screen with the version command.
How to Initiate Angular Projects on Ubuntu 24.04?
This section describes the process of initializing an Angular project on the Linux system like Ubuntu 24.04 machine.
Step 1: Create an Angular Project
Now, let’s create the first Angular project, such as “proj-greenwp” via the provided command:
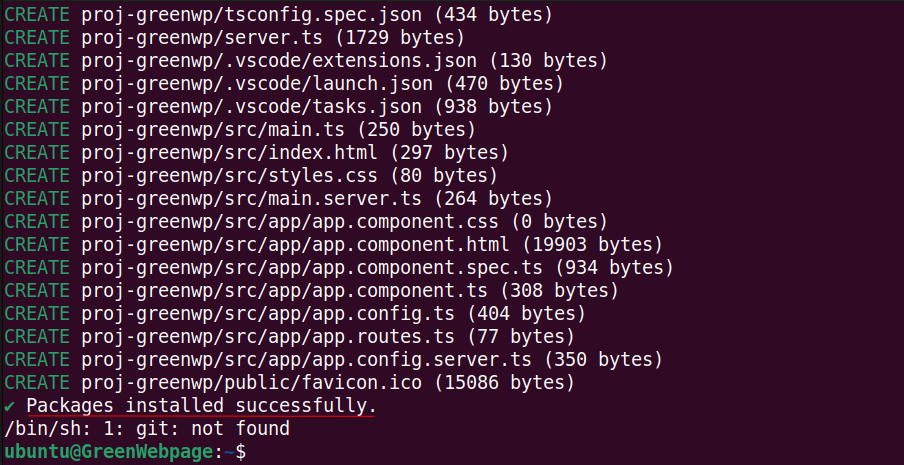
ng new proj-greenwp

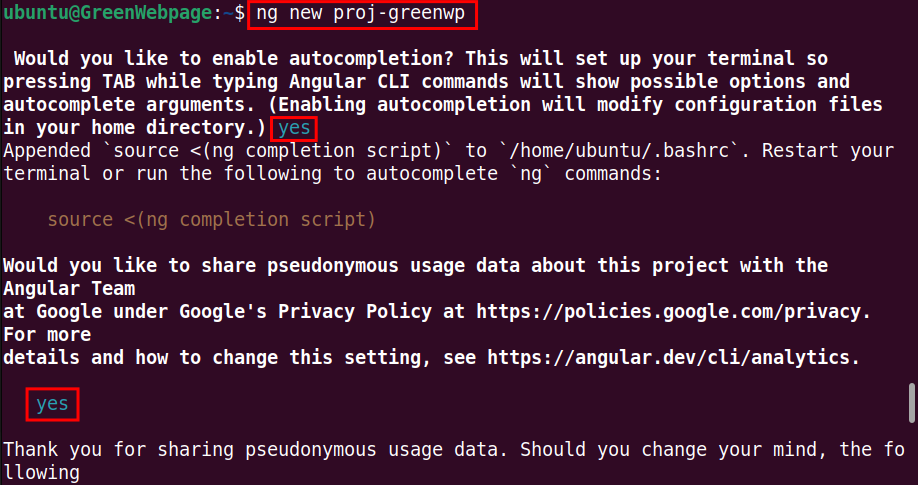

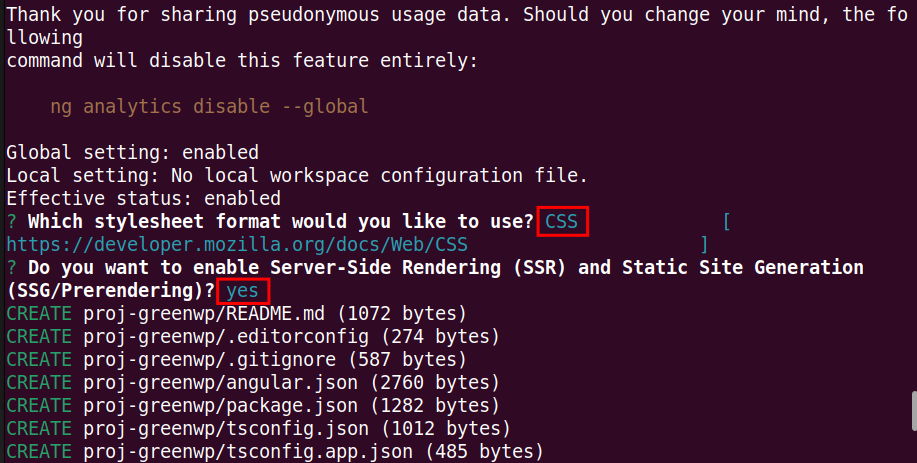

During the configuration, respond to the prompted questions accordingly.
Step 2: Start the Angular Project
Your Angular development project is ready to start. Simply run the command:
npm start

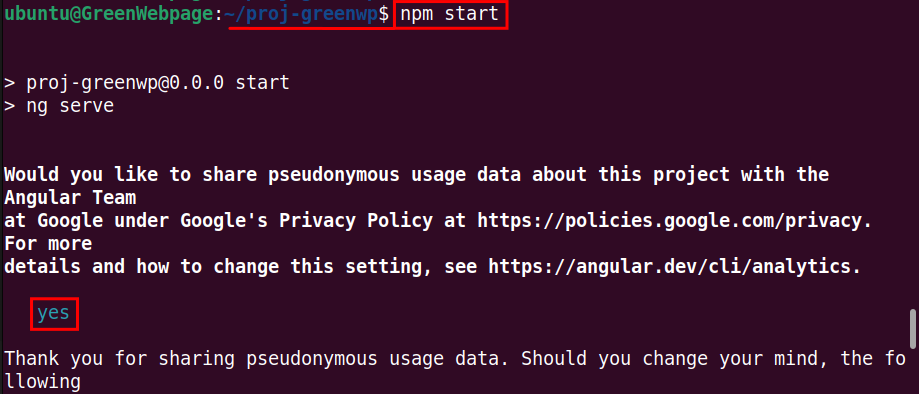

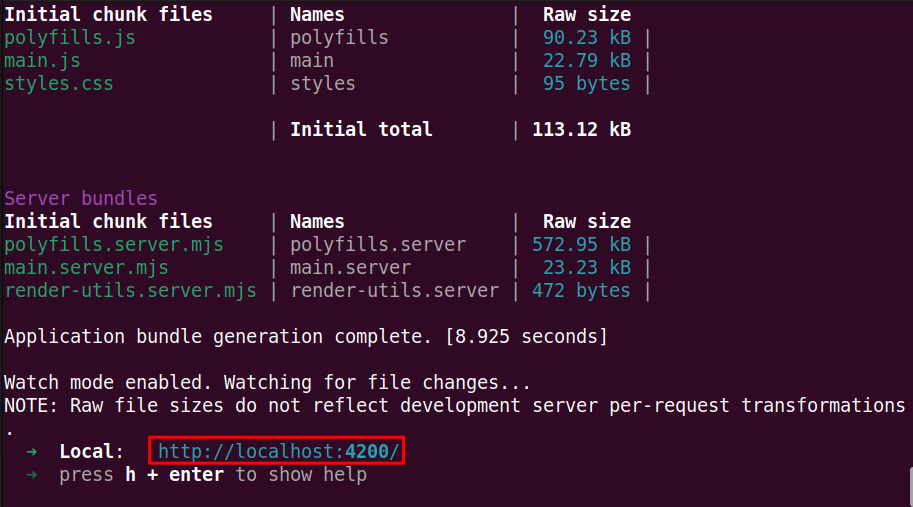
Once your Angular project (i.e. proj-greenwp) has been initiated, a server URL will be provided at the end.
Step 3: Access the Angular Project
Your Angular project is now accessible via the browser. here is the URL:
http://localhost:4200

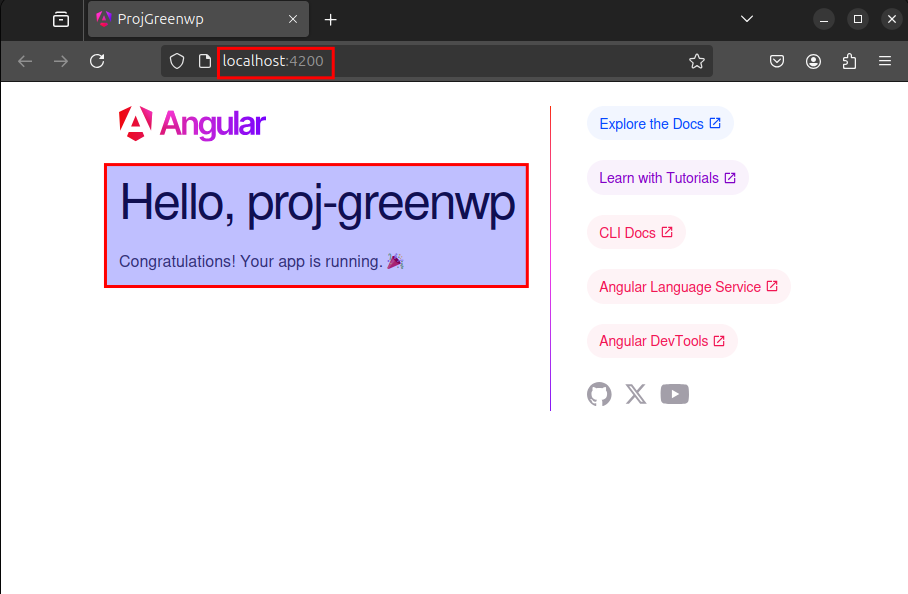
Finally, you will see “Hello, Proj-greenwp” on your screen. This means your Angular project is up and running perfectly.
Conclusion
Install Angular on your Ubuntu 24.04 system using NPM Manager. Start with installing NodeJS and then use the command “sudo npm install -g @angular/cli” to configure the Angular package on your Linux distributions.