AWS Command Line Interface is a powerful tool for managing Amazon Web Services from your Linux terminal. The AWS Command Line Interface (AWS CLI) gives you access to all AWS services with simple commands. This guide will show you how to install the AWS CLI using multiple methods on CentOS 10, each of which is explained in detail and step-by-step. Once installed, you configure it with awsconfig by entering your AWS Secret Key, Access Key, and region.
Table of Contents
- How to Install AWS CLI on CentOS 10
- How to Configure AWS CLI on CentOS 10
- How to Completely Uninstall AWS CLI from CentOS 10
- Conclusion
How to Install AWS CLI on CentOS 10
Installing AWS CLI in CentOS 10 requires updating your system. You can then download and unzip the official AWS installer. Run the installation script and confirm your installation using the aws-version command. Alternatively, you can use Python pip to install it with pip3 install –upgrade –user, or the CentOS repository using sudo dnf.
Method 1: Install AWS CLI Using the Official AWS Bundled Installer
This method is recommended as it installs AWS CLI directly from Amazon.
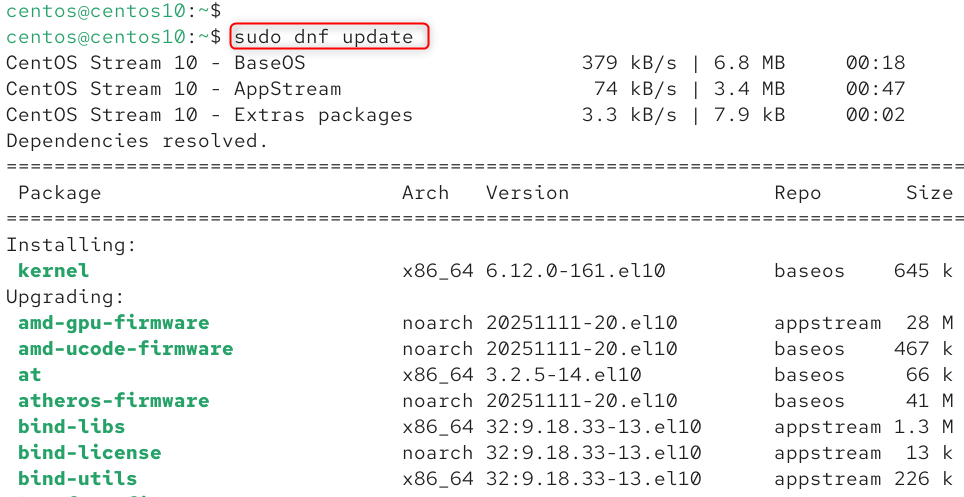
Step 1: Update System Packages
It’s important to make sure your system is updated before installing anything.
|
sudo dnf update |

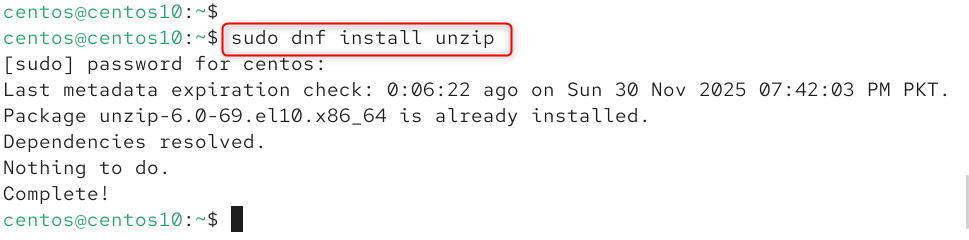
Step 2: Install Required Dependencies
Unzip is required to extract the installation files from AWS CLI.
|
sudo dnf install unzip |

Step 3: Download the AWS CLI Bundle
You can download the AWS installer zip file.
|
curl “https://awscli.amazonaws.com/awscli-exe-linux-x86_64.zip” -o “awscliv2.zip” |


Step 4: Unzip the Installer
Download the ZIP file and extract it to install.
|
unzip awscliv2.zip |


Step 5: Run the Installer
Install AWS CLI by executing the script.
|
sudo ./aws/install |


Step 6: Verify AWS CLI Installation
AWS CLI should be installed and running.
|
aws –version |


Method 2: Install AWS CLI Using pip (Python Package Manager)
This method can be useful if you wish to install multiple versions of AWS CLI or manage AWS via Python.
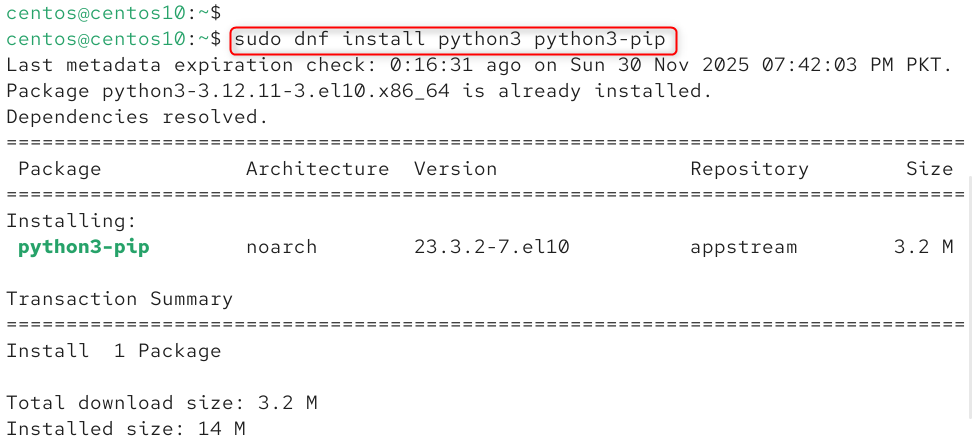
Step 1: Install Python and pip
Install CLI using pip, which requires Python and pip.
|
sudo dnf install python3 python3-pip |

Step 2: Install AWS CLI Using pip
Install AWS CLI using Python’s Package Manager.
|
pip3 install awscli –upgrade –user |


Step 3: Add AWS CLI to PATH
Install AWS CLI using Python’s Package Manager.
|
export PATH=$PATH:~/.local/bin |


Step 4: Verify AWS CLI Version
Install the CLI properly.
|
aws –version |


Method 3: Install AWS CLI Using CentOS Repository (Older Versions Only)
CentOS repos can include older AWS versions that are good for basic use.
Step 1: Install AWS CLI Package
Install AWS CLI from the default CentOS repositories.
|
sudo dnf install awscli |

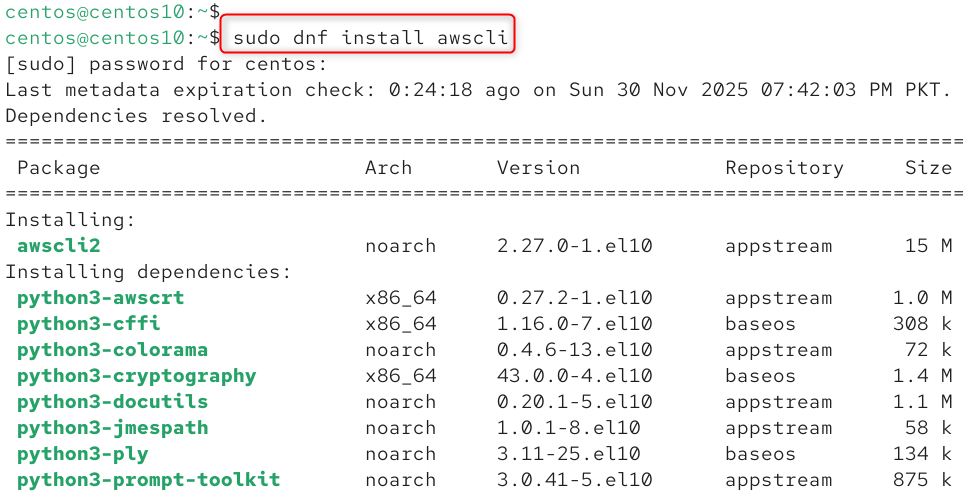
Step 2: Verify Installation
Verify the CLI version you have installed.
|
/usr/bin/aws –version |


How to Configure AWS CLI on CentOS 10
You must configure AWS CLI using your AWS Access Key (also known as Secret Key) and AWS Secret Key once it is installed.
This interactive wizard configures authentication and region defaults.
|
/usr/bin/aws configure |

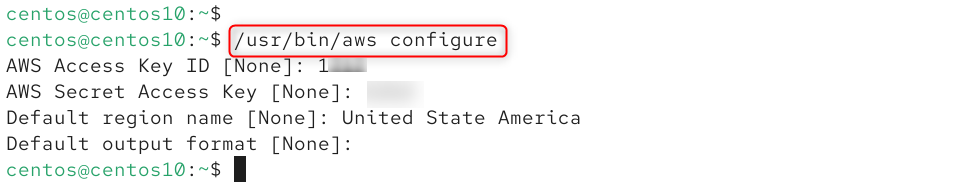
You’ll be asked for:
- AWS Access Key ID
- AWS Secret Access Key
- Default region name (e.g., us-east-1)
- Default output format (e.g., json)
How to Completely Uninstall AWS CLI from CentOS 10
Uninstall AWS CLI V2 (Bundled Installer Version)
|
sudo rm /usr/local/bin/aws |


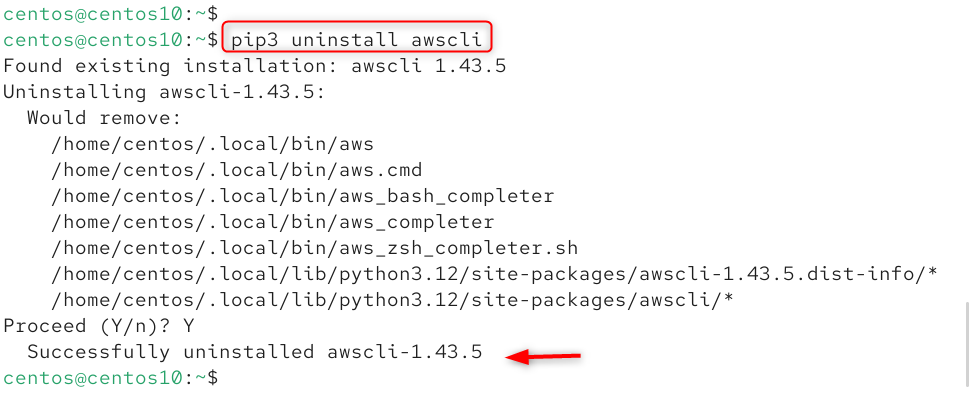
Uninstall the AWS CLI installed via pip
|
pip3 uninstall awscli |

Uninstall AWS CLI Installed from Repo
|
sudo dnf remove awscli -y |


That is all from the installation of AWS CLI on CentOS 10.
Conclusion
AWS CLI installation on CentOS 10 can be done in a variety of ways, depending on what you need. AWS’s official bundled installer offers the most flexibility, while DNF repositories offer quick installation of older versions. AWS CLI is a powerful tool that lets you securely and efficiently manage cloud resources from your Linux terminal. It’s a must-have for developers, DevOps engineers, and system administrators.