AnyDesk is a popular remote desktop application that allows users to connect to computers from anywhere in the world. It’s beneficial for IT support, remote work, and accessing files on your home computer while you’re away. AnyDesk is renowned for its speed, security, and ease of use, making it a top choice for many users.
In this guide, we’ll cover how to download and install AnyDesk on Ubuntu 24.04 LTS. We’ll walk through the installation process step by step. Additionally, we’ll address common issues you might encounter during installation and provide troubleshooting tips to ensure a smooth setup. You’ll be ready to access and manage your remote connections efficiently. Let’s dive in and make remote access effortless!
How to Install AnyDesk on Ubuntu 24.04 LTS
To help you navigate through the installation and setup process, here’s a detailed table of contents outlining the steps and methods covered in this guide:
6. Troubleshooting Common Issues
Before diving into the installation methods, let’s look at the system prerequisites to ensure everything is set up correctly.
Step 1: Prerequisites
Before you install AnyDesk, ensure that your system meets the following prerequisites:
1. Administrative Privileges: To install AnyDesk, you’ll need superuser permissions. This is achieved using the sudo command, which temporarily grants elevated rights necessary for system modifications.
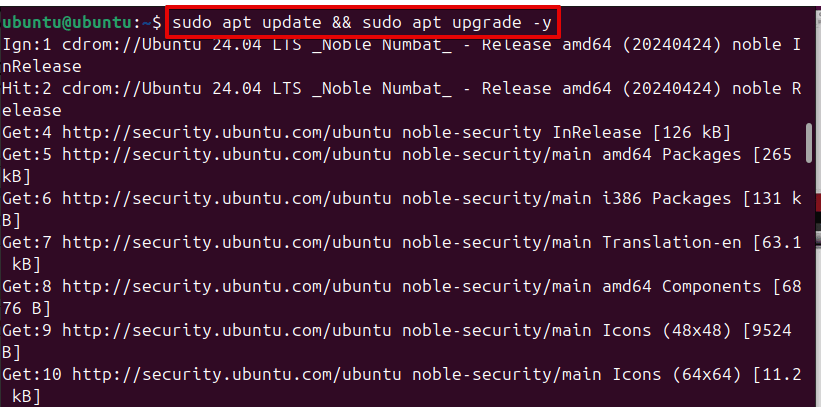
2. System Update: It is crucial to have an up-to-date system to ensure compatibility with new software. Run this command to update your package list and install any available updates:
sudo apt update && sudo apt upgrade -y

3. Internet Access: A stable internet connection is required to download the AnyDesk installer. Ensure your network is operational to avoid interruptions during the download.
Once you have addressed these prerequisites, you can move forward with the installation of AnyDesk.
Step 2: Downloading AnyDesk
In this section, we will cover how to download AnyDesk on Ubuntu 24.04 LTS using a terminal and web browser. You can select the method that best aligns with your preferences or requirements. Here’s a detailed breakdown of its installation methods:
Download via Web Browser
Visit the AnyDesk Website: Open your web browser and navigate to the AnyDesk download page for Linux.
Select the Linux Version: On the download page, choose the .deb package for Ubuntu. This package format is compatible with Debian-based systems like Ubuntu.
Download via Terminal
Alternatively, you can download the installer via the terminal using wget. This method is convenient if you prefer command-line operations:
wget https://download.anydesk.com/linux/anydesk_VERSION_amd64.deb
Note: The version number may change. Always check the AnyDesk website for the latest version and update the URL accordingly.
Step 3: Installing AnyDesk
With the AnyDesk .deb package downloaded, follow these steps to install it:
Making the Package Executable
Open your terminal and navigate to the directory where the .deb file is located. To navigate between directories, you can use the cd command:
cd ~/Downloads
To install a package, utilize the dpkg command:
sudo dpkg -i anydesk_VERSION_amd64.deb
This command installs the AnyDesk package on your system.
Resolving Dependencies
If the installation process reports any missing dependencies, resolve them by running:
sudo apt-get install -f
Note: This command installs any required packages that were not included in the initial installation process.
Step 4: Starting AnyDesk
After installation, you need to start AnyDesk to begin using it.
You can start AnyDesk directly from the terminal with:
anydesk
This command launches the AnyDesk application.
Alternatively, you can find AnyDesk in your application menu. Search for AnyDesk and click on the icon to open the application.
Initial Setup
Note: When you start AnyDesk, it will show a unique AnyDesk ID. This ID is necessary for establishing remote connections to your computer. Make a note of this ID if you plan to use it for remote access or support.
Step 5: Configuring AnyDesk
Configuring AnyDesk involves setting it up so you can use it the way you need.
Setting Up Unattended Access
To set this up:
1. Open AnyDesk: Launch the AnyDesk application.
2. Go to Settings: Click on the Set Password tab.
3. Find Security Settings: Go to the Security section.
4. Set a Password: Enter a password in the Password for Unattended Access field. This password is required to connect to your computer remotely.
5. Save Your Settings: Make sure to save the changes.
Note: By setting a strong password, you ensure that only people who know the password can access your computer when you’re not around. This helps keep your system secure.
Step 6: Troubleshooting Common Issues
During the installation and usage of AnyDesk, you might encounter some issues. Here are a few tips for troubleshooting AnyDesk:
Connection Problems: If you cannot connect to a remote device, ensure that AnyDesk is running on both the local and remote devices. Double-check the AnyDesk ID and ensure it is entered correctly. Also, verify that no network issues or firewalls are blocking the connection. Make sure ports used by AnyDesk are open on your network.
Step 7: Uninstalling AnyDesk
If you decide to remove AnyDesk, follow these steps to ensure a clean uninstallation:
To remove the package, open your terminal and run:
sudo apt remove anydesk
This command removes the AnyDesk package from your system.
To clean up residual files and configuration data, you can use:
sudo apt purge anydesk
Finally, remove any unnecessary packages that were installed as dependencies:
sudo apt autoremove
Conclusion
By following this guide, you’ve successfully installed and configured AnyDesk on Ubuntu 24.04 LTS. This setup provides a powerful remote access solution, enabling you to manage your systems from anywhere. You’ve also learned how to troubleshoot common issues and uninstall AnyDesk if needed. Ensuring proper configuration will help maintain a secure and efficient remote access environment. With AnyDesk on Ubuntu 24.04 LTS, you gain enhanced flexibility and productivity, leveraging its powerful features for seamless remote connections. Enjoy the convenience of accessing and managing your systems effortlessly, no matter where you are.