


Django is a powerful tool that helps developers build websites quickly and easily using Python. This web framework allows you to manage the development process, including handling user accounts and making web applications more organized.
In short, Django is widely used because it facilitates and simplifies complex tasks and all kinds of web-based projects.
This is a comprehensive guide for you on how to install and set up the Django on CentOS 9 system. Also, read How to Install Django on Debian 12.
How to Install Django on CentOS 9?
This article will focus on the following topics:
- How to Set Up Prerequisites for Django on CentOS 9?
- How to Install Django via “pip3” on CentOS 9?
- How to Create a Django Project on CentOS 9?
How to Set Up Prerequisites for Django on CentOS 9?
Utilizing the following commands will install the necessary dependencies (i.e. Python3 and pip) for Django on your CentOS 9 machine.
Step 1: Update the CentOS’s Cache Files
First, ensure that your CentOS has the latest versions of the available packages. To do this, execute the command to refresh and update your CentOS package files:
sudo dnf update |
|---|


This command will fetch and install the newest package files, libraries, and dependencies.
Step 2: Install Python3 and Python3-pip
The Django package requires python3 and python3-pip. To install these packages on your CentOS 9, run the mentioned-below command:
sudo dnf install python3 python3-pip -y |
|---|

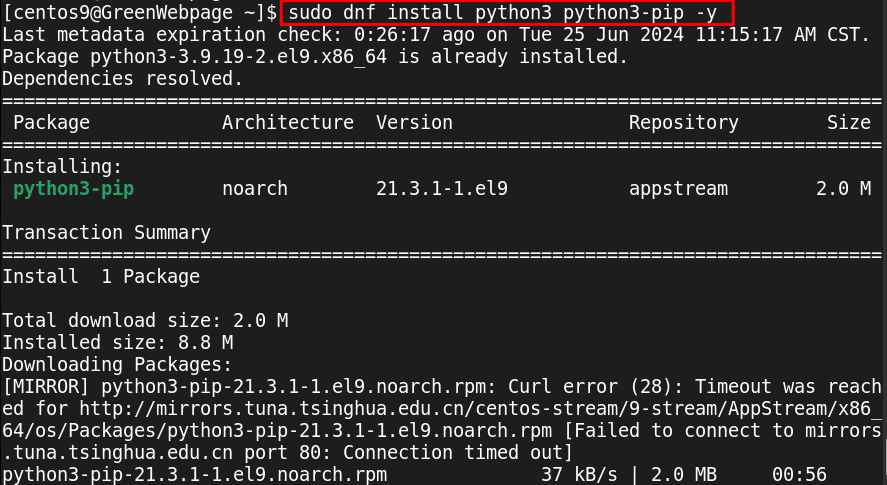
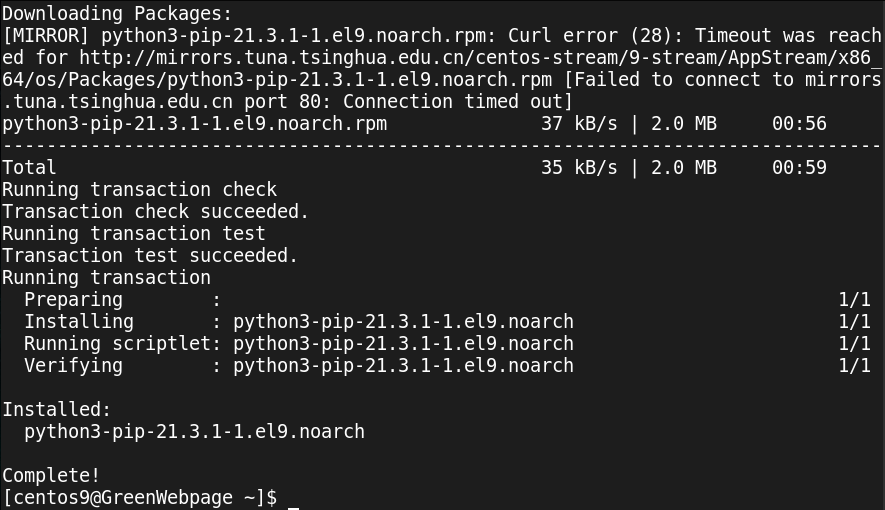

When the installation of Python 3 and Python 3-pip is complete, you will see a confirmation message (i.e. Complete!) on your CentOS terminal.
Step 3: Verify Python 3 and pip installation
Through the below command, you can check the installed version of Python3 and Python3-pip:
python3 -V && pip3 -V |
|---|


Currently, we have Python 3.9.19 and pip 21.3.1 on our CentOS 9 machine.
How to Install Django via “pip3” on CentOS 9?
You can easily set up the Django package on your CentOS 9 via the “pip”. Here are the straightforward commands.
Step 1: Install Django via “pip3”
Upon successful installation of the required dependencies (i.e., Python 3 and pip), install the Django package using the following command:
sudo pip3 install Django |
|---|

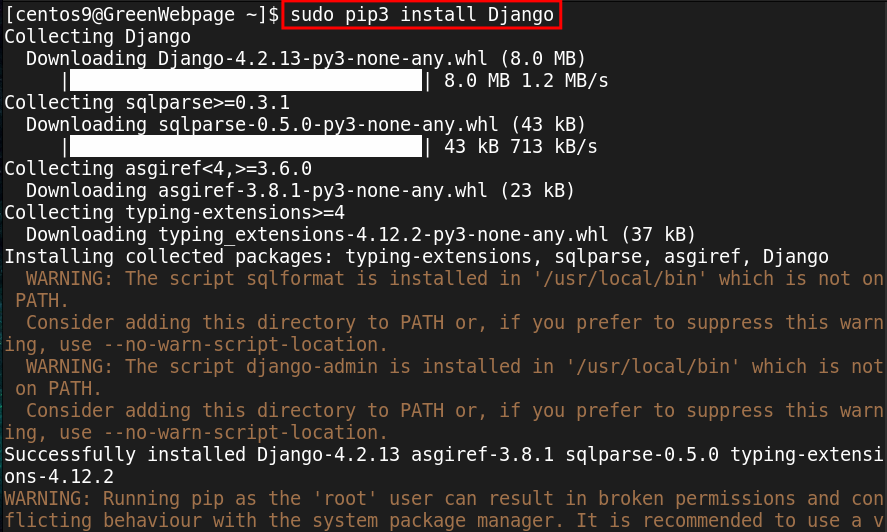

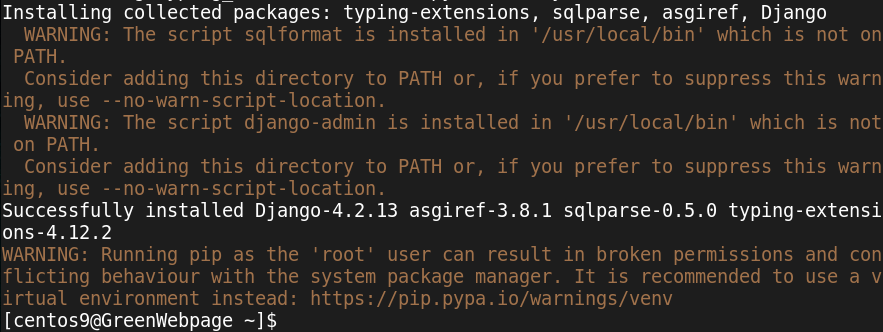
As mentioned above, the command installed Django on your CentOS 9 system using pip3.
Step 2: Check Django Version
The Django installation can be confirmed using the following version command:
django-admin --version |
|---|


If you see a version number such as 4.2.13, it confirms that Django has been installed on your CentOS 9 system.
How to Create a Django Project on CentOS 9?
These stepwise commands will initiate and create a new Django project on your CentOS 9 system.
Step 1: Create a Django project
Once you have successfully installed the Django package, let’s create a new Django project, such as “greenWP”:
django-admin startproject greenWP |
|---|

You can specify any name of your choice for the Django project.
Step 2: Initialize Django database migrations
Next, navigate into your Django project directory (i.e. greenWP) and run the command to initialize database migrations:
cd greenWP && python3 manage.py migrate |
|---|

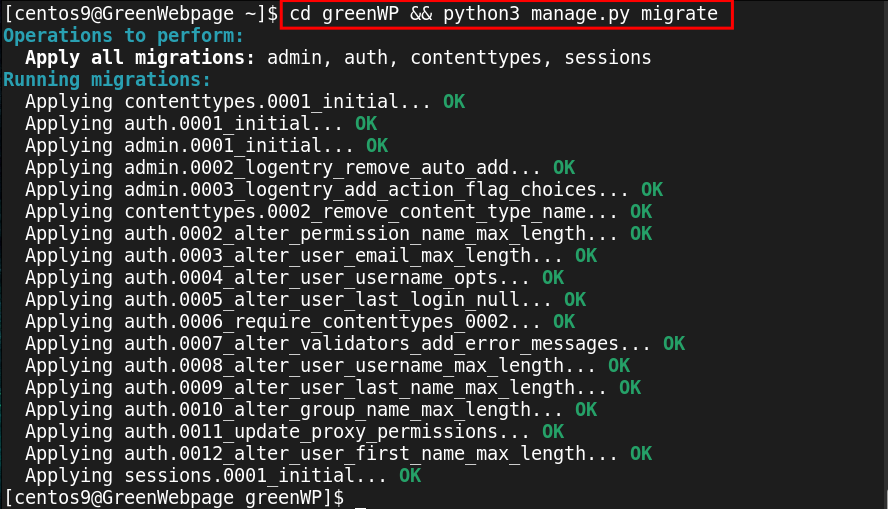
This command will apply all required migrations such as admin, auth, contenttypes, and sessions, for your Django project.
Step 3: Create a superuser for Django Admin
For managing the Django admin interface, create a superuser with the command:
python3 manage.py createsuperuser |
|---|


When the above command runs, it will ask you to provide a username, a valid email address, and a strong password for managing the Django admin interface.
Step 4: Run the Django development server
Finally, your Django development server is ready to start. Operate the command to initiate the Django development server:
python3 manage.py runserver |
|---|

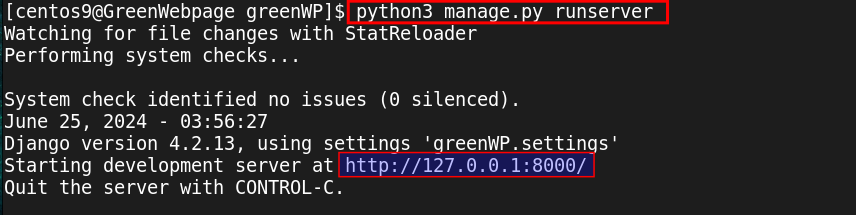
The above command will provide the link to access the Django development server. For instance, the default server runs at “http://127.0.0.1:8000”.
Step 5: Access your Django application
To access your Django application, open your web browser and paste the server link, such as http://127.0.0.1:8000, to check if your Django application is running properly.
127.0.0.1:8000 |
|---|

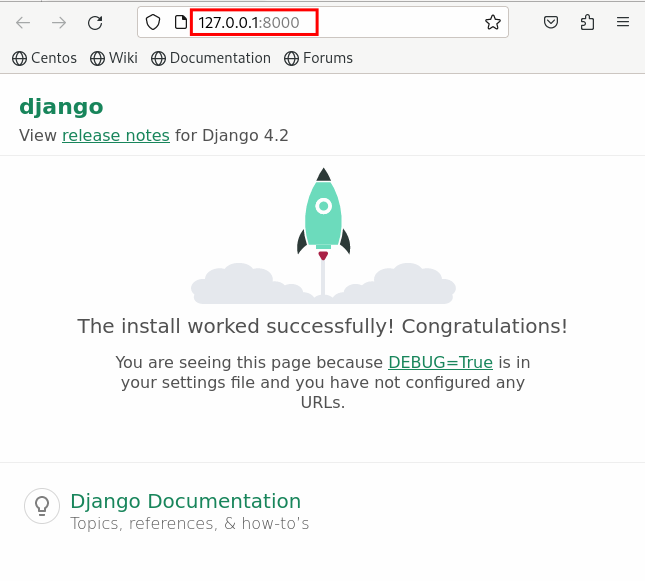
If you see the default Django page on your screen, it confirms that Django is installed and set up correctly without encountering any errors.
Conclusion
It is easy to install and set up the Django package on a CentOS 9 machine. For installing the Django package, confirm that you have already installed the Python3 and pip packages on your system. Then, use the “sudo pip3 install Django” command to install the Django latest version on your CentOS 9 system.


