
Installing NGINX for CentOS 10 allows you to create a powerful web server, reverse-proxy, or load balancer. NGINX, which is known for its scalability and low resource consumption, is used by many to host websites, manage web traffic, and serve static content. Installing NGINX is a quick and easy way to create a scalable, fast web server. Whether you’re deploying a simple website, a high-traffic application, or using NGINX as a load-balancer,
This guide will show you how to install NGINX on CentOS 10, including managing the firewall, enabling repositories and verifying the installation.
Table of Content
- Why Choose NGINX on CentOS Stream 10?
- How to Install NGINX on CentOS Stream 10
- Method 1: Using the Distribution Repository
- Method 2: Using the Official NGINX org Repository
- Basic Configuration After Installation
- Post-Installation Best Practices
- Conclusion
Why Choose NGINX on CentOS Stream 10?
NGINX’s high performance, low resources footprint, event-driven architectural design, and flexibility are what make it a popular web server, reverse proxy and load balancer. Combining NGINX and CentOS Stream 10, a modern RHEL distribution derived from CentOS. It gives you a stable platform with newer packages. NGINX is the perfect solution for administrators looking to get both performance and support.
How to Install NGINX on CentOS Stream 10
Installing NGINX is simple and powerful on CentOS Stream 10. You can use either the default repository or the NGINX.org official repository, but you will have the full guide, from installation, configuration, firewall settings, virtual hosts and best practices. When NGINX is properly configured on CentOS Stream 10 you will have a high-performance web server that’s ready for production workloads or scalable web apps.
Prerequisites
- CentOS Stream 10 server with sudo or root privileges.
- You can enable a firewall service such as firewalld (you will open ports later).
- Downloading packages requires network internet access.
- Basic knowledge of command-line operations.
Method 1: Install NGINX Using the Distribution Repository
Installing NGINX using the CentOS Stream 10 default repositories is the easiest way to do it. It is ideal for production environments where you want fewer surprises. To install NGINX on CentOS 10, follow below steps:
Step 1: Update the system packages
Make sure your system is up-to-date with patches and dependencies to avoid conflicts during installation.
sudo dnf update -y |
|---|


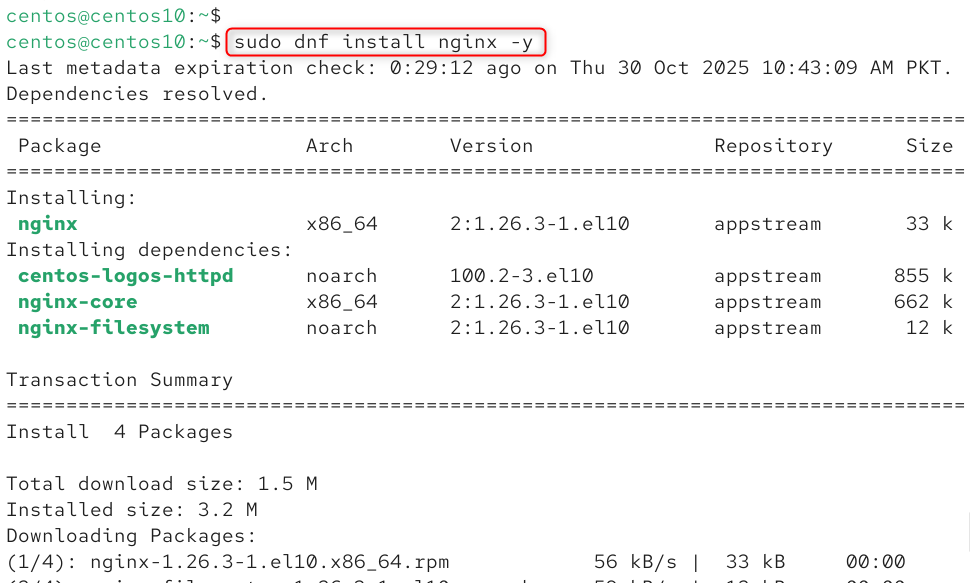
Step 2: Install NGINX
Install the NGINX package using the CentOS repository. The version may be a little older, but it is thoroughly tested.
sudo dnf install nginx -y |
|---|

Step 3: Start and enable NGINX service
Starts NGINX instantly and configures it so that it starts automatically on boot.
sudo systemctl start nginx sudo systemctl enable nginx |
|---|


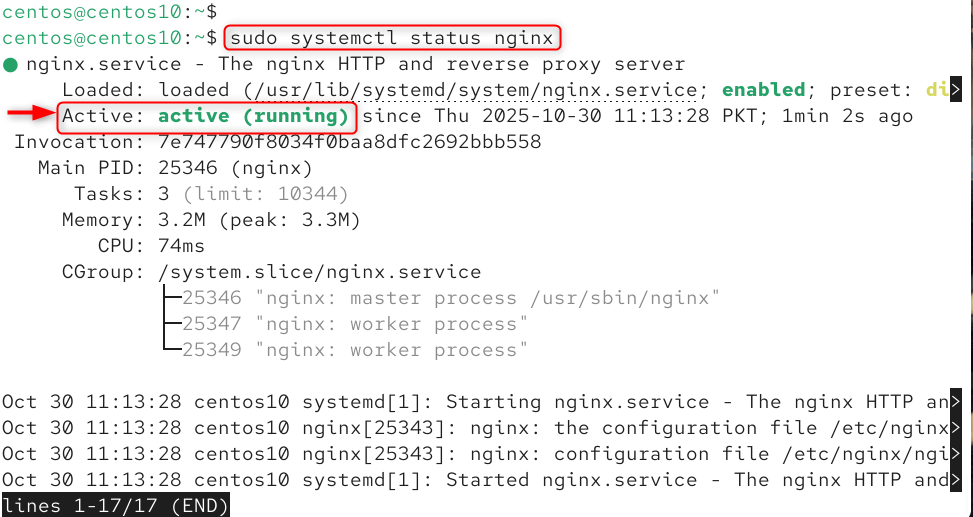
Let’s check its services.
sudo systemctl status nginx |
|---|

Step 4: Open HTTP/HTTPS ports in the firewall
Allow incoming traffic to ports 80 and 443, so that NGINX may serve web pages.
sudo firewall-cmd –permanent –add-service=http sudo firewall-cmd –permanent –add-service=https sudo firewall-cmd –reload |
|---|


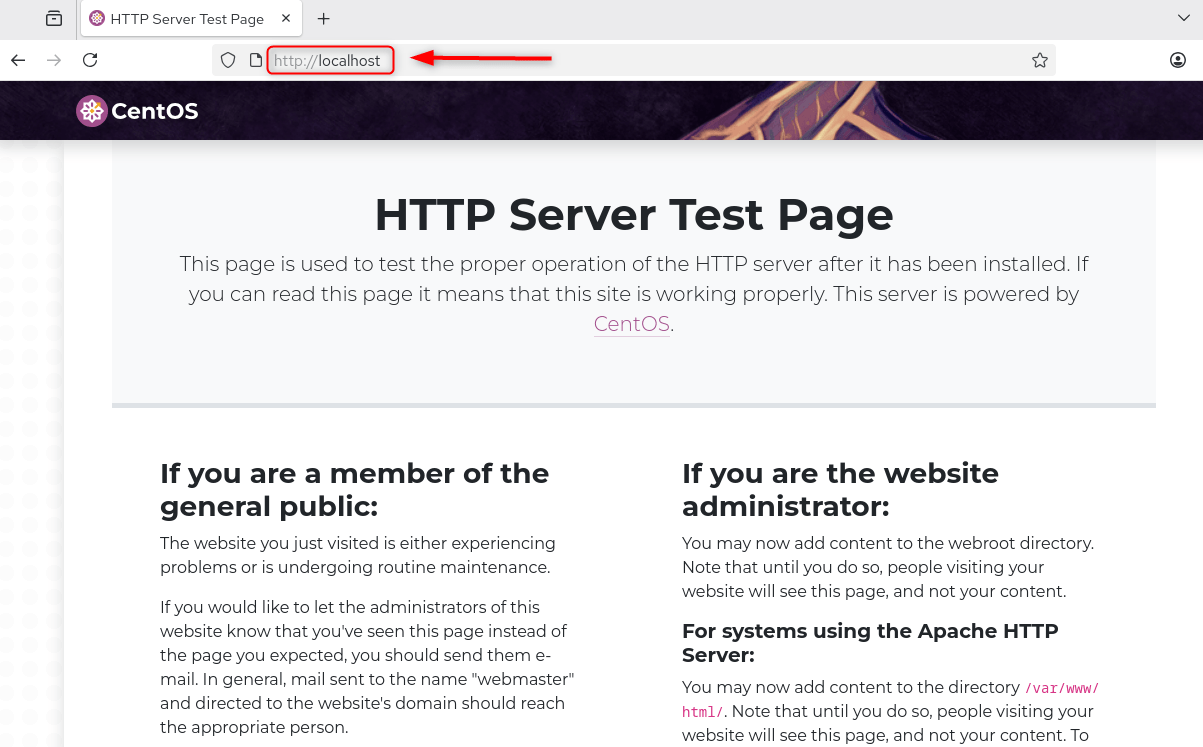
Step 5: Test NGINX
Navigate to the IP address or domain of your server. You should be able to see the NGINX default welcome page. Alternatively:
curl -I http://localhost |
|---|

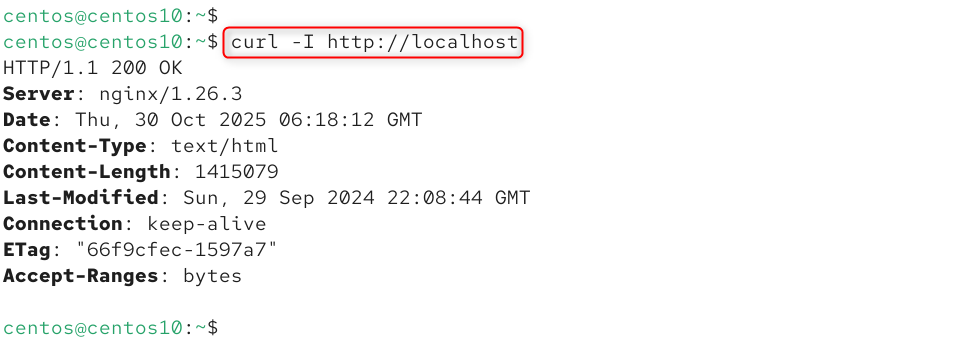
Verifies that NGINX is running and accessible.
http://localhost |
|---|

Method 2: Install NGINX Using the Official NGINX.org Repository
Use NGINX repository if you want to download the latest stable version or mainline NGINX with newer modules or features. You will have more control over the update process.
Step 1: Set up the NGINX repository
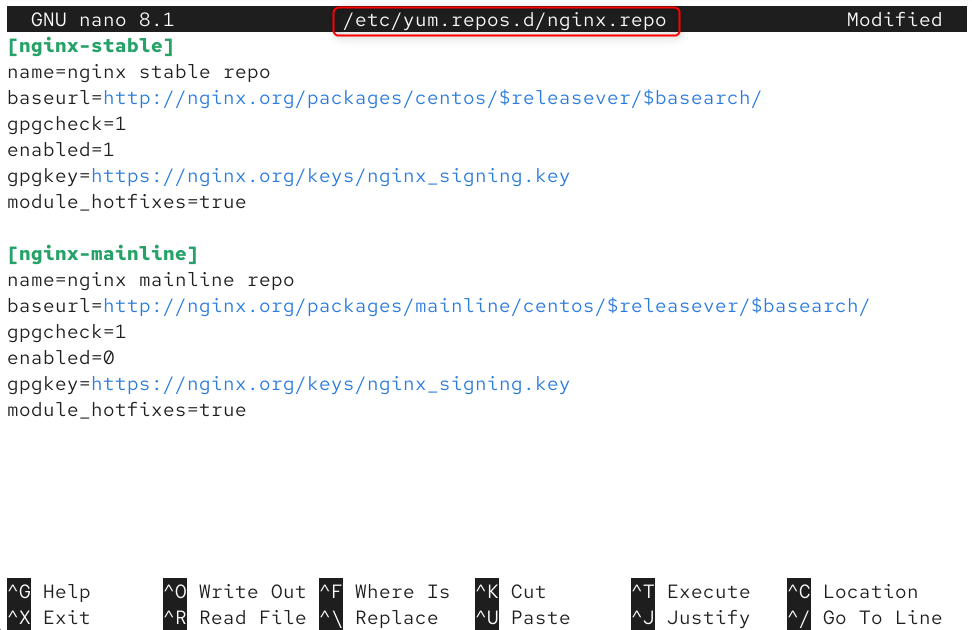
Create repository file
sudo nano /etc/yum.repos.d/nginx.repo |
|---|
Add contents:
[nginx-stable]
name=nginx stable repo
baseurl=http://nginx.org/packages/centos/$releasever/$basearch/
gpgcheck=1
enabled=1
gpgkey=https://nginx.org/keys/nginx_signing.key
module_hotfixes=true
[nginx-mainline]
name=nginx mainline repo
baseurl=http://nginx.org/packages/mainline/centos/$releasever/$basearch/
gpgcheck=1
enabled=0
gpgkey=https://nginx.org/keys/nginx_signing.key
module_hotfixes=true

Installs NGINX.org repo to install the latest version directly. If you prefer the stable version to mainline:
sudo dnf config-manager –enable nginx-mainline |
|---|


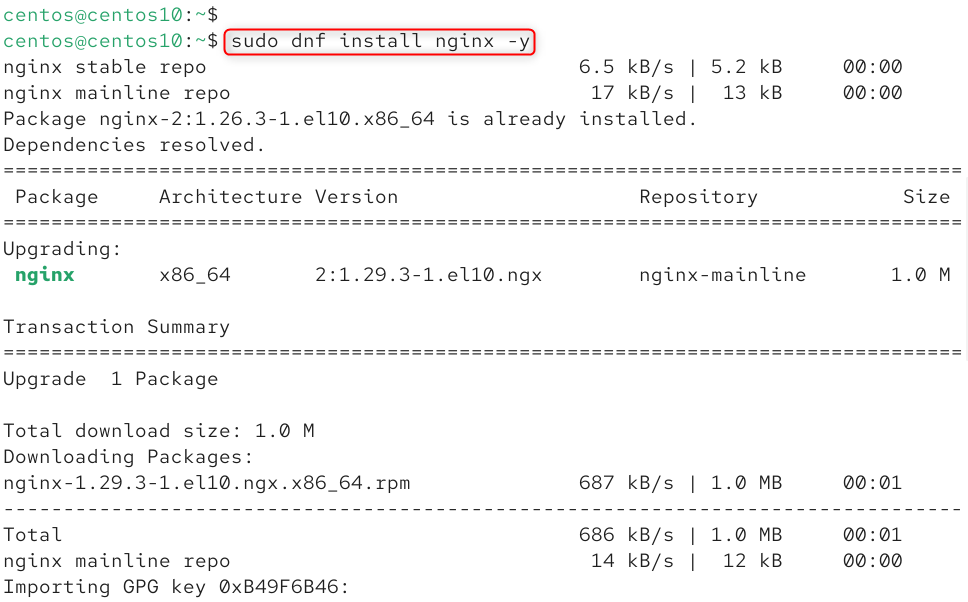
Step 2: Install NGINX
Install NGINX using the NGINX.org repository. You’ll receive the latest version and modules.
sudo dnf install nginx -y |
|---|

Step 3: Start and enable the service
Let’s start and enable services:
sudo systemctl start nginx sudo systemctl enable nginx |
|---|

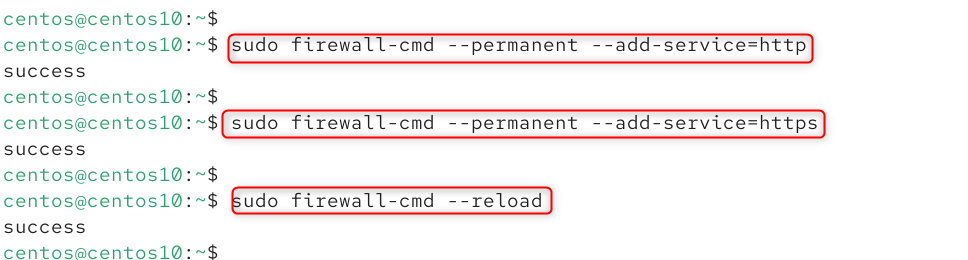
Step 4: Configure firewall (same as in Method 1)
Allow incoming traffic to ports 80 and 443, so that NGINX may serve web pages.
sudo firewall-cmd –permanent –add-service=http sudo firewall-cmd –permanent –add-service=https sudo firewall-cmd –reload |
|---|
Step 5: Verify installation and version
This tool lets you verify that you have installed the correct version of NGINX and check which one is currently running. Verify the installation version:
nginx -v |
|---|


Basic Configuration After Installation
You’ll probably want to configure NGINX after it is up and running.
- Configuration file: /etc/nginx/nginx.conf
- Additional site configurations: directory /etc/nginx/conf.d
Test configuration syntax:
Before reloading NGINX, check for syntax errors.
sudo nginx -t |
|---|


Reload the service whenever there are changes:
sudo systemctl reload nginx |
|---|


Set up a virtual host example:
Create file /etc/nginx/conf.d/example.com.conf:
server { listen 80; server_name example.com www.example.com; root /usr/share/nginx/html/example.com; index index.html; location / { try_files $uri $uri/ =404; } } |
|---|
Defines a new site that serves example.com from a directory.
Post-Installation Best Practices
- If you are unsure, disable SELinux or ensure that the contexts for web serving are enabled.
- Update the server block so that it listens on 443.
- Regularly update NGINX and review logs (/var/log/nginx/access.log, /var/log/nginx/error.log).
- Scalability can be improved by using NGINX a reverse proxy or as a load balancer for the backend nodes.
- Monitor performance with tools such as top, htop ngxtop or netstat.
Conclusion
To install NGINX on CentOS 10, update your system using sudo dnf update -y to ensure all packages are current. Then install NGINX with sudo dnf install nginx -y and start the service using sudo systemctl start nginx. Enable it to start on boot with sudo systemctl enable nginx. Next, allow HTTP and HTTPS traffic through the firewall by running sudo firewall-cmd –permanent –add-service=http, sudo firewall-cmd –permanent –add-service=https, and sudo firewall-cmd –reload. Finally, verify the installation by entering your server’s IP address in a browser or running curl -I http://localhost; if successful, the default NGINX welcome page confirms that your web server is installed and running correctly on CentOS 10.