UNetbootin, also known as Universal Netboot Installer, is a versatile tool that allows users to create bootable live USB drives for Ubuntu and other Linux distributions without the need for burning a CD. This utility is particularly useful for users who wish to install Linux distributions on their systems without an optical drive or for those who prefer the convenience of a USB installation. With UNetbootin, you can either select from a list of supported distributions to download automatically or use an existing ISO file you have.
UNetbootin is a versatile tool that allows users to create bootable Live USB drives for Ubuntu and other Linux distributions without the need for burning a CD. This can be particularly useful for installing new operating systems or running system utilities.
Here’s a comprehensive guide to installing UNetbootin on Ubuntu 24.04.
Table of Content
How to Install UNetbootin on Ubuntu 24.04
UNetbootin is a multi-platform tool that allows you to create bootable USB drives from various operating system ISO images. This can be particularly useful for users who want to install Linux on a machine that does not have a CD drive or for those who prefer the convenience of a USB drive.
The most straightforward method to install UNetbootin on Ubuntu 24.04 is by using the official site. To do this, you will need to add the UNetbootin PPA to your system and then install the software. Here are the steps:
Step 1: Visit the UNetbootin GitHub Page
Another method is to download UNetbootin directly from the official website. This method is useful if you prefer to use the latest version of the software or if the PPA is not up-to-date.
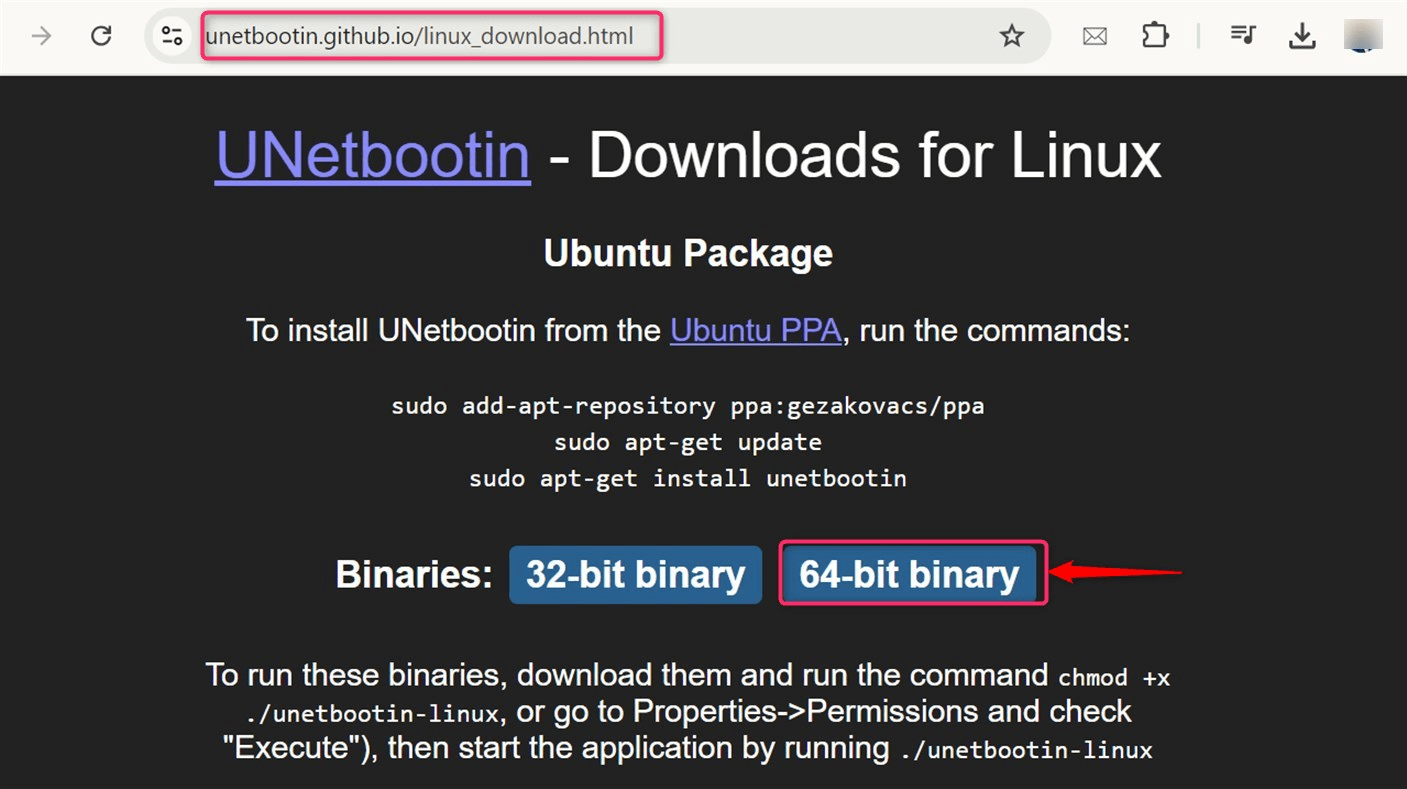
Step 2: Download the UNetbootin
Now, download the latest version of UNetbootin for Linux. Whether you’re installing a new Linux distribution or running system utilities, UNetbootin is a reliable tool that simplifies the process:
wget https://github.com/unetbootin/unetbootin/releases/download/702/unetbootin-linux64-702.bin
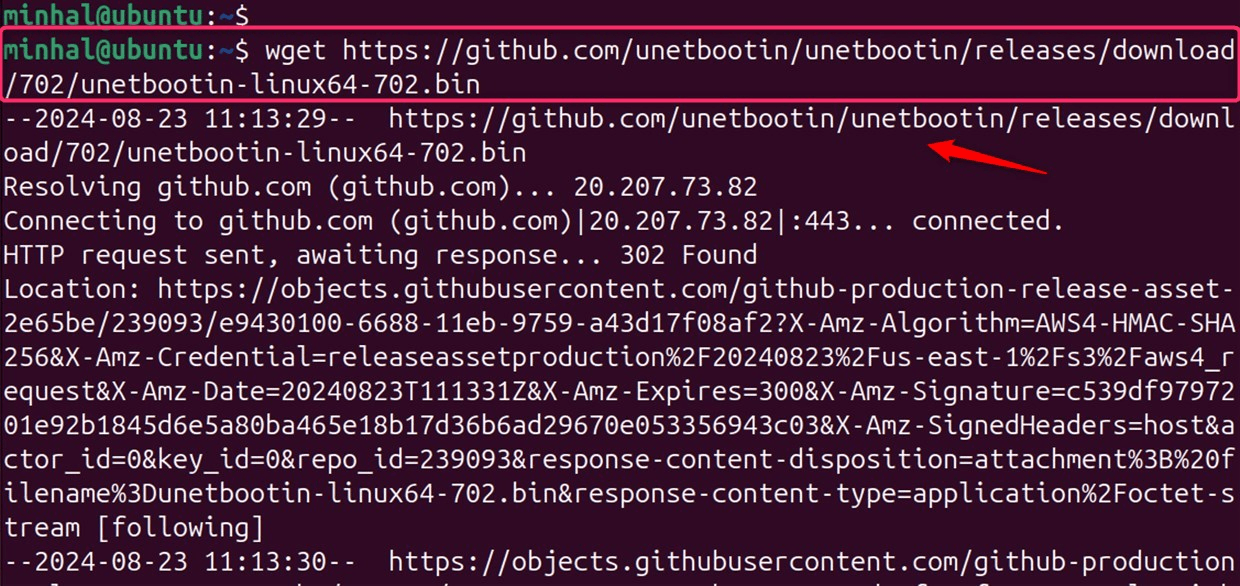
Step 3: Get Executable Permission
Make the downloaded file executable by right-clicking on it, selecting Properties, then Permissions, and checking the box that says “Allow executing file as program.” or use the chmod command with x option:
chmod +x ./unetbootin-linux*

Step 4: Launch Unetbootin
Once installed, you can launch Unetbootin from the “Applications” menu or by searching for it in the Dash. Or run the executable file to start UNetbootin, you can follow its on-screen instructions to create bootable USB drives from your desired ISO images:
sudo ./unetbootin-linux*
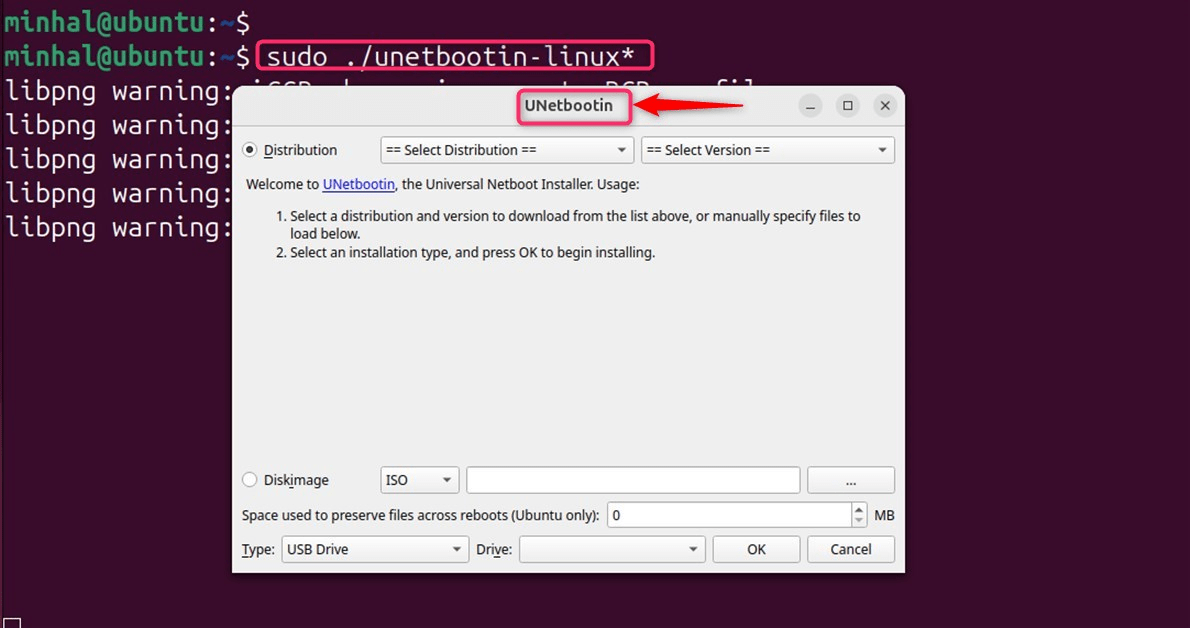
Note: UNetbootin is an effective tool for creating live USB drives. Whether you choose to install it, directly from the official website, or using the package manager, the process is relatively simple and straightforward.
Step 5: Select Linux Distribution
With UNetbootin installed, you can easily create a bootable USB drive for Ubuntu 24.04 or any other supported Linux distribution:
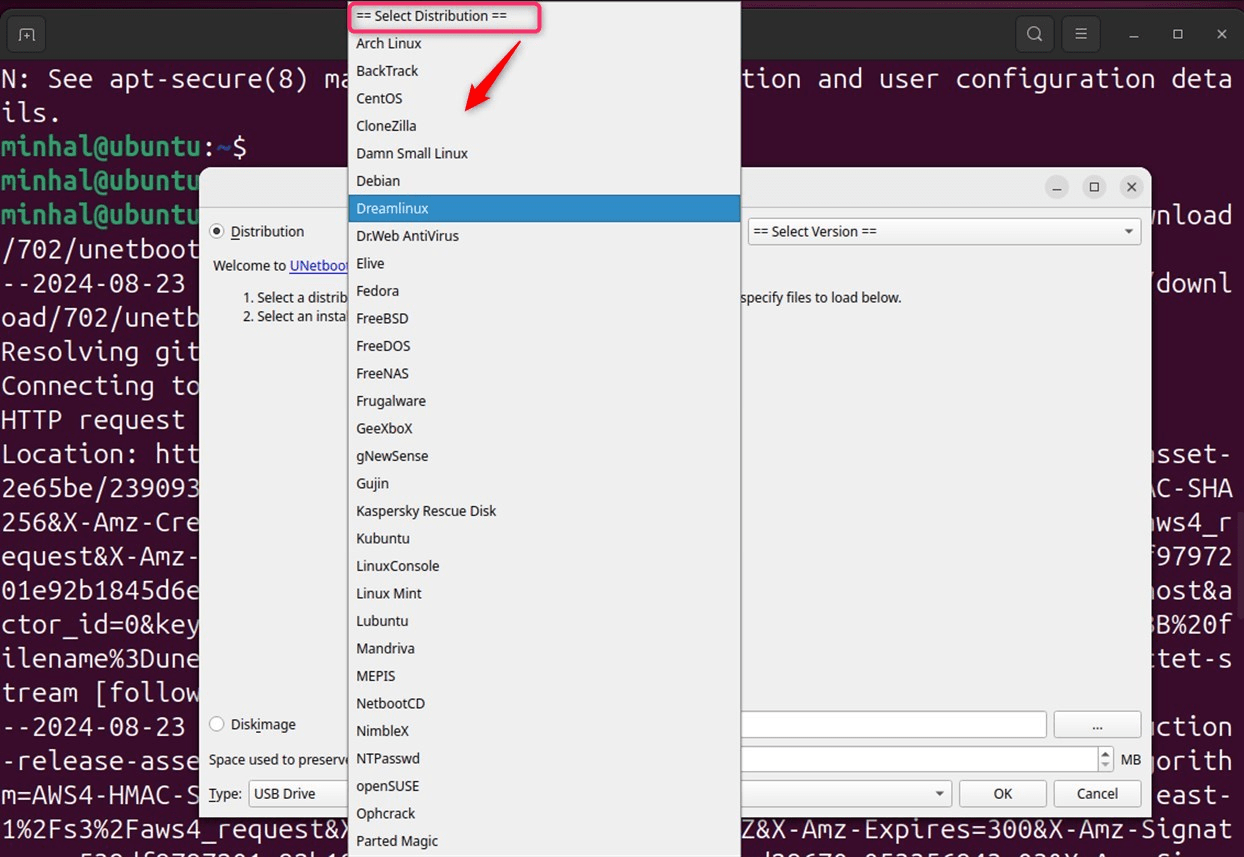
Before you can use UNetbootin, you need to insert a USB drive into your computer. It’s important to note that the drive should be formatted as FAT32. If it’s not, you can format it using the Disks utility or GParted.
Step 6: Creating a Bootable Live USB
In the UNetbootin interface, select the “Diskimage” option and choose the ISO file for the Linux distribution you wish to use. Your USB drive should be automatically selected. If not, make sure to select it manually:
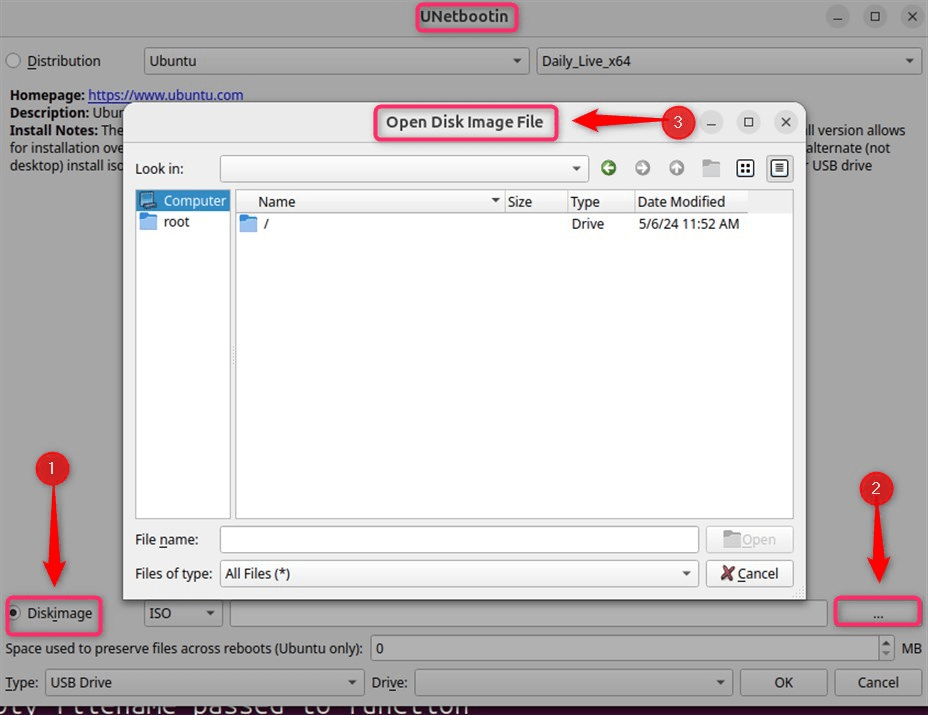
Hit “OK” for starting the procedure of creating your Live USB.
Step 7: Rebooting and Booting from USB
After UNetbootin has finished, reboot your computer. As your computer starts up, you’ll need to enter the boot menu. This usually involves pressing a key like Esc, F12, or F2, depending on your computer’s make and model.
Select your USB drive from the boot menu to boot into your Live USB.
Troubleshooting
If you encounter any issues, such as the USB drive not being recognized, try reformatting it as FAT32 and repeating the process. For further assistance, UNetbootin’s official website provides a comprehensive FAQ section.
By following these steps, you should have a bootable Live USB drive ready for use. Remember to always verify the integrity of the downloaded files and ensure that your USB drive is formatted correctly before creating a bootable drive.
Conclusion
It’s a straightforward process that involves choosing the ISO file or distribution, selecting the target drive, and then rebooting the system once the creation of the bootable drive is complete. For Ubuntu 24.04, installing UNetbootin can be particularly helpful for setting up a new system, testing different Linux environments, or troubleshooting systems without affecting the installed operating system. It’s a critical tool for system administrators who frequently work with different Linux distributions and need a reliable method for system recovery or installation.




Leave feedback about this