Upgrading to a new Long-Term Support (LTS) version of Ubuntu doesn’t have to be a stressful, command-line-heavy process. If you are using Ubuntu 22.04 LTS (Jammy Jellyfish) and need to upgrade to Ubuntu 24.04 LTS (Noble Numbat). The following guide will explain how to upgrade your machine using CLI and GUI.
Ubuntu 24.04 LTS offers better performance, new software package updates, and long-term support.
Simply follow the steps that we are going to list below, and you should be on your way to enjoying the new features in Ubuntu 24.04 in no time.
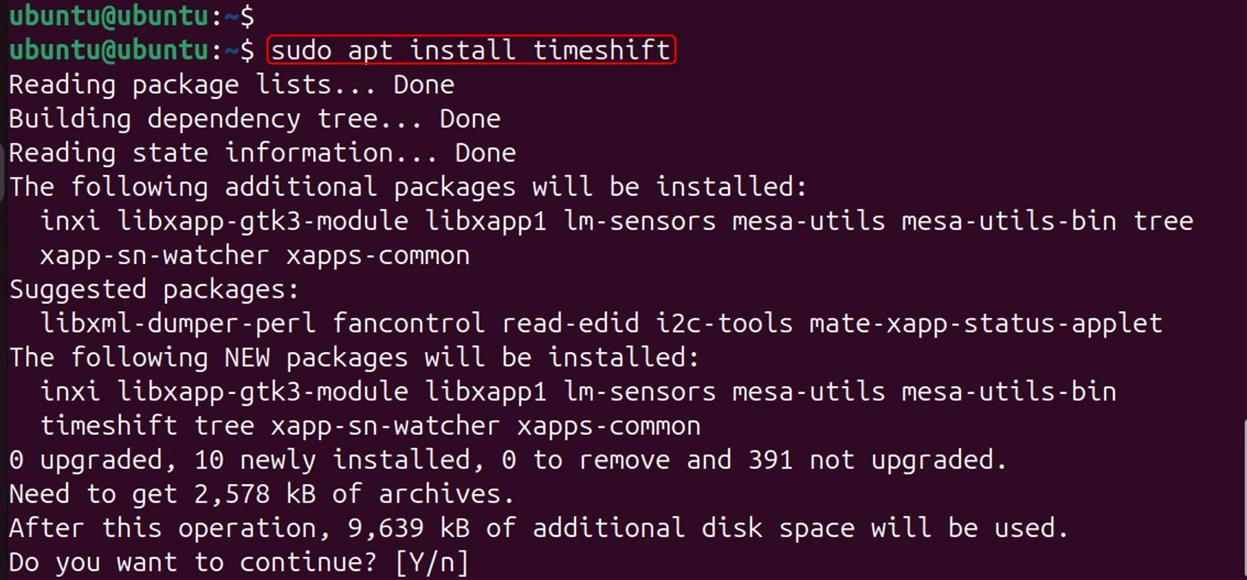
1. Backup your system
As always, you should back up important data or take a snapshot if you are other a VM before attempting to upgrade:
sudo apt install timeshift
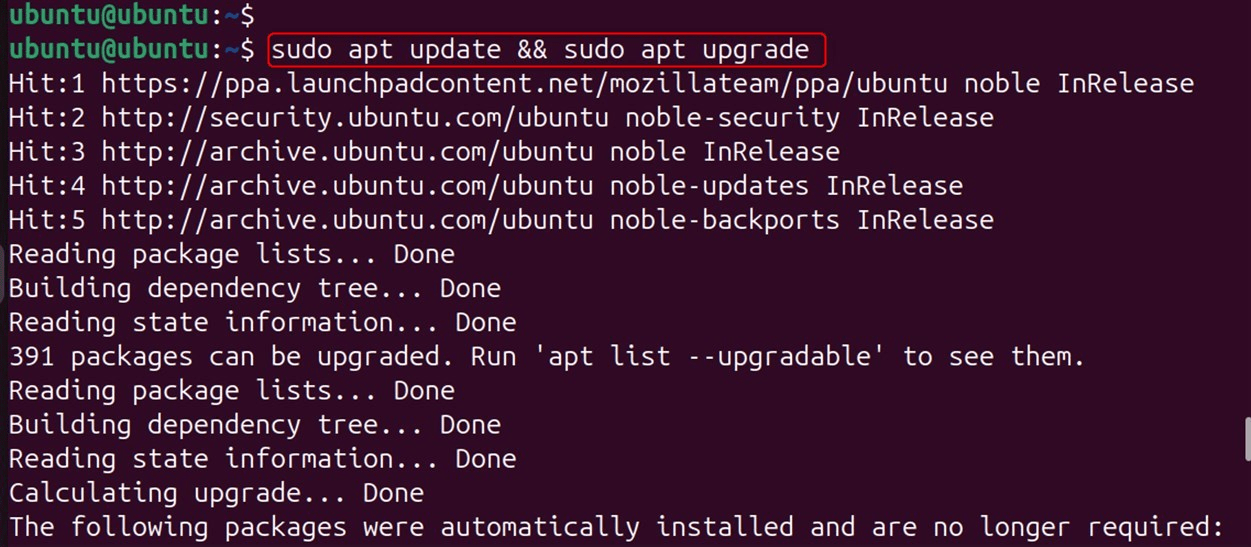
2. Ensure the system is up to date
Refreshes the package list and then installs any available updates. It takes care that your system has been completely patched before upgrading.
sudo apt update && sudo apt upgrade
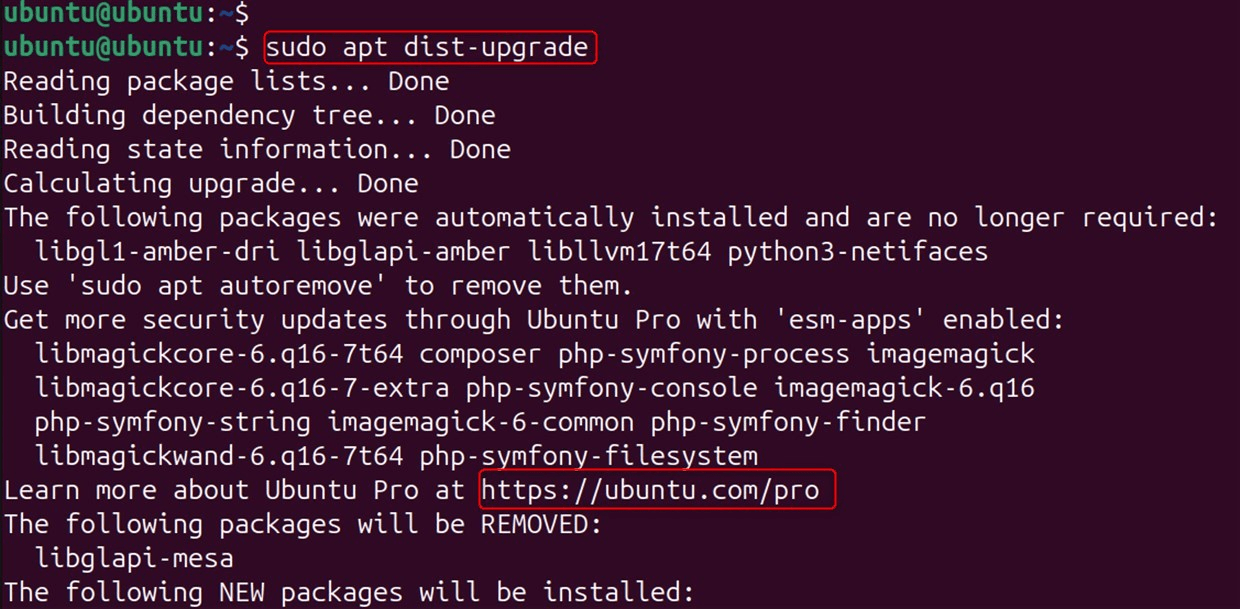
Update your system by running the following command. It manages dependency changes and replaces old packages.
sudo apt dist-upgrade
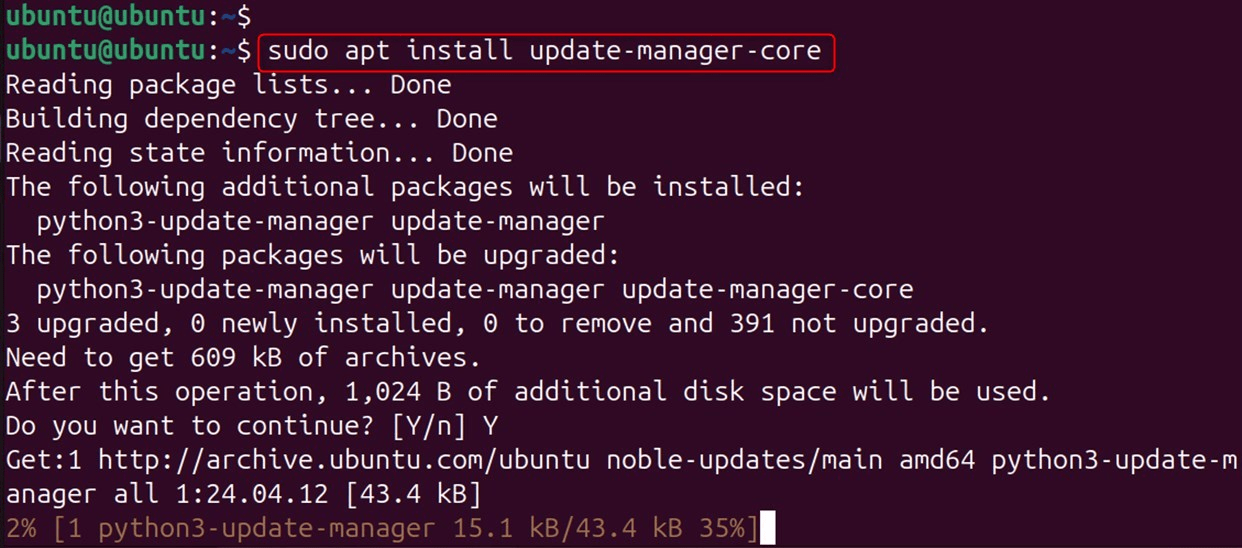
3. Install the update-manager-core package
It gives you the base package for managing Ubuntu upgrades. It is required by the do-release-upgrade.
sudo apt install update-manager-core
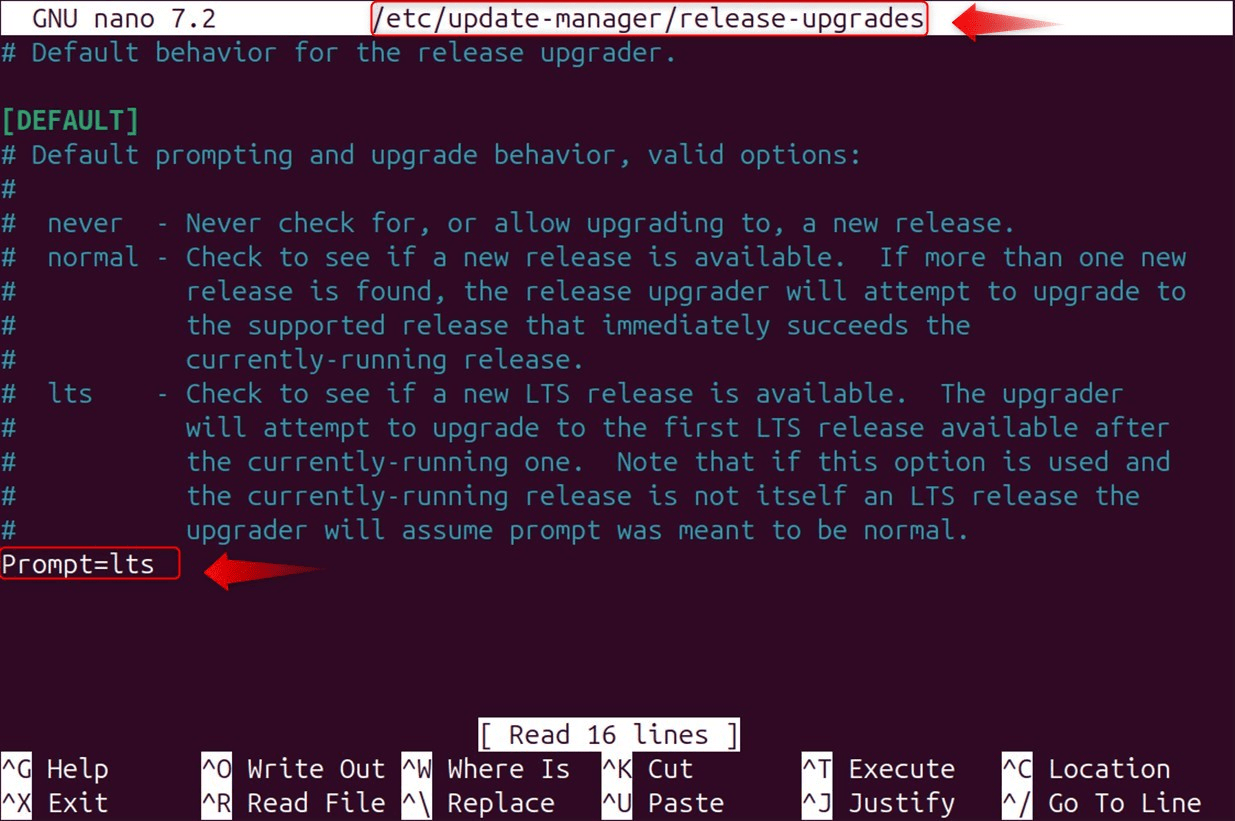
4. Check release-upgrades configuration
Edits the release-upgrades file to only follow LTS versions.
sudo nano /etc/update-manager/release-upgrades
Make sure this line is set to:
Prompt=lts
This guarantees you’ll receive the upgrade to the next LTS release (24.04).
5. Start the upgrade
Launches the distribution upgrade tool.
sudo do-release-upgrade
6. Reboot into Ubuntu 24.04
Reboots your PC upon completion of the upgrade.
sudo reboot
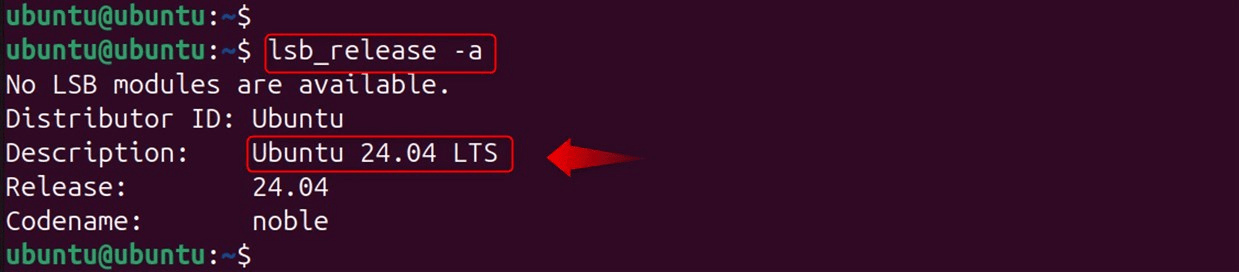
Displays information about the Ubuntu version being used. Verify your version:
lsb_release -a
How to Upgrade Ubuntu 22.04 to 24.04 Using GUI?
The GUI method of upgrading from Ubuntu 22.04 is the safest and easiest way for most users to follow:
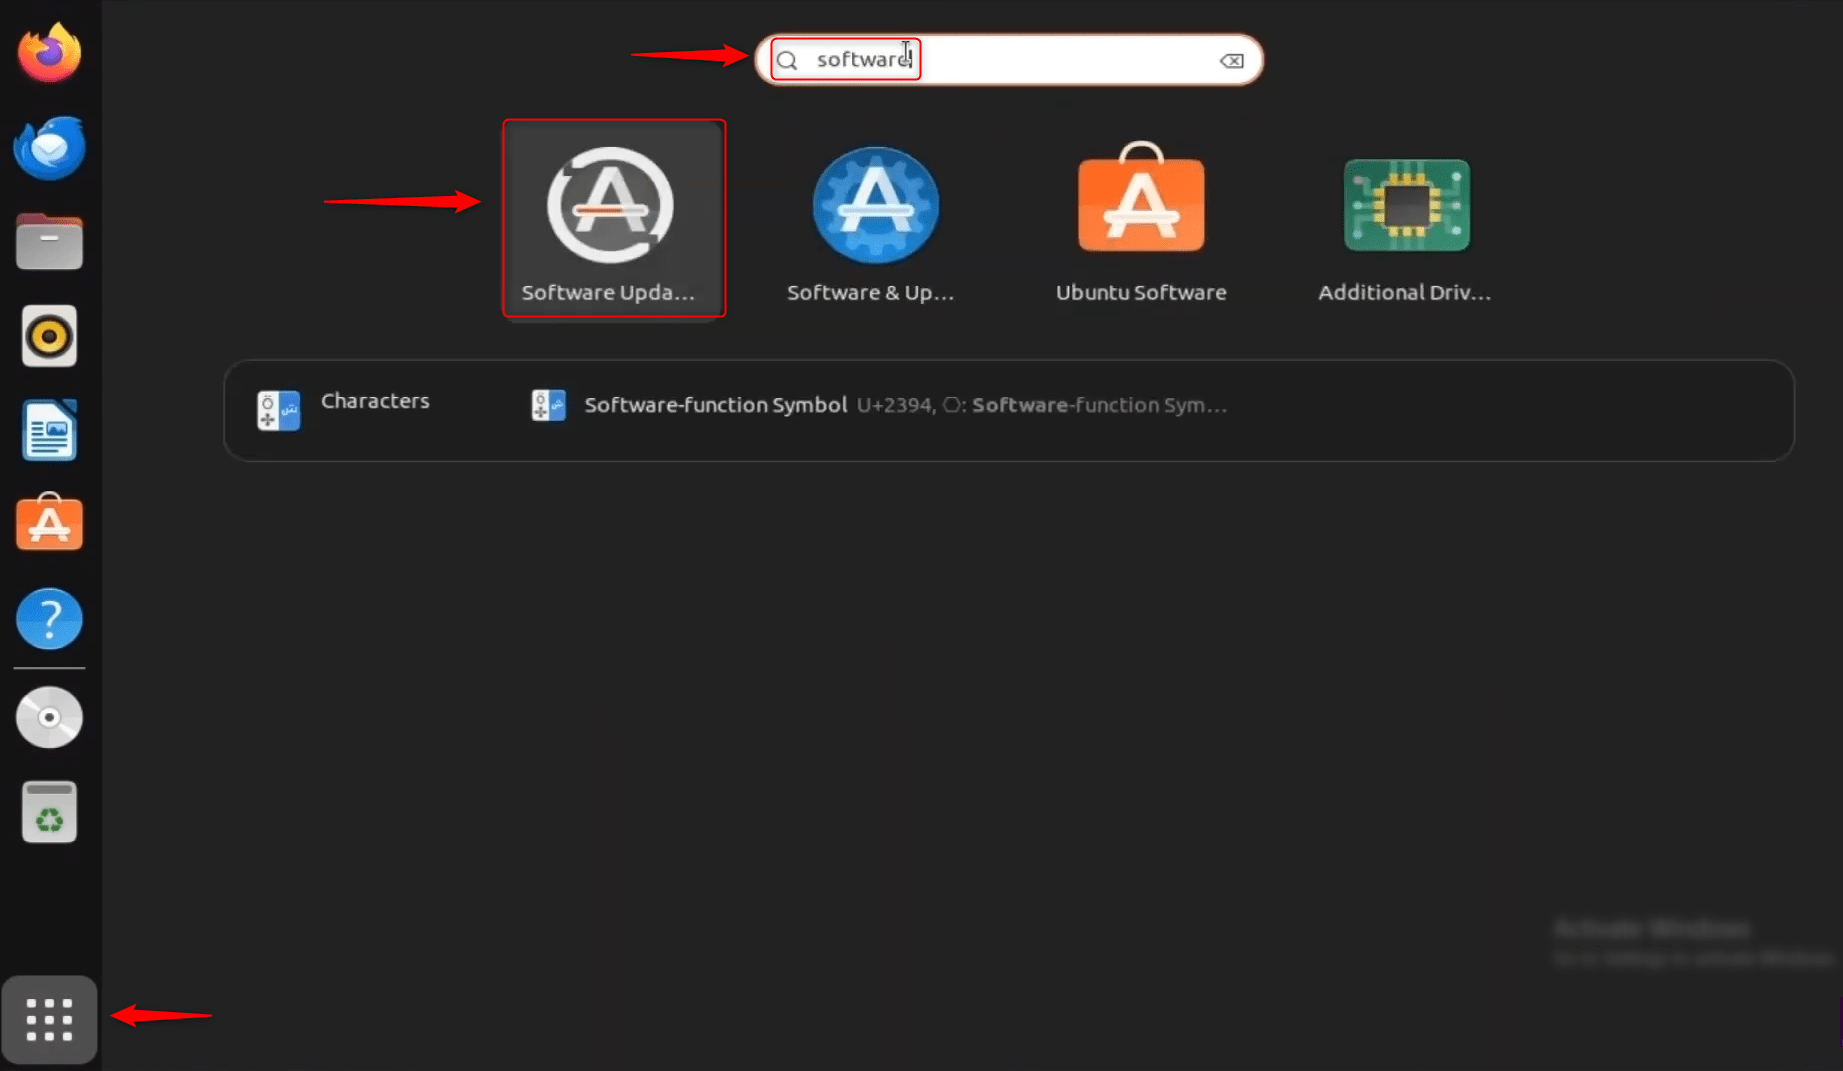
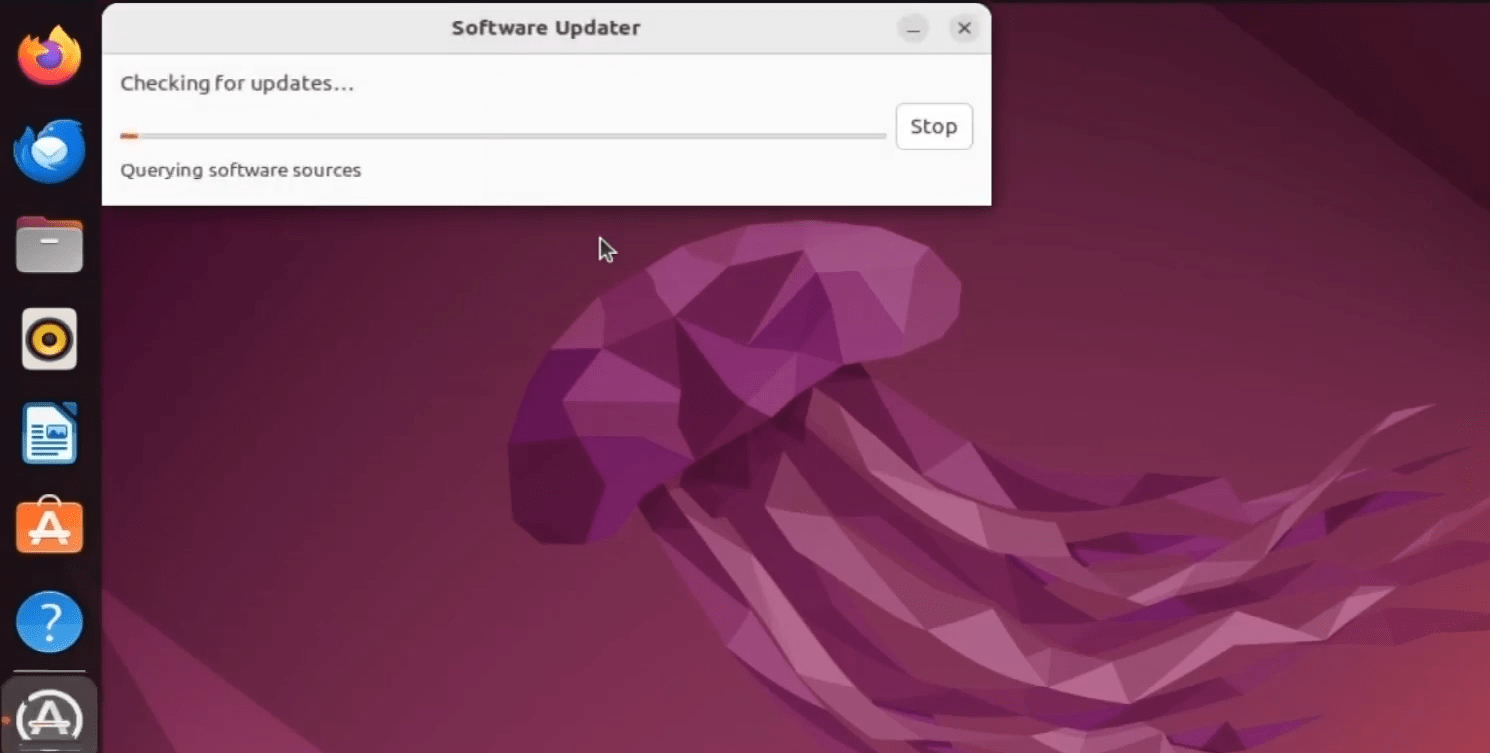
Step 1: Open the Update Manager (Software Updater)
Click the “Show Applications” button (located at the bottom-left of the screen). Type “software updater” and launch it.
Step 2: Open Update Settings
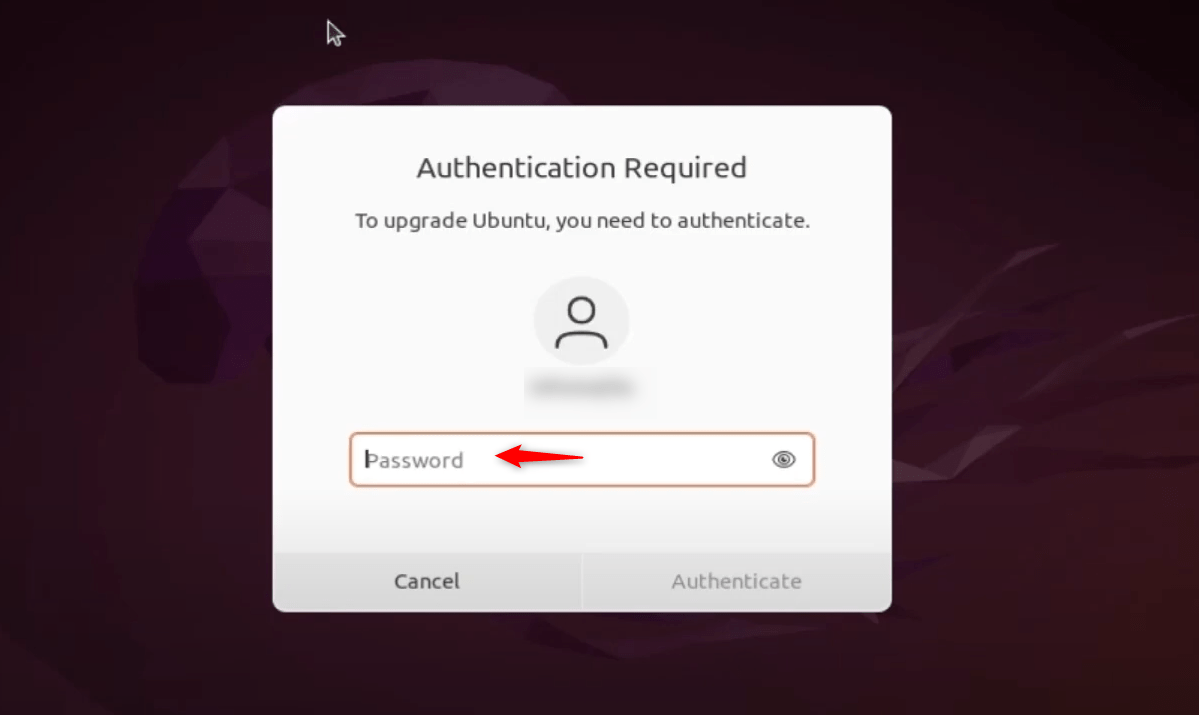
The system will begin to look for updates. Once the Software Updater has finished this process:
A new window is going to pop up, and it will ask you to authenticate. Enter your password when prompted:
Step 3: Setting Up For New Ubuntu Releases
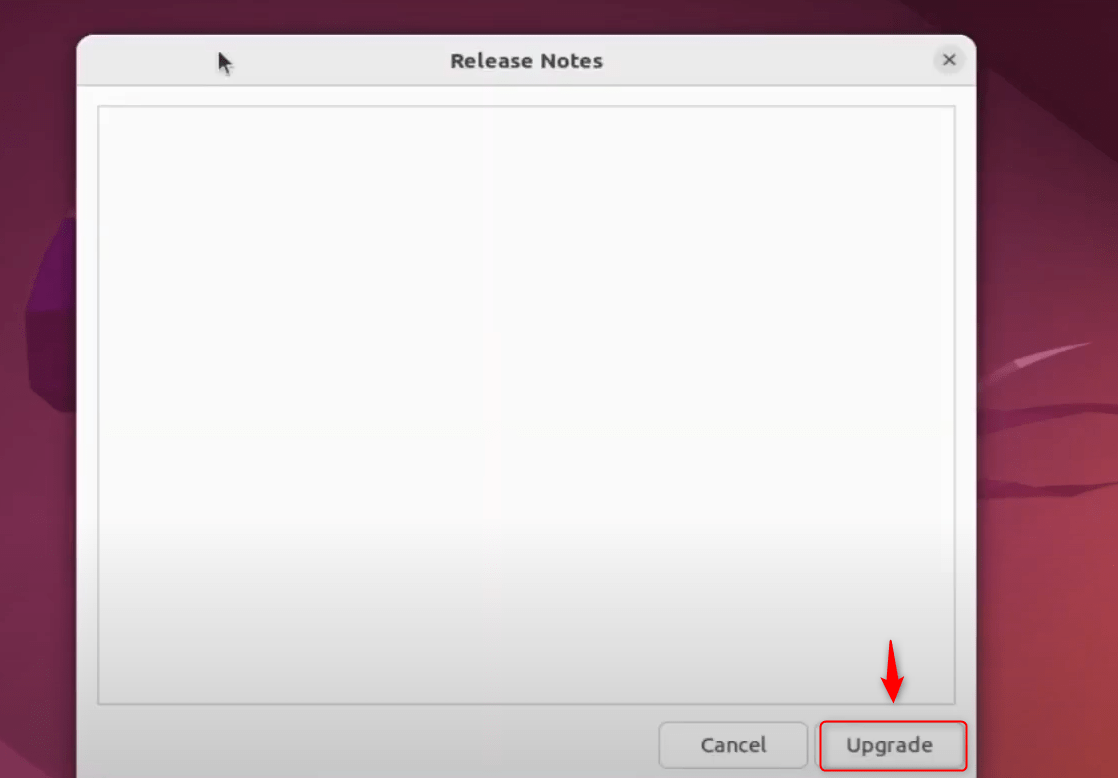
Now that you’re in Software & Updates, click the “Upgrade” button.
It is time to start preparing to upgrade Ubuntu:
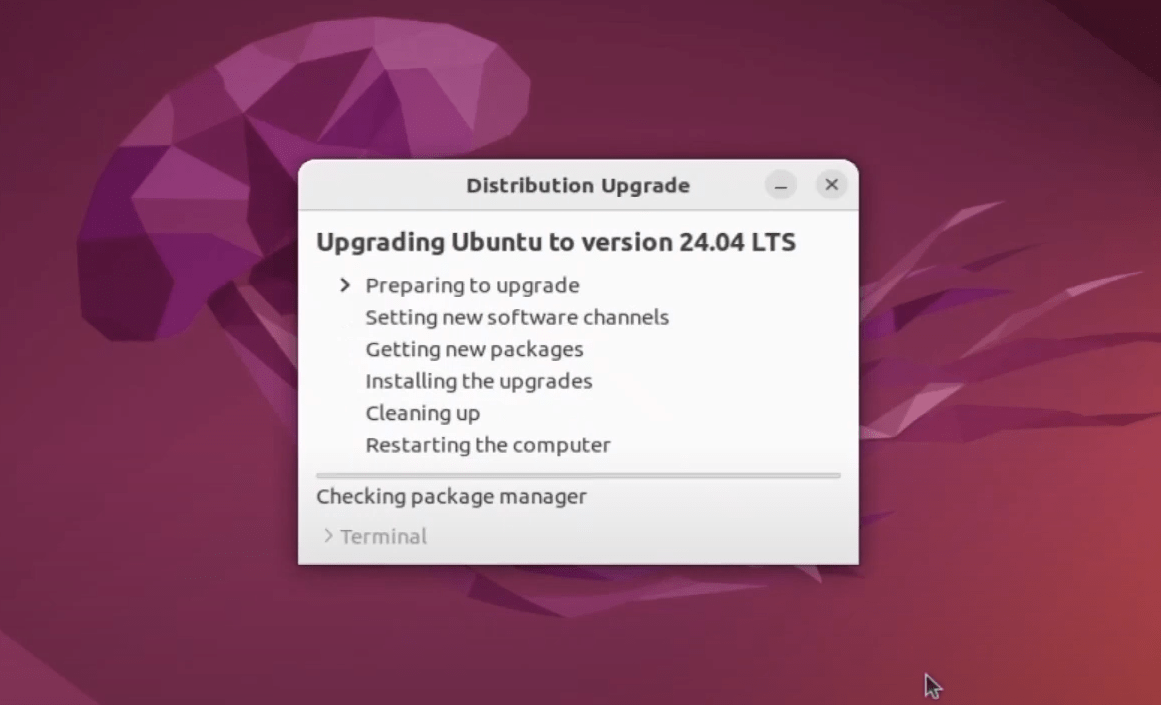
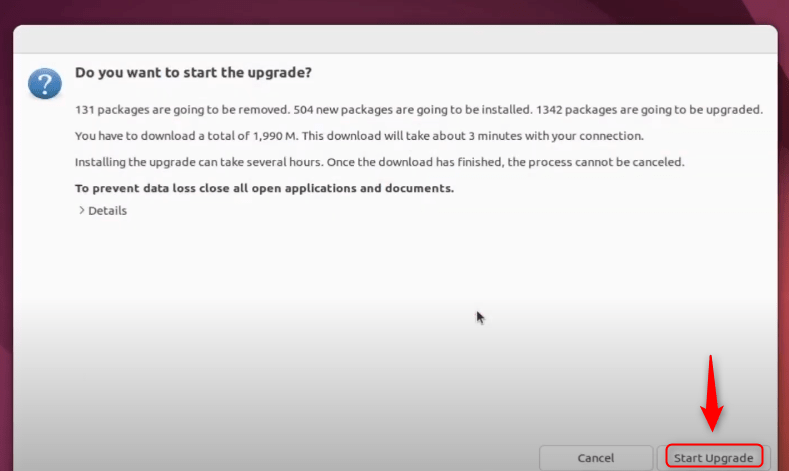
Now the Ubuntu machine will tell you the new version, maybe 24.04 LTS, is ready to upgrade. Hit the Start Upgrade button:
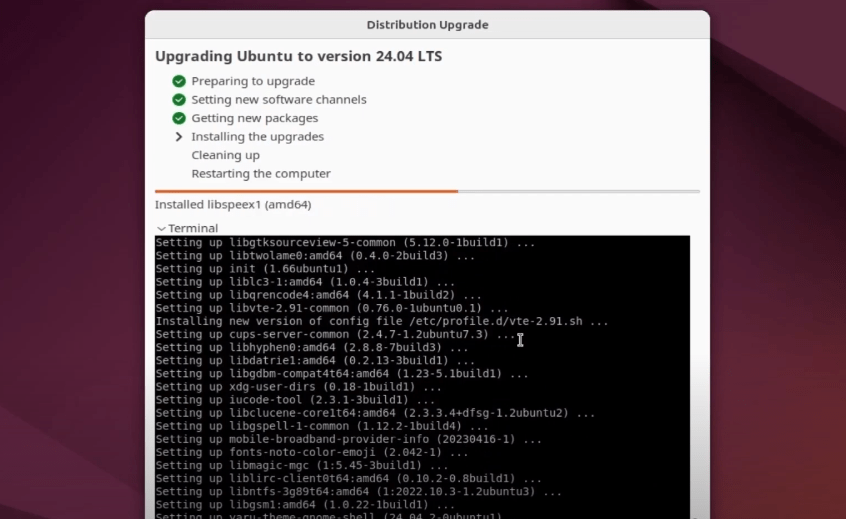
It is still in progress:
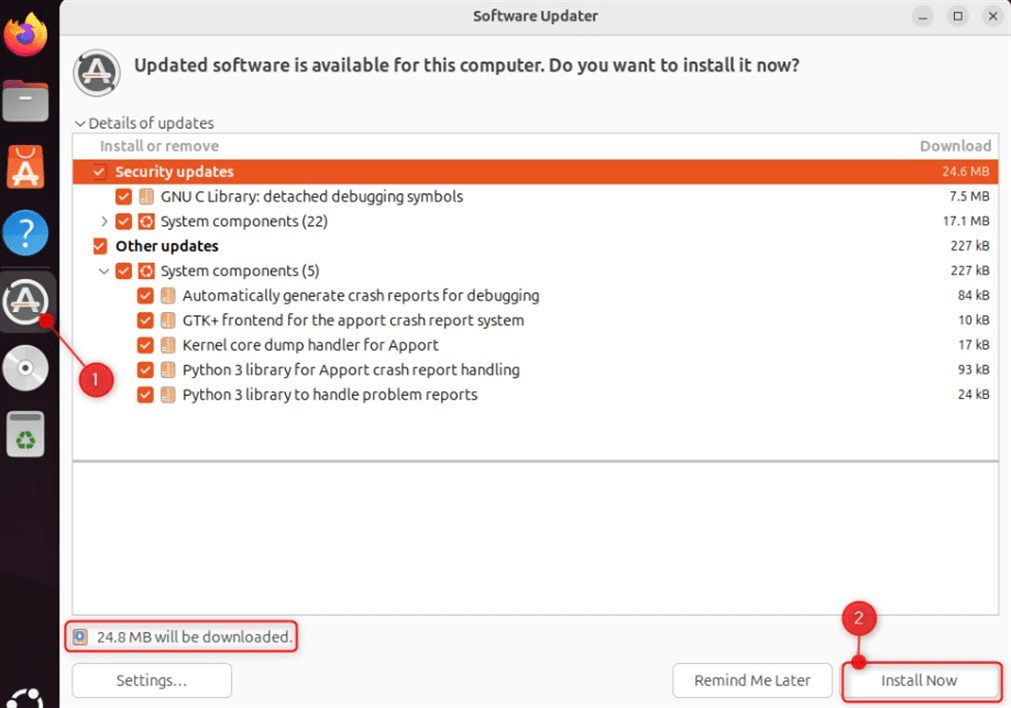
Step 4: Re-check System Updates
Now go back to the Software Updater window. Hit the “Check” button to scan for all available updates. If there are updates, hit the “Install Now” button:
Restart your system if prompted.
Note: If not possible, you will receive a message if Ubuntu 24.04 LTS is officially out for your device.
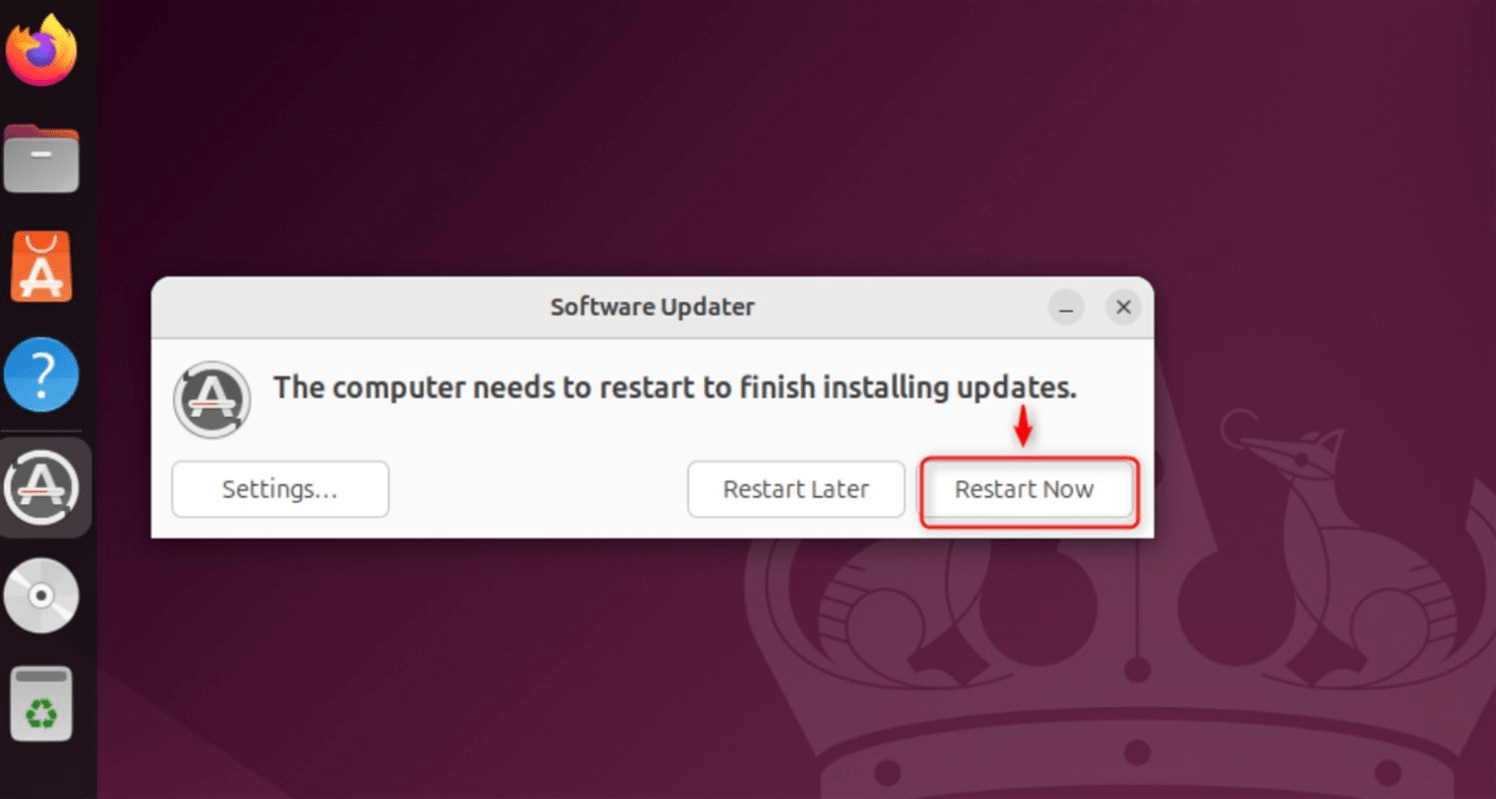
Step 5: Restart Into Ubuntu 24.04 LTS
Once the installation is complete. It should prompt you to reboot. Click Restart Now.
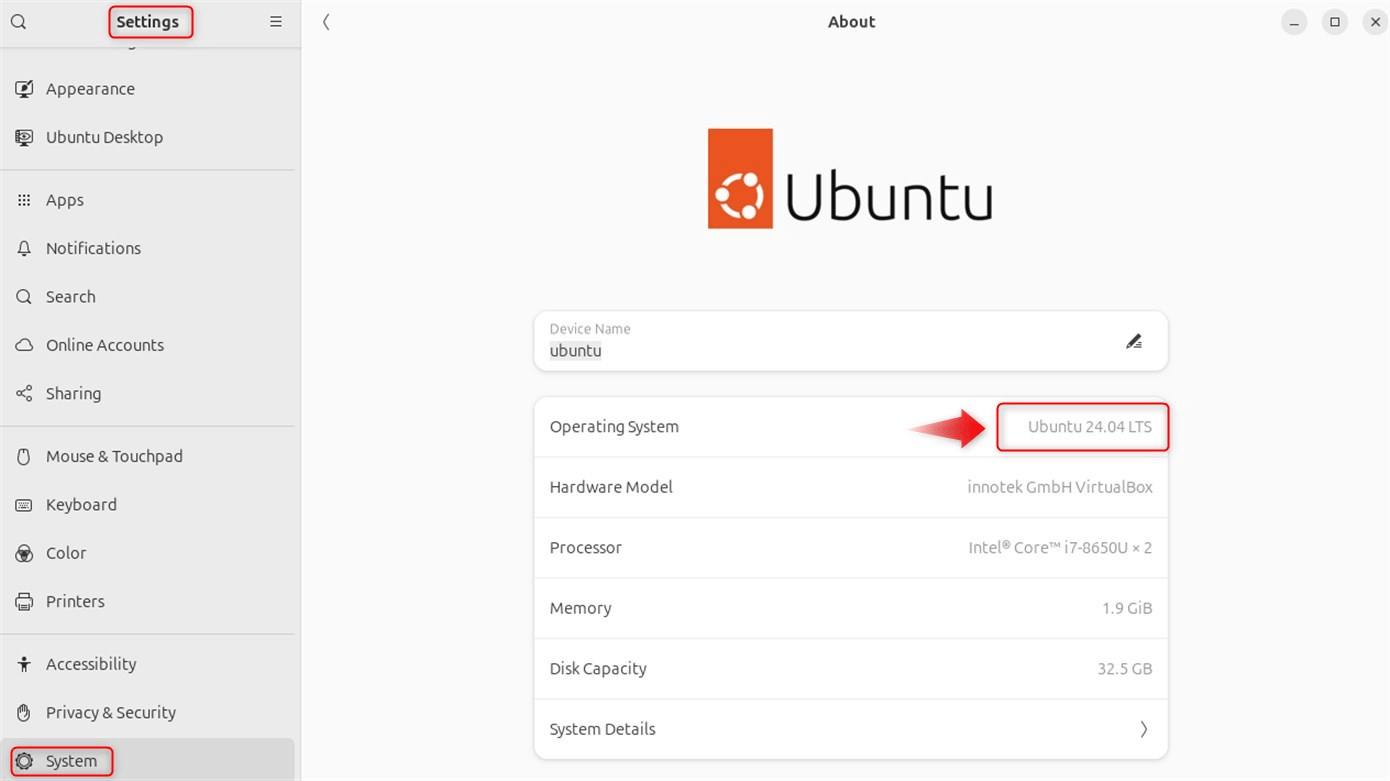
Step 6: Verify Upgrade Ubuntu 24.04 LTS
Your computer will start up into the fresh new Ubuntu 24.04 LTS (Noble Numbat):
Congratulations! You’ve successfully upgraded using the GUI.
Conclusion
If you want to upgrade from Ubuntu 22.04 to 24.04, run sudo apt update && sudo apt upgrade -y && sudo apt dist-upgrade -y to make sure your system is up to date, and then sudo apt install update-manager-core -y, followed by setting the Prompt to lts in /etc/update-manager/release-upgrades. Finally, sudo do-release-upgrade -d, reboot, and verify with lsb_release -a. You can also follow the GUI method by following the above-mentioned steps.