AlmaLinux 10 is a community-based and enterprise-level Linux distribution that is a downstream replica of Red Hat Enterprise Linux (RHEL). User account management is one of the most essential administrative functions on any Linux server.
This step-by-step tutorial describes all things you must know about AlmaLinux 10 user management – adding and assigning users, assigning groups, setting passwords, modifying account properties, and safely deleting users at the command line. As a system administrator or a beginner to Linux, this tutorial will equip you with the knowledge to handle user accounts in AlmaLinux 10 with ease.
Table of Contents
- Importance of User Management in AlmaLinux 10
- Understanding User Types in AlmaLinux
- Prerequisites
- Creating a new user in AlmaLinux 10
- Setting and Changing user passwords
- Create a User with Specific Options
- Add a User to a Group in AlmaLinux 10
- View User Information
- Modify an Existing User Account
- Locking and unlocking a user account
- Deleting a User in AlmaLinux 10
- Managing Users via /etc/passwd and /etc/shadow
- Creating System Users and Service Accounts
- Conclusion
Importance of User Management in AlmaLinux 10
Correct user management in AlmaLinux 10 assists you in enforcing the principle of least privilege, that is, each user or service receives just the permissions necessary to perform its job – no more. This saves you from the attack on your system and the chances of accidental or malicious damage. To any organization that uses AlmaLinux 10 in production, the ability to create users, allocate the appropriate permissions, and delete stale accounts will not be an option, but a security requirement.
The commands in this guide are applicable whether you are operating a single VPS, a bare-metal server, or a fleet of cloud instances. The useradd, usermod, userdel, passwd, and groupadd are common to all RHEL-based distros, and AlmaLinux 10 relies on these commands, making this knowledge highly portable.
Understanding User Types in AlmaLinux 10
There are three major types of users, which are present on an AlmaLinux 10 system, before you begin creating or deleting users.
– Root User (UID 0): The root user is the superuser who has unlimited access to all files, processes, and commands on the system. In production environments, direct root login is not recommended, and instead, sudo-based access should be used to audit and enhance security.
– Regular (Normal) Users: These are human users who are created to be used in interactive login. On AlmaLinux 10, their UID normally begins at 1000. Every ordinary user is assigned a home directory in the path/home/username and a default login shell.
– System Users (Service Accounts): Service accounts are automatically generated by software packages or created manually by administrators to execute system services, including web servers, databases, and daemons. UIDs below 1000 are typically used by system users, who do not have a home directory, nor have a valid login shell, and thus cannot log in interactively.
This difference is critical when you run useradd with or without the flag system, and when you issue UIDs and GIDs when creating accounts.
Prerequisites
To follow this tutorial, you will require the following:
- An operational AlmaLinux 10 server or virtual machine.
- A sudo user account, or root access.
- General knowledge of the Linux terminal.
To identify the version of AlmaLinux, run:
|
cat /etc/almalinux-release |
|---|


To check whether you have sudo access, run:
|
sudo whoami |
|---|


When the output gives root, then your sudo settings are correct, and you are all set to move on.
Creating a New User in AlmaLinux 10
The most common command used to create a new user account in AlmaLinux 10 is useradd. This command will not only create the user account but will also configure a home directory, assign a UID and GID, and default shell settings, all in one command.
Basic Syntax
|
sudo useradd username |
|---|
Example: Creating a User Named “john”
|
sudo useradd john |
|---|


This command will create a user named john with the following defaults:
- Home directory: /home/john (created automatically)
- Default shell: /bin/bash
- UID: Generated automatically (UID number next)
- Primary group: A new group of john is also formed.
Verify the User Was Created
Once the user has been created, confirm that the account has been created by viewing the /etc/passwd file:
|
grep john /etc/passwd |
|---|


Every field in this output has its fields separated by colons, and the following fields, in that order, represent: username, password placeholder, UID, GID, GECOS (comment), home directory, and login shell.
Setting and Changing User Passwords
A new user account in AlmaLinux 10 will not be given a password, implying that the account will be locked and the user will not be able to log in. Once you have created the account, you will be required to set a password.
Create a password for a new user.
|
sudo passwd john |
|---|

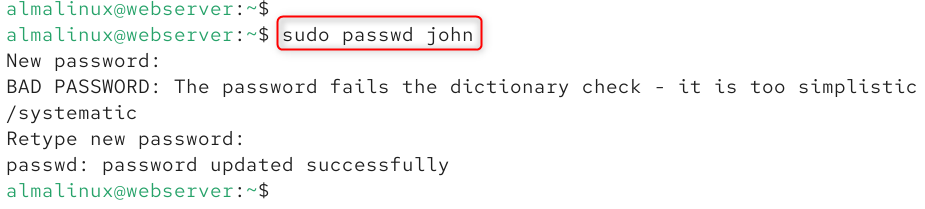
Entering the new password will be requested. Changing the user password of user john.
Here, passwd: all authentication tokens updated successfully.
Change Your Password
The user does not need to be the root user to change his/her password, which can be done by simply running:
|
passwd |
|---|


Force a User to Change Password at Next Login
As an administrator, you might desire to make a user change his/her password on the first login. Enter the -e (expire) flag, passwd command:
|
sudo passwd -e john |
|---|


Once this command has been run, john will be advised to change their password on the next login into the system.
Create a User with Specific Options in AlmaLinux 10
The useradd command has numerous helpful flags that enable you to tailor the account during its creation. With these choices, it saves more time than the first option, which creates the account and subsequently updates it.
Create a User with a Comment (Full Name)
|
sudo useradd -c “John Smith” johnson |
|---|


The -c option includes a comment (usually the complete name of the user) that is saved in the GECOS field of /etc/passwd and can be helpful in identifying a user with a multi-user system.
Create a User with a Custom Home Directory
|
sudo useradd -d /opt/joh joh |
|---|


This makes the user joh whose home directory is not /home/joh but rather /opt/joh.
Create a User with a Specific UID
|
sudo useradd -u 1500 john11 |
|---|


Using a particular UID can be handy when it is important to have a uniform UID across various servers or when connecting to LDAP or NFS systems.
Create a User with an Expiry Date
|
sudo useradd -e 2026-12-31 john2 |
|---|


This will cause the account to automatically expire on December 31, 2026. The user will not be able to log in after the expiry date without an administrative intervention. This feature is best suited to make temporary accounts of contractors or interns.
Create a User with Multiple Options at Once
|
sudo useradd -c “John Smith” -d /home/john3 -s /bin/bash -u 1800 -e 2026-12-31 john6 |
|---|


The use of two or more flags within a command is an effective and clean method of creating a user in AlmaLinux 10.
How to Add a User to a Group in AlmaLinux 10
Linux Permissions in Linux. Groups enable you to give permission to more than one user. As an illustration, a user is added to the wheel group, where the user is given sudo privileges on AlmaLinux 10.
Add a User to the wheel Group (Grant sudo Access)
|
sudo usermod -aG wheel john |
|---|


The -aG flag implies that you are adding to a group -a should not take the user out of the groups he already has and place him in the new one. Always -a -G unless you mean to substitute all the supplementary groups.
Add a User to Multiple Groups at Once
|
sudo usermod -aG wheel john |
|---|


This makes john a member of three groups at once: wheel.
Create a New Group
|
sudo groupadd developers |
|---|


List All Groups a User Belongs To
|
groups john |
|---|


Or for more detailed output, including GIDs:
|
id john |
|---|


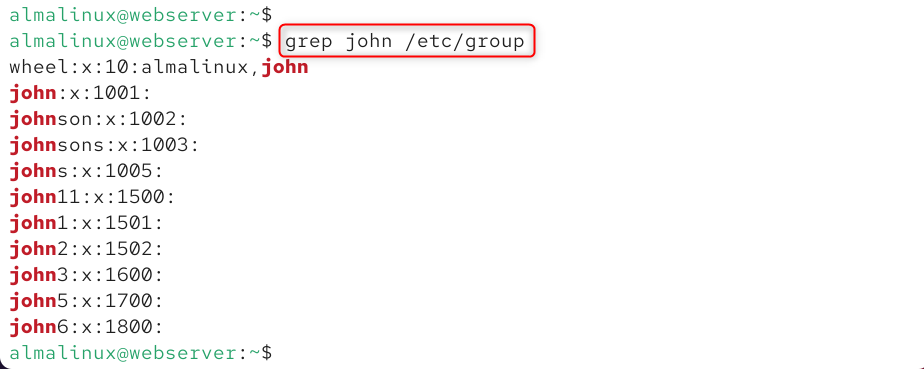
Verify Group Membership from /etc/group.
|
.grep john /etc/group |
|---|

How to View User Information in AlmaLinux 10
AlmaLinux 10 offers a number of commands to view the user account information. These are needed in auditing, troubleshooting, and ensuring that accounts are set up.
View Basic User Info
|
id john |
|---|

View the /etc/passwd Entry.
|
.grep john /etc/passwd |
|---|

View Password and Aging Information
|
sudo chage -l john |
|---|

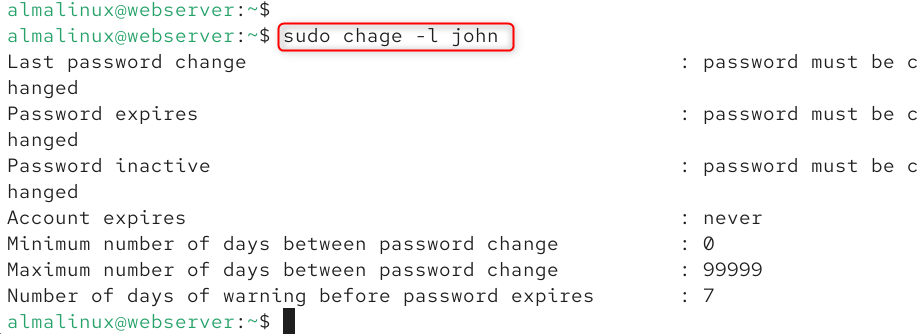
This command shows the account aging information, such as the account’s last password, password expiry date, account expiry date, and days of inactivity before the account is locked.
List All Users on the System
|
cut -d: -f1 /etc/passwd |
|---|

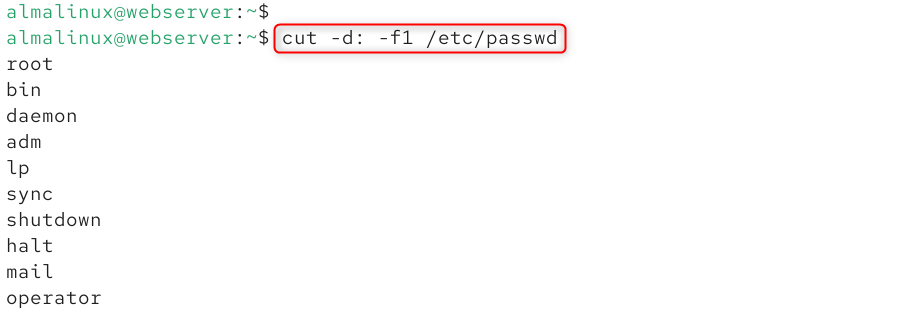
This command will extract and list only the usernames in /etc/passwd, which will yield you a clean list of all user accounts (and system accounts) on the AlmaLinux 10 server.
List Only Human (Interactive) Users
|
awk -F: ‘$3 >= 1000 && $3 != 65534 {print $1}’ /etc/passwd |
|---|

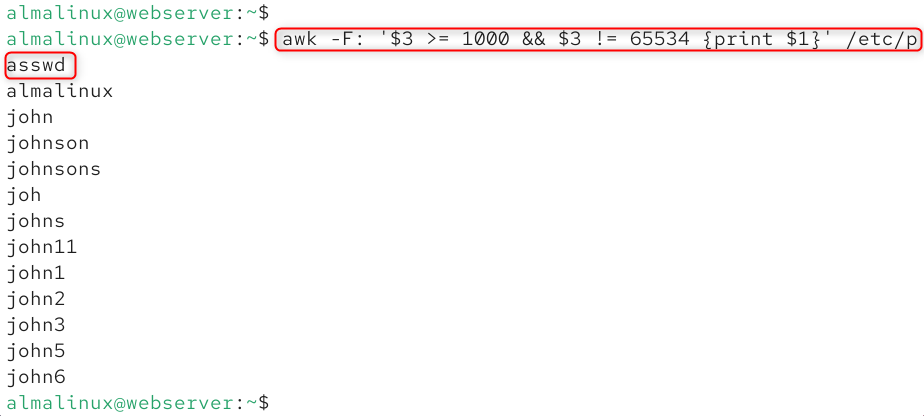
It is a command that restricts the /etc/Passwd to only reveal accounts whose UID is 1000 or higher, which is equivalent to that of normal human user accounts within AlmaLinux 10.
How to Modify an Existing User Account in AlmaLinux 10
The usermod command modifies the attributes of an already existing user account, without the need to delete and create a new account.
Change a User’s Login Name
|
sudo usermod -l newusername oldusername |
|---|


This changes the name of the login without changing the home directory. In case it is necessary, you have to rename the home directory independently.
Change a User’s Home Directory
|
sudo usermod -d /new/home/john -m henry |
|---|


The -m flag tells usermod to move the contents of the old home directory to the new location.
Change a User’s Comment (Full Name)
|
sudo usermod -c “Johnathan Smith” john1 |
|---|


Change a User’s UID
|
sudo usermod -u 1900 john1 |
|---|


Set an Account Expiry Date on an Existing Account
|
sudo usermod -e 2027-06-30 john1 |
|---|


Remove Account Expiry (Make Account Permanent)
|
sudo usermod -e “” john1 |
|---|


Entering a blank string as -e will enable the removal of the expiry date to make the account permanent.
Locking and Unlocking a User Account
There are occasions when you require temporarily disabling a user account without necessarily deleting it, such as when an employee is on long leave or when there are suspicions that a security incident has occurred.
Lock a User Account
|
sudo usermod -L john1 |
|---|


Alternatively, use the passwd command:
|
sudo passwd -l john1 |
|---|


Locking the user account will add an exclamation mark to the password hash in /etc/shadow, which will not allow password-based authentication but leave the account and all its data unchanged.
Verify Lock Status
|
sudo passwd -S john1 |
|---|


The output will show LK (locked) or PS (password set/active) in the second field, letting you quickly confirm the current state of the account.
Deleting a User in AlmaLinux 10
The userdel command is used to delete a user account in AlmaLinux 10. You can simply delete the account, or you can delete the account and its home directory and mail spool.
Delete a User Account (Keep Home Directory)
|
sudo userdel john1 |
|---|


This will take the user out of /etc/passwd, /etc/shadow, and /etc/group, but does not take the home directory, /home/john, and its contents. This will be the best method in case you might need to access the user’s data after deleting the account.
Delete a User Account and Remove Home Directory
|
sudo userdel -r john2 |
|---|


The -r option deletes the user’s home directory, mail spool, and account. This flag should be used when you are sure that the user no longer needs his/her data.
Find Files Owned by a Deleted User
After deleting a user, files they owned will show their former UID (a number) instead of a username in the ls -l output. These orphaned files can be found with:
|
sudo find / -nouser -print 2>/dev/null |
|---|

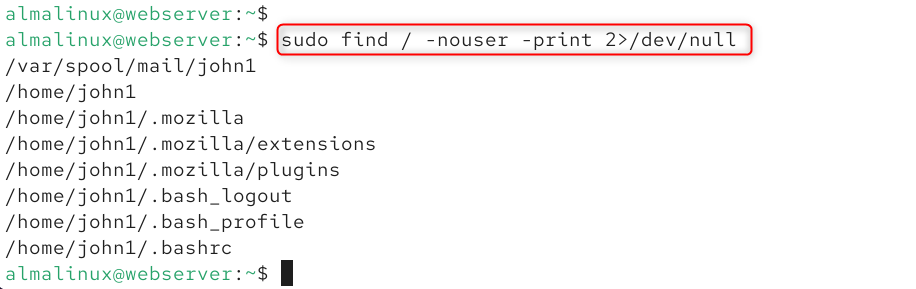
Another step to take in cleaning up after the deletion of an account is to review and reassign or remove these orphaned files.
Managing Users via /etc/passwd and /etc/shadow
Learning the important configuration files behind AlmaLinux 10 user management provides you with more control and assists in troubleshooting.
The /etc/passwd File
Basic account information is placed in the /etc/Passwd file. Every line is one user account with seven fields that are separated by a colon:
|
username:x:UID:GID:comment:home_directory:login_shell |
|---|
The x in the second field means that the encrypted password is in /etc/shadow (readable only by root), rather than in this file.
The /etc/shadow File
The passwords and account aging data are encrypted and stored in the/etc/ shadows file. There are nine fields in every line separated by a colon:
|
username:encrypted_password:last_change:min:max:warn:inactive:expire:reserved |
|---|
These files are highly discouraged as a direct way to edit, but rather the accepted tools (useradd, usermod, passwd, etc.), since the occurrence of a syntax error in either of the files can put all the users in the system (including root) out of business.
The /etc/group File
There is a group definition stored in the /etc/group file:
|
groupname:x:GID:member1,member2,member3 |
|---|
Add, modify, and delete groups with groupadd, groupmod, and groupdel.
Creating System Users and Service Accounts
Non-login accounts used by services and daemons are called system users. They are set up with UIDs less than 1000 and should not have a valid shell or home directory unless required to do so.
Create a System User
|
sudo useradd –system –no-create-home –shell /sbin/nologin myservice |
|---|


Breaking down this command:
- The system will assign a UID less than 1000, and the account will be a system account.
- home creation is bypassed by no-create-home.
- shell /sbin/nologin allocates a shell that immediately quits in case any person tries to log on interactively, which in effect prevents the process of login, and the service can still be run under this account.
This is the common and safe way of establishing service accounts on AlmaLinux 10 and other distributions based on RHEL.
Conclusion
To manage user accounts in AlmaLinux 10, you primarily use terminal commands with root or sudo privileges. To create a new user, execute sudo useradd -m username, where the -m flag ensures a home directory is automatically generated. Immediately follow this by setting a password with the sudo passwd username command, as new accounts are locked by default.
Finally, to delete a user, use sudo userdel username; adding the -r flag (e.g., sudo userdel -r username) is recommended to permanently remove the user’s home directory and mail spool along with the account. For those who prefer a graphical interface, these tasks can also be performed via the Settings > Users menu in the GNOME Desktop environment.