Running AlmaLinux 10 inside VirtualBox is one of the easiest ways to learn Linux administration, test server configurations, or build a safe sandbox for development work without touching a physical machine. This guide walks through the full process of installing AlmaLinux 10 on VirtualBox on Windows, macOS, or Linux hosts. You will download the correct ISO, create and configure the virtual machine, complete the AlmaLinux installer, and finish with the guest additions that make the VM actually pleasant to use day-to-day.
Table of Content
- Why Install AlmaLinux 10 on VirtualBox?
- What You Will Need Before Installing AlmaLinux 10 on VirtualBox
- Easiest Steps to Install AlmaLinux 10 on VirtualBox
- Step 1: Download the AlmaLinux 10 ISO
- Step 2: Create a New Virtual Machine in VirtualBox
- Step 3: Allocate Hardware Resources
- Step 4: Enable Virtualization Features Before First Boot
- Step 5: Boot the VM and Start the AlmaLinux Installer
- Step 6: Complete the Installation and Reboot
- Step 7: Install VirtualBox Guest Additions
- Step 8: Update the System
- Step 9: Enable Shared Folders (Optional but Useful)
- Common Problems and How to Fix Them
- Conclusion
- Frequently Asked Questions
Why Install AlmaLinux 10 on VirtualBox?
Installing AlmaLinux OS 10 on VirtualBox lets you safely explore and test a free, enterprise-grade, Red Hat Enterprise Linux (RHEL)-compatible operating system directly on your current computer without risking your main system’s stability.
This setup is ideal for developers, students, or system administrators who want to practice Linux administration, deploy enterprise server environments, or test software compatibility in an isolated, flexible virtual workspace.
What You Will Need Before Installing AlmaLinux 10 on VirtualBox
Before opening VirtualBox, gather these three things.
A host machine with virtualization enabled. Most modern CPUs support this, but it sometimes needs to be turned on manually in your BIOS or UEFI settings under a name like Intel VT-x or AMD-V. If VirtualBox refuses to start a 64-bit VM later in this guide, this setting is almost always the reason.
At least 4 GB of free RAM and 25 GB of free disk space. AlmaLinux 10 itself can run on less, but giving the VM enough headroom makes the whole experience noticeably smoother, especially if you install a desktop environment.
The current version of VirtualBox installed on your host. As of mid 2026, the stable release is VirtualBox 7.2.x. Download it directly from the official Oracle VirtualBox site for your operating system and install it using the default options.
Easiest Steps to Install AlmaLinux 10 on VirtualBox
You can install AlmaLinux 10 on Oracle VM VirtualBox by creating a new virtual machine, attaching the downloaded ISO file, and running through the Anaconda installer.
Step 1: Download the AlmaLinux 10 ISO
Go to the official AlmaLinux download page and choose your image. AlmaLinux currently offers three ISO types.

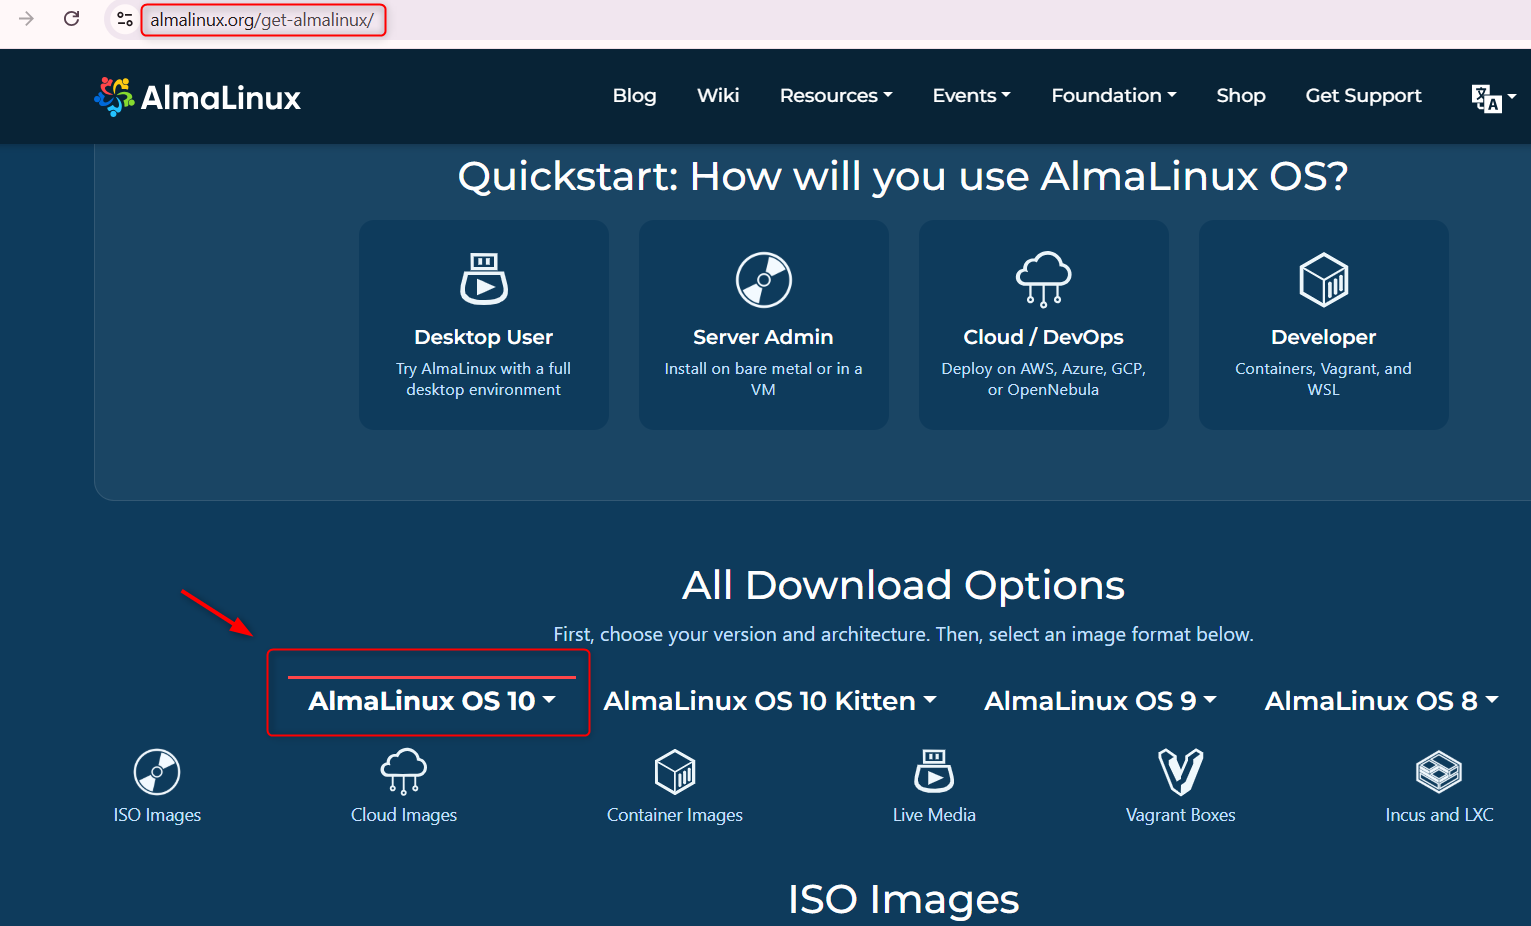
DVD ISO includes every package needed for a full offline install. This is the simplest choice for most people following this guide and typically runs around 10 GB.
Minimal ISO is a smaller, lighter image intended for lean server builds, roughly 2 GB. You will need an internet connection during setup to pull additional packages.
Boot ISO is a tiny network installer that downloads everything during setup. Only worth using if bandwidth is not a concern and you want the absolute latest packages at install time.
For a first VirtualBox install, the DVD ISO is the easiest path.
Note: Compare the output against the checksum listed on the download page.
Step 2: Create a New Virtual Machine in VirtualBox
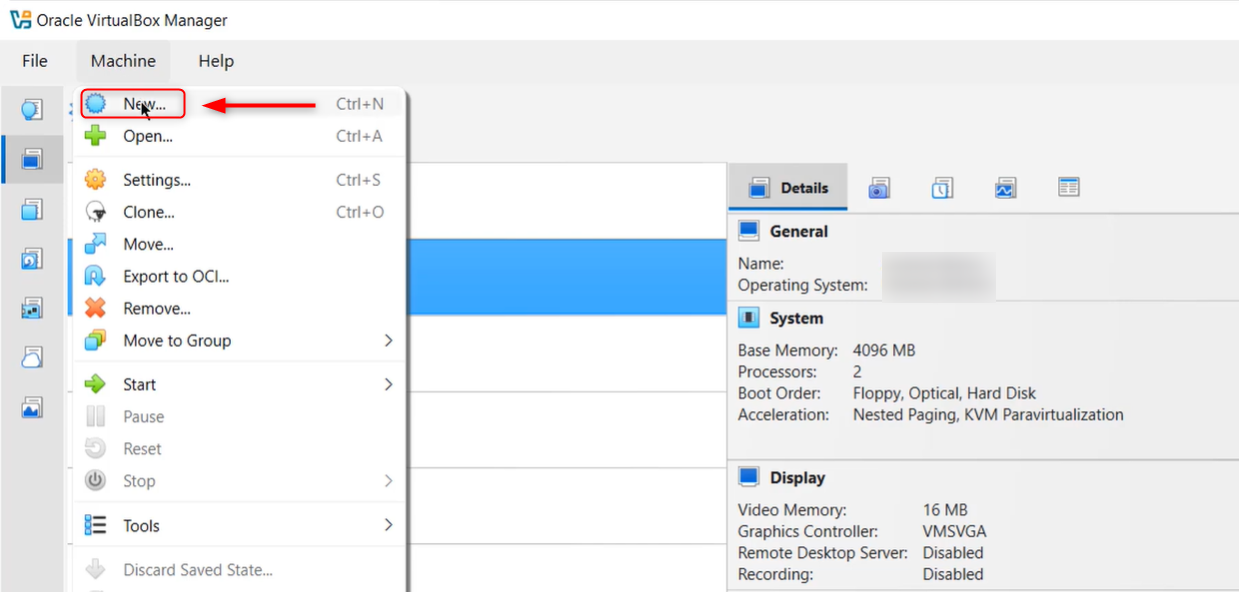
Open VirtualBox and click New.

Give the machine a clear name such as “almalinux101vmo”. VirtualBox will usually detect the type and version automatically once it sees “AlmaLinux” in the name, setting Type to Linux and Version to Red Hat (64-bit). If it does not auto-detect, select these manually. AlmaLinux is binary compatible with RHEL, so the Red Hat profile is the correct match even though it is a separate distribution.

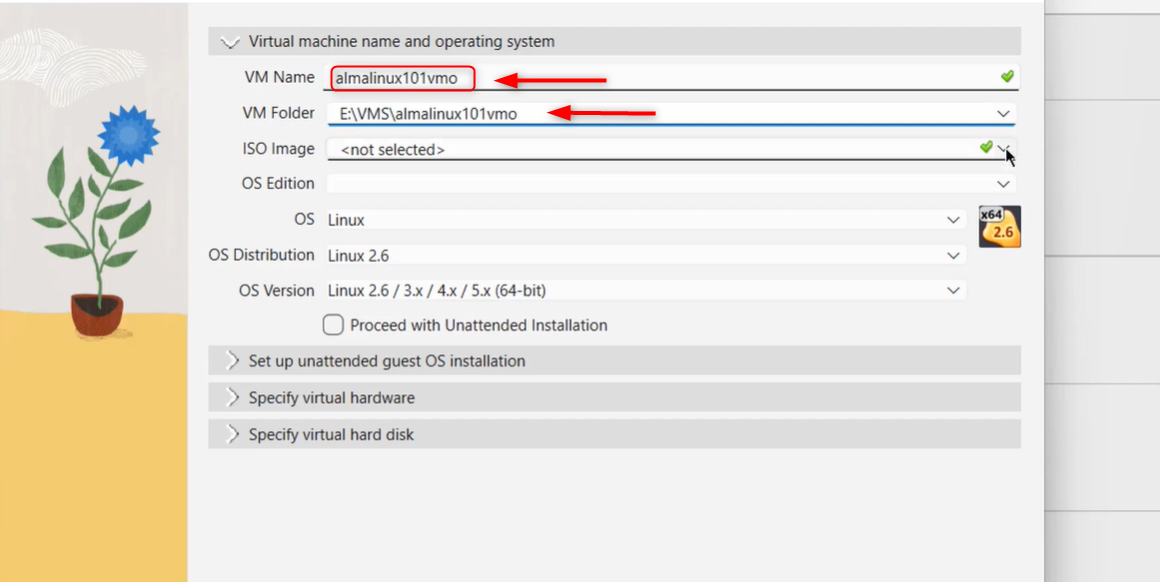
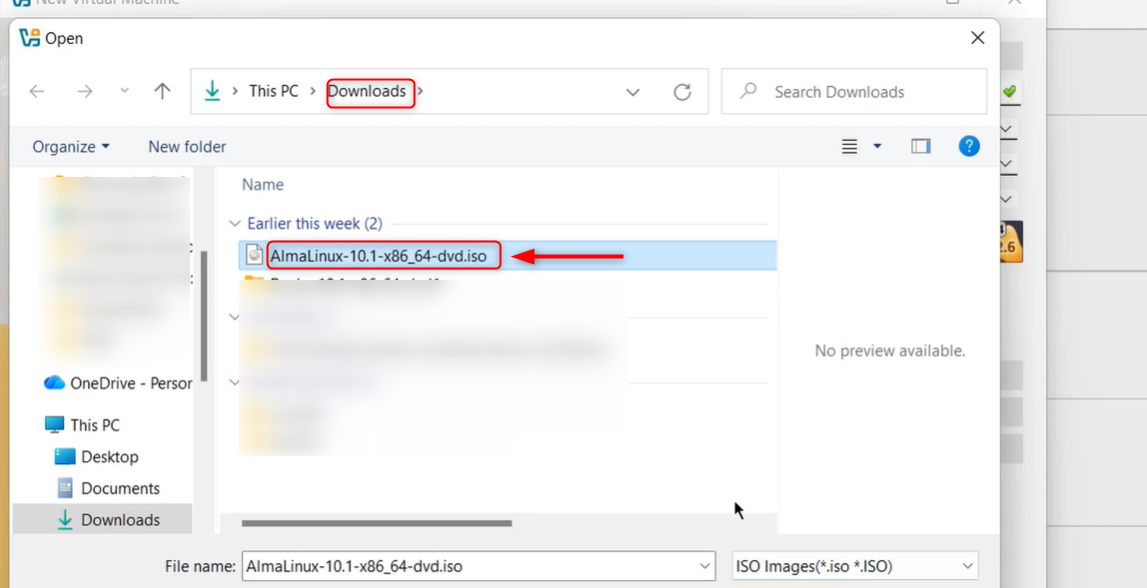
On the next screen, point ISO Image to the file you downloaded in Step 1.

Step 3: Allocate Hardware Resources
This is the step most new users underallocate, which leads to a sluggish VM later.
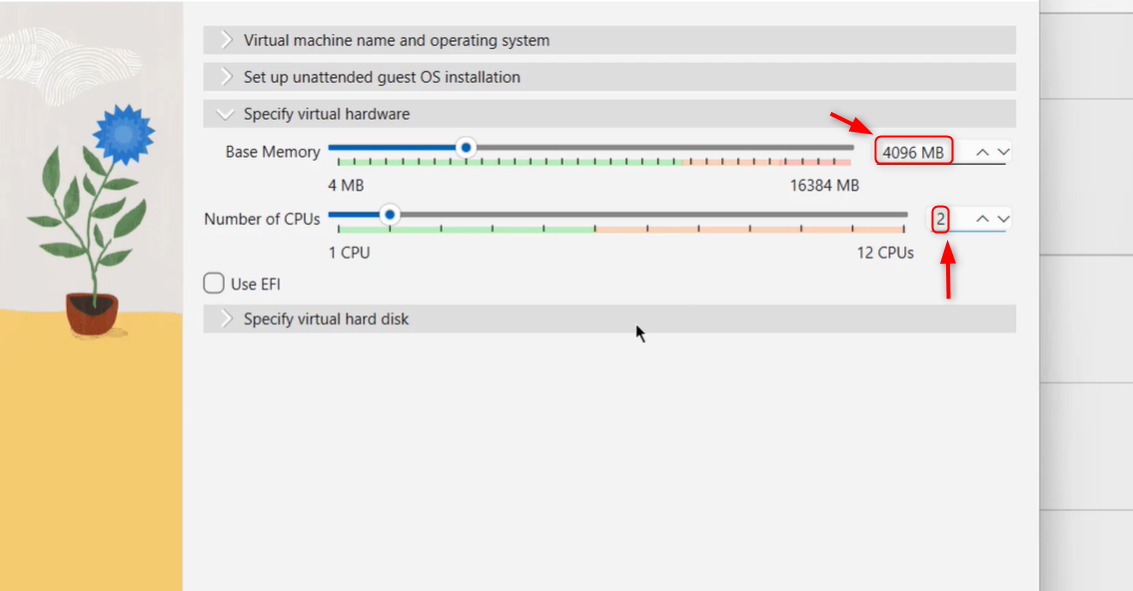
Memory (RAM): Set this to at least 4096 MB. If your host has 16 GB or more, 6144 MB or 8192 MB gives a noticeably better experience, especially with a graphical desktop.
Processors: Assign at least 2 CPU cores. 4 cores is a good target if your host has 8 or more available.

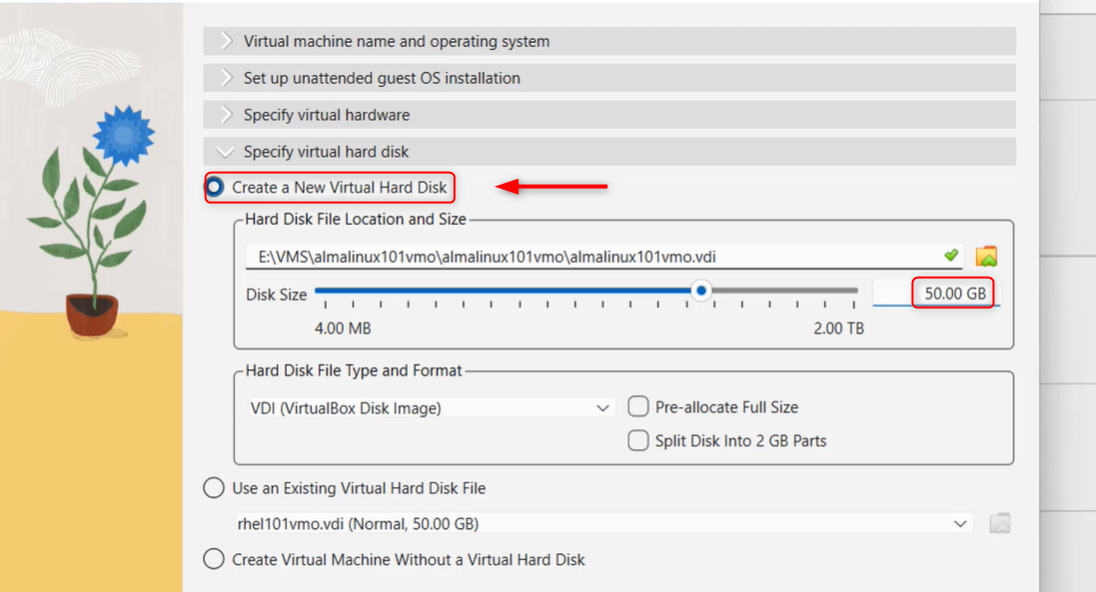
Hard disk: Choose Create a New Virtual Hard Disk and set the size to at least 50 GB, using the dynamically allocated option so the file only grows as you actually use space. VDI is the right format for a VirtualBox-only setup.

Review the summary screen and click Finish to create the machine.
Step 4: Enable Virtualization Features Before First Boot
Before starting the VM, open its Settings and check a few options that make a real difference.

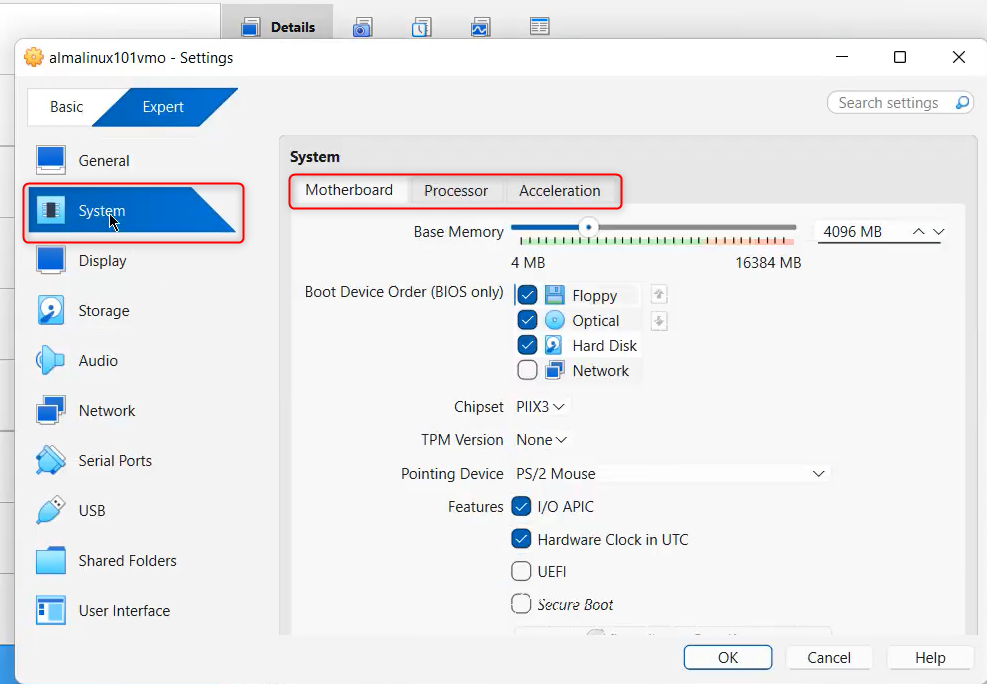
Under System > Processor, enable Enable PAE/NX.
Under System > Acceleration (or under the Processor tab depending on your VirtualBox version), confirm that Enable Nested VT x/AMD V is checked if your host CPU supports it. This matters if you plan to run containers or nested virtualization tools inside the guest later.
Under Display, increase Video Memory to at least 64 MB if you plan to use a graphical desktop environment, and enable 3D acceleration for smoother rendering.
Under Network, the default NAT mode is fine for basic internet access inside the VM. If you want to reach the VM directly from your host, for example to test a web server running inside it, switch to Bridged Adapter instead so the VM gets its own address on your local network.
Step 5: Boot the VM and Start the AlmaLinux Installer
Select your new VM and click Start.

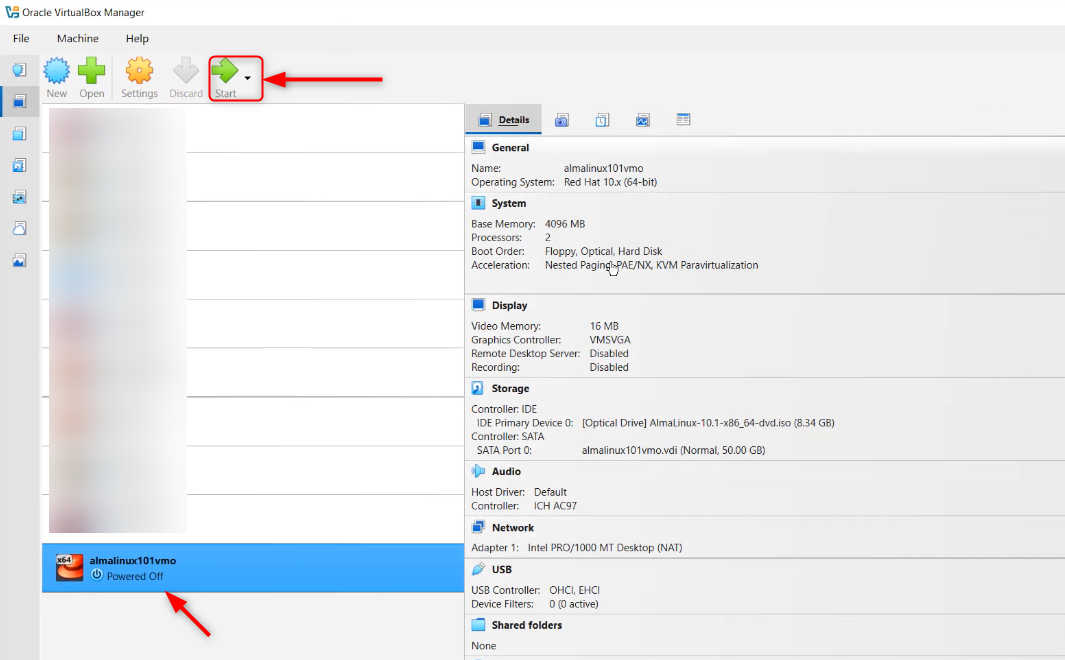
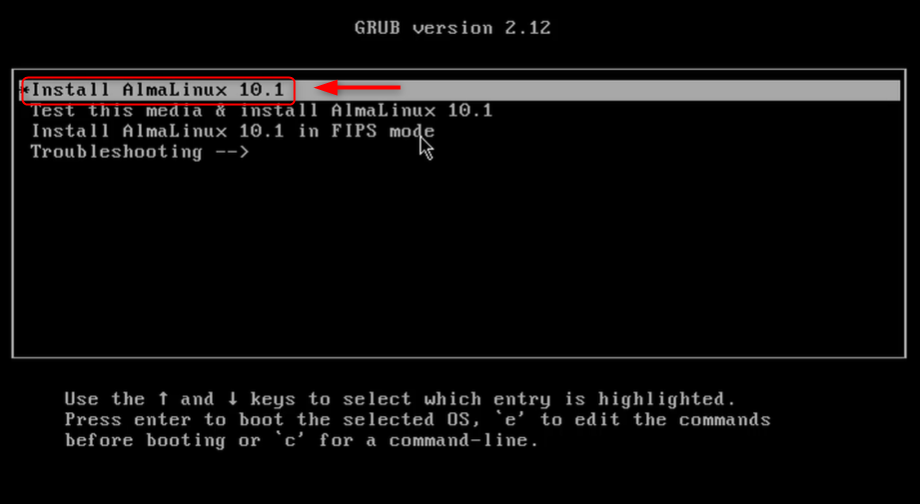
It will boot from the mounted ISO into the AlmaLinux installer, powered by Anaconda, the same installer used across RHEL and its derivatives.

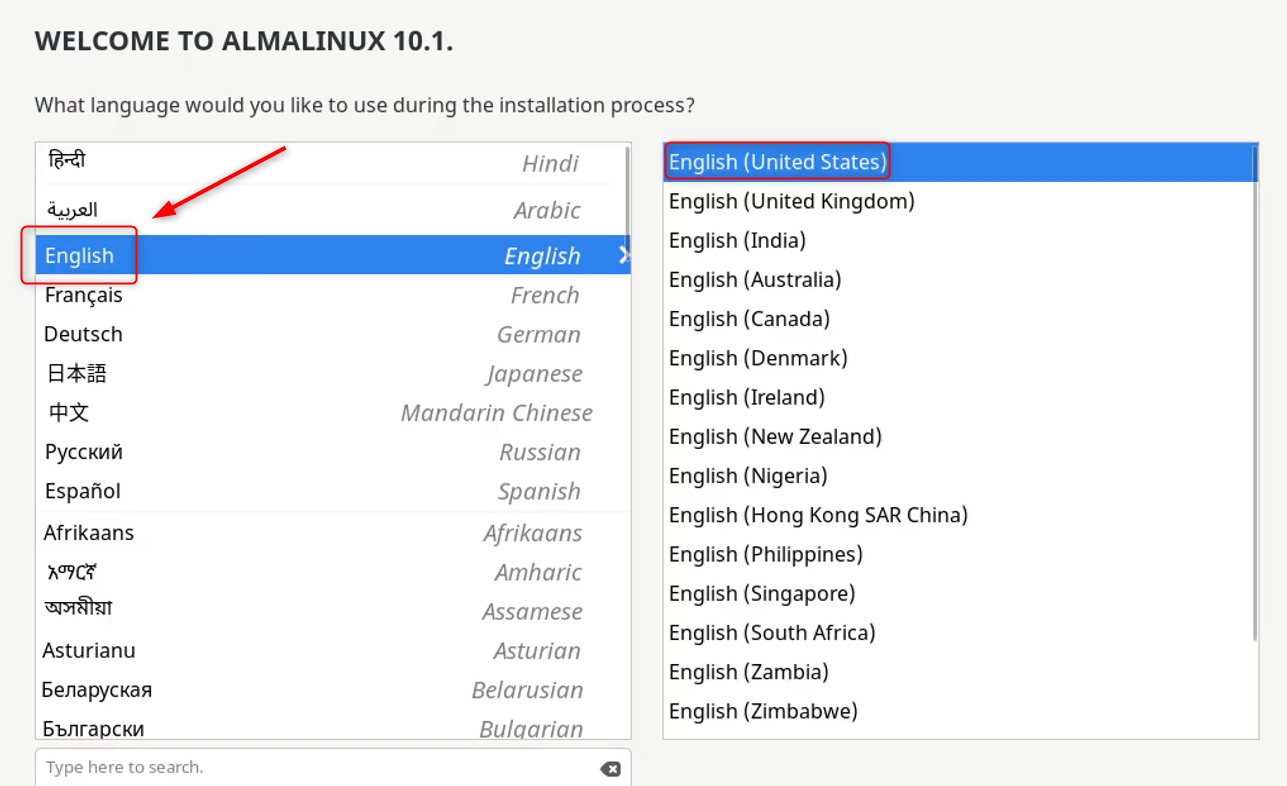
Choose your language and click Continue.

On the main installation summary screen, work through each section.

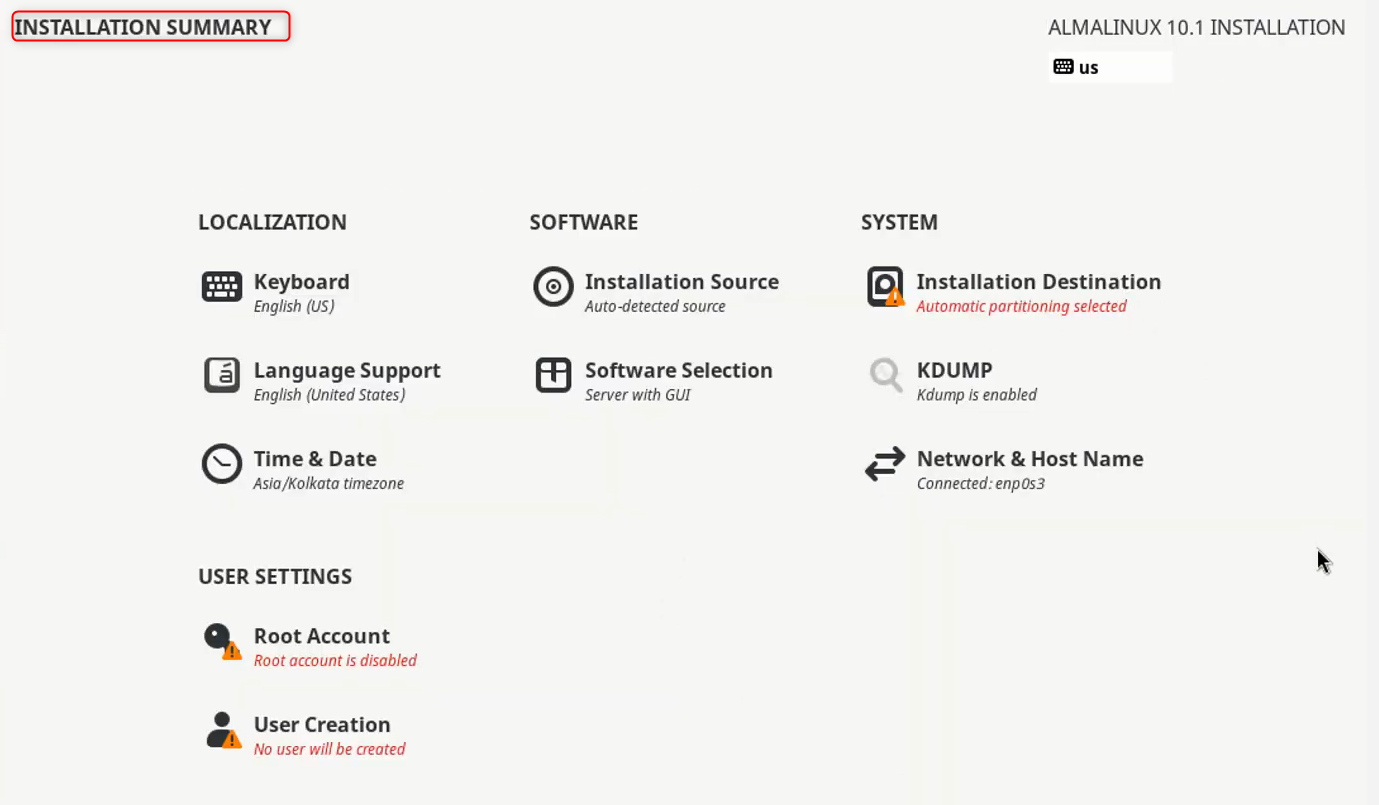
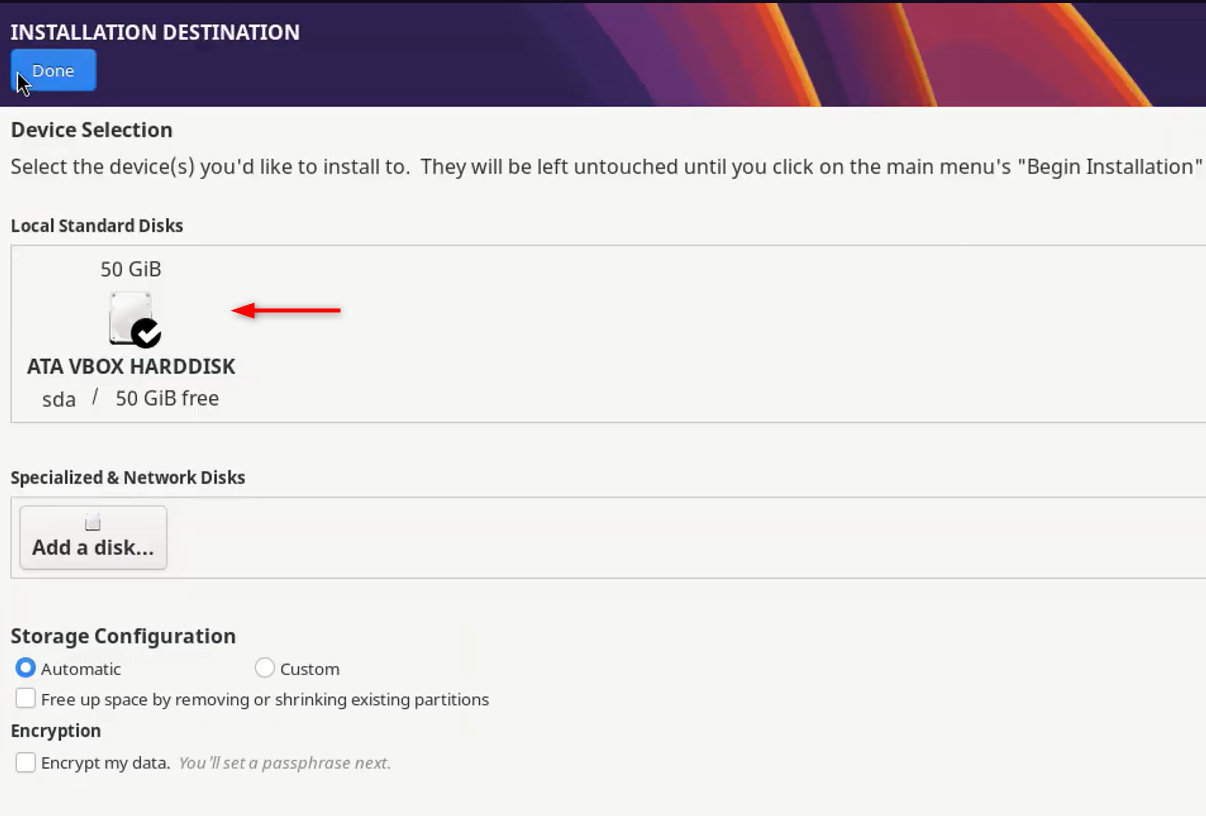
Installation Destination: Select the virtual disk you created and choose automatic partitioning unless you have a specific layout in mind. For a learning VM, automatic partitioning is the right choice.

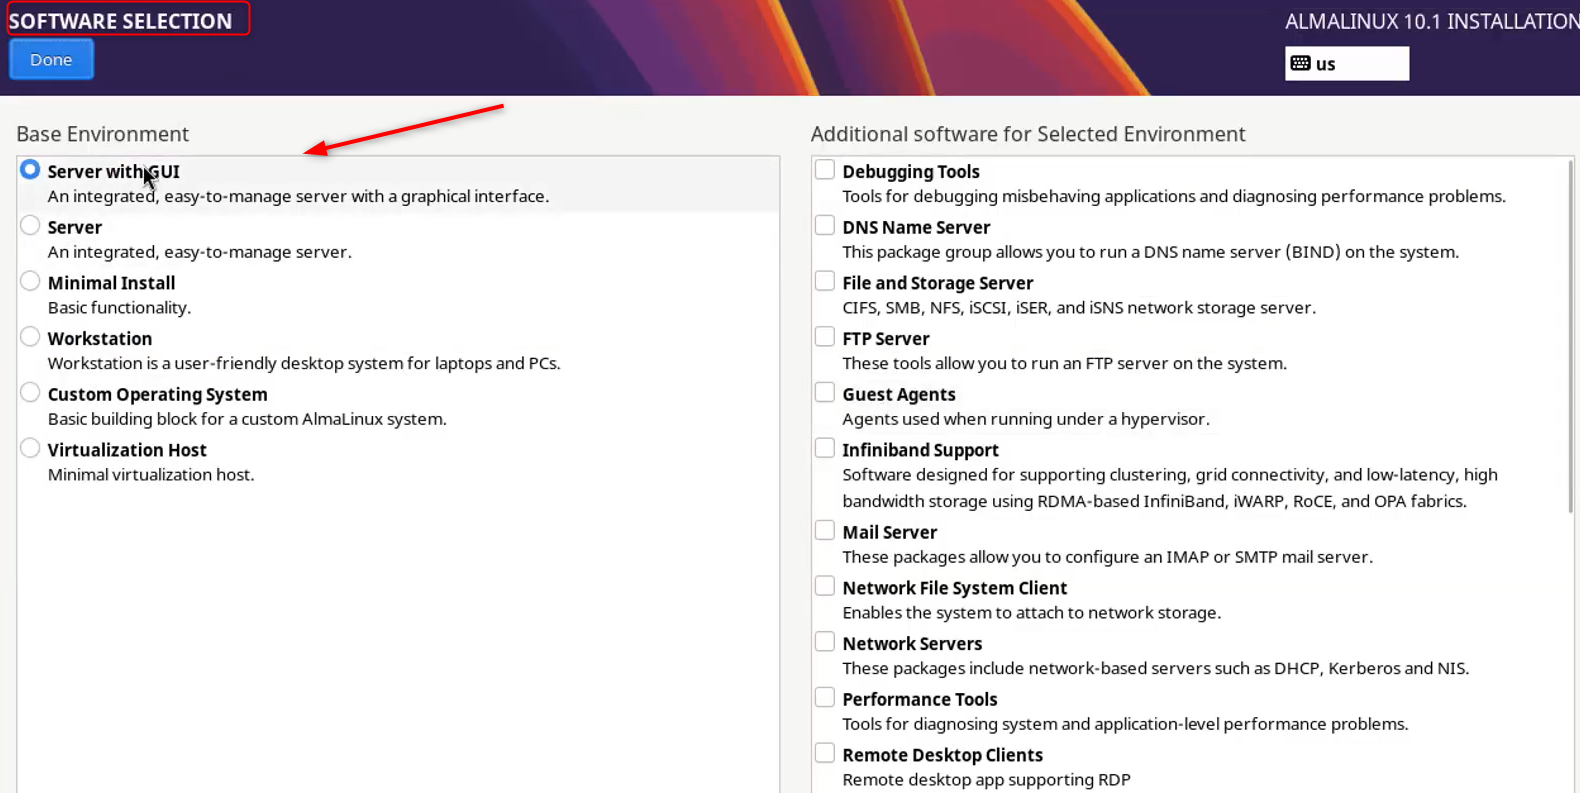
Software Selection: Choose Server with GUI if you want a desktop environment to work in visually, or Minimal Install if you plan to manage everything through the terminal, which is common practice for anyone learning server administration.

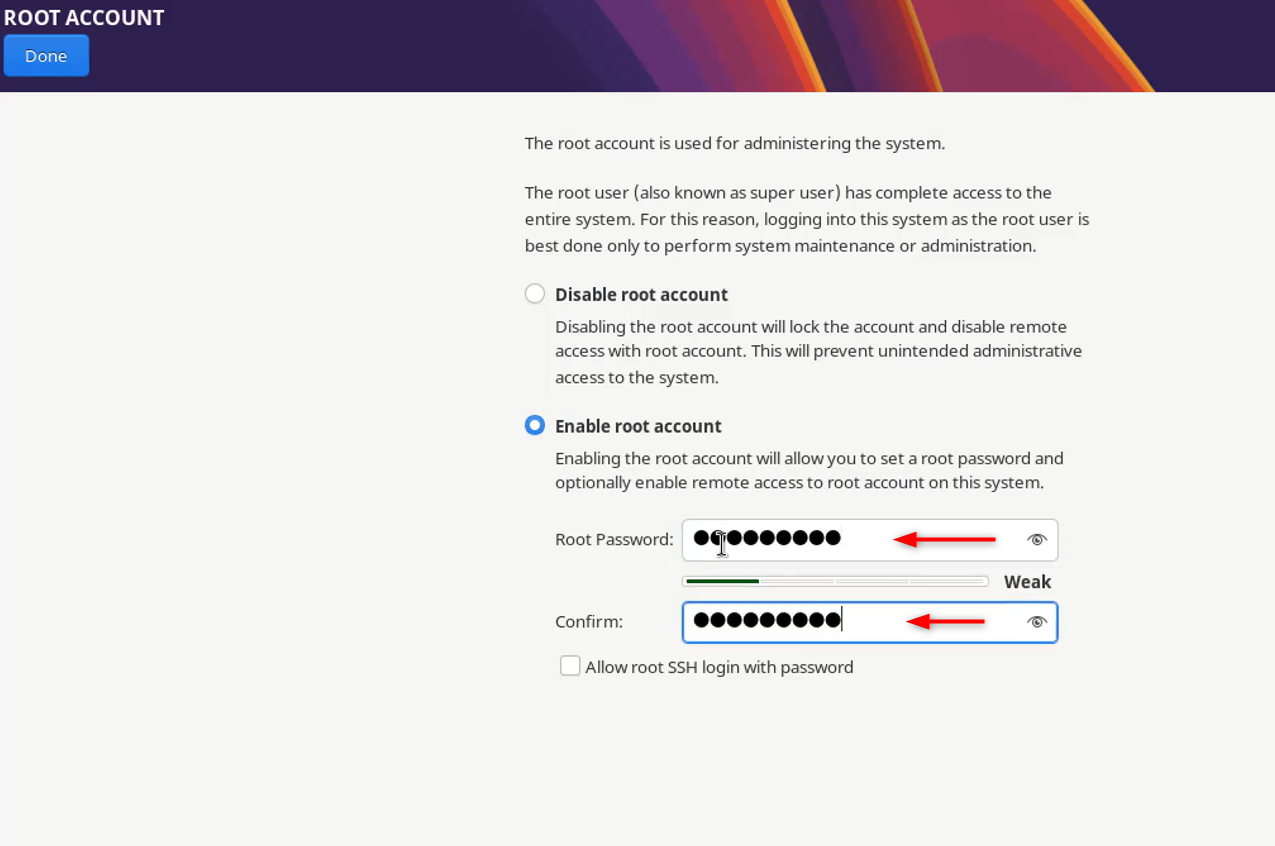
Root Password and User Creation: Set a root password and create a regular user account with administrator privileges. Avoid using root as your daily login even inside a test VM. Building good habits here carries over directly to production servers later.

Once every section shows a green checkmark, click Begin Installation.
Step 6: Complete the Installation and Reboot
The installer copies and configures packages in the background, which typically takes 10 to 20 minutes depending on your host hardware.

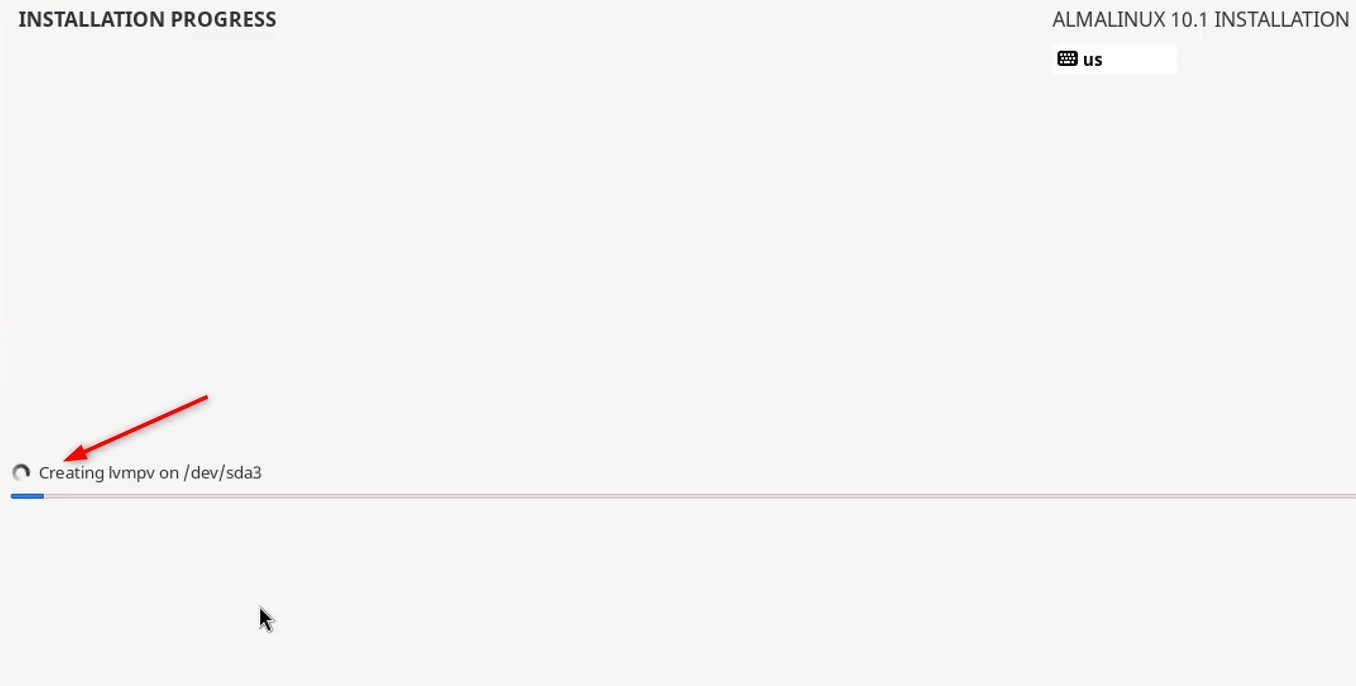
When it finishes, click Reboot System.
VirtualBox may try to boot from the ISO again on restart. If it does, go to Devices > Optical Drives and remove the AlmaLinux ISO, then reboot the VM once more so it boots from the installed disk instead of the installer.

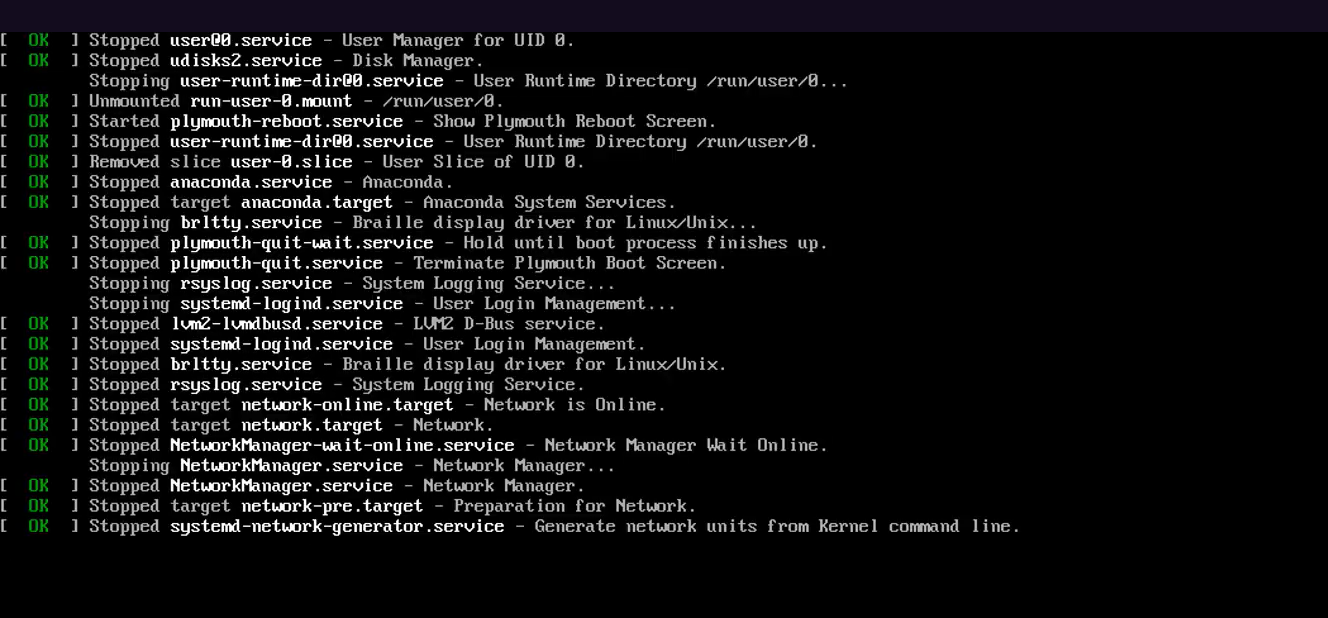
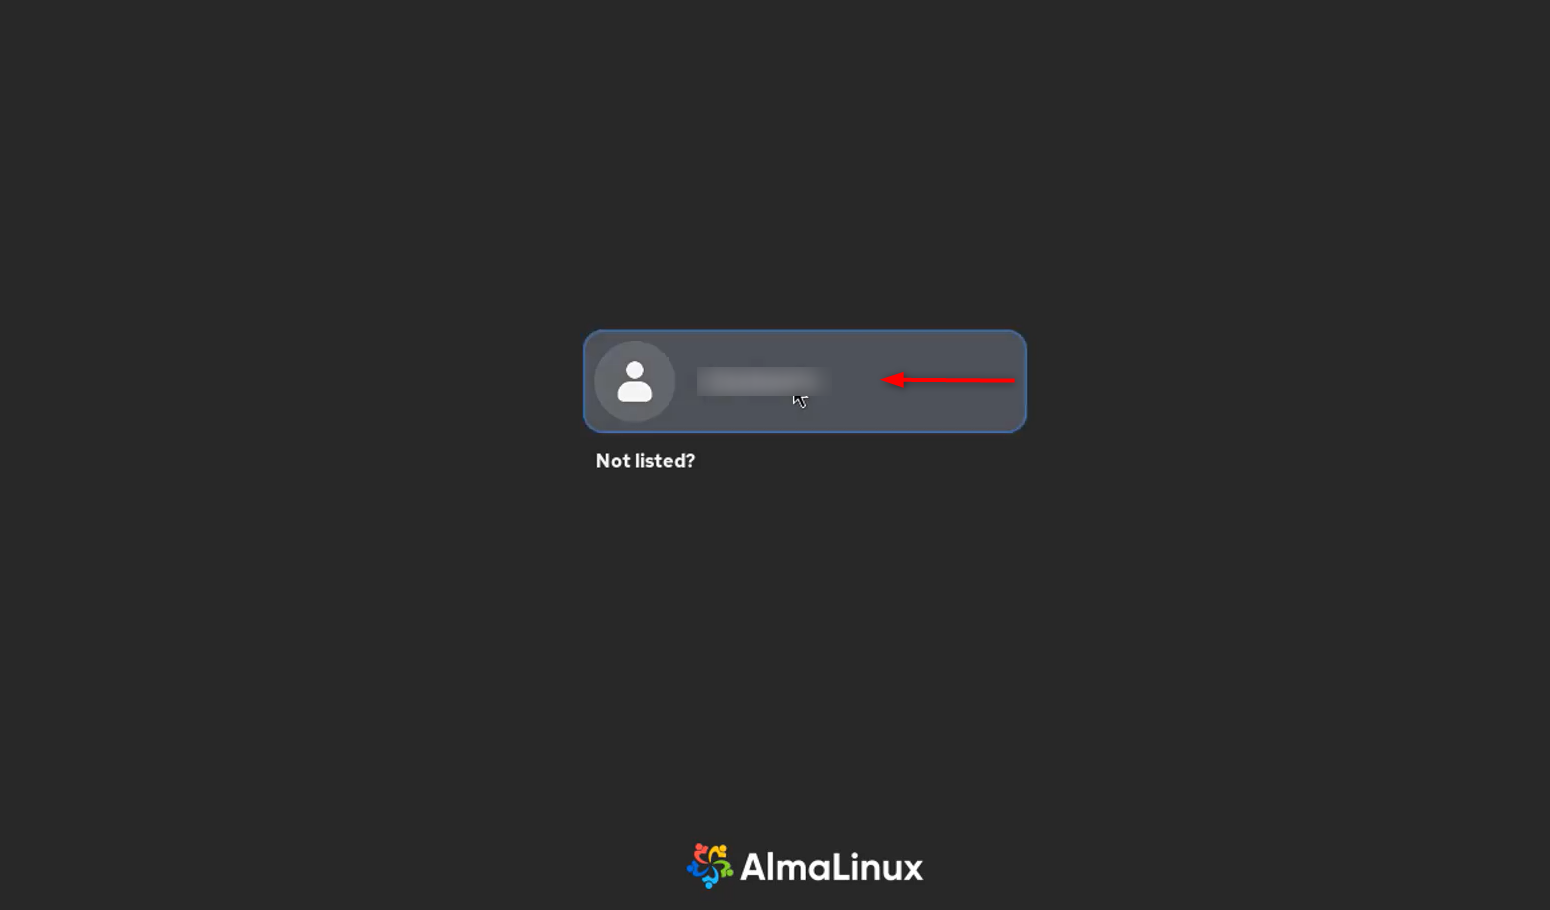
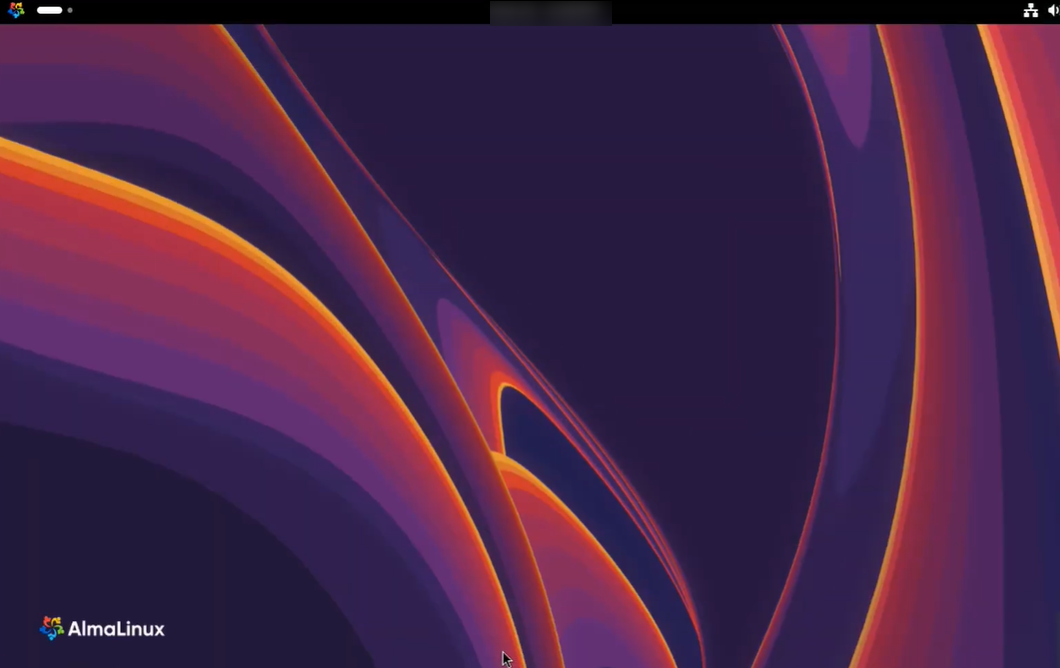
Log in with the user account you created in Step 5.

Step 7: Install VirtualBox Guest Additions
Guest Additions unlock shared clipboard, shared folders, better screen resolution scaling, and smoother overall performance. Without them, the VM works but feels noticeably rougher around the edges.

First, install the packages Guest Additions needs to build kernel modules:
sudo dnf install gcc make perl kernel-devel kernel-headers bzip2 -y |
|---|
In the VirtualBox window menu, click Devices > Insert Guest Additions CD Image. Inside the guest, mount and run it:
sudo mkdir -p /mnt/cdrom sudo mount /dev/cdrom /mnt/cdrom cd /mnt/cdrom sudo ./VBoxLinuxAdditions.run |
|---|
Reboot the VM once the installation finishes:
sudo reboot |
|---|
After rebooting, resizing the VM window should now scale the desktop resolution automatically, and copy-paste between host and guest will work as expected.
Step 8: Update the System
Right after your first login, bring the fresh install fully current:
sudo dnf update |
|---|

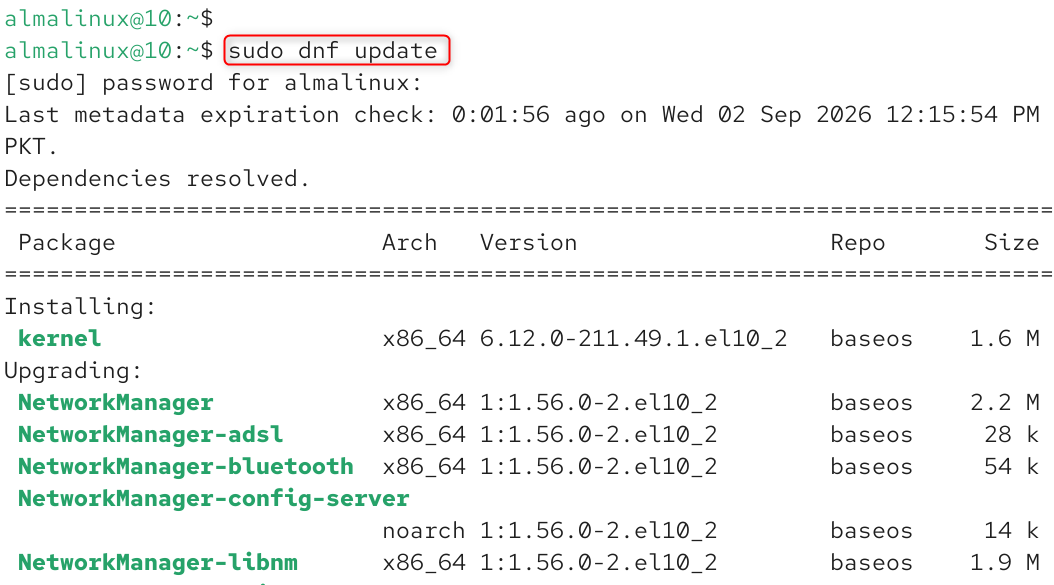
This pulls in any security patches released since the ISO was built and gives you a clean, current baseline to work from.
Step 9: Enable Shared Folders (Optional but Useful)
If you want to move files between your host and the VM without setting up a network share, shared folders are the simplest option.
In VirtualBox, go to Settings > Shared Folders and add a folder path from your host, giving it a name such as hostshare. Inside the guest, mount it:
sudo mkdir -p /mnt/hostshare sudo mount -t vboxsf hostshare /mnt/hostshare |
|---|
To make this persist automatically across reboots, add an entry to /etc/fstab rather than remounting it manually each time.
Common Problems and How to Fix Them
VirtualBox says “VT x/AMD V hardware acceleration is not available.”
Virtualization is disabled in your host’s BIOS or UEFI settings. Restart the host, enter the BIOS setup, and enable Intel VT-x or AMD-V, then save and reboot.
The installer boots, but the screen resolution is stuck very small.
This resolves itself once Guest Additions are installed in Step 7. Until then, resize the window manually or switch to full-screen mode.
Guest Additions installation fails with a missing kernel headers error.
Run sudo dnf install kernel-devel kernel-headers -y again and confirm the version matches your running kernel with uname -r, then retry the Guest Additions installer.
Network inside the VM is not working.
Check that the network adapter is actually enabled under VM Settings and that you chose NAT or Bridged rather than leaving it set to Not Attached.
Conclusion
To install AlmaLinux 10 on VirtualBox, download the ISO file from the official website, open VirtualBox, click New to create a virtual machine, and select Red Hat (64-bit) as the version while allocating at least 2 GB of RAM and 20 GB of disk space.
Next, open the VM settings, go to the Storage menu, and mount the downloaded ISO file into the virtual optical drive. Finally, start the virtual machine, choose Install AlmaLinux 10 from the boot menu, and follow the on-screen installer to configure your language, partitions, root password, and software selection before rebooting into your new OS.
Frequently Asked Questions
1. Is AlmaLinux 10 free to use in VirtualBox?
Yes. AlmaLinux is completely free and open source, and VirtualBox is also free for personal, educational, and most business use under Oracle’s licensing terms. There is no cost to running AlmaLinux 10 as a VirtualBox guest.
2. How much RAM does AlmaLinux 10 actually need in a VM?
A minimal, terminal-only install can run on 2 GB of RAM, but 4 GB is a more comfortable baseline for general use, and 6 GB or more is recommended if you install a full desktop environment with a graphical interface.
3. Why is my AlmaLinux VM running slowly in VirtualBox?
The most common causes are too little allocated RAM or CPU, virtualization not being enabled in the host BIOS, or Guest Additions not being installed yet. Working through Steps 3, 4, and 7 in this guide resolves the vast majority of performance complaints.
4. Can I install a graphical desktop on AlmaLinux 10 in VirtualBox?
Yes. Choose Server with GUI during the Software Selection step of the installer, which installs GNOME by default. Make sure you also allocate enough video memory and install Guest Additions afterward for smooth resolution scaling and rendering.
5. What is the difference between AlmaLinux and CentOS for a home lab?
AlmaLinux was created as a direct, community-driven replacement after CentOS shifted to a rolling release model, and it remains binary compatible with RHEL in the way CentOS Linux once was. For anyone building a home lab or learning server administration today, AlmaLinux is the more actively maintained and future-proof choice between the two.