
Are you new to the recently launched Ubuntu 26.04 LTS, also known as Resolute Raccoon? It was released on April 23, 2026, and it will restart the 5-year clock for standard maintenance and security updates. Although every Linux distribution comes with default security, it’s never enough; it always requires more. We can make it more secure for better performance and safety.
Similarly, Ubuntu 26.04 comes with many default secure settings, but it’s not hardened enough; it doesn’t have firewall rules or intrusion monitoring.
This article takes you through some important steps to harden and secure your Ubuntu 26.04 LTS server.
What is Server Hardening?
Server hardening is the process of improving a system’s security by cutting its attack surface and restricting opportunities for unauthorized access. Hardening the server involves adding, removing, or modifying system settings or components based on the user’s requirements. We’ll be applying various security measures for hardening and securing our Ubuntu LTS 26.04 server.
System Updates and Security Updates
First, we’ll enable automatic updates and upgrades and remove unwanted system packages.
Update and Upgrade Ubuntu
The first and most essential step for hardening is to update and upgrade the Ubuntu server:
$ sudo apt update && sudo apt upgrade -y |
|---|


Ubuntu is now updated and upgraded and ready to use for further cleaning.
Clean the Unnecessary Packages:
Now, run the autoremove and autoclean commands to remove unnecessary/unused packages and remove obsolete package files from the cache:
|
|---|


All the unnecessary packages are removed.
Configure Automatic Security Updates
Next, we’ll upgrade and install automatic security updates:
|
|---|
- sudo apt install -y unattended-upgrades → Installs the package that automatically applies security updates.
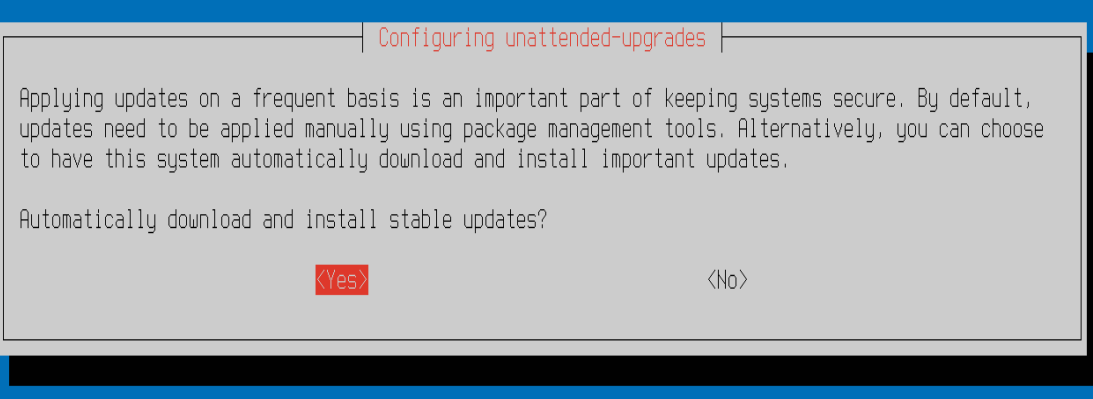
- sudo dpkg-reconfigure -plow unattended-upgrades → Configures and enables automatic updates.


Press yes to continue:

User and Sudo Security
Secondly, we’ll check if we have a sudo user or a normal user because we need proper user management and admin permissions for hardening and securing the Ubuntu 26.04 LTS server.
To check your user privilege level and verify it, run the following whoami and groups commands:
|
|---|
- whoami → It shows the current user.
- groups → It shows user groups.
- sudo -v → It verifies sudo access.


A sudo user gives administrative privileges without demanding direct root login, reducing excessive exposure of the root account.
In our case, we have the user named ‘muser,’ which already belongs to the sudo group, so there’s no need to create a new account or add it to the sudo group.
You can add your existing account to sudo by running the following commands:
|
|---|
Or, you can also create a new one and then add it to the sudo group:
|
|---|
SSH Hardening
Now, we’ll move forward to our next step of hardening our server. SSH hardening is a method of securing SSH to prevent unwanted remote access from unauthorized users. Moreover, it reduces the risk of attacks such as brute force, MITM, and DOS.
Let’s begin the process of SSH hardening step-by-step:
Step 1: Create SSH Hardening Configuration File
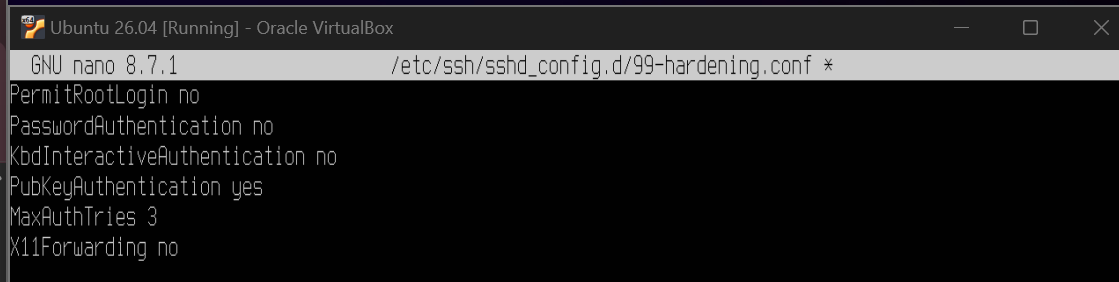
Firstly, we’ll create a new separate file for SSH settings. By running the command below, the nano file editor will open:
$ sudo nano /etc/ssh/sshd_config.d/99-hardening.conf |
|---|
Write down the following lines in the file:
|
|---|
Now, save the file and close it:

Step 2: Test SSH Configuration
Now, test if the configuration was right by the following sshd command:
$ sudo sshd -t |
|---|
If the command returns no output, it means there was no error in the file:


Step 3: Apply the Changes
Next, apply the changes by running the reload command:
$ sudo systemctl reload ssh |
|---|
Step 4: Verify SSH Settings
Lastly, check if the configuration was successful:
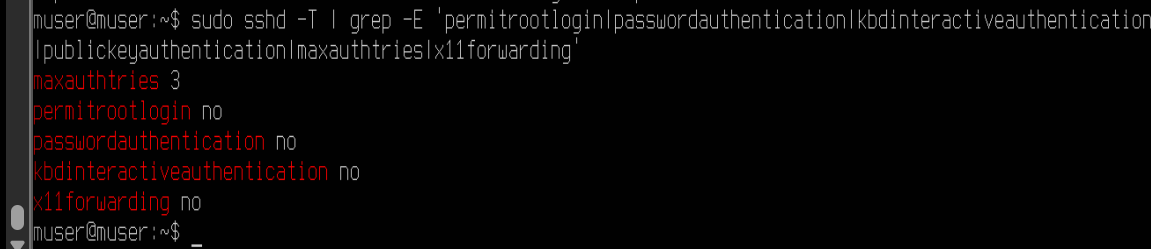
$ sudo sshd -T | grep -E ‘permitrootlogin|passwordauthentication|kbdinteractiveauthentication|pubkeyauthentication|maxauthtries|x11forwarding’ |
|---|
The output below shows the changed settings:

Firewall Configuration with UFW
In this section, we’ll configure the firewall with UFW (Uncomplicated Firewall). It’s a firewall tool in Ubuntu that controls incoming and outgoing network traffic.
It actively checks live traffic and filters out unwanted or anonymous traffic, allowing only what the server actually needs.
Step 1: Set Default Firewall Rules
Firstly, we’ll block incoming traffic, allow outgoing traffic, and we’ll also enable SSH connections:
|
|---|
Step 2: Enable UFW and Verify Firewall Status
Moving forward, we’ll enable UFW, and after that we’ll check its status:
|
|---|

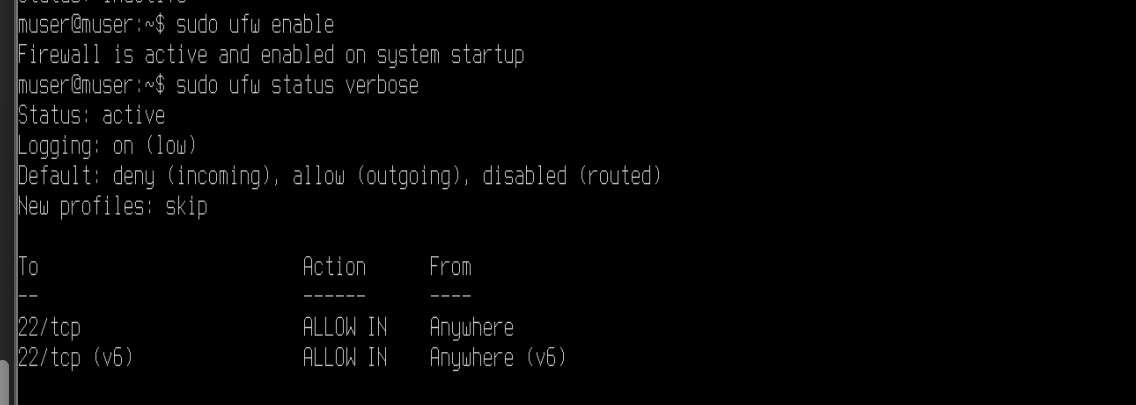
Our screenshot above shows that our firewall is active.
Step 3: Check Firewall Rules
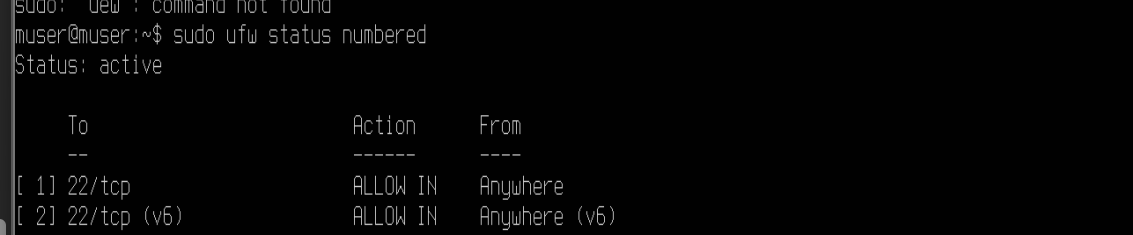
After that, we’ll check the configured firewall rules in a numbered format:
$ sudo ufw status numbered |
|---|

Fail2Ban Configuration
Let’s now discuss what Fail2Ban is, what it does, and how to install it and enable its services. Fail2Ban is a security tool that monitors login attempts and temporarily blocks IP addresses that show repeated suspicious or failed authentication attempts.
It prevents attacks like brute force. Now, we’ll install and enable it step-by-step.
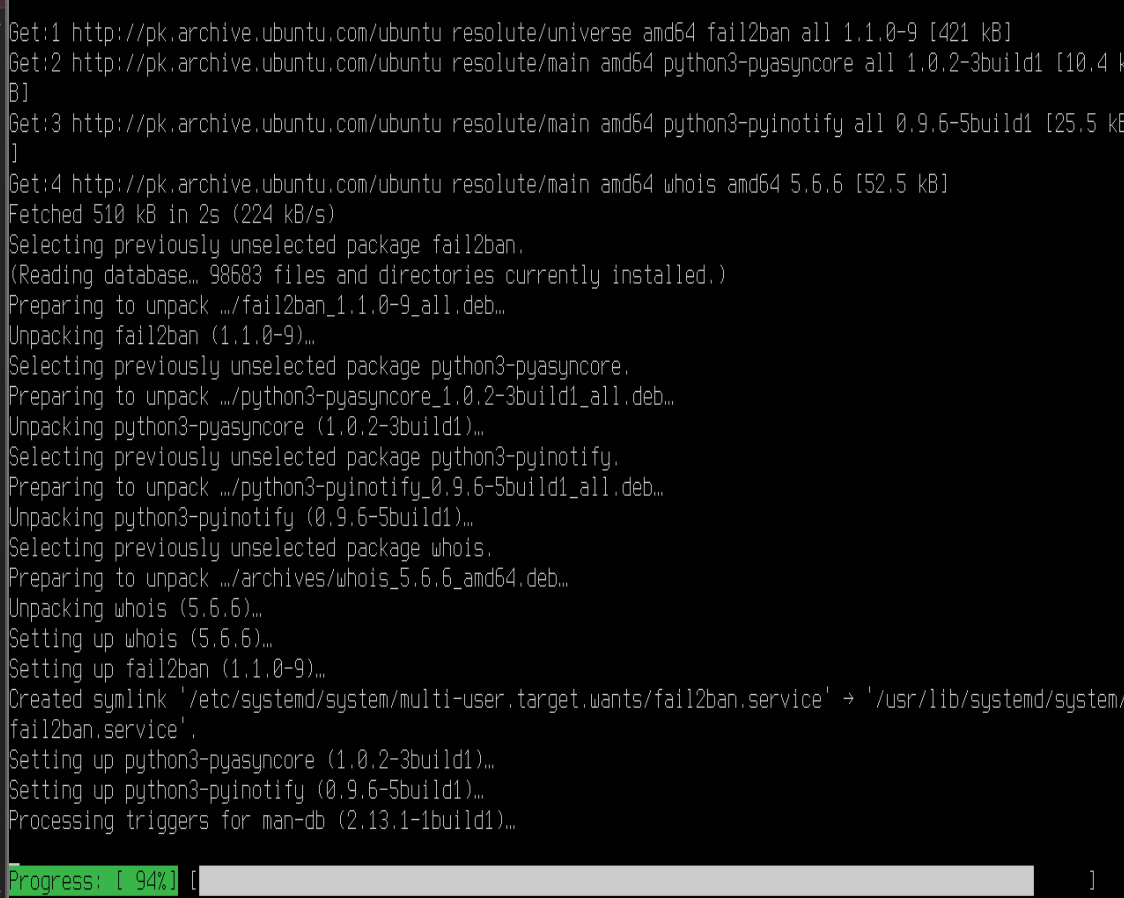
Step 1: Install Fail2Ban
Run the following command to install Fail2Ban:
$ sudo apt install fail2ban -y |
|---|

Step 2: Enable and Start Fail2Ban
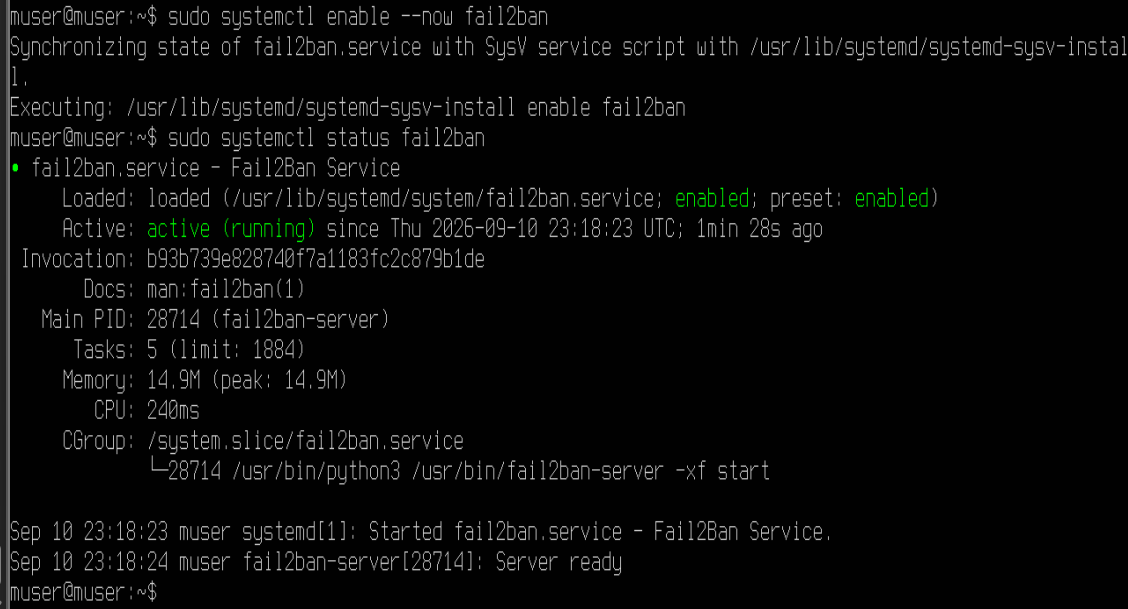
After installing Fail2Ban, we’ll enable it and start it, using the following systemctl command:
$ sudo systemctl enable –now fail2ban |
|---|
The output below shows that Fail2Ban is active:

Step 3: Check Active Fail2Ban Jails
After starting Fail2Ban, we checked the active security jails using:
$ sudo fail2ban-client status |
|---|
The output shows the active protection jails:


It shows 1 active jail named sshd.
Security Auditing with Lynis
Moving onward, we’ll install Lynis and audit our server with it. Lynis is a security auditing tool that scans a Linux system for vulnerabilities and provides hardening recommendations.
Step 1: Install Lynis
First, we’ll install Lynis on our server:
$ sudo apt install lynis -y |
|---|
Step 2: Run a Security Audit
After installing, let’s run a security audit:
$ sudo lynis audit system |
|---|

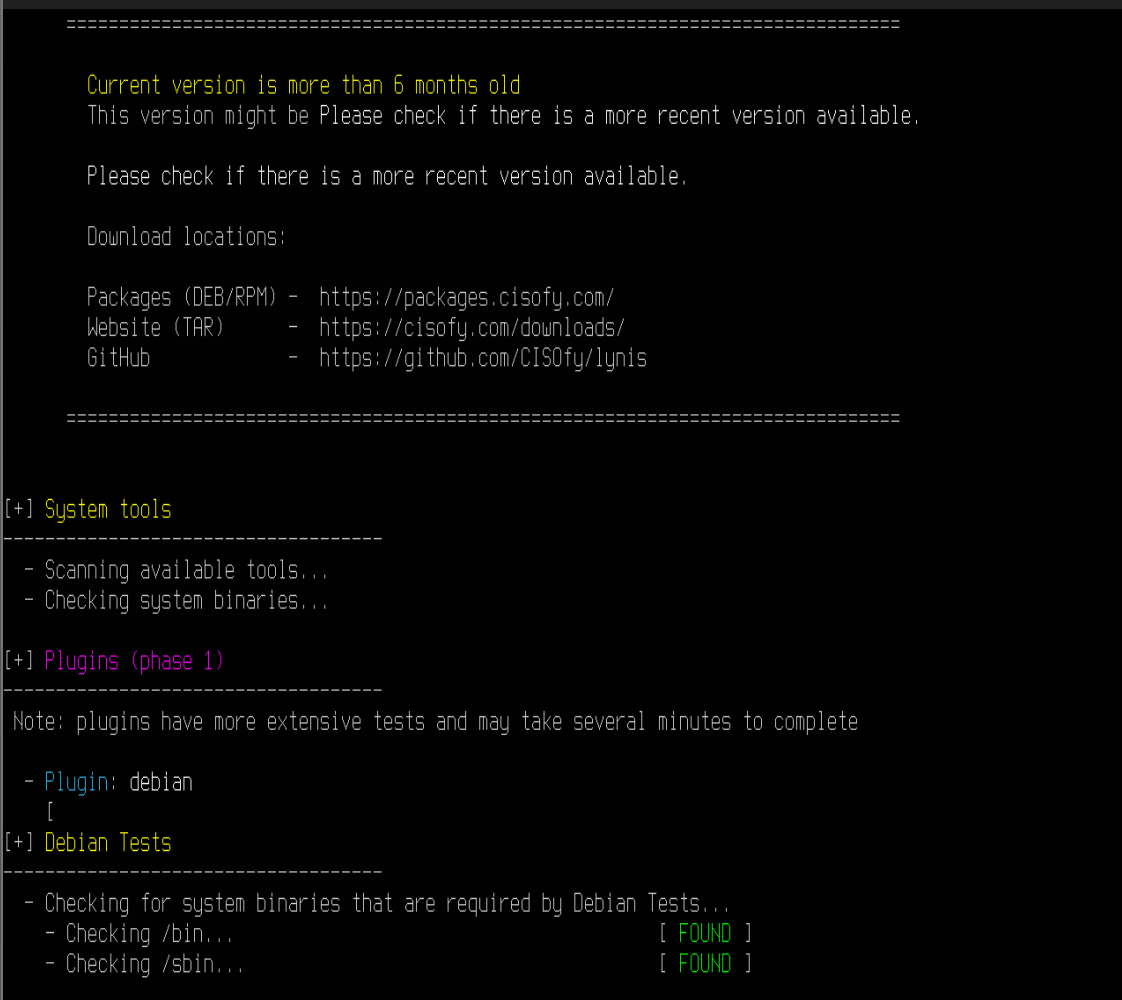
The screenshot above shows the audit; it may take a few minutes to complete. Lastly, it’ll provide recommendations to harden your Ubuntu 26.04.
Conclusion
All in all, like every other distribution, Ubuntu 26.04 LTS server also comes with some security shortcomings. In this guide, we discussed various methods and tools that can be used to make our server more secure.
The process included system updates and automatic security updates, user and sudo security, SSH hardening, UFW firewall configuration, Fail2Ban, and Lynis security auditing. These methods reduce the risk of unnecessary exposure and protect against repeated login attempts.
In simple words, we successfully hardened and secured the Ubuntu 26.04 LTS server.