Upon installing a new Ubuntu 26.04 LTS “Resolute Raccoon” server, you might have noticed that this release ships with GNOME 50 preinstalled on Wayland (by default), and the old notions of VNC and Ubuntu don’t quite apply anymore. That is why it is important for so many admins to look for the steps to set up a remote desktop in Ubuntu 26.04. That is why many admins must be looking for how to configure a remote desktop on Ubuntu 26.04. TightVNC is still one of the most stable, compact, and effective ways to access a graphical display on a headless or remote box, and it has proved to be the most effective way.
This guide covers how to install a TightVNC server on Ubuntu, download TightVNC, set it up securely, and make a working VNC connection on 26.04.
Table of Contents
- What is TightVNC and when should you use it on Ubuntu?
- Prerequisites and system requirements
- How to Install/Configure TightVNC Server on Ubuntu 26.04
- Step 1: Update the system and install the XFCE desktop
- Step 2: Install TightVNC Server on Ubuntu 26.04
- Step 3: Set the VNC password and run the initial session
- Step 4: Configure the xstartup file for XFCE
- Step 5: Create a systemd service for auto-start
- Step 6: Secure the connection with an SSH tunnel
- Step 7: Connect using a VNC client
- Conclusion
- Frequently asked questions
What is TightVNC and when should you use it on Ubuntu?
TightVNC is a free, cross-platform remote desktop software built on the Virtual Network Computing (VNC) protocol. The “Tight” is its name for its TightEncoding compression algorithm, which is a good thing for remote sessions when using slower Internet connections or high-latency connections to Cloud VPS instances, as it saves a considerable amount of bandwidth.
Ubuntu 26.04 LTS servers come without any graphical desktop. TightVNC does just that by enabling a virtual display to be run in parallel with a lightweight desktop server, allowing you to have full GUI access to your remote server without using a physical monitor. Typical places where it is used are for remote server management, remote graphical technical support, using graphical development tools on a remote machine, and for home lab or corporate management of Ubuntu desktops with no physical access.
VNC Server | Ubuntu Availability | Best For | Encryption |
TightVNC | apt repository | Lightweight, slow connections, simplicity | Via SSH tunnel |
TigerVNC | apt repository | Performance, active upstream maintenance | Via SSH tunnel or TLS |
RealVNC | Vendor .deb | Enterprise, cloud-brokered connectivity | Built-in |
x11vnc | apt repository | Sharing an existing physical desktop session | Via SSH tunnel |
Note on TigerVNC
TightVNC has been widely used, is available in Ubuntu’s apt repository, and is the right solution if you have to support legacy VNC clients or existing documentation.
Prerequisites and system requirements
Before starting the installation, confirm your environment meets the following requirements.
- OS: Ubuntu 26.04 LTS (server or desktop edition, 64-bit)
- RAM: At least 1 GB; 2 GB recommended for a comfortable XFCE session
- User: A non-root user account with sudo privileges
- Connectivity: SSH access to the Ubuntu server or direct console
- VNC client: TightVNC Viewer, RealVNC Viewer, or Remmina on your local machine
How to Install/Configure TightVNC Server on Ubuntu 26.04
Learn how to install and set up a VNC server with TightVNC on an Ubuntu server and connect to it securely through an SSH tunnel.
Step 1: Update the system and install the XFCE desktop
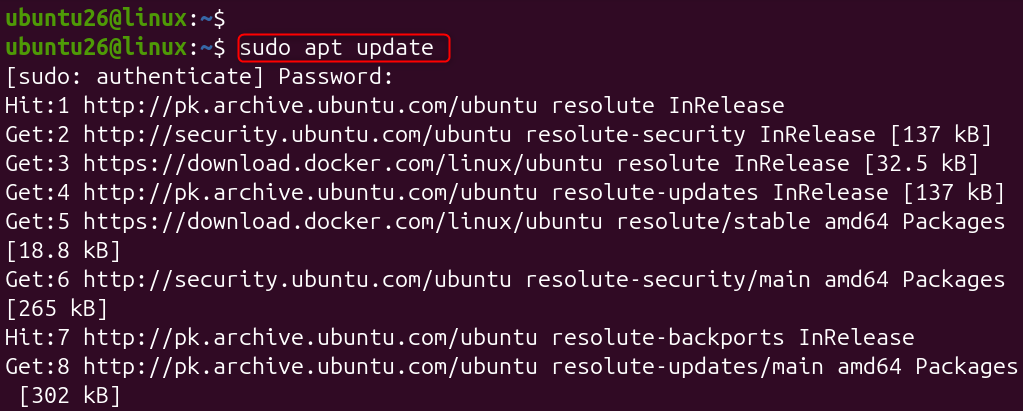
Begin by refreshing the package index and installing XFCE. Update the package index and upgrade all installed packages
sudo apt update |

Install the XFCE desktop environment and its productivity add-ons
sudo apt install xfce4 xfce4-goodies -y |

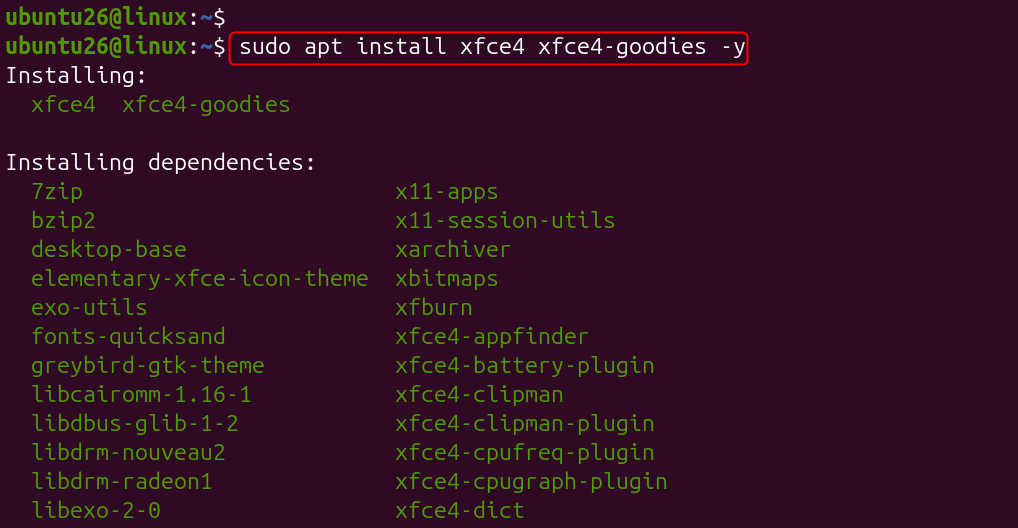
During display manager selection, choose lightdm as it will be mainly compatible with VNC sessions on headless servers.

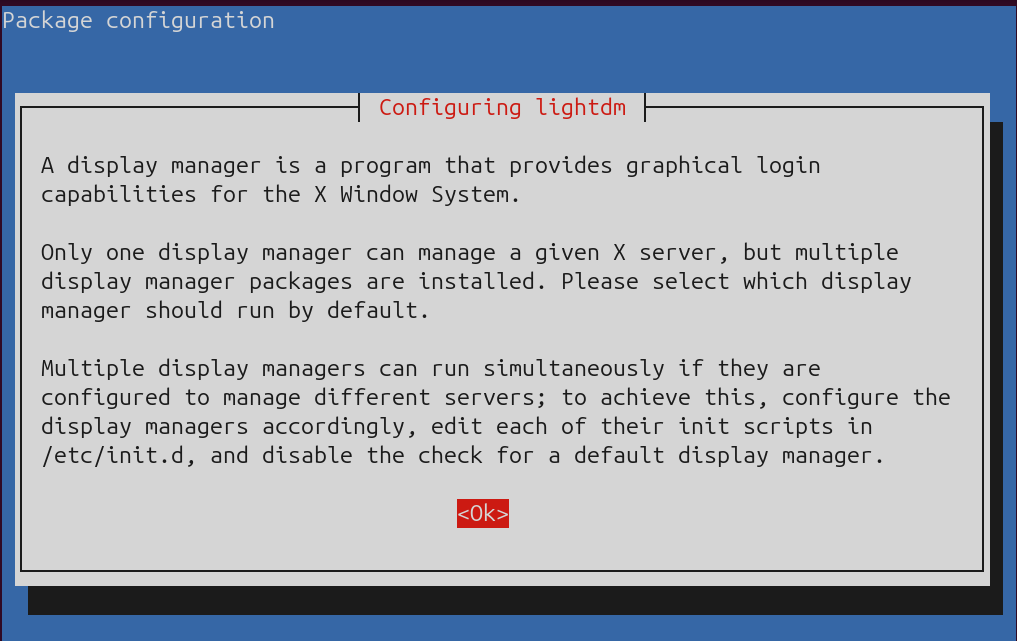
The installation downloads and configures all required graphical components and may take several minutes depending on your connection speed.

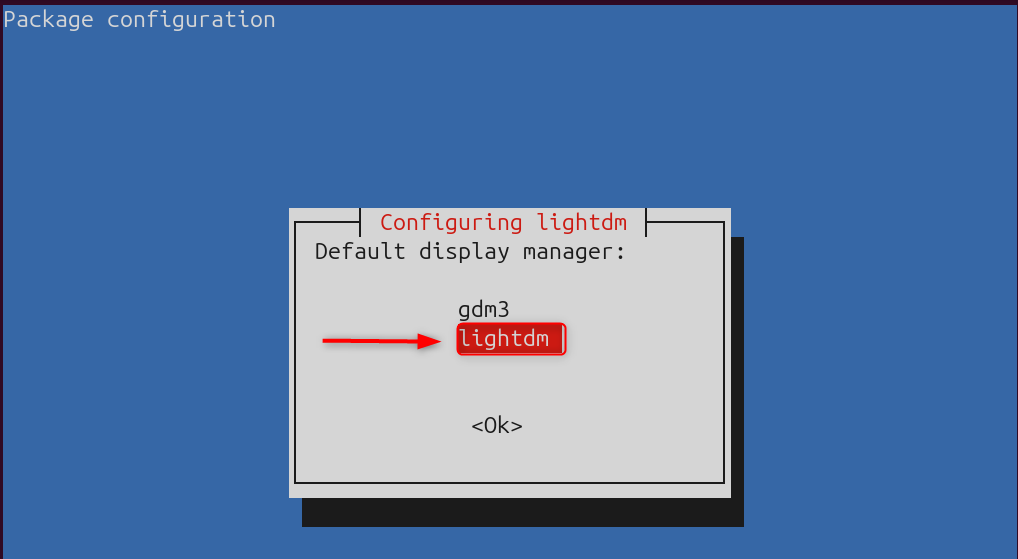
Step 2: Install TightVNC Server on Ubuntu 26.04
TightVNC Server is available in Ubuntu’s default apt repositories under the package name tightvncserver.
Let’s install the TightVNC server.
sudo apt install tightvncserver -y |

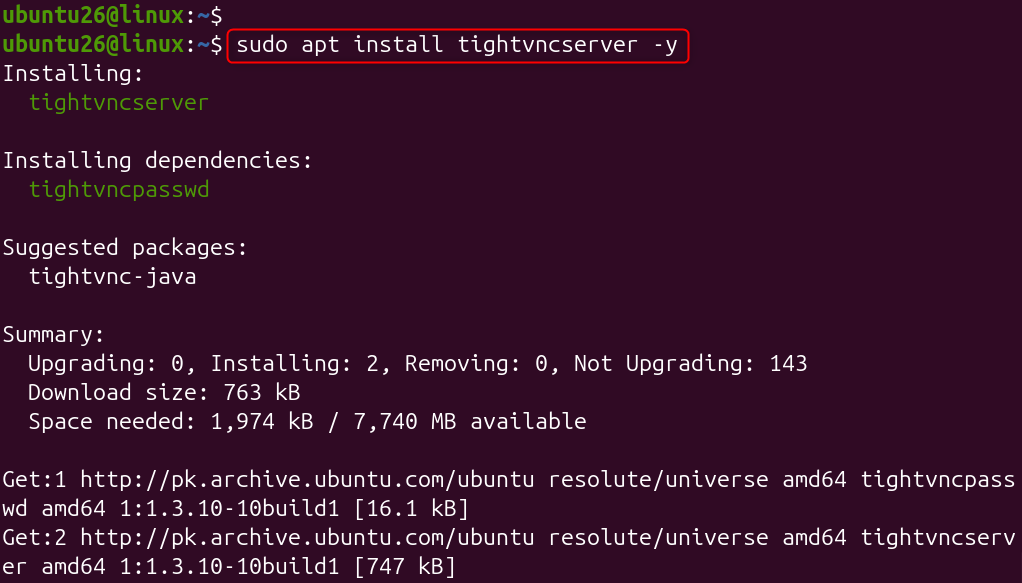
Confirm the package was installed successfully.
vncserver -version |

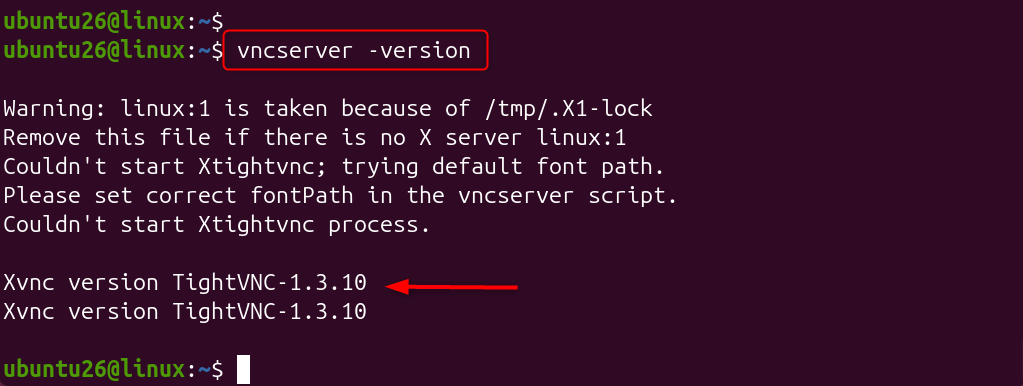
A successful installation prints the TightVNC version string to the terminal.
Step 3: Set the VNC password and run the initial session
The first time you run vncserver, TightVNC prompts you to set a password. This password protects access to the VNC session and must be entered every time a client connects.
Start TightVNC for the first time to trigger password setup and create config files.
vncserver |

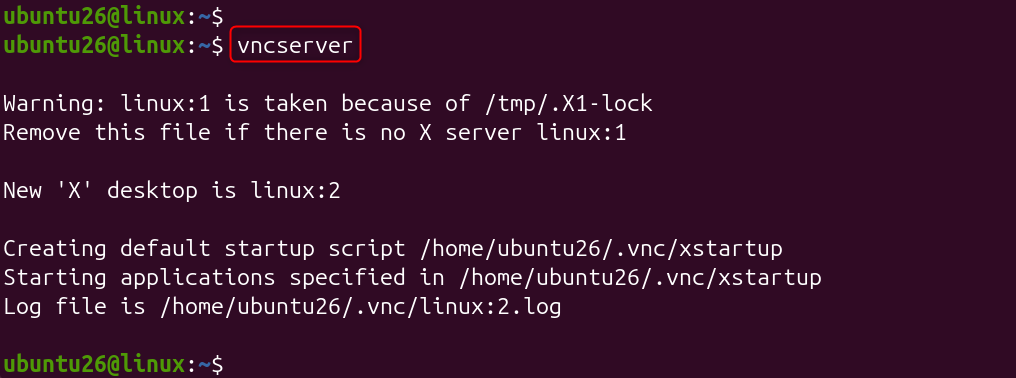
TightVNC prompts you for a password, asks you to verify it, and then asks whether you want to set a separate view-only password that prevents remote users from controlling the desktop (optional).
Step 4: Configure the xstartup file for XFCE
The default xstartup file created by TightVNC does not start XFCE, so you need to replace its contents with the correct XFCE startup commands.
Edit the xstartup file.
nano ~/.vnc/xstartup |
Erase the entire text in the file and type only the following text.
#!/bin/bash xrdb $HOME/.Xresources startxfce4 & |

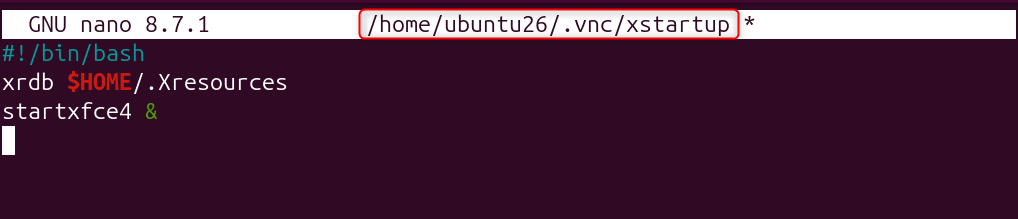
Save the file and exit nano.
Execute permission on the xstartup script.
chmod +x ~/.vnc/xstartup |


Step 5: Create a systemd service for automatic startup
TightVNC was integrated into Ubuntu’s service management system as a service unit. A service unit called tightvncserver was developed to solve this problem, as it will automatically start up at boot time and be managed using the normal systemd tools.
If running VNC sessions are still open, you might have to kill them first to create the service.
Create the systemd service unit file
Make a service unit file for TightVNC.
sudo nano /etc/systemd/system/vncserver@.service |
Paste the following content into the file. Replace your_username on every line with the actual username that runs the VNC session (the user whose ~/.vnc/ directory holds the password and xstartup files).
[Unit] Description=Start TightVNC server at startup After=syslog.target network.target [Service] Type=forking User=your_username Group=your_username WorkingDirectory=/home/your_username PIDFile=/home/your_username/.vnc/%H:%i.pid ExecStartPre=-/usr/bin/vncserver -kill :%i > /dev/null 2>&1 ExecStart=/usr/bin/vncserver -depth 24 -geometry 1280×800 :%i ExecStop=/usr/bin/vncserver -kill :%i [Install] WantedBy=multi-user.target |

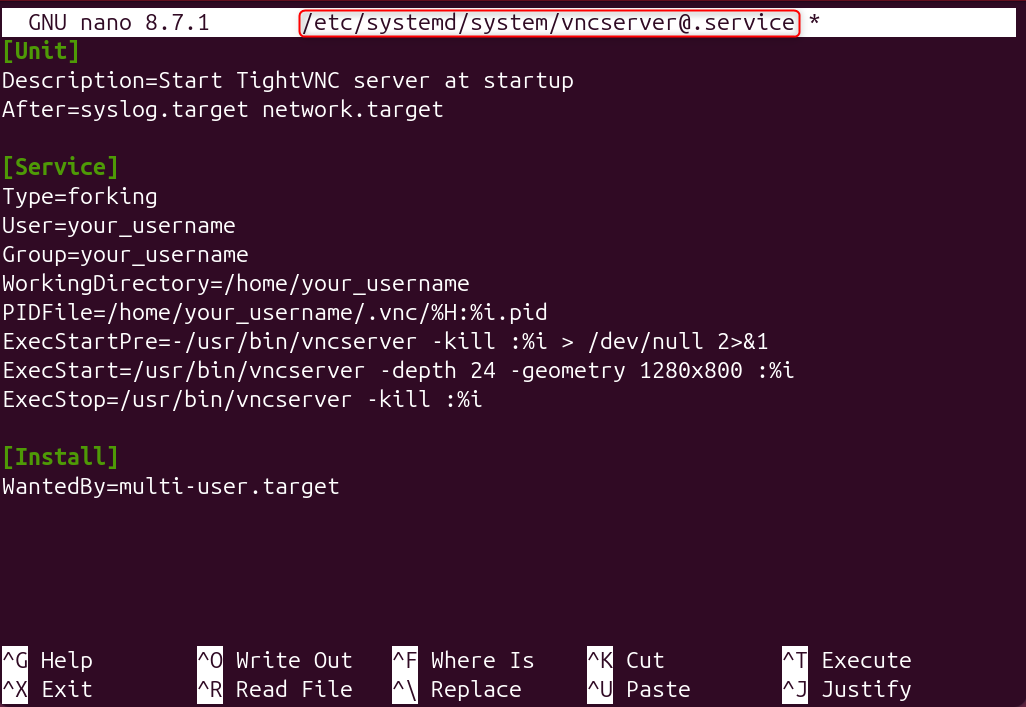
Enable and start the service
Reload systemd to register the new service unit.
sudo systemctl daemon-reload |


Enable and start the service automatically on each boot (display :1)
sudo systemctl enable vncserver@1.service |


After that, start the VNC server immediately without rebooting using the sudo systemctl start vncserver@1.service command.
Step 6: Secure the connection with an SSH tunnel
The correct approach is to route the VNC connection through an SSH tunnel, which encrypts all traffic using the same cryptographic layer as your regular SSH sessions.
Block VNC ports with UFW
Allow SSH through the firewall.
sudo ufw allow OpenSSH |


Deny direct VNC connections from outside.
sudo ufw deny 5901 |


Enable the firewall.
sudo ufw enable |


Verify the rules.
sudo ufw status |

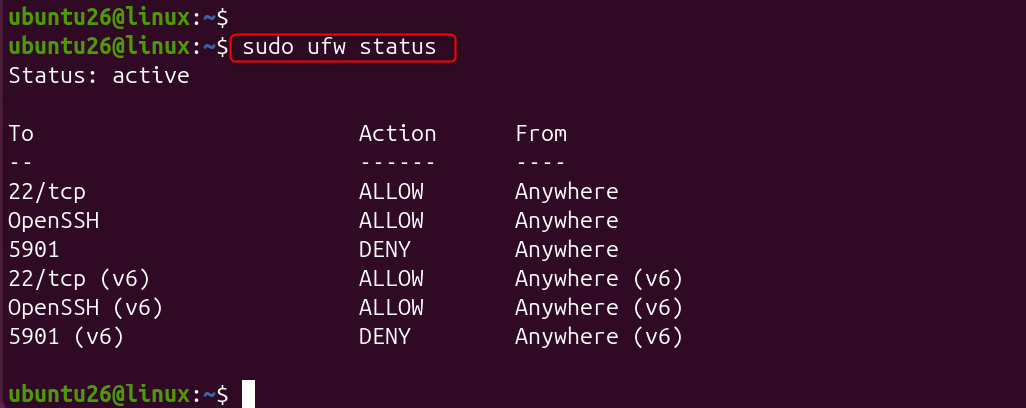
Create the SSH tunnel from your local machine
Forward local port 5901 to the server’s localhost:5901 via SSH.
Replace your_username and server_ip with your actual values.
ssh -L 5901:127.0.0.1:5901 -N -f your_username@server_ip |


The flags mean: -L sets up the local port forward, -N tells SSH not to execute any commands (tunnel only), and -f sends the SSH process to the background so your terminal remains free.
Step 7: Connect using a VNC client
With the SSH tunnel active, open your preferred VNC client on your local machine and connect to localhost:5901. Do not enter the server’s public IP address; always use localhost when connecting through the tunnel.

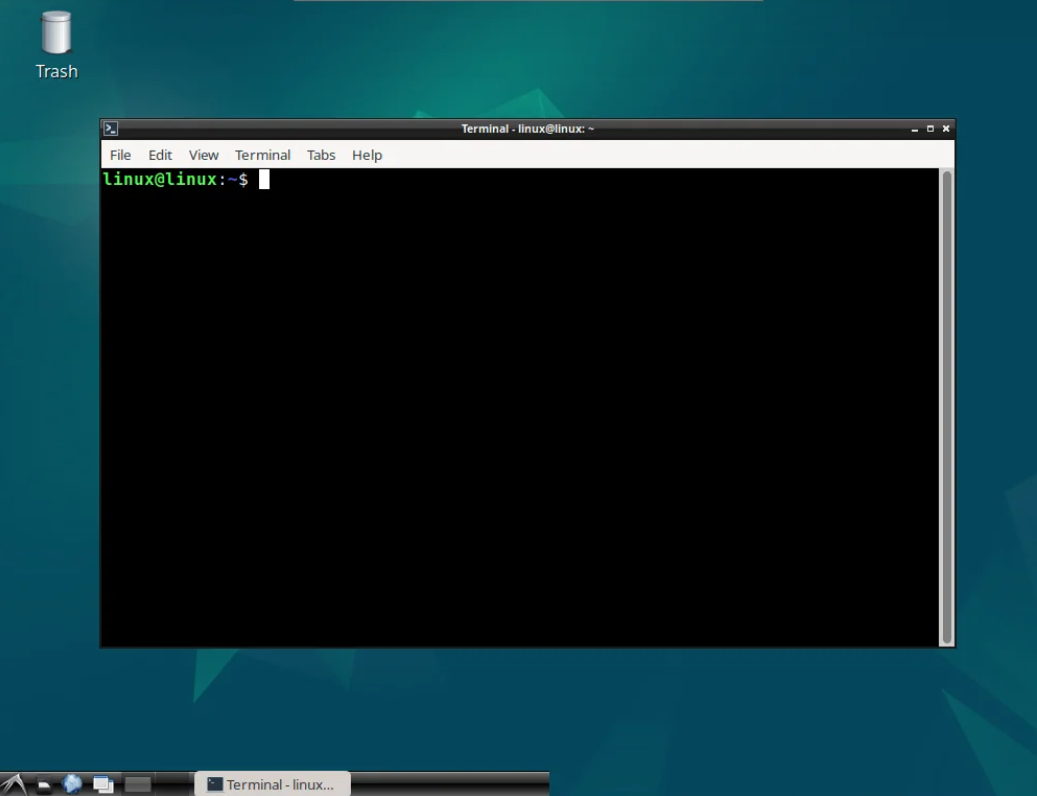
Enter localhost:5901 as the server address in your VNC client, click Connect, and enter the VNC password you set in Step 3. Within a few seconds, the XFCE desktop environment on your Ubuntu 26.04 server will appear in the client window. Now you can control your remote server in Ubuntu.
Conclusion
To install TightVNC Server on Ubuntu 26.04, run sudo apt update && sudo apt install tightvncserver, then start it with vncserver to set your access password. Configure the desktop session by editing ~/.vnc/xstartup to launch your GNOME or lightweight desktop, then restart the service with vncserver :1. Finally, allow VNC traffic through the firewall using sudo ufw allow 5901/tcp and connect via any VNC client using your-server-ip:5901.
Frequently asked questions
1. How do I download TightVNC for Windows, Linux, or Mac?
You can get the appropriate version of TightVNC based on your operating system. TightVNC download for Windows is available as an installer, while TightVNC download for Linux typically requires installation through your distribution’s package manager. There is no official TightVNC download for the Mac server version, although Mac users can use compatible VNC clients or alternative remote desktop solutions.
2. Where can I download TightVNC Viewer?
You can perform a TightVNC Viewer download from the official TightVNC website. The viewer application allows you to connect securely to remote computers running a VNC server and is available primarily for Windows.
3. What is the TightVNC default password?
TightVNC does not have a default password. During setup, you must create a custom password to secure remote access. If no password has been configured, remote connections are not permitted until one is set.
4. What is the TightVNC default port?
The TightVNC default port for VNC connections is 5900 for the first display. Additional displays use sequential ports, such as 5901, 5902, and so on. If the built-in web server is enabled, it typically uses port 5800.
5. How does TightVNC remote desktop work?
TightVNC remote desktop software uses the Virtual Network Computing (VNC) protocol to let you view and control another computer over a network. After installing the TightVNC Server on the remote computer and the TightVNC Viewer on the local device, you can establish a secure remote desktop connection using the server’s IP address and configured password.