Docker is the industry standard for containerization, and it allows developers and system administrators to package applications and all the dependencies needed to run them into a lightweight and portable container. From web application deployments to constructing CI/CD pipelines, managing cloud-native workloads, and everything in between, Docker ensures a consistent development, test, and production environment.
Ubuntu 26.04 LTS is a great platform for Docker deployments, thanks to its long-term support, enterprise-grade stability, frequent security updates, and wide hardware support. When installing Docker from the official Docker repository, you are guaranteed to receive the latest stable releases, security patches, and production-ready features.
This tutorial will help you install Docker on Ubuntu 26.04 LTS, configure it for daily use, test it, enable Docker Compose, and practice security best practices in a secure Docker environment.
Table of Contents
- What Is Docker?
- Why Install Docker on Ubuntu 26.04 LTS?
- System Requirements and Prerequisites
- Install Docker on Ubuntu 26.04 LTS
- Step 1: Remove Old or Conflicting Docker Packages
- Step 2: Add Docker’s Official Repository
- Step 3: Install Docker Engine
- Step 4: Configure Docker for Non-Root Users
- Step 5: Verify the Installation
- Step 6: Verify Docker Compose
- Step 7: Enable Docker at Boot
- Troubleshooting Common Docker Issues
- Conclusion
What Is Docker?
Docker is an open source container platform designed for running applications and their dependencies within isolated environments (containers). Everything an application requires is packaged in a container: libraries, runtime components, configuration files, and deployments become more predictable and portable.
Containers share the host operating system kernel as opposed to traditional virtual machines, which run in virtualization software using their own isolated operating system. This architecture minimizes resource overhead, speeds up startup time, and makes the application deployment on different environments easier.
Why Install Docker on Ubuntu 26.04 LTS?
The Ubuntu 26.04 LTS release offers a secure and stable base for container-based applications. It is highly popular in enterprise environments, cloud infrastructures, and development workstations due to its long-term support and regular security updates.
Typical use cases for Docker containers deployed on Ubuntu servers involve hosting databases, building scalable cloud-based applications, running development environments, hosting microservices, and deploying Web applications. The pair of Docker and Ubuntu is still one of the most reliable options for today’s infrastructure management.
System Requirements and Prerequisites
In order to install Docker, check that the following requirements are met:
Requirement | Recommended |
Operating System | Ubuntu 26.04 LTS (64-bit) |
RAM | 2 GB or more |
Available Storage | 5 GB or more |
Internet Connection | Required |
User Privileges | sudo access |
Verify Your Ubuntu Version
To make sure your system is running Ubuntu 26.04 LTS, execute the following command.
lsb_release -a |

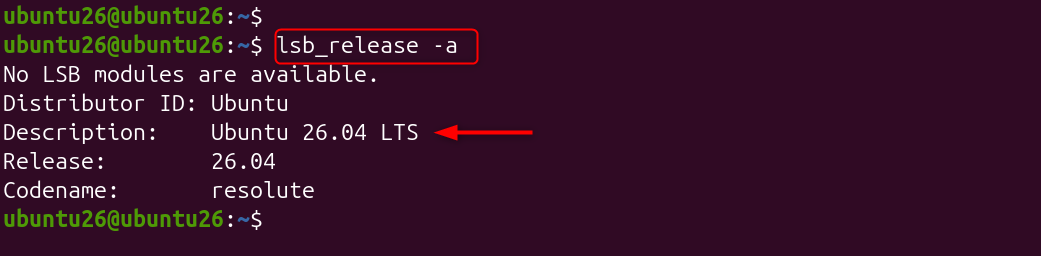
This command prints out information about your Linux distribution. Check if the release version is the same as the Ubuntu 26.04 LTS before installation.
Update Existing Packages
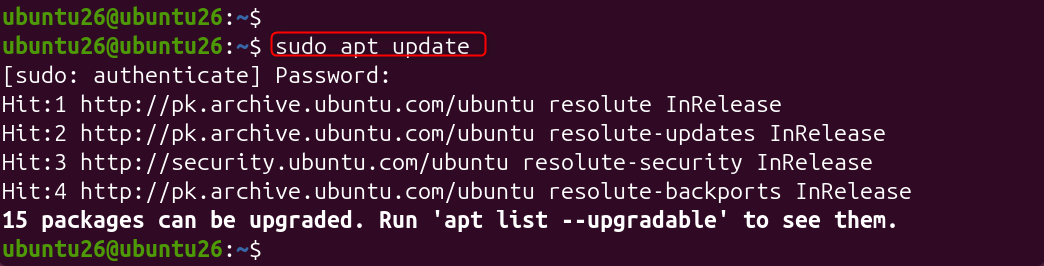
Having up-to-date package information means that you have the latest security updates and software patches. An updated system will prevent compatibility problems when installing Docker.
sudo apt update |

Install Docker on Ubuntu 26.04 LTS Using the Official Docker APT Repository
The recommended way to install Docker on Ubuntu 26.04 LTS is from Docker’s official repository. That means the latest features, secure updates, and the latest Docker Compose.
Step 1: Remove Old or Conflicting Docker Packages
There may be some Docker-related packages that are in conflict with the most recent Docker release. In some cases, older Docker-related packages can conflict with the newest Docker release. Their removal helps to provide a clean installation.
for pkg in docker.io docker-doc docker-compose docker-compose-v2 \ podman-docker containerd runc; do sudo apt-get remove -y $pkg done |

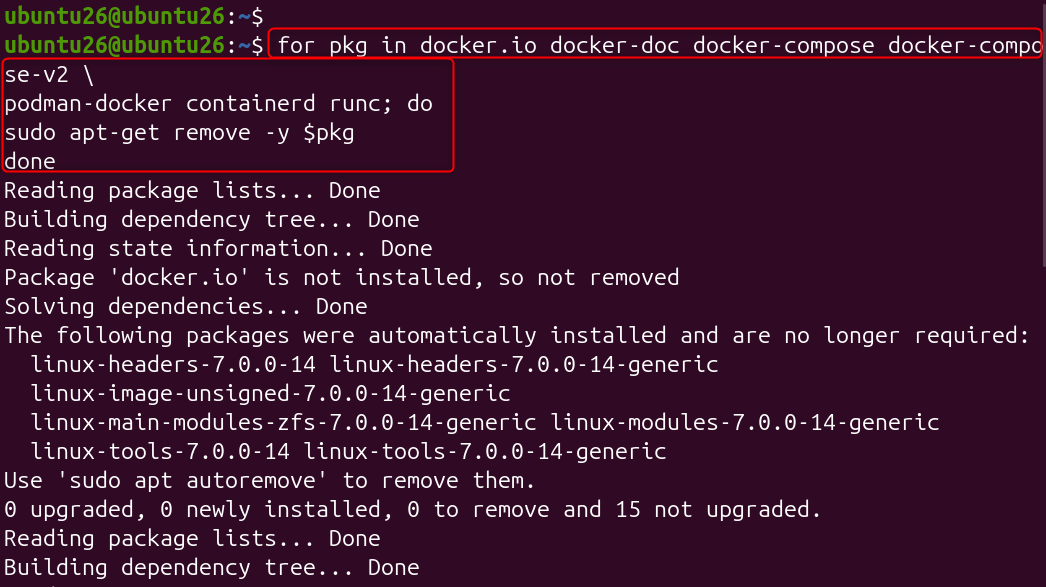
This command will look for any pre-installed Docker packages and remove them. If they are not installed, the Ubuntu operating system will proceed without error.
Step 2: Add Docker’s Official Repository
Docker prefers to install Docker Engine from their official repository as opposed to distribution-provided packages. This way, the newest stable versions and security patches are assured.
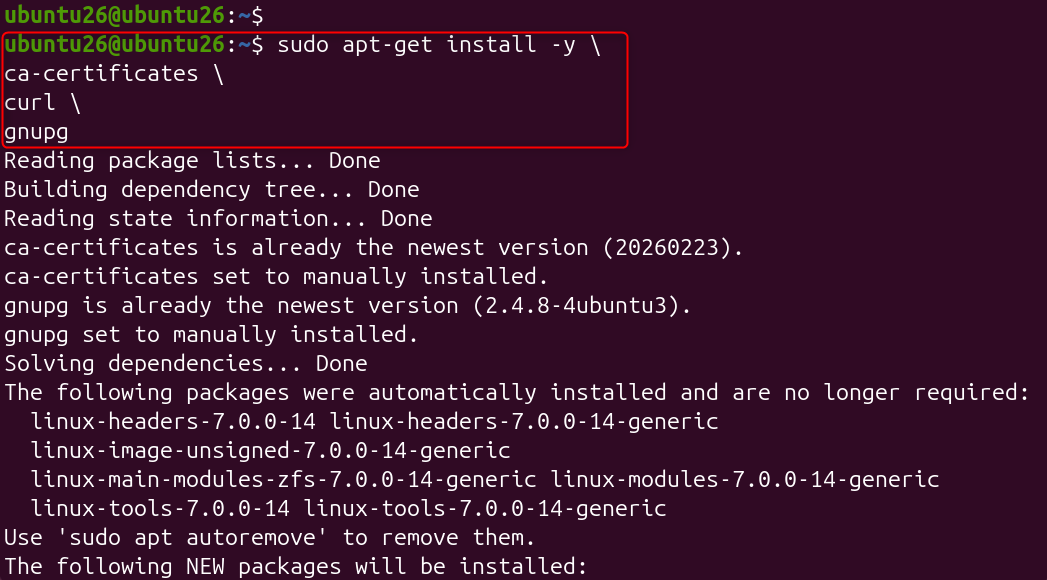
Install Required Dependencies
Such packages can be used to communicate securely with external repositories, and Ubuntu can confirm the authenticity of packages. Putting them first allows downloading and validation of Docker packages to be done correctly.
sudo apt-get install -y \ ca-certificates \ curl \ gnupg |

Create the Keyring Directory
The trusted repository signing keys are stored in the keyring directory. This will hold the official GPG key for Docker to ensure the integrity of packages before installation.
sudo install -m 0755 -d /etc/apt/keyrings |


Download Docker’s Official GPG Key
This command downloads Docker’s public crypto key and transforms it for use with the Ubuntu package manager. Package verification is important for safeguarding against tampered or unauthorized software.
curl -fsSL https://download.docker.com/linux/ubuntu/gpg | \ sudo gpg –dearmor -o /etc/apt/keyrings/docker.gpg |


Set Proper Permissions
Make the Docker GPG public and readable to all users. Make /etc/apt/keyrings/docker.gpg public and readable by all.
sudo chmod a+r /etc/apt/keyrings/docker.gpg |


The package manager needs to be able to read the GPG key file. If you set them right, repository verification will operate as it should when later updates are performed.
Add the Docker Repository
This command installs Docker’s official package repository on Ubuntu. Your system is now able to download and install Docker packages from Docker’s released channel.
echo \ “deb [arch=$(dpkg –print-architecture) \ signed-by=/etc/apt/keyrings/docker.gpg] \ https://download.docker.com/linux/ubuntu \ $(. /etc/os-release && echo “$VERSION_CODENAME”) stable” | \ sudo tee /etc/apt/sources.list.d/docker.list > /dev/null |

 \ signed-by=/etc/apt/keyrings/docker.pgp"](http://greenwebpage.com/community/wp-content/uploads/2026/06/word-image-16917-8.png)
Refresh the Package Index
You need to refresh the Package index.
sudo apt-get update |

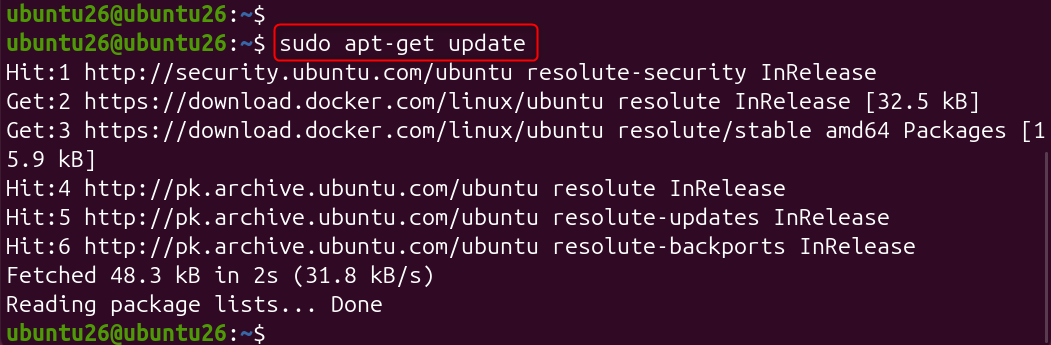
By refreshing the package index, Ubuntu can get the package information from the new Docker repository. In the update output, you should see that Docker packages are included.
Step 3: Install Docker Engine
With the repository set up, you can proceed to install Docker Engine and some of its components.
sudo apt-get install -y \ docker-ce \ docker-ce-cli \ containerd.io \ docker-buildx-plugin \ docker-compose-plugin |

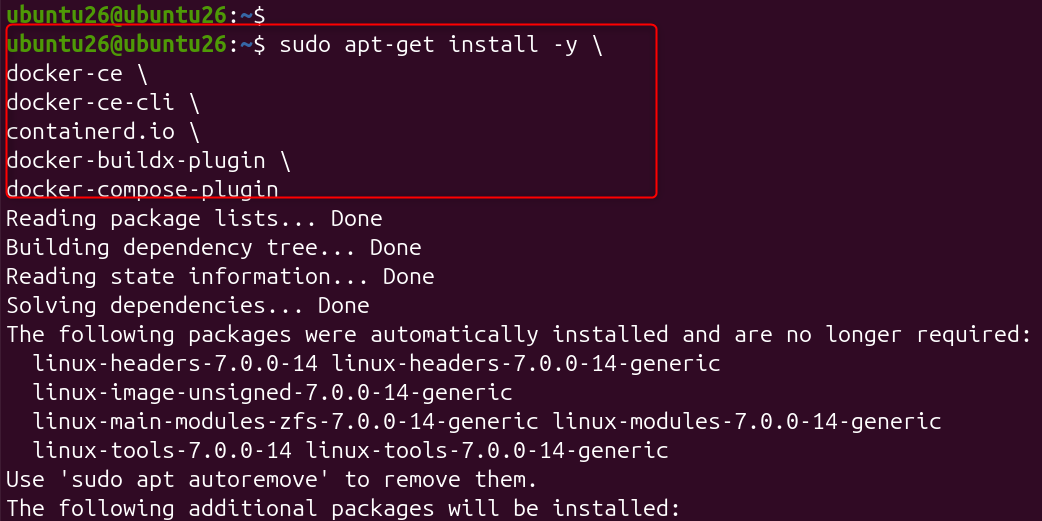
These packages feature Docker daemon, command-line tools, container runtime, Buildx capabilities, and Docker Compose support. This can take a few minutes, depending on the speed of the Internet connection.
Verify the Installed Version
This command verifies that Docker has been installed and shows the version of Docker that is currently installed. A valid version number means that the Docker CLI is installed on your machine.
docker –version |


Step 4: Configure Docker for Non-Root Users
Docker commands are run as an administrator by default. If you do not want to use the sudo command every time you run a Docker command, you can add your user account to the Docker group.
sudo groupadd docker |


If the group doesn’t exist, create the Docker user group.
sudo usermod -aG docker $USER |


This command will add the current user to the Docker group, which will enable the use of Docker commands without elevation of privileges.
newgrp docker |


In the current session, the new group Membership is immediately activated. Or you can log out, log in to apply the changes.
Step 5: Verify the Docker Installation
After installing Docker and configuring user permissions, it is important to verify that the Docker daemon is running correctly and can successfully launch containers.
Run the Official Test Container
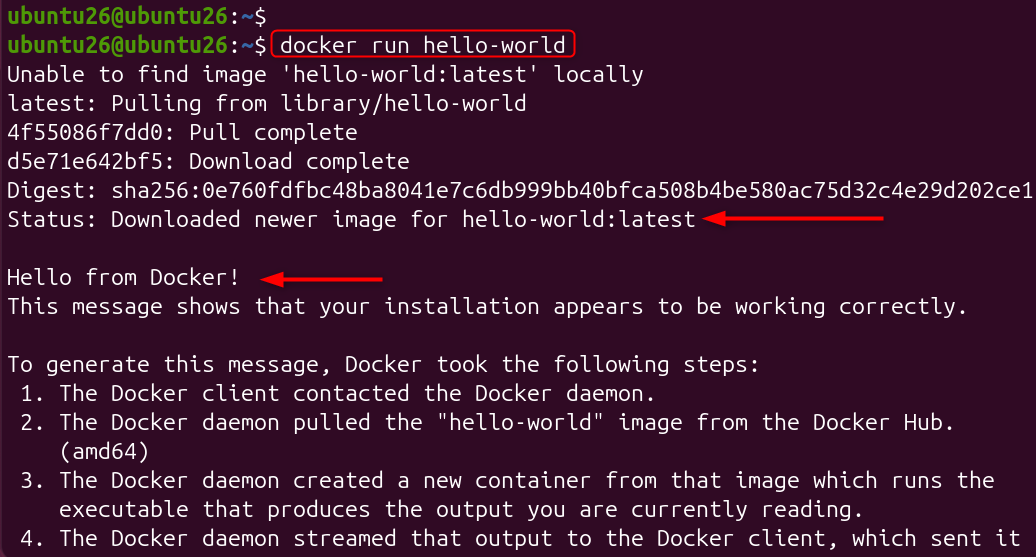
This command downloads the official hello-world image from Docker Hub and runs it as a container. If Docker is installed correctly, you will see a confirmation message indicating that the Docker daemon, networking, and container runtime are functioning properly.
docker run hello-world |

Check the Installed Docker Version
This command displays the currently installed Docker version. Verifying the version confirms that the Docker CLI is properly installed and accessible from your system.
docker –version |


Display Detailed Docker Information
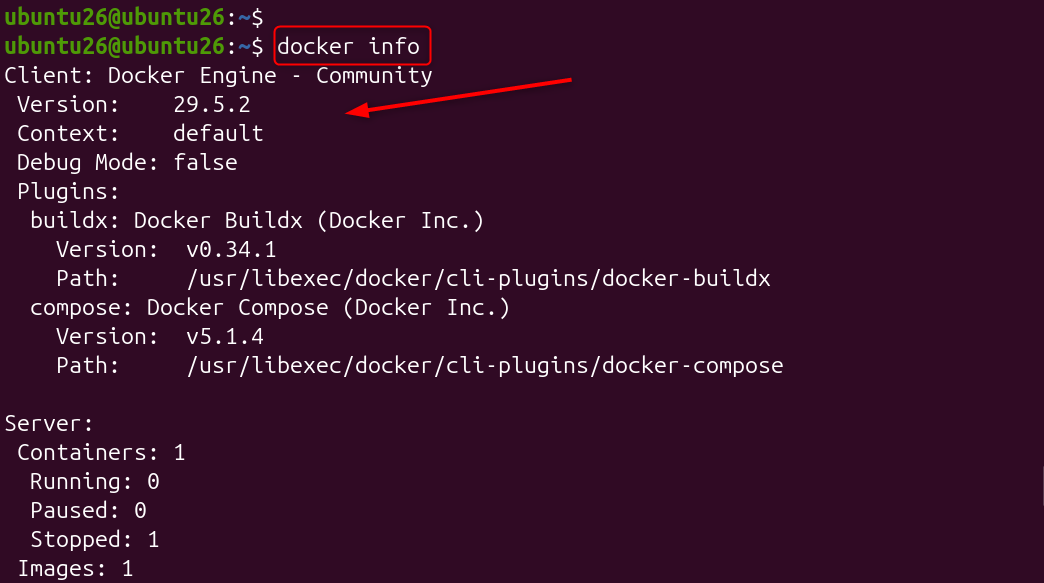
The Docker info command provides detailed information about your Docker environment, including storage drivers, container runtime details, available resources, and system configuration.
docker info |

Verify Docker Service Status
This command confirms that the Docker service is running. A healthy installation should display an “active (running)” status.
sudo systemctl status docker |


Step 6: Verify Docker Compose
Docker Compose simplifies the management of multi-container applications by allowing services to be defined in a single configuration file.
Check Docker Compose Version
This command verifies that the Docker Compose plugin was installed successfully. You should see the installed Compose version displayed in the output.
docker compose version |


Create a Test Compose File
Create a file named docker-compose.yml and add the following content:
services: web: image: nginx ports: – “80:80” |

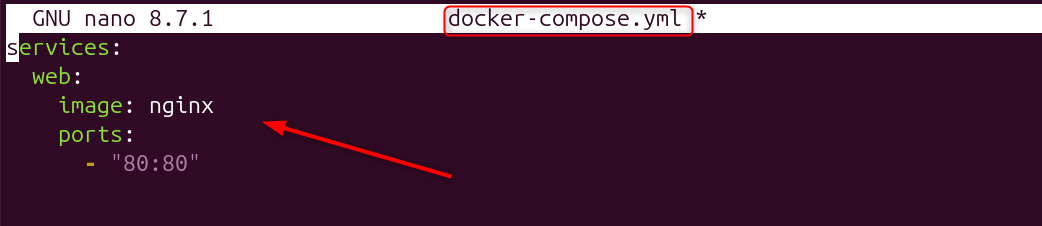
This configuration defines a simple Nginx web server container that listens on port 80.
Launch the Test Application
Docker Compose downloads the Nginx image if necessary and starts the container in detached mode. Running containers in detached mode allows services to continue operating in the background.
docker compose up -d |


Verify Running Containers
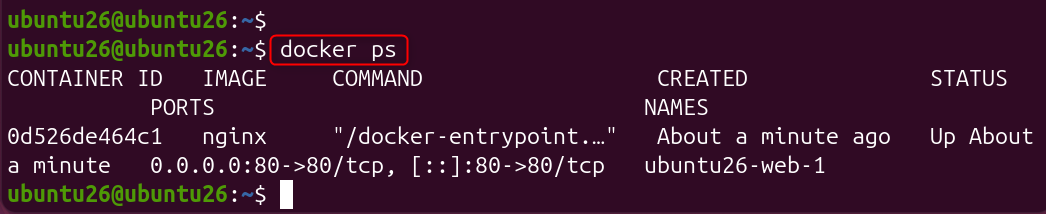
This command lists all active containers on the system. You should see the Nginx container running and listening on the configured port.
docker ps |

Step 7: Enable Docker at Boot
Enabling Docker at boot ensures that containers and services can start automatically after system restarts.
Enable the Docker Service
This command configures Docker to start automatically whenever the system boots. Automatic startup is recommended for production environments and servers hosting containerized applications.
sudo systemctl enable docker.service |


Enable the Container Runtime
Containerd is the underlying runtime used by Docker. Enabling this service ensures that container management capabilities are available immediately after startup.
sudo systemctl enable containerd.service |


Verify Startup Configuration
The command should return “enabled” if Docker has been successfully configured to start automatically.
systemctl is-enabled docker |


Troubleshooting Common Docker Installation Issues
Even straightforward installations can occasionally encounter issues. The following solutions address some of the most common Docker problems.
Error: Cannot connect to the Docker Daemon
Restart the Docker service:
sudo systemctl restart docker |


This command restarts the Docker daemon and resolves many temporary service-related issues.
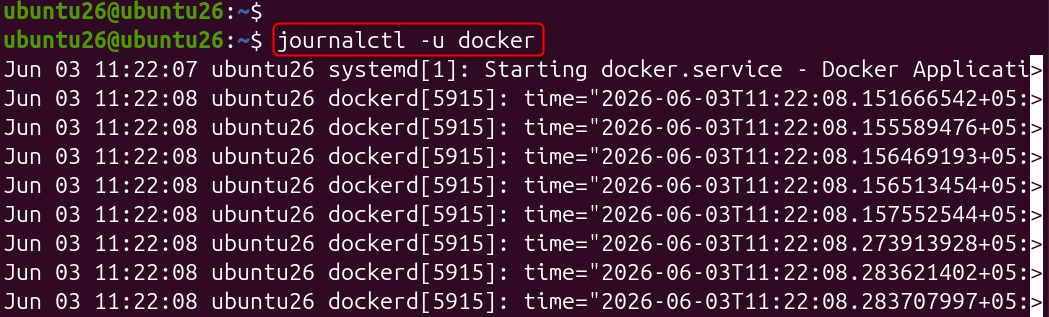
View Docker Service Logs
Service logs provide valuable diagnostic information that can help identify startup failures or configuration problems.
journalctl -u docker |

Error: Permission Denied
Check your group membership:
groups |


If the Docker group does not appear in the output, log out and back in or run newgrp docker to refresh your session. Repository errors are often caused by outdated package indexes or incorrectly configured repository settings.
Network Connectivity Problems
Test internet connectivity:
ping google.com |

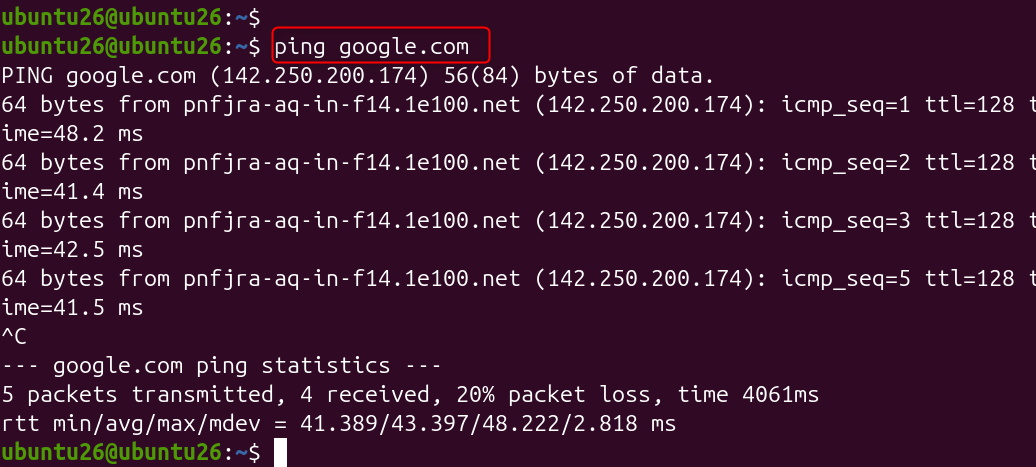
Docker requires network access to download images and communicate with registries. Verifying connectivity can help identify firewall or DNS-related issues.
How do I Uninstall Docker?
Remove Docker packages:
sudo apt purge docker-ce docker-ce-cli containerd.io |
Then remove Docker data:
sudo rm -rf /var/lib/docker sudo rm -rf /var/lib/containerd |
This process completely removes Docker and all associated containers, images, and configuration files.
Should I Use Docker or Podman?
Docker remains the most widely adopted container platform and offers the largest ecosystem, extensive documentation, and broad third-party integration support. Podman is a strong alternative for users seeking daemonless and rootless container management, but Docker remains the preferred choice for most organizations.
Conclusion
To install Docker on Ubuntu 26.04 LTS, add Docker’s APT repository, install Docker engine, start and enable the Service, manage Docker as a Non-Root User, and verify installation. By using Docker’s official repository, configuring proper user permissions, and following security best practices, you can build a reliable and production-ready container environment.
Whether you are deploying web applications, managing microservices, running CI/CD pipelines, or building scalable cloud infrastructure, Docker continues to be one of the most valuable tools in the Linux ecosystem. Following the steps outlined in this guide will help you install Docker confidently and maintain a secure, efficient, and scalable environment on Ubuntu 26.04 LTS.