Linux Mint 22 XFCE Edition is an easy-to-use, fast, and simple Linux software with a lightweight, ideal for both beginners and advanced users. It is based on the XFCE desktop environment that is efficient with the stability of Ubuntu, which is more suitable for old hardware or in systems that require high performance. You can install the OS in your computer with only a bootable USB and a few basic steps.
This article will take us through the steps required to install the Linux Mint 22 XFCE operating system step-by-step.
Table of Contents
- Why Choose XFCE Edition?
- How to Install Linux Mint 22 XFCE Edition
- Step 1: Download the Linux Mint 22 XFCE ISO
- Step 2: Create Bootable USB
- Step 3: Boot from USB & Start Live Session
- Step 4: Begin Installation
- Step 5: Disk Partitioning and Type of Installation
- Step 6: Timezone, User, & Hostname Setup
- Step 7: First Boot & Post-Installation Tasks
- Step 8: Tips & Useful Tweaks
- Conclusion
Why Choose XFCE Edition?
Before installing, let’s quickly review why you might prefer the XFCE edition:
- Efficiency & speed: XFCE has less impact on system resources as compared to heavier desktop environments or Cinnamon.
- Simplicity and flexibility: It provides the right amount of personalisation without being flaky and messy.
- Best option with old hardware: XFCE is an option that can be used to stretch older hardware with limited RAM or with a less powerful CPU.
These sound like what you need, and on the other hand, Linux Mint 22 XFCE is an excellent option.
How to Install Linux Mint 22 XFCE Edition
Linux Mint 22 (codename Wilma) is a refined, friendly distro that is founded on Ubuntu, and it is offered in Cinnamon, Mate, and XFCE versions. The XFCE version is particularly well known due to its lightweightness, high performance, and compatibility with older computers or low overhead requirements.
Let’s install Linux Mint 22 XFCE Edition with ease.
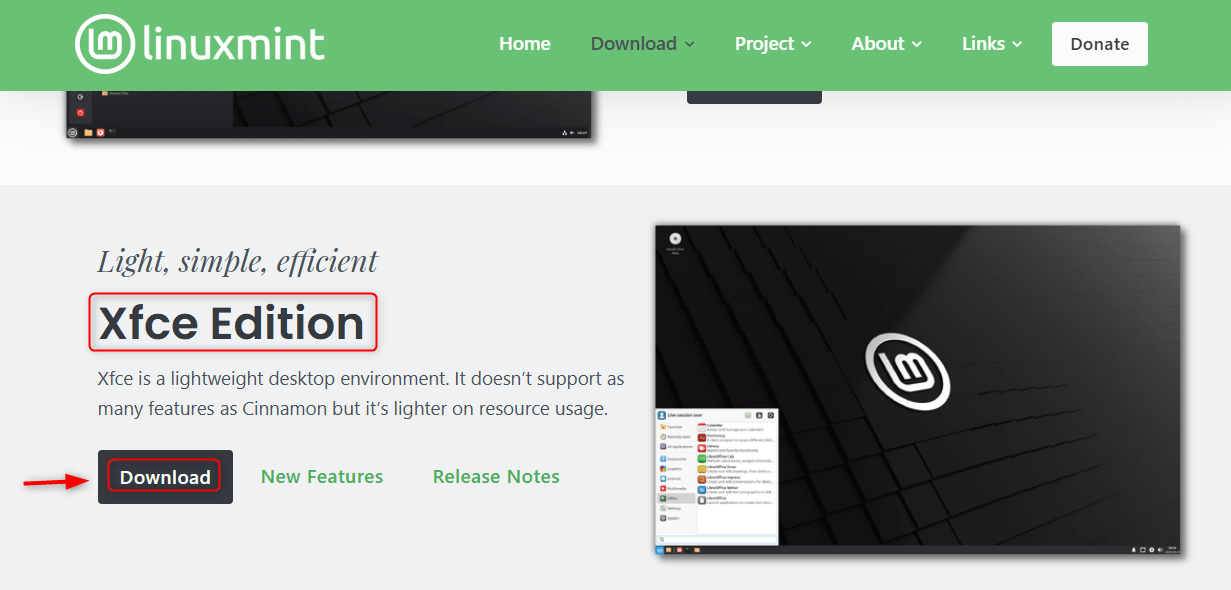
Step 1: Download the Linux Mint 22 XFCE ISO
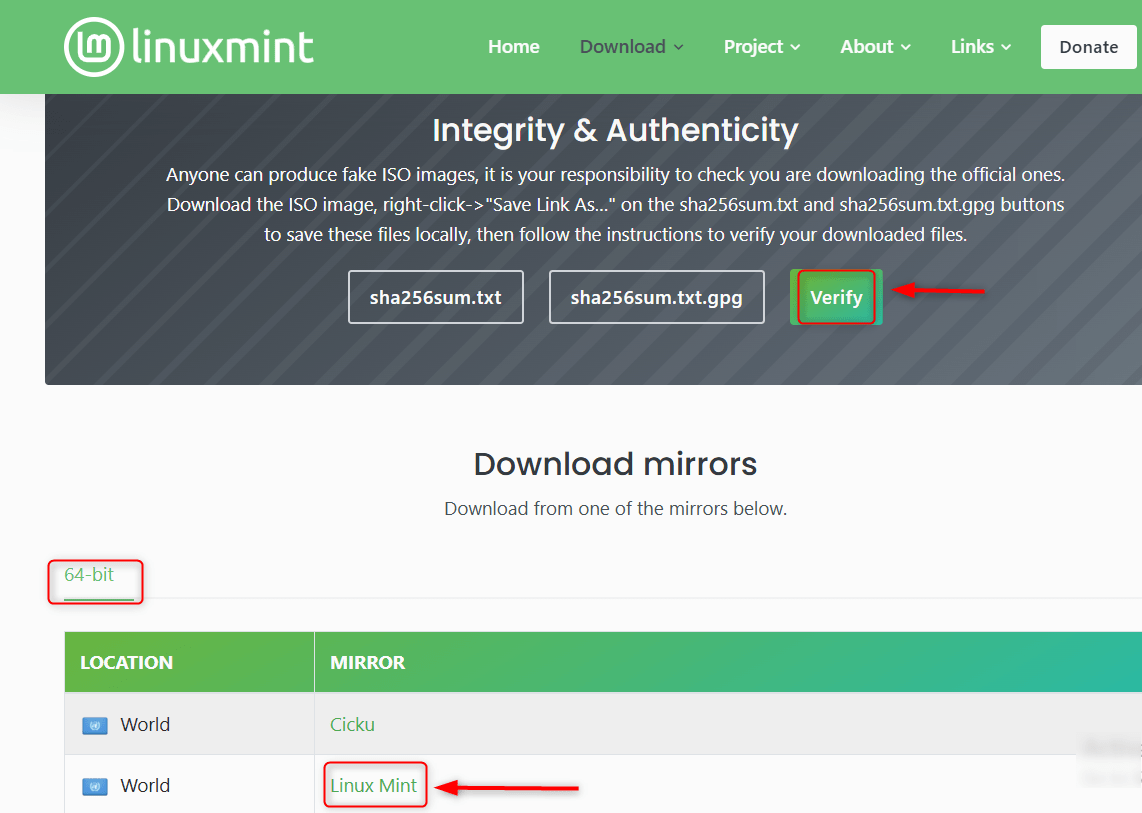
The first step is to download the Linux Mint 22 XFCE ISO. For this, browse the official Linux Mint site or mirror. Choose the XFCE version of Linux Mint 22 (Wilma). Finally, install the 64-bit version unless you have an actual need to install a 32-bit version:

(Optional but recommended) Verify the checksums (SHA256 or similar) of the downloaded ISO to ensure integrity.

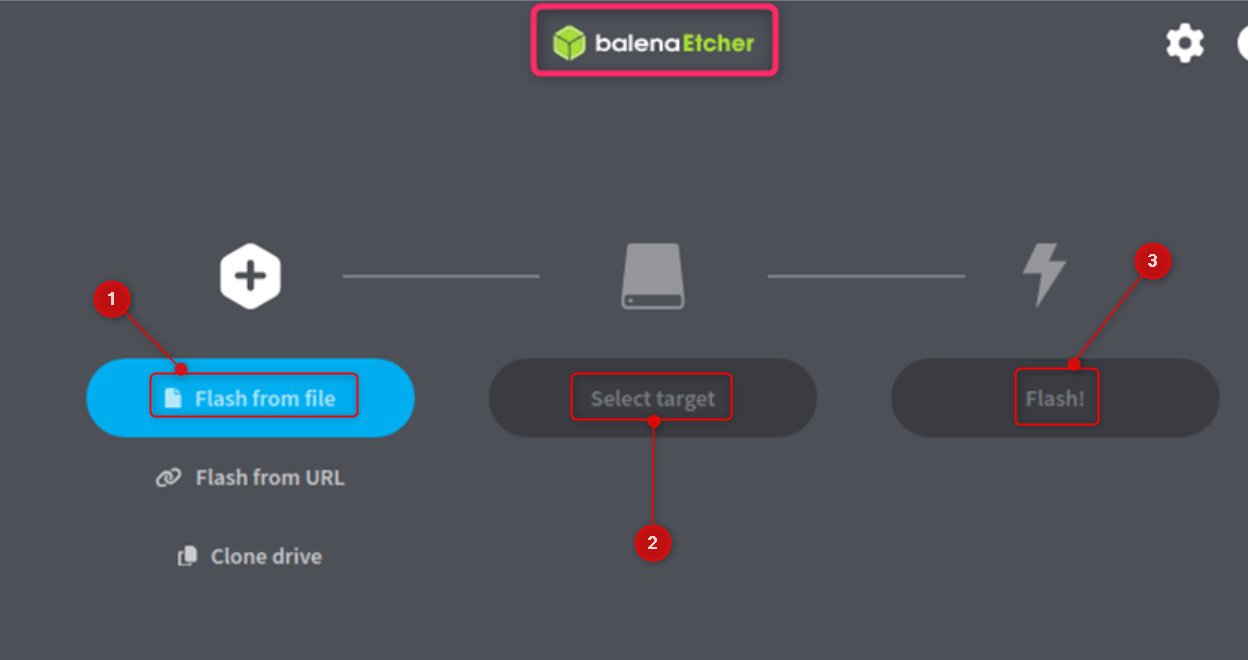
Step 2: Create Bootable USB
Once you have the ISO, in Windows, it is possible to use programs such as Rufus or balenaEtcher. In macOS, one can use Etcher or the dd command in Terminal (be very careful with dd):

Step 3: Boot from USB & Start Live Session
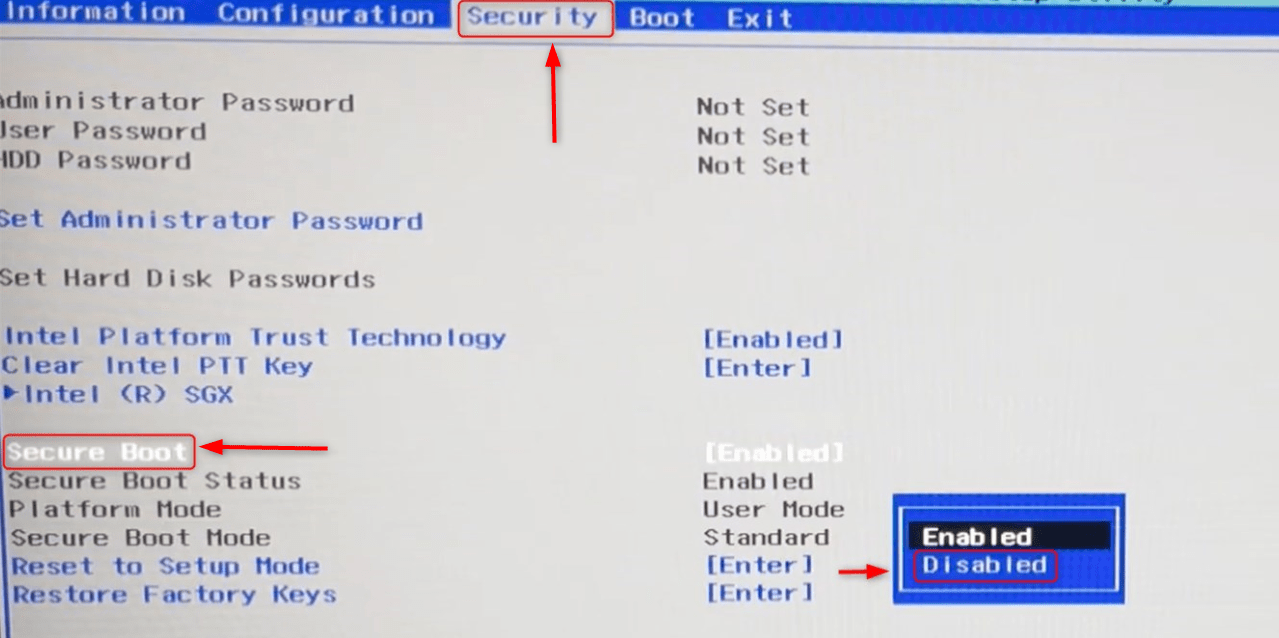
Install Linux Mint on a bootable USB in the computer where you wish to install it. Reboot and enter BIOS/UEFI settings (often by pressing F2, F10, F12, Esc on boot, depending on your manufacturer).
Swap the boot order such that the USB drive comes first. Secure Boot settings may have to be changed; disable Secure Boot when needed.

Save changes and reboot. This will allow you to test Linux Mint without changing your hard disk.
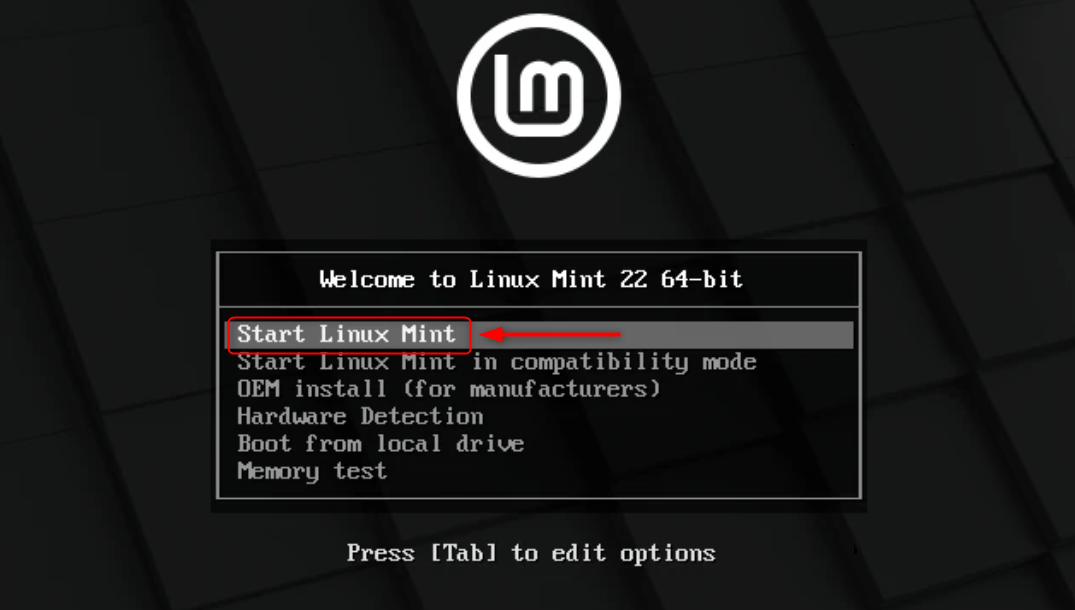
Step 4: Begin Installation of Linux Mint 22 XFCE Edition
Once in the live desktop, click on the Start Linux Mint on the desktop:

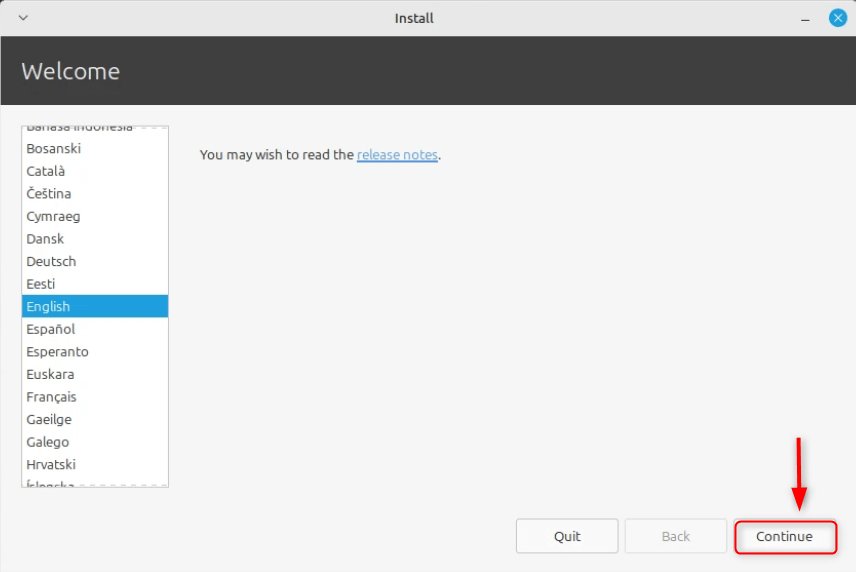
Choose a language, and hit the Continue button:

Pick the keyboard layout, and hit the Continue button:

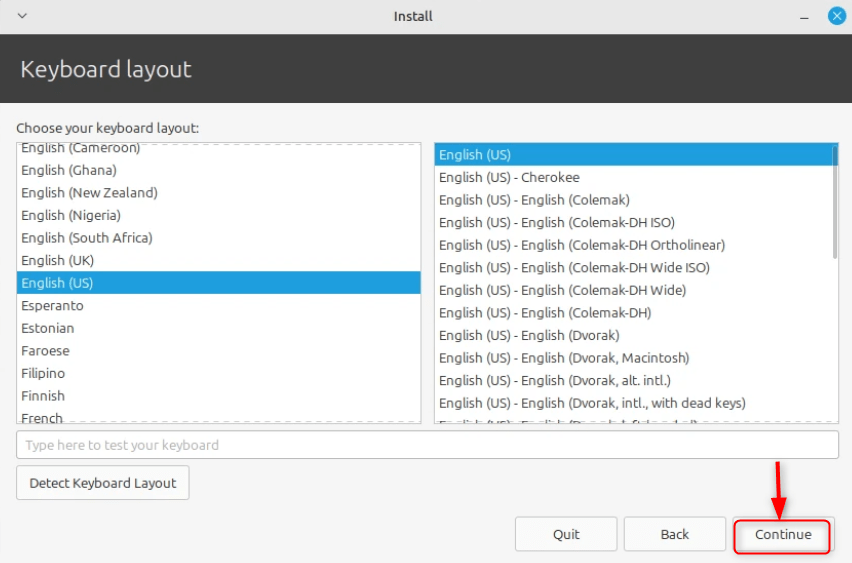
Note: When you have access to the internet, make sure to tick install multimedia codecs (recommended) so that you can support the use of such formats as MP3, MP4, etc.
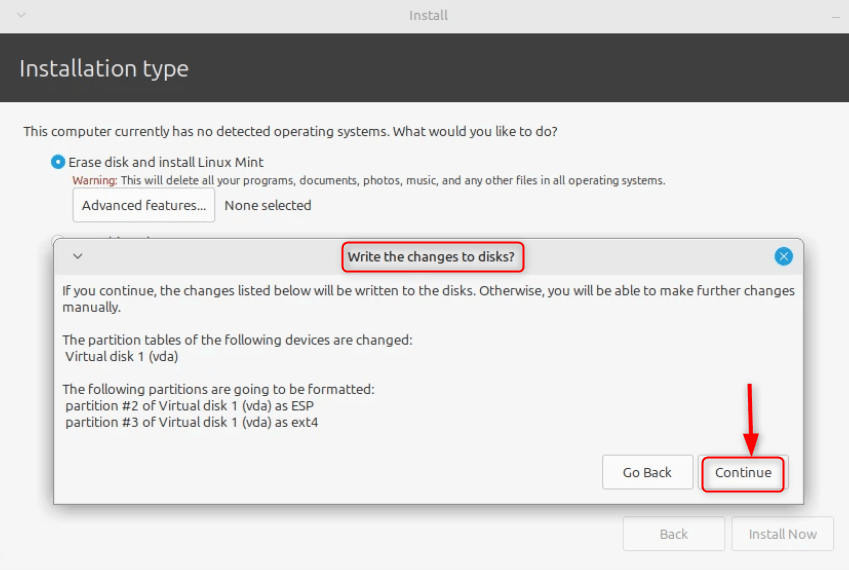
Step 5: Disk Partitioning and Type of Installation
You will have to select the Erase disk and install Linux Mint; this removes all the data and puts Mint as the primary OS. Good for clean installs:


“Something else”: Eases partition customization (e.g., separate root /, home /home, swap). Good when you are sure what you are doing.

Note: If you choose manual, use the ext4 filesystem for root (/). Make a swap partition (size normally the same as ram, or any size you want in case you want to hibernate).
Step 6: Timezone, User, & Hostname Setup
Enter your user information: name, user name, computer host name, and password.


To be on the safe side, it is possible to encrypt your home folder. Full drive encryption can also be done, but more sophisticated.
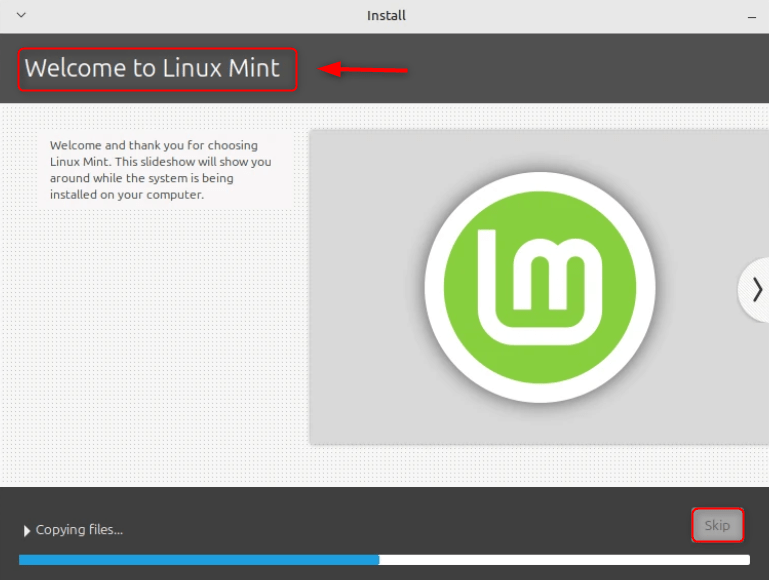
Step 7: Installing & Finalizing of Linux Mint 22 XFCE Edition
Once the setup is done, the installer will copy files, install the partitions, and install the OS. Wait till the process of installation is completed (this normally takes 10-30 minutes, depending on your hardware).

After that, the installer will request you to Restart Now. Be sure to eject the USB drive when it asks you to be able to boot into your new Linux Mint install. 

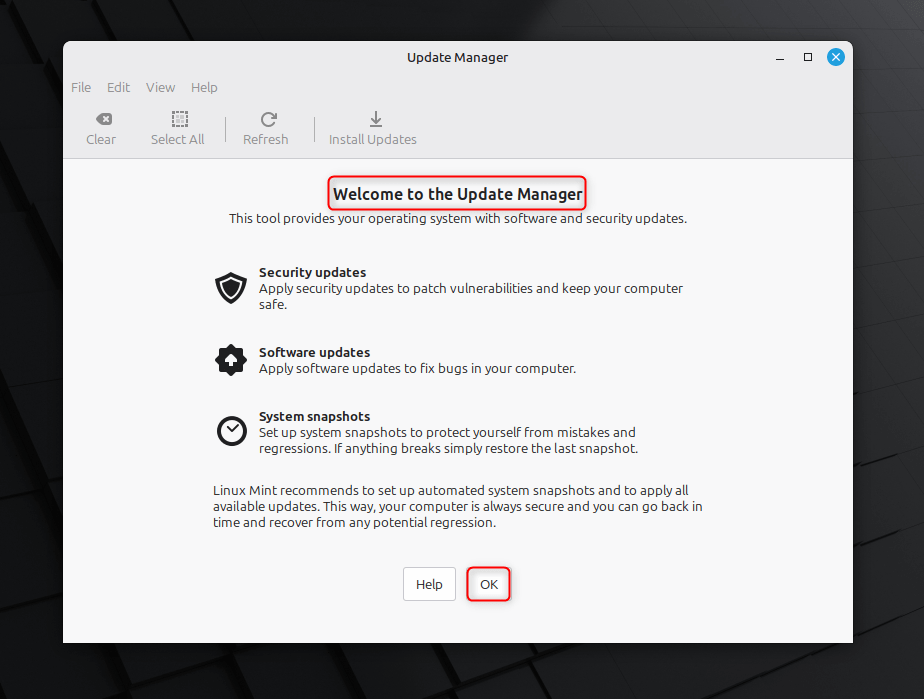
Step 7: First Boot & Post-Installation Tasks
After reboot, log in using the user account that you have created. Use the Update Manager to ensure that you receive all the current system and security updates.

Install more drivers where necessary (particularly, GPU, WiFi, etc.). Linux Mint has its driver manager to manage proprietary drivers.
Step 8: Tips & Useful Tweaks
Linux Mint 22 XFCE is an easy-to-install operating system that enables you to have a secure and personalized operating system.
- Enable Timeshift: Mint has a snapshot tool, Timeshift. Use it such that you will be able to restore the system to working condition in case something fails.
- Customize XFCE: XFCE is highly customizable. You can tweak panel positions, themes, fonts, and window manager tweaks.
- Install personal file backup.

That is all from the guide.
Conclusion
Linux Mint 22 XFCE edition is easy to install and particularly for users who are familiar with OS installation. To install it, download Linux Mint 22 XFCE ISO from the official site and create a bootable USB with the help of tools such as Rufus or Etcher. Boot into the USB and choose Install Linux Mint, then follow the on-screen setup and install it. XFCE provides you with a fast, adaptable, and lightweight desktop as soon as it is installed.