Samba is an open-source software that allows sharing between different operating systems on a single network; it provides smooth access to files and other resources from one system to another.
In this blog post, we will cover Samba, mention some of its features, and end with how to install and configure it on Ubuntu 26.04.
What is Samba
Samba is free, open-source software that was originally released in 1991 by Andrew Tridgell. Developed as open-source software, it uses the Server Message Block (SMB) protocol, which is the standard for sharing resources such as files and printers. In addition, Samba creates a network share to allow file sharing between Windows and Unix-like operating systems, or vice versa.
Features of Samba
Let’s discuss a few of the main features of Samba:
Cross-Platform Sharing: Samba lets users share files across different operating systems like Windows and Linux over the same network.
SMB/CIFS Protocol Support: Samba uses the SMB/CIFS protocol, which allows efficient communication between operating systems.
Domain Controller Functionality: Samba can also act as a domain controller, which manages users, passwords, and devices on a network. Moreover, it can work with Windows Active Directory.
Print Services: Samba can manage print services, which allows Linux-connected printers to be accessed by Windows clients.
Installation of Samba on Ubuntu
In this section, we’ll install Samba on our Ubuntu 26.04 LTS. Before installing anything, it is a good practice to update your Linux system. Let’s start with the system update:
$ sudo apt update |
|---|
After the system update, which will take a minute or two, execute the installation command:
$ sudo apt install samba |
|---|
After a few seconds, it will ask you whether to continue the operation. Type y and hit the Enter key.

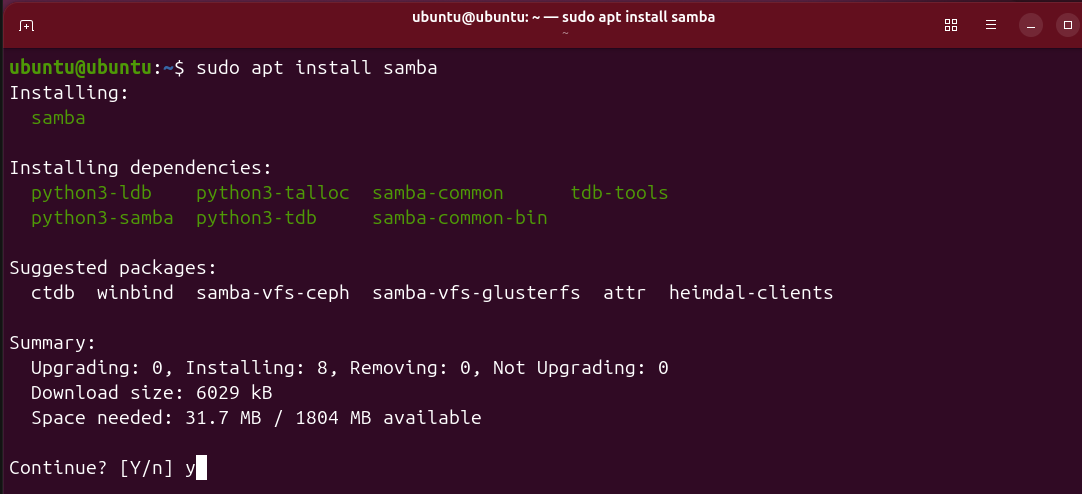
Once the installation is complete, you can check the Samba installation path using the following command:
$ whereis samba |
|---|


Additionally, you can check which version of Samba you have installed by using the command smbd –version:
$ smbd –version |
|---|
Here, version 4.23.6 of Samba is installed in my Ubuntu system; yours may differ from this according to your distribution of the operating system.


Lastly, to check the status of Samba, you can run the following command:
$ systemctl status smbd |
|---|
The result shows that Samba is running (active).

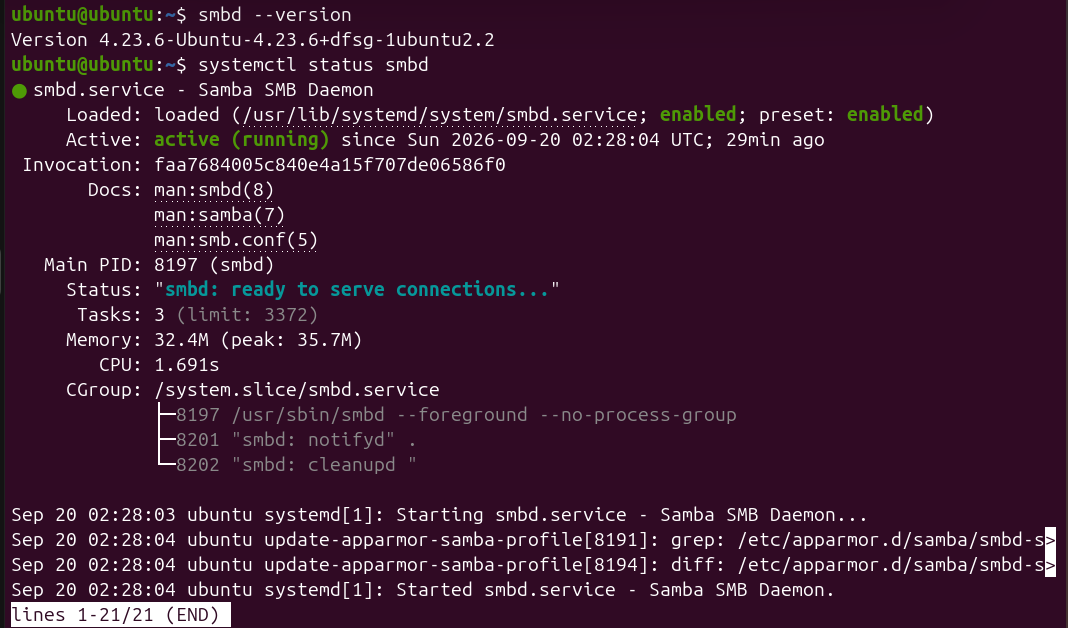
Finally, you have successfully installed Samba on your Ubuntu system.
Creating a Shared Directory
Now, let’s move on to create a shared directory to implement the actual use of Samba, which is sharing files.
To do this, execute the following command:
$ sudo mkdir -p /home/sharing |
|---|
Run the ls command to verify if the directory was created successfully:
$ ls /home |
|---|


Configuring Samba
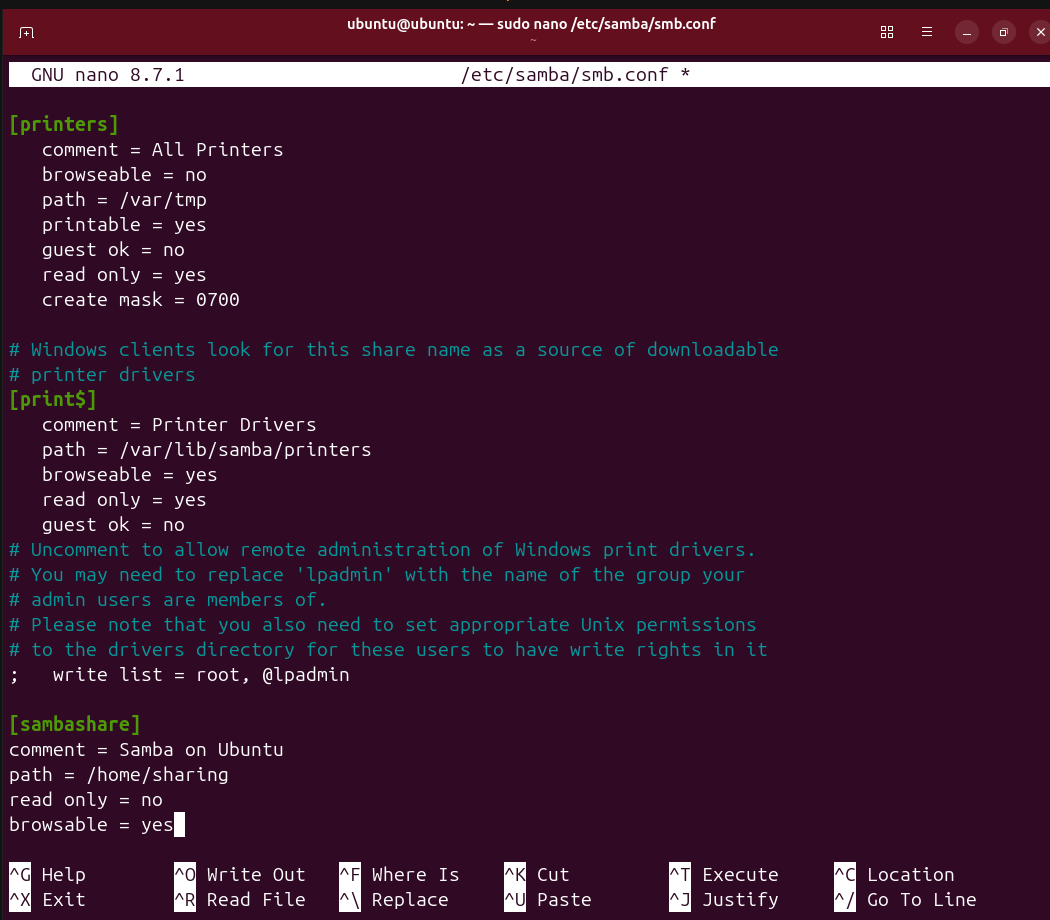
After creating the ‘sharing’ directory, we will configure Samba by modifying the smb.conf file:
$ sudo nano /etc/samba/smb.conf |
|---|
This type of text file will open; scroll to the end of the file.
Write the following lines in the file and save it:
[sambashare]
comment = Samba on Ubuntu
path = /home/sharing
read only = no
browsable = yes

To make sure the Linux firewall enables Samba traffic, use the following command:
sudo ufw allow samba |
|---|
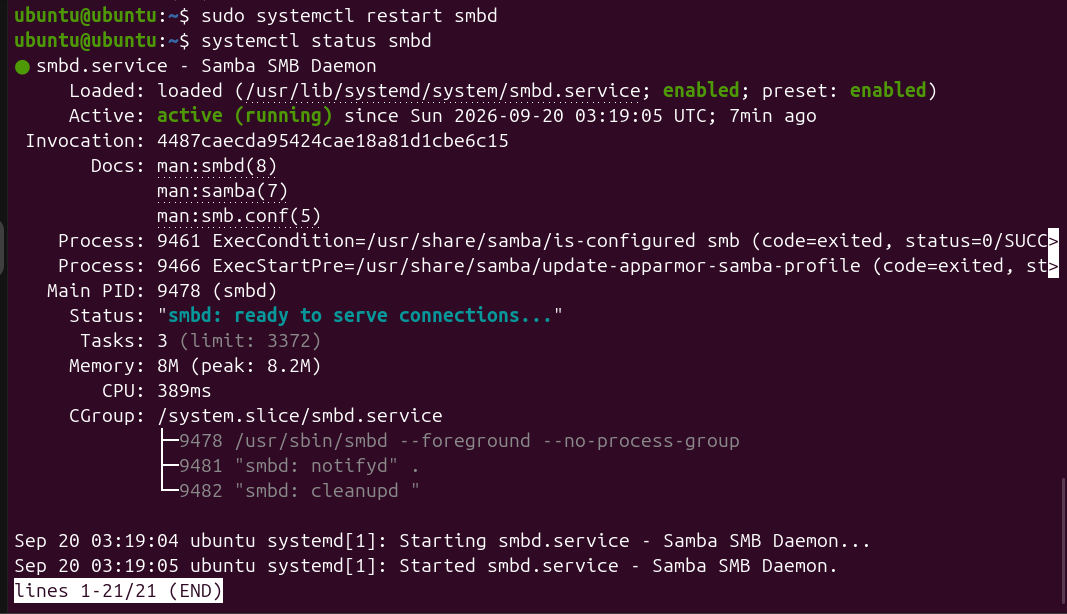
Now, before starting Samba, restart your services:
sudo systemctl restart smbd |
|---|
Then check if it is active by checking its status:
$ systemctl status smbd |
|---|

Setting up a User Account
To share files through Samba, we need to create a user account. By executing the following command, we can create a user account and set a password:
$ sudo smbpasswd -a ubuntu |
|---|
Here, we created an account named ‘ubuntu’ and set a password:


Connecting to the Shared Directory
Now, to connect to the shared directory, open the default file manager and go to the network section.
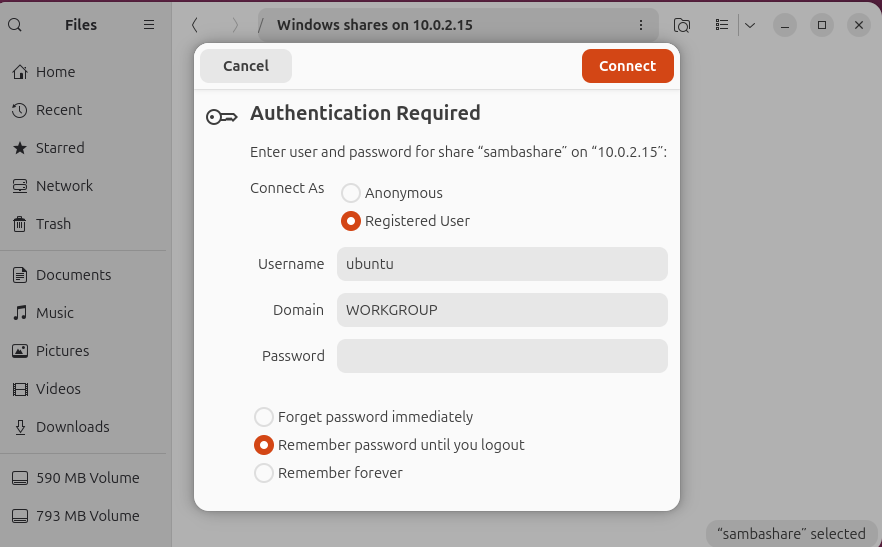
Type “smb://10.0.2.15” (Samba server address) in the blank in front of connect to server and press enter. A pop-up box will appear. Select Registered User and enter the Samba username and password created earlier. The default domain can remain WORKGROUP.
After that, set the password for the user we just added and connect it to share files.

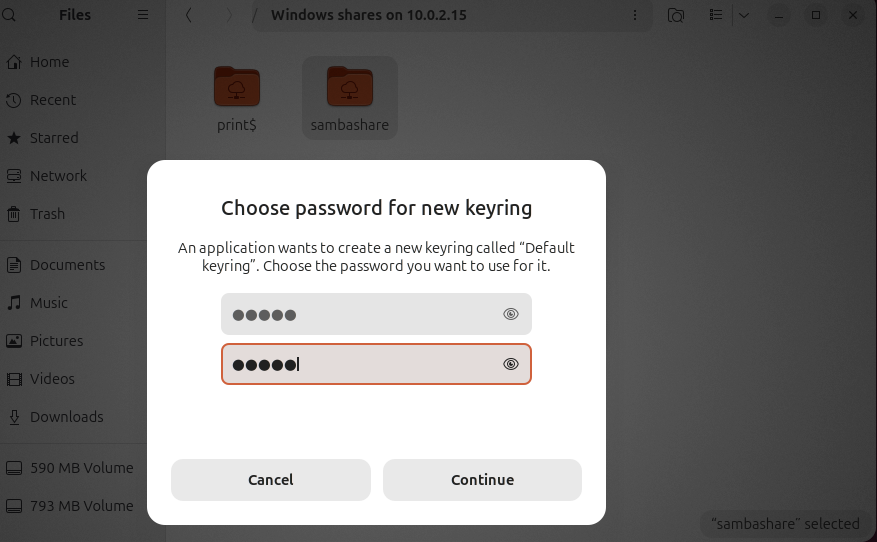
Moving ahead, you’ll be asked to create the password for the keyring:

Click on continue; and then the Samba Share will appear in the file manager, allowing you to access the shared directory.

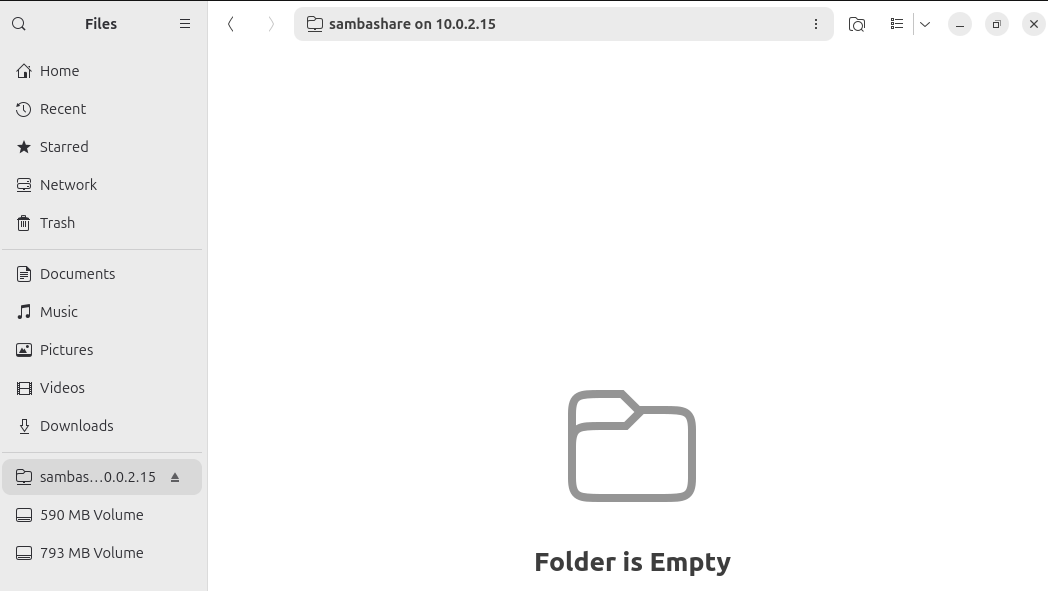
Now, we can easily share files between Ubuntu and Windows, as well as with other operating systems.
Testing the Samba Shared Directory
In this section, we’ll check if our shared Samba directory is working or not. To test it, we’ll create a .txt test file in the /home/sharing directory:
$ sudo touch /home/sharing/test.txt |
|---|
To verify that the file was created successfully, run:
$ ls -l /home/sharing |
|---|


The output should show the newly created test.txt file. The 0 indicates that the file is currently empty.
After verifying the file, we’ll open Samba Share in File Manager to confirm that test.txt appears:

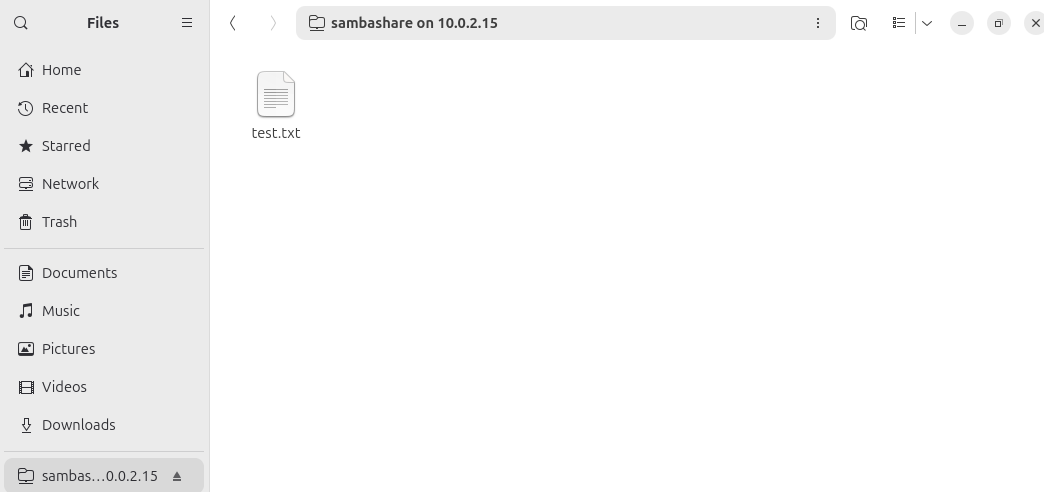
Our file automatically appears in the Samba share.
Conclusion
Samba is an open-source software that allows sharing between different operating systems on a single network; it provides smooth access to files and other resources from one system to another. It bridges the gap between different operating systems in hybrid environments.
In this blog post, we’ve installed and configured Samba on Ubuntu 26.04 and tried to share a file using it. We hope you liked it. Have a good rest of the day.