Developers love the Java Runtime Environment because it includes all the components needed to run Java programs. For many developers, installing JRE on their systems has become an essential thing, the kind of thing that you install once and forget about.
In this article, we’ll tell you what the Java Runtime Environment (JRE) is, the steps to install it on Ubuntu 26.04 Desktop, and also how to uninstall/remove it (in case you change your mind).
What Is JRE?
The Java Runtime Environment (JRE) is a software package that is essential for running Java applications. The JRE comprises the Java Virtual Machine (JVM), class libraries, and other components that are used to execute Java programs.
The history of the Java Runtime Environment is much older than you might think; its first version was released in January 1996 by Sun Microsystems. Moreover, almost every major operating system, including Windows, Linux, and macOS, supports Java. On top of that, the JRE is free to use and download. That is why it has become widely used by developers globally.
Steps to Install JRE on Ubuntu 26.04
In this section, we’ll go through the steps to install the Java Runtime Environment on Ubuntu’s latest Long Term Support release, Ubuntu 26.04.
This is the easiest and most convenient method to install the JRE on Ubuntu 26.04 LTS.
Step 1: Update the Package Index
To install the Java Runtime Environment, we’ll first update our machine. Updating and upgrading Ubuntu is best practice before installing anything on it.
Updating Ubuntu is crucial because it refreshes the package lists from the configured repositories, allowing Ubuntu to identify available updates and newly available packages. Basically, it ensures everything is up to date:
$ sudo apt update |
|---|
sudo apt update refreshes the list of available packages and retrieves information about their latest versions from the configured repositories:

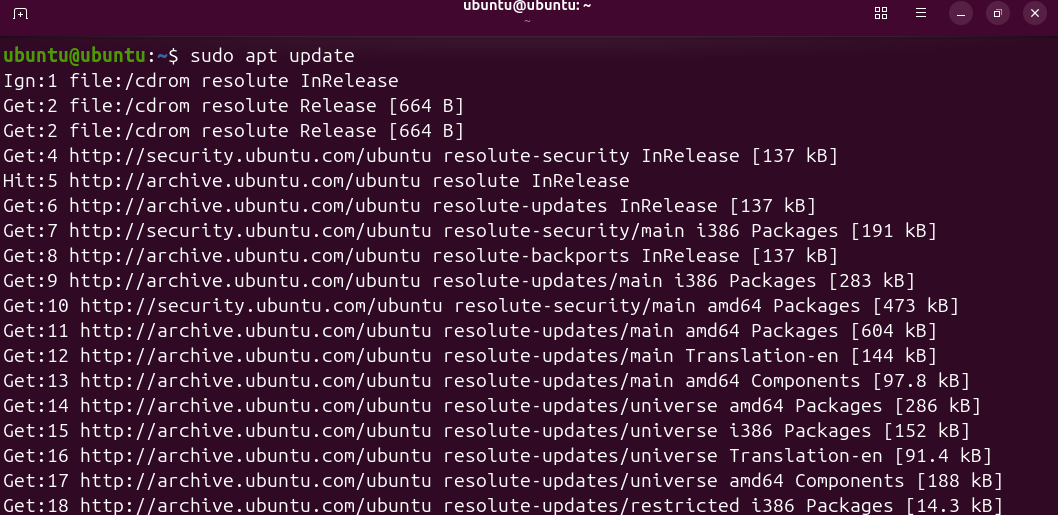
After updating our system, our Ubuntu 26.04 is ready for installing the Java Runtime Environment. It ensured that our system knows about the newest available packages, their versions, and their dependencies before installing or upgrading software.
Step 2: Install the Default JRE
Moving on, we’ll now install the Java Runtime Environment on our Ubuntu machine. We’ll install the default JRE provided by Ubuntu:
$ sudo apt install default-jre |
|---|
The above command installs the default Java Runtime Environment on Ubuntu 26.04 LTS. It provides the essential components to execute Java applications. The default-jre means that Ubuntu will automatically choose the recommended version of Java for your Ubuntu release:

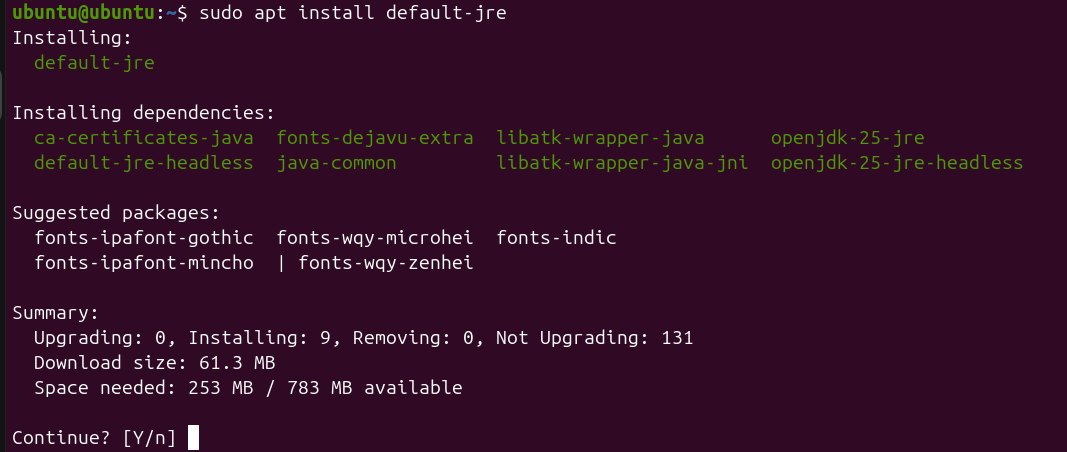
After running the install command, the terminal will ask you to continue. Here, type ‘Y’ to keep the operation going.
Step 4: Verify the Installation
Once the installation is done, we’ll confirm it by running the version command. From this, we can also see our version of Java installed:
$ java -version |
|---|
The version command displays the Java version installed on our system. It’s also used to verify if the JRE is installed correctly or not:


The output above shows that JRE is installed on our system. The output showing OpenJDK 25.0.4, the OpenJDK Runtime Environment, and the 64-Bit Server VM confirms that a Java runtime is available on your system.
Install a Specific Version of JRE on Ubuntu 26.04
If you want to choose the version of the Java Runtime Environment by yourself, or you want a particular version for you, you can install it by using the version’s name in the command, like if you want JRE 26, you have to run the following command:
$ sudo apt install openjdk-26-jre |
|---|
For instance, let’s install JRE 26:

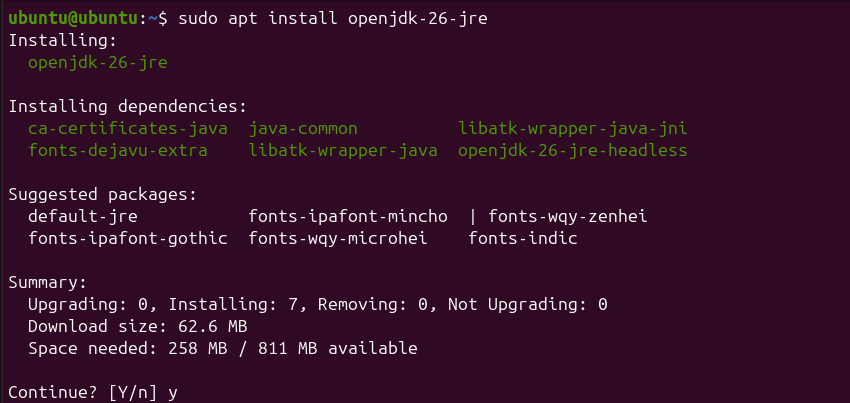
Enter ‘Y’ to continue the installation.
Or if you want an older version, like 8, just replace 26 with 8:
sudo apt install openjdk-8-jre |
|---|

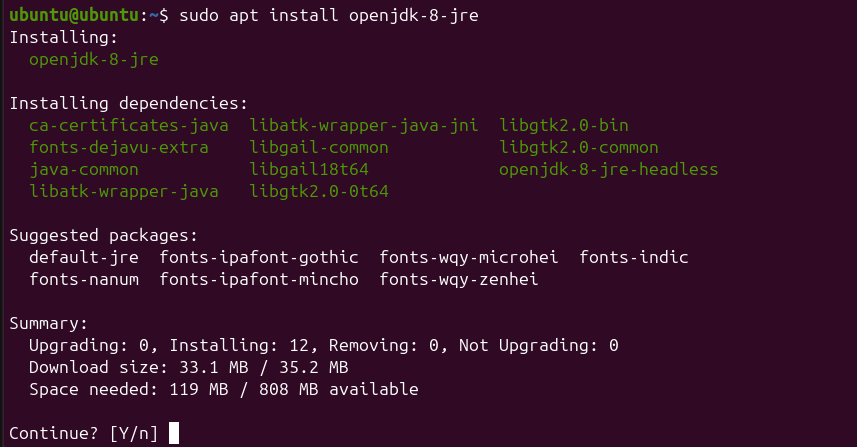
Selecting the Default Java Version
If you have two or more JRE versions and you want to choose one for your work without uninstalling others, you can just set a default version of your choice. To do so, you have to select that version and run the following command.
This will not remove other versions, but it will set the selected version as the default JRE of your system:
$ sudo update-alternatives –config java |
|---|
Enter the selection number of your preferred version that is given on the left side:

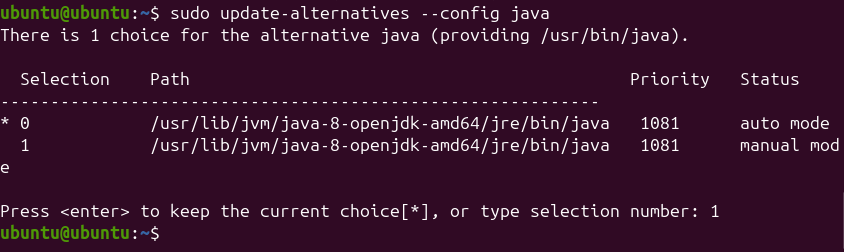
Now, check the default version by running the version command:


How to Uninstall JRE on Ubuntu 26.04
Many of us install software for assignments or temporary work, then uninstall it once the work is done. So, for similar reasons, if you want to uninstall JRE from Ubuntu 26.04 LTS, we’ve got your back. Don’t worry.
Just open your terminal and run the following remove command:
$ sudo apt remove default-jre |
|---|
This command uninstalls and removes the JRE from our Ubuntu machine:

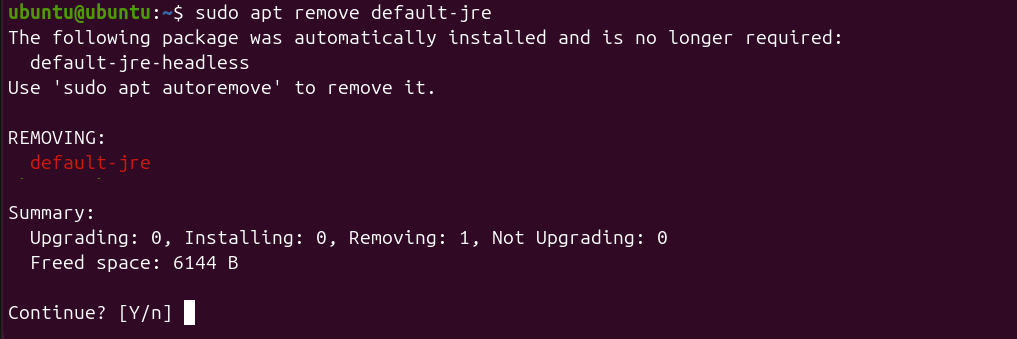
Type ‘Y’ to continue the uninstallation.
Conclusion
All in all, the Java Runtime Environment (JRE) is a software package that is essential for running Java applications. It comprises the Java Virtual Machine (JVM), class libraries, and other components that are used in the execution of Java programs. JRE was first released in 1996, and it is supported by multiple operating systems. This guide took you through the installation process of the Java Runtime Environment in Ubuntu 26.04 LTS.